bpmnjs的基本使用(vue)
bpmn-js在vue中的基本使用
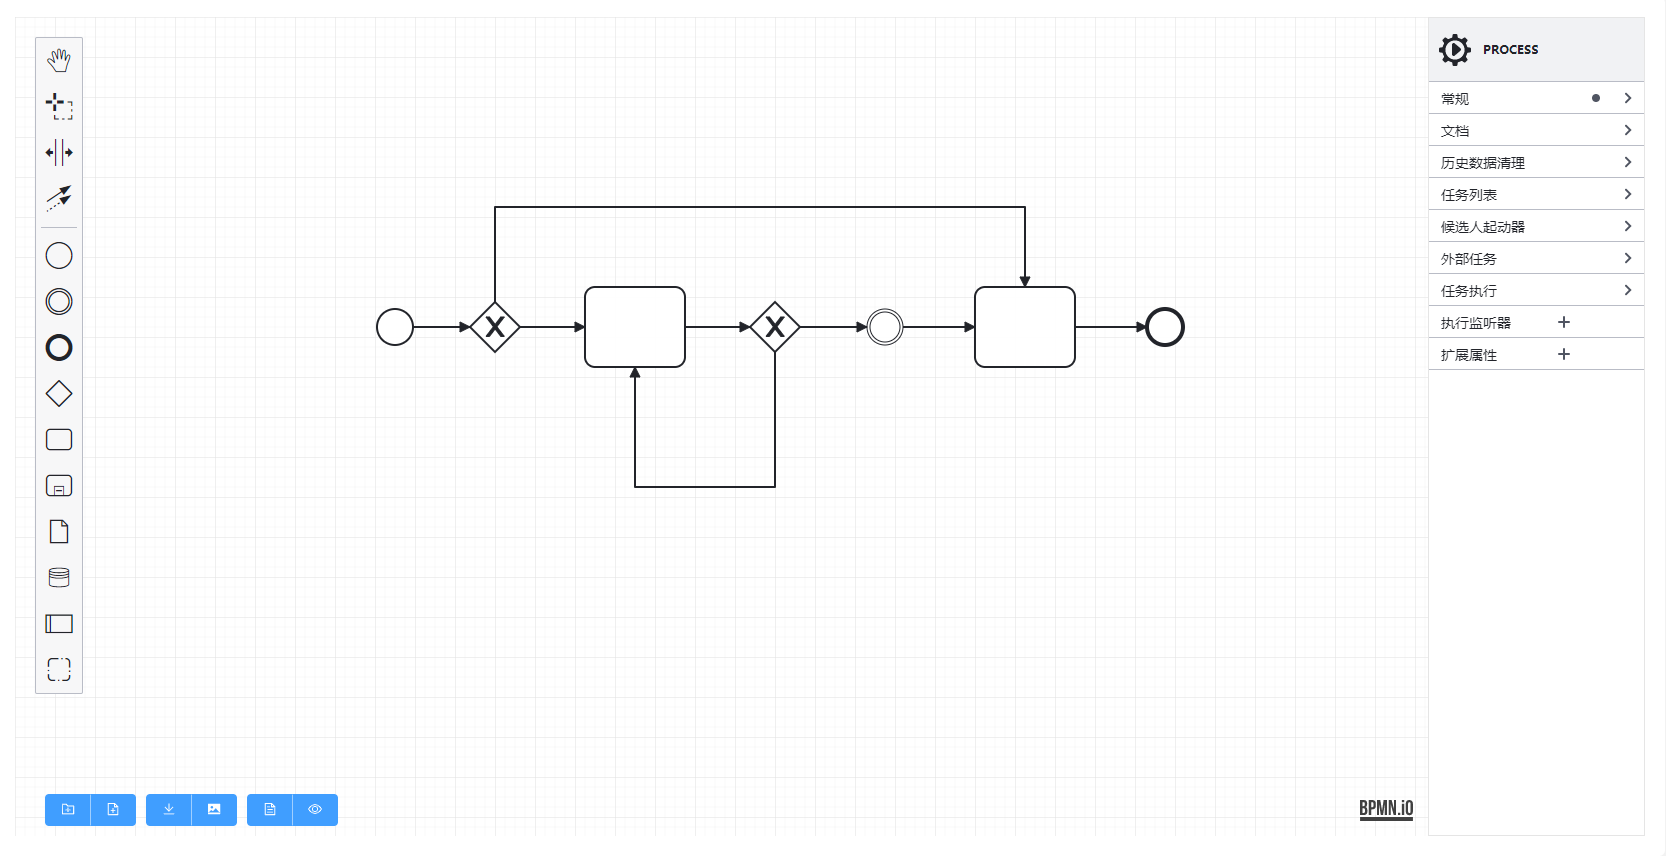
效果:

- 下载依赖包
npm i bpmn-js bpmn-js-properties-panel camunda-bpmn-moddle
"bpmn-js": "^10.3.0",

"bpmn-js-properties-panel": "^1.11.2",

"camunda-bpmn-moddle": "^7.0.1",
- 构建bpmn界面
// 样式

import 'bpmn-js/dist/assets/diagram-js.css'

import 'bpmn-js/dist/assets/bpmn-font/css/bpmn.css'

import 'bpmn-js/dist/assets/bpmn-js.css'

import 'bpmn-js/dist/assets/bpmn-font/css/bpmn-codes.css'

import 'bpmn-js/dist/assets/bpmn-font/css/bpmn-embedded.css'

import 'bpmn-js-properties-panel/dist/assets/element-templates.css';

import 'bpmn-js-properties-panel/dist/assets/properties-panel.css';

// bpmn构建器

import BpmnModeler from 'bpmn-js/lib/Modeler.js' // 引入 bpmn-js

// 初始化xml

import diagramXML from './bpmnXML'

// 汉化

import zh from './zh'

// 构建模块

import {

  BpmnPropertiesPanelModule,

  BpmnPropertiesProviderModule,

  CamundaPlatformPropertiesProviderModule,

  CloudElementTemplatesPropertiesProviderModule

} from 'bpmn-js-properties-panel'

import camundaModdleDescriptor from 'camunda-bpmn-moddle/resources/camunda.json'
// html

<template>

  <div class="app-container">

    <div class="bpmn-main-box">

      <!-- 内容区 -->

      <div ref="bpmn" id="bpmn-container" class="bpmn-container"></div>

      <!-- 右侧控制区 -->

      <div ref="bpmnPanel" id="js-properties-panel"></div>

    </div>

  </div>

</template>

// js

mounted() {

  this.bpmnModeler = new BpmnModeler({

    container: this.$refs.bpmn,

    propertiesPanel: {

      parent: this.$refs.bpmnPanel

    },

    additionalModules: [

      BpmnPropertiesPanelModule,

      BpmnPropertiesProviderModule,

      CamundaPlatformPropertiesProviderModule,

      CloudElementTemplatesPropertiesProviderModule,

      { translate: [ 'value', this.customTranslate ] } // 汉化

    ],

    moddleExtensions: {

      camunda: camundaModdleDescriptor

    }

  })

  this.createNewDiagram()

}

// 方法

customTranslate(template: any, replacements: any) {

  replacements = replacements || {};

  template = (zh as Record<string, string>)[template] || template;

  return template.replace(/{([^}]+)}/g, function(_: any, key: any) {

    return replacements[key] || '{' + key + '}';

  });

}

createNewDiagram() {

  this.openDiagram(diagramXML);

}

async openDiagram(xml: string) {

  this.bpmnModeler.importXML(xml);

}
css
// css

.app-container {

  background-color: white;

  position: relative;

  height: 100vh;

}

.buttons{

  position: absolute;

  bottom: 30px;

  display: flex;

  left: 50px;

  padding: 0;

  margin: 0;

  list-style: none;

  .item {

    margin-right: 10px;

  }

  .download button {

    padding: 0;

    a {

      padding: 8px 15px;

    }

  }

}

 .bpmn-main-box {

  width:100%;

  height:100%;

  display: flex;

 }

 .bpmn-container {

    width: 100%;

    height: 100%;

    background: url('data:image/svg+xml;base64,PHN2ZyB3aWR0aD0iNDAiIGhlaWdodD0iNDAiIHhtbG5zPSJodHRwOi8vd3d3LnczLm9yZy8yMDAwL3N2ZyI+PGRlZnM+PHBhdHRlcm4gaWQ9ImEiIHdpZHRoPSI0MCIgaGVpZ2h0PSI0MCIgcGF0dGVyblVuaXRzPSJ1c2VyU3BhY2VPblVzZSI+PHBhdGggZD0iTTAgMTBoNDBNMTAgMHY0ME0wIDIwaDQwTTIwIDB2NDBNMCAzMGg0ME0zMCAwdjQwIiBmaWxsPSJub25lIiBzdHJva2U9IiNlMGUwZTAiIG9wYWNpdHk9Ii4yIi8+PHBhdGggZD0iTTQwIDBIMHY0MCIgZmlsbD0ibm9uZSIgc3Ryb2tlPSIjZTBlMGUwIi8+PC9wYXR0ZXJuPjwvZGVmcz48cmVjdCB3aWR0aD0iMTAwJSIgaGVpZ2h0PSIxMDAlIiBmaWxsPSJ1cmwoI2EpIi8+PC9zdmc+')

      repeat !important;

 }

 #js-properties-panel {

  border: 1px solid rgba(0,0,0,0.1);

  width: 250px;

 }
zh.ts(部分代码)
export default {

  'Id': '编号',

  'Name': '名称',

  'General': '常规',

  'Details': '详情',

  'Message Name': '消息名称',

  'Message': '消息',

  'Initiator': '创建者',

  'Asynchronous continuations': '持续异步',

  'Asynchronous before': '异步前',

  'Asynchronous after': '异步后',

  'Job configuration': '工作配置',

  'Exclusive': '排除',

  'Job Priority': '工作优先级',

  'Retry Time Cycle': '重试时间周期',

  'Documentation': '文档',

  'Element Documentation': '元素文档',

  'History Configuration': '历史配置',

  'History Time To Live': '历史的生存时间',

  'Forms': '表单',

}
bpmnXML.ts
export default `<?xml version="1.0" encoding="UTF-8"?>

<bpmn2:definitions

xmlns:xsi="http://www.w3.org/2001/XMLSchema-instance"

xmlns:bpmn2="http://www.omg.org/spec/BPMN/20100524/MODEL"

xmlns:bpmndi="http://www.omg.org/spec/BPMN/20100524/DI"

xmlns:dc="http://www.omg.org/spec/DD/20100524/DC"

xmlns:di="http://www.omg.org/spec/DD/20100524/DI"

xsi:schemaLocation="http://www.omg.org/spec/BPMN/20100524/MODEL BPMN20.xsd"

id="sample-diagram"

targetNamespace="http://bpmn.io/schema/bpmn">

  <bpmn2:process id="Process_1" isExecutable="false">

  </bpmn2:process>

  <bpmndi:BPMNDiagram id="BPMNDiagram_1">

    <bpmndi:BPMNPlane id="BPMNPlane_1" bpmnElement="Process_1">

      <bpmndi:BPMNShape id="_BPMNShape_StartEvent_2" bpmnElement="StartEvent_1">

        <dc:Bounds height="36.0" width="36.0" x="412.0" y="240.0"/>

      </bpmndi:BPMNShape>

    </bpmndi:BPMNPlane>

  </bpmndi:BPMNDiagram>

</bpmn2:definitions>`
至此页面搭建已经完成,接下来实现操作功能
- 添加操作按钮
<template>

  <div class="app-container">

    <div class="bpmn-main-box">

      <div ref="bpmn" id="bpmn-container" class="bpmn-container"></div>

      <div ref="bpmnPanel" id="js-properties-panel"></div>

    </div>

    <!-- 操作按钮 -->

    <ul class="buttons">

      <input ref="file" type="file" style="display: none" @change="fileChange"/>

      <el-button-group class="item download">

        <el-button type="primary" @click="upload()">

          <a title="上传文件"><el-icon><FolderAdd /></el-icon></a>

        </el-button>

        <el-button type="primary" @click="newCreateDoc()">

          <a title="新建"><el-icon><DocumentAdd /></el-icon></a>

        </el-button>

      </el-button-group>

      <el-button-group class="item download">

        <el-button @click="downloadLinkClick()" type="primary" >

          <a ref="downloadLink" id="js-download-diagram" title="xml下载"><el-icon><Download /></el-icon></a>

        </el-button>

        <el-button @click="downloadSvg" type="primary" >

          <a ref="downloadSvg" id="js-download-svg" title="svg下载"><el-icon><PictureFilled /></el-icon></a>

        </el-button>

      </el-button-group>

      <el-button-group class="item download">

        <el-button type="primary" @click="perviewXML">

          <a title="xml预览"><el-icon><Document /></el-icon></a>

        </el-button>

        <el-button type="primary" @click="perviewSVG">

          <a title="svg预览"><el-icon><View /></el-icon></a>

        </el-button>

      </el-button-group>

    </ul>

    <!-- 预览弹出 -->

    <el-dialog title="XML预览" width="80%" v-model="perviewXMLShow">

      <div style="max-height: 65vh;overflow: auto;">

        <highlightjs language='html' :code="perviewXMLStr" />

      </div>

    </el-dialog>

    <el-dialog title="SVG预览" width="80%" v-model="perviewSVGShow">

      <div style="text-align: center;" v-html="perviewSVGData" />

    </el-dialog>

  </div>

</template>
事件方法
let bpmnModeler: any = null

let perviewXMLShow = false

let perviewSVGShow = false

let perviewXMLStr = ''

let perviewSVGData = ''

// 文件上传

fileChange() {

  const fileElement = this.$refs.file as HTMLInputElement

  if (fileElement && fileElement.files) {

    const file = fileElement.files[0]

    const fileReader = new FileReader();

    (this.$refs.file as HTMLInputElement).value = ''

    fileReader.onload = (e: any) => {

      this.bpmnModeler.importXML(e.target.result)

    }

    fileReader.readAsText(file);

  }

}

// 点击文件上传

upload() {

  this.getHTMLElementByRef('file').click()

}

// 新建

newCreateDoc() {

  this.bpmnModeler.importXML(diagramXML)

}

// 下载XML

async downloadLinkClick() {

  const downloadLink = this.$refs.downloadLink as HTMLElement

  try {

    const { xml } = await this.bpmnModeler.saveXML({ format: true });

    this.setEncoded(downloadLink, 'diagram.bpmn', xml);

  } catch (error) {

    this.toast.error('下载失败,请重试')

  }

}

// 下载SVG

async downloadSvg() {

  const downloadSvgLink = this.$refs.downloadSvg as HTMLElement

  try {

    const { svg } = await this.bpmnModeler.saveSVG();

    this.setEncoded(downloadSvgLink, 'diagram.svg', svg);

  } catch (error) {

    this.toast.error('下载失败,请重试')

  }

}

// XML预览

async perviewXML() {

  try {

    const { xml } = await this.bpmnModeler.saveXML({ format: true });

    this.perviewXMLStr = xml

    this.perviewXMLShow = true

  } catch (error) {

    this.toast.error('预览失败,请重试')

  }

}

// SVG预览

async perviewSVG() {

  try {

    const { svg } = await this.bpmnModeler.saveSVG();

    this.perviewSVGData = svg

    this.perviewSVGShow = true

  } catch (error) {

    this.toast.error('预览失败,请重试')

  }

}

// 设置数据

setEncoded(link: HTMLElement, name: string, data: any) {

  const encodedData = encodeURIComponent(data);

  if (data) {

    link.className += ('active')

    link.setAttribute('href', 'data:application/bpmn20-xml;charset=UTF-8,' + encodedData)

    link.setAttribute('download', name)

  } else {

    link.className.replace('active', '')

  }

}
bpmnjs的基本使用(vue)的更多相关文章
- vue项目中使用bpmn-流程图预览篇
前情提要 上文已经实现了节点操作的前进.后退.导入.导出等操作,今日来实现“流程图预览”,以及视图的放大缩小 前提:项目安装过bpmn,安装可见上篇文章 实现要点 bpmn提供了两个神器:Modele ...
- vue项目中使用bpmn-节点篇
前情提要 根据之前的操作,我们可以创建.导入.导出流程图,并对其进预览.通过此篇可以学到: 为节点添加点击.鼠标悬浮等事件 获取流程图内所有指定类型的节点 通过外部更新节点名字 获取节点实例的两种方法 ...
- vue项目中使用bpmn-为节点添加颜色
内容概述 本系列 “vue项目中使用bpmn-xxxx” 分为五篇,均为自己使用过程中用到的实例,手工原创,目前属于陆续更新中.主要包括vue项目中bpmn使用实例.应用技巧.基本知识点总结和需要注意 ...
- vue项目中使用bpmn-基础篇
内容概述 本系列“vue项目中使用bpmn-xxxx”分为五篇,均为自己使用过程中用到的实例,手工原创,目前属于陆续更新中.主要包括vue项目中bpmn使用实例.应用技巧.基本知识点总结和需要注意事项 ...
- 最好用的流程编辑器bpmn-js系列之基本使用
最好用的流程编辑器bpmn-js系列文章 BPMN(Business Process Modeling Notation)是由业务流程管理倡议组织BPMI(The Business Process M ...
- SpringBoot+Activiti+bpmn.js+Vue.js+Elementui(OA系统审批流)
引言:OA系统用到请假.加班.调休.离职,需要使用工作流进行流程审批 一:activiti流程设计器的选择(通过学习activiti工作流过程中,发现一款好的流程设计器将会更好的方便的设计好流程(主要 ...
- Vue.js 和 MVVM 小细节
MVVM 是Model-View-ViewModel 的缩写,它是一种基于前端开发的架构模式,其核心是提供对View 和 ViewModel 的双向数据绑定,这使得ViewModel 的状态改变可以自 ...
- wepack+sass+vue 入门教程(三)
十一.安装sass文件转换为css需要的相关依赖包 npm install --save-dev sass-loader style-loader css-loader loader的作用是辅助web ...
- wepack+sass+vue 入门教程(二)
六.新建webpack配置文件 webpack.config.js 文件整体框架内容如下,后续会详细说明每个配置项的配置 webpack.config.js直接放在项目demo目录下 module.e ...
- wepack+sass+vue 入门教程(一)
一.安装node.js node.js是基础,必须先安装.而且最新版的node.js,已经集成了npm. 下载地址 node安装,一路按默认即可. 二.全局安装webpack npm install ...
随机推荐
- 【编程】Python3 正则表达式使用笔记
前言 Python 从1.5版本开始使用re模块来处理正则表达式.我们可以使用"re模块"或"re.compile方法"来创建正则表达式对象(re.RegexO ...
- jdkman(jdk版本管理工具)安装和使用(mac)
1.安装jdkman 1.1.下载命令 curl -s "https://get.sdkman.io" | bash 执行后,sdkman安装到目录$HOME/.sdkman/,比 ...
- core程序实现文件下载
已知本地文件名,返回给前台流 string filepath = path +"/" + filename +".txt"; if(System.IO.File ...
- 面向对象2(Java)
封装 基本介绍 该露的露,该藏的藏,我们的程序设计要追求"高内聚,低耦合": 高内聚:类的内部数据操作细节自己完成,不允许外部干涉 低耦合:仅暴露少量的方法给外部使用 封装(数据的 ...
- 对表单input输入框加特殊符号(正斜杠和反斜杠)校验
<p>图片名称:</p><input type="text" name="afterName" style="heigh ...
- Javascript 事件派发 dispatcher
基本使用 基础事件 let event = new Event("click") //新建click事件 node.addEventListener("click&quo ...
- PHP递归的简单理解
递归简单来说就是自己调用自己 比如说 A向B问路 但是B不知道 于是乎B问C 但是C不知道 于是乎问D D知道 D把怎么走告诉C C在把怎么走告诉B B再把怎么走告诉A A虽然是最先问的 但是是最后一 ...
- Flush cache via menu in D365FO
Most of the time it is a caching issue because D365fO is (like previous versions) a master of cachin ...
- Centos 8 部署harbor 访问502
部署过程不做多说, 部署完之后访问502, 以下可能只是一种情况, 有可能是其它情况导致的503 查看日志 core.log 提示访问数据库被拒绝 贴出解决方案:https://github.com/ ...
- 英码科技边缘计算智慧工地解决方案——给工地戴上AI“安全帽”
据统计显示,2021年全国共发生房屋市政工程生产安全事故734起,死亡840人:且近3年来,工地事故数量.死亡人数连续攀升.这不仅仅是一个普通的数字,每个数字都代表一个独特.鲜活的生命.为什么每年会发 ...
