Android动态添加碎片
我们编写一个能够用过按钮动态更替碎片的APP,首先在主页上显示第一个碎片,点击按钮后可以替换到第二个碎片,或者删除已经替换掉的第二个碎片。
一.MainActivity.java
import androidx.fragment.app.FragmentActivity;

import androidx.fragment.app.FragmentManager;

import androidx.fragment.app.FragmentTransaction;

import android.os.Bundle;

import android.util.Log;

import android.view.View;

import android.widget.Button;

public class MainActivity extends FragmentActivity {

    public MainActivity() {

        Log.e("TAG", "MainActivity()..");

    }

    @Override

    protected void onCreate(Bundle savedInstanceState) {

        Log.e("TAG", "MainActivity onCreate()..");

        super.onCreate(savedInstanceState);

        setContentView(R.layout.activity_main);//重写onCreate()方法

        // 创建Fragment对象

        final MyFragment1 fragment1 = new MyFragment1();

        // 得到FragmentManager

        FragmentManager manager = getSupportFragmentManager();

        // 得到FragmentTransacation

        FragmentTransaction transaction = manager.beginTransaction();

        // 添加Fragment对象并提交

        transaction.add(R.id.ll_main, fragment1).commit();

        Button button1=(Button)findViewById(R.id.fragment_1);

        button1.setOnClickListener(new View.OnClickListener() {

            @Override

            public void onClick(View view) {

                showFragment2();

            }

        });

        Button button2=(Button)findViewById(R.id.fragment_2);

        button2.setOnClickListener(new View.OnClickListener() {

            @Override

            public void onClick(View view) {

                deleteFragment2();

            }

        });

    }

    private MyFragment2 fragment2;

    public void showFragment2() {

        // 创建Fragment对象

        fragment2 = new MyFragment2();

        // 得到FragmentManager

        FragmentManager manager = getSupportFragmentManager();

        // 得到FragmentTransacation

        FragmentTransaction transaction = manager.beginTransaction();

        //将当前操作添加到回退栈, 这样点击back回到上一个状态

        transaction.addToBackStack(null);

        // 替换Fragment对象并提交

        transaction.replace(R.id.ll_main, fragment2).commit();

    }

    public void deleteFragment2() {

        // 得到FragmentManager

        FragmentManager manager = getSupportFragmentManager();

        // 得到FragmentTransacation

        FragmentTransaction transaction = manager.beginTransaction();

        // 移除Fragment对象并提交

        transaction.remove(fragment2).commit();

    }

}
二.activity_main.xml
<?xml version="1.0" encoding="utf-8"?>

<LinearLayout xmlns:android="http://schemas.android.com/apk/res/android"

    xmlns:app="http://schemas.android.com/apk/res-auto"

    xmlns:tools="http://schemas.android.com/tools"

    android:layout_width="match_parent"

    android:layout_height="match_parent"

    android:orientation="vertical"

    tools:context=".MainActivity">

    <LinearLayout

        android:orientation="horizontal"

        android:layout_width="match_parent"

        android:layout_height="wrap_content">

<Button

    android:id="@+id/fragment_1"

    android:text="切换至第二个碎片"

    android:layout_width="0dp"

    android:layout_weight="1"

    android:layout_height="wrap_content" />

    <Button

        android:id="@+id/fragment_2"

        android:text="删除第二个碎片"

        android:layout_width="0dp"

        android:layout_weight="1"

        android:layout_height="wrap_content" />

    </LinearLayout>

<LinearLayout

    android:id="@+id/ll_main"

    android:orientation="horizontal"

    android:layout_width="match_parent"

    android:layout_height="match_parent">

</LinearLayout>

</LinearLayout>
编写好的界面如下图所示: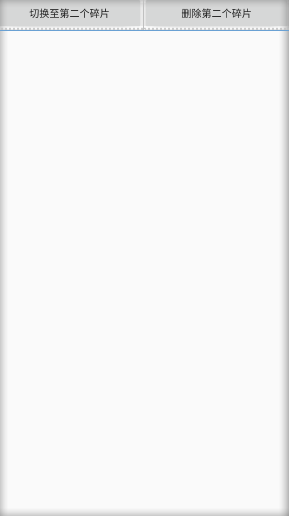
三.MyFragment1.java
import android.os.Bundle;

import androidx.fragment.app.Fragment;

import android.util.Log;

import android.view.LayoutInflater;

import android.view.View;

import android.view.ViewGroup;

import android.widget.TextView;

public class MyFragment1 extends Fragment {

    public MyFragment1() {

        // Required empty public constructor

    }

    @Override

    public void onCreate(Bundle savedInstanceState) {

        super.onCreate(savedInstanceState);

    }

    @Override

    public View onCreateView(LayoutInflater inflater, ViewGroup container,

                             Bundle savedInstanceState) {

        // Inflate the layout for this fragment

        return inflater.inflate(R.layout.fragment_my_fragment1, container,false);

    }

}
四.MyFragment2.java
import android.os.Bundle;

import androidx.fragment.app.Fragment;

import android.util.Log;

import android.view.LayoutInflater;

import android.view.View;

import android.view.ViewGroup;

import android.widget.TextView;

public class MyFragment2 extends Fragment {

    public MyFragment2() {

        // Required empty public constructor

    }

    @Override

    public void onCreate(Bundle savedInstanceState) {

        super.onCreate(savedInstanceState);

    }

    @Override

    public View onCreateView(LayoutInflater inflater, ViewGroup container,

                             Bundle savedInstanceState) {

        // Inflate the layout for this fragment

        return inflater.inflate(R.layout.fragment_my_fragment2, container,false);

    }

}
五.fragment1.xml
<?xml version="1.0" encoding="utf-8"?>

<FrameLayout xmlns:android="http://schemas.android.com/apk/res/android"

    xmlns:tools="http://schemas.android.com/tools"

    android:layout_width="match_parent"

    android:layout_height="match_parent"

    tools:context=".MyFragment1">

    <!-- TODO: Update blank fragment layout -->

    <TextView

        android:layout_width="match_parent"

        android:layout_height="match_parent"

        android:text="这是第一个碎片" />

</FrameLayout>
六.fragment2.xml
<?xml version="1.0" encoding="utf-8"?>

<FrameLayout xmlns:android="http://schemas.android.com/apk/res/android"

    xmlns:tools="http://schemas.android.com/tools"

    android:layout_width="match_parent"

    android:layout_height="match_parent"

    tools:context=".MyFragment2">

    <!-- TODO: Update blank fragment layout -->

    <TextView

        android:layout_width="match_parent"

        android:layout_height="match_parent"

        android:text="这是第二个碎片" />

</FrameLayout>
完毕
Android动态添加碎片的更多相关文章
- Android — — —动态添加碎片
<?xml version="1.0" encoding="utf-8"?><LinearLayout xmlns:android=" ...
- Android中如何动态添加碎片
Android中的开发需要兼容手机和平板,两个方面.这就引入了碎片的概念.(注意:这里用的Fragment强烈建议使用support-v4库中的Fragment) 碎片:是一种可以嵌入在活动当中的UI ...
- Android动态添加Device Admin权限
/********************************************************************** * Android动态添加Device Admin权限 ...
- Android 动态添加Spinner(.java文件内实现) 实现 改变spinner 内文字属性
动态添加spinner 控件 Spinner s = new Spinner(this); String []items={"自己定义的要显示的数组"}; my_SpinnerAd ...
- Android动态添加和移除布局
package com.hyang.administrator.studentproject; import android.os.Bundle; import android.support.v7. ...
- android动态添加TextView或者ImageView
动态添加 text1=new TextView(this); text1.setText("动态添加"); ((LinearLayout) this.findViewById(R. ...
- Android -- 动态添加布局
在做项目的时候,遇到了scrollView与listView结合的使用,导致了滑动的混乱,但是有一个办法可以解决掉这个问题,就是手写listView的高度,还有另外一种方法,传送门:<Andro ...
- Android 动态添加删除ExpandableListView的item的例子
这个例子可以学习到如下几点: 1.通过自定义Dialog(单独布局的xml文件进行弹出显示) 2.通过menu点击监听添加,删除view中的items 3.点击ExpandableListView中g ...
- Android动态添加布局
//1.利用LayoutInflater的inflate动态加载XML mLinearLayout = (LinearLayout)findViewById(R.id.LinearLayout_ID) ...
随机推荐
- 题解 P1047 【校门外的树】
可以直接模拟,用珂朵莉树是不有点小题大做. 你怎么做珂朵莉都会骂你:"这么简单的模拟都要用***" 附赠珂朵莉照片一张 另外讲几点: 可以用int,你要不怕MLE #include ...
- Python的os,shutil和sys模块
*********OS*********** os.sep 可以取代操作系统特定的路径分隔符.windows下为 '\\' os.name 字符串指示你正在使用的平台.比如对于Windows,它是'n ...
- 2场 J -Subarray
题意: 长度为1e91e9的(1,−1)(1,−1)序列,下标从00到1e9−11e9−1,已知有nn个区间为11,其他为−1−1, 问存在多少个区间的和>1>1(保证∑1≤i≤nr[i] ...
- 记一次MySQL数据库导入错误
昨天在转数据的时候,控制台报出了下面这个warning: Warning: Data truncated for column '控制距离' at row 1 字面上意思应该是:控制距离这一字段在第一 ...
- CentOS 7 Keepalive 脚本不执行解决
目录 问题 问题一 括号问题 问题二 脚本名称问题 问题 起因是在测试部署 Altls + Keepalive 高可用读写分离,测试停止Atlas服务的时候,发现Keepalive不会自动主从切换,就 ...
- CCNA 之 综合实验
CCNA 综合实验 需要:根据下列图中的网路拓扑,搭建环境; PC1属于VLAN10:PC2属于VLAN20:网关均在OR_C2811: VLAN10.20对应的网段分别为192.168.10.0.2 ...
- PAT甲级满分攻略|记一次考试经历
一次考试经历 今天是"大雪",很冷. 来到隔壁的学校考试,记得上一次来河中医是两年前大一刚开学吧,那天晚上印象比较深刻,6个室友骑车到处闲逛.当时还不会Hello world. 很 ...
- 谁说微服务是Spring Cloud的独角戏?Service Mesh了解一下?
Service Mesh 的概念自 2017 年初提出之后,受到了业界的广泛关注,作为微服务的下一代发展架构在社区迅速发酵,并且孵化出了诸如 Istio 等广受业界关注的面向于云原生 (Cloud N ...
- [UWP]在应用退出时弹出确认提示框
1. 需求 在应用退出时(点击右上角的关闭按钮)弹出一个确认按钮可以说是一个最常见的操作了,例如记事本的"你是否保存": 但这个功能在UWP上居然有点小复杂.这篇文章将解释如何实现 ...
- Webstorm相关设置
[1.快速激活Webstorm] http://jingyan.baidu.com/article/9f63fb919674f2c8400f0e9a.html [2.webstorm 2017 激活破 ...