Ubuntu 16.04上anaconda安装和使用教程,安装jupyter扩展等 | anaconda tutorial on ubuntu 16.04
本文首发于个人博客https://kezunlin.me/post/23014ca5/,欢迎阅读最新内容!
anaconda tutorial on ubuntu 16.04
Guide
versions:
- ubuntu 16.04
- conda 4.6.14
- python 3.7.3 (default)
- python 3.5.6 (env)
Install Conda
download Anaconda3-2019.03-Linux-x86_64.sh from here
bash ./Anaconda3-2019.03-Linux-x86_64.sh
output
[/home/kezunlin/anaconda3] >>>

PREFIX=/home/kezunlin/anaconda3

installing: python-3.7.3-h0371630_0 ...

Python 3.7.3

...

installing: scikit-image-0.14.2-py37he6710b0_0 ...

installing: scikit-learn-0.20.3-py37hd81dba3_0 ...

installing: astropy-3.1.2-py37h7b6447c_0 ...

installing: statsmodels-0.9.0-py37h035aef0_0 ...

installing: seaborn-0.9.0-py37_0 ...

installing: anaconda-2019.03-py37_0 ...

installation finished.

Do you wish the installer to initialize Anaconda3

by running conda init? [yes|no]

If you'd prefer that conda's base environment not be activated on startup,

   set the auto_activate_base parameter to false:

conda config --set auto_activate_base false

Thank you for installing Anaconda3!
conda config --set auto_activate_base false
check version
conda --version

conda 4.6.11

conda update conda

conda --version

conda 4.6.14
Managing Environments
create new env
When you begin using conda, you already have a default environment named base. You don't want to put programs into your base environment, though. Create separate environments to keep your programs isolated from each other.
(base) kezunlin@ke:~$ conda --version

conda 4.6.14

(base) kezunlin@ke:~$ conda create --name snowflakes biopython

(base) kezunlin@ke:~$ conda activate snowflakes

(snowflakes) kezunlin@ke:~$

(snowflakes) kezunlin@ke:~$ conda deactivate

(base) kezunlin@ke:~$
conda activateonly works on conda 4.6 and later versions.
list envs
conda info --envs

# conda environments:

#

base                  *  /home/kezunlin/anaconda3

snowflakes               /home/kezunlin/anaconda3/envs/snowflakes
~/.conda/environments.txt
/home/kezunlin/anaconda3

/home/kezunlin/anaconda3/envs/snowflakes

/home/kezunlin/anaconda3/envs/py35
Managing Python
When you create a new environment, conda installs the same Python version you used when you downloaded and installed Anaconda. If you want to use a different version of Python, for example Python 3.5, simply create a new environment and specify the version of Python that you want.
conda create --name snakes python=3.5

conda activate py35

conda info --envs

# conda environments:

#

base                     /home/kezunlin/anaconda3

py35                  *  /home/kezunlin/anaconda3/envs/py35

snowflakes               /home/kezunlin/anaconda3/envs/snowflakes

(base) kezunlin@ke:~$ python --version

Python 3.7.3

(base) kezunlin@ke:~$ conda activate py35

(py35) kezunlin@ke:~$ python --version

Python 3.5.6 :: Anaconda, Inc.
Managing packages
list packages
(base) kezunlin@ke:~$ conda activate py35

(py35) kezunlin@ke:~$

(py35) kezunlin@ke:~$ conda list

# packages in environment at /home/kezunlin/anaconda3/envs/py35:

#

# Name                    Version                   Build  Channel

ca-certificates           2019.1.23                     0

certifi                   2018.8.24                py35_1

libedit                   3.1.20181209         hc058e9b_0
search
conda search beautifulsoup4

...

beautifulsoup4                 4.6.3          py27_0  pkgs/main

beautifulsoup4                 4.6.3          py35_0  pkgs/main

beautifulsoup4                 4.6.3          py36_0  pkgs/main

beautifulsoup4                 4.6.3          py37_0  pkgs/main

beautifulsoup4                 4.7.1          py27_1  pkgs/main

beautifulsoup4                 4.7.1          py36_1  pkgs/main

beautifulsoup4                 4.7.1          py37_1  pkgs/main
install
conda install beautifulsoup4
conda config
conda config --set show_channel_urls yes

conda config --show
Tools
Jupyter notebook
install jupyter
conda create -n py35 python=3.5

conda activate py35

conda install jupyter
install kernel
python -m ipykernel install --user --name=py35

Installed kernelspec py35 in /home/kezunlin/.local/share/jupyter/kernels/py35
jupyterdepends onnotebookandipykernel
also see tensorflow jupyter notebook kenel
run jupyter
jupyter notebook
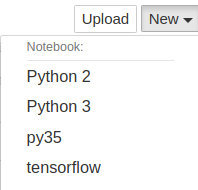
now we can see py35 kernel appears.
tensorflow-gpu/keras
conda activate py35

conda install tensorflow-gpu keras
test
 >>>import tensorflow as tf

 >>>import keras as K

 Using TensorFlow backend.
.keras/keras.json
{

    "epsilon": 1e-07,

    "floatx": "float32",

    "image_data_format": "channels_last",

    "backend": "tensorflow"

}
pytorch
see pytorch tutorial on ubuntu 16.04
Reference
History
- 20190524: created.
Copyright
- Post author: kezunlin
- Post link: https://kezunlin.me/post/23014ca5/
- Copyright Notice: All articles in this blog are licensed under CC BY-NC-SA 3.0 unless stating additionally.
Ubuntu 16.04上anaconda安装和使用教程,安装jupyter扩展等 | anaconda tutorial on ubuntu 16.04的更多相关文章
- ubuntu 16.04上源码编译dlib教程 | compile dlib on ubuntu 16.04
本文首发于个人博客https://kezunlin.me/post/c6ead512/,欢迎阅读! compile dlib on ubuntu 16.04 Series Part 1: compil ...
- Ubuntu 18.04上安装 phpMyAdmin
我们将安装 phpMyAdmin 在 Ubuntu18.04 上配合 Apache 一起工作. 在安装 phpMyAdmin 之前需要已经安装了LAMP栈并提供了web页面. 如果没有安装可以参照 U ...
- 在 Ubuntu 14.04/15.04 上配置 Node JS v4.0.0
大家好,Node.JS 4.0 发布了,这个流行的服务器端 JS 平台合并了 Node.js 和 io.js 的代码,4.0 版就是这两个项目结合的产物——现在合并为一个代码库.这次最主要的变化是 N ...
- 在ubuntu18.04上安装EOS
在ubuntu18.04上安装EOS 在ubuntu18.04上安装EOS的目的: 把交易所的eos转到eos主网,防止交易所跑路或者交易所被黑客攻击 在不联网的安全环境下,用eos官方的命令行工具, ...
- 如何在 Ubuntu Linux 16.04上安装开源的 Discourse 论坛
导读 Discourse 是一个开源的论坛,它可以以邮件列表.聊天室或者论坛等多种形式工作.它是一个广受欢迎的现代的论坛工具.在服务端,它使用 Ruby on Rails 和 Postgres 搭建, ...
- 如何在Ubuntu 16.04上安装配置Redis
如何在Ubuntu 16.04上安装配置Redis Redis是一个内存中的键值存储,以其灵活性,性能和广泛的语言支持而闻名.在本指南中,我们将演示如何在Ubuntu 16.04服务器上安装和配置Re ...
- 在 Ubuntu 16.04上安装 vsFTPd
在 Ubuntu 16.04上安装 vsFTPd Ubuntu vsFTPd 关于 vsFTPd vsFTPd 代表 Very Secure File Transfer Protocol Daemon ...
- (译)综合指南:通过Ubuntu 16.04上从Source构建来安装支持GPU的Caffe2
(译)综合指南:通过Ubuntu 16.04上从Source构建来安装支持GPU的Caffe2 译者注: 原文来自:https://tech.amikelive.com/node-706/compre ...
- Ubuntu 16.04上安装并配置Postfix作为只发送SMTP服务器
如果大家已经在使用第三方邮件服务方案发送并收取邮件,则无需运行自己的邮件服务器.然而,如果大家管理一套云服务器,且其中安装的应用需要发送邮件通知,那么运行一套本地只发送SMTP服务器则更为理想. 如何 ...
随机推荐
- Selenium+java - 单选框及复选框处理
一.什么是单选框.复选框? 二.被测页面html源代码 CheckBoxRadioDemo.html <!DOCTYPE html> <html lang="en" ...
- 拎壶学python3-----(2)python之if语句用法
在生活中我们经常遇到各种选择,比如玩色子,猜大小,再比如选择未来另一半.python也经常会遇到这样的选择,这时候if语句显得尤为重要. 下边我们看一个简单的例子 如果是二选一怎么做呢?如下 如果多个 ...
- JMS入门Demo
2.1点对点模式(邮箱) 点对点的模式主要建立在一个队列上面,当连接一个列队的时候,发送端不需要知道接收端是否正在接收,可以直接向ActiveMQ发送消息,发送的消息,将会先进入队列中,如果有接收端在 ...
- 前端之json,ajax和jsonp
json json是 JavaScript Object Notation 的首字母缩写,单词的意思是javascript对象表示法,这里说的json指的是类似于javascript对象的一种数据格式 ...
- Wpf Prism.Unity 7
Prism.Unity 中UnityBootStrapper已经不用了,可以继承PrismApplication 1.Install-package Prism.Unity -v 7.2.0.1367 ...
- 最近的项目系之2——core3.0整合Autofac
1.前言 core3.0与之前版本相比,有一些brokenchanges,那周边一些配套组件往往也难逃brokenchanges,Autofac也不例外.这里重点关注core整合Autofac,与之前 ...
- css 行内水平均等排布方式
<div class="justify"> <span>测试1</span> <span>测试2</span> < ...
- Java生鲜电商平台-电商支付流程架构实战
Java生鲜电商平台-电商支付流程架构实战 说明:我一直秉承的就是接地气的业务架构实战.我的文章都有一个这样的核心. 1. 业务场景 2. 解决问题. 3.代码实现. 4.代码重构. 5.总结与复盘. ...
- 易优CMS:arcview的基础用法
[基础用法] 名称:arcview 功能:获取单条文档数据 语法: {eyou:arcview aid='文档ID'} <a href="{$field.arcurl}"&g ...
- CSS3 过渡---transition
过渡(transition)是CSS3中具有颠覆性的特征之一,我们可以在不使用 Flash 动画或 JavaScript 的情况下,当元素从一种样式变换为另一种样式时为元素添加效果. 过渡动画: 是从 ...