构建web应用之——SpringMVC实现CRUD
配置好SpringMVC最基本的配置后,开始实现处理数据的CRUD(CREATE, READ, UPDATE, DELETE)
为实现模块上的松耦合,我们将与数据库的交互任务交给DAO(Data Access Object,即数据访问对象)层,
SpringMVC中使用@Repository注解为DAO自动生成bean,下面是实现数据增删改查所用的数据库:
1.数据库:mysql
2.数据源连接池:DBCP(最先使用了Spring中内置的基于JDBC的数据源DriverManagerDataSource,但它没有
池的概念,在每次请求连接时都要创建新连接,降低了性能)
实现过程:
一、添加依赖
基于之前的项目,我们还需要配置一些其他的依赖,来支持我们项目的构建,具体依赖如下:
<!-- mysql -->

    <dependency>

      <groupId>org.springframework</groupId>

      <artifactId>spring-jdbc</artifactId>

      <version>5.1.3.RELEASE</version>

    </dependency>

    <dependency>

      <groupId>mysql</groupId>

      <artifactId>mysql-connector-java</artifactId>

      <version>8.0.13</version>

      <scope>runtime</scope>

    </dependency>

    <!-- 数据源连接池 -->

    <dependency>

      <groupId>commons-dbcp</groupId>

      <artifactId>commons-dbcp</artifactId>

      <version>1.4</version>

    </dependency>

    <dependency>

      <groupId>commons-pool</groupId>

      <artifactId>commons-pool</artifactId>

      <version>1.6</version>

    </dependency>
除了上述依赖意外,我们还需要加入spring bean的依赖。虽然我们使用注解自动装配以及XML配置的形式来声明和使用bean,
但是,我们需要spring bean来配置我们的配置文件路径。
<dependency>

      <groupId>org.springframework</groupId>

      <artifactId>spring-beans</artifactId>

      <version>5.1.3.RELEASE</version>

    </dependency>
二、编码(Service层和Controller层的实现)
我们通过DAO层来与数据库实现交互,因此,我们的Service层以及Controller层无需关注数据交互,只需要处理自己本职的工作即可。
下面是文件结构:

我们通过StudentController类来响应请求,通过StudentService接口来定义CRUD四种服务,通过StudentDao接口来定义
与数据库交互的方法(增、删、改、查),StudentServiceImpl类以及StudentDaoImpl类分别实现了接口中定义的方法。
StudentDao定义与数据库交互的方法(具体实现过程抛给其实现类):
package example.dao;

import example.entity.Student;

public interface StudentDao {

    public void create(Student student);

    public Student readById(String studentId);

    public void updateName(String studentId, String newUsername);

    public void deleteById(String studentId);

}
有了StudentDao中定义的方法后,我们就可以编写Controller层和Service层代码逻辑了(数据如何增删改查我们暂时不用关心)
StudentService定义了我们的web项目所要拥有的功能:
1.添加一个学生
2.查找指定学号的学生信息
3.更新学生信息
4.删除指定学生
package example.service;

import example.entity.Student;

public interface StudentService {

    public void create(Student student);

    public Student readById(String studentId);

    public void updateUsername(String studentId, String newName);

    public void deleteById(String studentId);

}
StudentServiceImpl实现了StudentService接口中的方法
package example.service;

import example.dao.StudentDao;

import example.entity.Student;

import org.springframework.beans.factory.annotation.Autowired;

import org.springframework.context.annotation.ComponentScan;

import org.springframework.stereotype.Service;

@Service

public class StudentServiceImpl implements StudentService {

    // 注入StudentDao

    @Autowired

    private StudentDao studentDao;

    @Override

    public void create(Student student) {

        studentDao.create(student);

    }

    @Override

    public Student readById(String studentId) {

        return studentDao.readById(studentId);

    }

    @Override

    public void updateUsername(String studentId, String newName) {

        studentDao.updateName(studentId, newName);

    }

    @Override

    public void deleteById(String studentId) {

        studentDao.deleteById(studentId);

    }

}
使用@Service注解使得Spring自动为StudentService生成bean,同时我们注入了StudentDao的bean
Controller层负责处理请求:
package example.controller;

import example.entity.Student;

import example.service.StudentService;

import org.springframework.beans.factory.annotation.Autowired;

import org.springframework.context.annotation.ComponentScan;

import org.springframework.stereotype.Controller;

import org.springframework.ui.Model;

import org.springframework.web.bind.annotation.PathVariable;

import org.springframework.web.bind.annotation.RequestMapping;

import org.springframework.web.bind.annotation.RequestMethod;

import org.springframework.web.bind.annotation.RequestParam;

@Controller

@RequestMapping("/student")

public class StudentController {

    // 注入StudentService Bean

    @Autowired

    private StudentService studentService;

    // 处理创建学生请求

    @RequestMapping(value = "/create", method = RequestMethod.POST)

    public String createStudent(Student student) {

        studentService.create(student);

        // 重定向到学生信息界面

        return "redirect:/student/read/" + student.getStudentId();

    }

    // 处理查询学生信息请求

    @RequestMapping(value = "/read/{studentId}", method = RequestMethod.GET)

    public String readStudent(

            @PathVariable("studentId") String studentId,

            Model model) {

        model.addAttribute(studentService.readById(studentId));

        return "student";

    }

    // 处理JSP视图查询处理

    @RequestMapping(value = "/read", method = RequestMethod.GET)

    public String readStudentByView(

            @RequestParam("studentId") String studentId,

            Model model) {

        model.addAttribute(studentService.readById(studentId));

        return "student";

    }

    // 处理修改学生信息请求

    @RequestMapping(value = "/update", method = RequestMethod.POST)

    public String updateStudent(String studentId, String newUsername) {

        studentService.updateUsername(studentId, newUsername);

        return "redirect:/student/read/" + studentId;

    }

    // 处理删除学生请求

    @RequestMapping(value = "/delete", method = RequestMethod.POST)

    public String deleteStudent(String studentId) {

        studentService.deleteById(studentId);

        return "deleteSuccessfully";

    }

}
@Controller注解使Spring自动为其生成bean,@RequestMapping注解用来声明请求映射(类比之前的helloMVC实现)
最后,我们需要在DispatcherServlet以及Spring内部配置文件中进行配置,使其能够在编译时扫描到带有注解的类并为其生成bean
dispatcher-servlet.xml中
<!-- DispatcherServlet上下文只管理@Controller类型的bean -->

    <context:component-scan base-package="example">

        <context:include-filter type="annotation" expression="org.springframework.stereotype.Controller"/>

    </context:component-scan>

<!-- 自动扫描装配 -->

    <context:component-scan base-package="example.controller"/>
applicationContext.xml
<!-- 忽略对@Controller的扫描 -->

    <context:component-scan base-package="example">

        <context:exclude-filter type="annotation" expression="org.springframework.stereotype.Controller"/>

    </context:component-scan>
三、实现Dao层
到目前为止,我们还无法获取数据(当然可以在StudentDaoImpl中使用静态数据),接下来我们要实现StudentDao接口中
的方法,使得我们能真正意义上在视图中看到想要的数据
在编写方法逻辑之前,我们需要完成数据库相关配置:
1.数据库配置参数(jdbc.properties)松耦合的一种方式
############ DBCP数据源连接池配置

############ mysql

jdbc.driverClassName=com.mysql.cj.jdbc.Driver

jdbc.url=jdbc:mysql://localhost:3306/student?useUnicode=true&characterEncoding=utf8&serverTimezone=GMT

jdbc.username=root

jdbc.password=

############ BasicDataSource的池配置属性

jdbc.initialSize=5

jdbc.maxActive=10
2.完成数据库、数据源以及bean的装配
<!-- Spring内置JDBC数据源 -->
<!-- <bean id="dataSource" class="org.springframework.jdbc.datasource.DriverManagerDataSource">
<property name="driverClassName" value="com.mysql.jdbc.Driver"/>
<property name="url" value="jdbc:mysql://localhost:3306/student?useUnicode=true&characterEncoding=utf8
&serverTimezone=GMT"/>
<property name="username" value="root"/>
<property name="password" value=""/>
</bean> --> <!-- 配置jdbc.properties路径 -->
<bean id="propertyConfigurer" class="org.springframework.beans.factory.config.PropertyPlaceholderConfigurer">
<property name="location" value="classpath:jdbc.properties"/>
</bean>
<!-- 使用DBCP数据源连接池 -->
<bean id="dataSource" class="org.apache.commons.dbcp.BasicDataSource">
<property name="driverClassName" value="${jdbc.driverClassName}"/>
<property name="url" value="${jdbc.url}"/>
<property name="username" value="${jdbc.username}"/>
<property name="password" value="${jdbc.password}"/>
<property name="initialSize" value="${jdbc.initialSize}"/>
<property name="maxActive" value="${jdbc.maxActive}"/>
</bean> <!-- 使用JDBC模板操作数据 -->
<bean id="jdbcTemplate" class="org.springframework.jdbc.core.JdbcTemplate">
<constructor-arg ref="dataSource"/>
</bean>
注意:配置连接数据库的参数变量时,不能只写url,username等,应为xml中使用${username}获得的是计算机账号的名称,要加以区分
3.实现StudentDao方法
这一部分说白了就是编写增删改查的SQL语句,代码如下:
package example.dao;

import example.entity.Student;

import org.springframework.beans.factory.annotation.Autowired;

import org.springframework.jdbc.core.JdbcTemplate;

import org.springframework.jdbc.core.RowMapper;

import org.springframework.stereotype.Repository;

import java.sql.ResultSet;

import java.sql.SQLException;

@Repository

public class StudentDaoImpl implements StudentDao {

    private JdbcTemplate jdbcTemplate;

    @Autowired

    public StudentDaoImpl(JdbcTemplate jdbcTemplate) {

        this.jdbcTemplate = jdbcTemplate;

    }

    private static final String INSERT_STUDENT =

            "insert into student (student_id, student_name, password)" +

                    "values (?, ?, ?)";

    private static final String QUERY_STUDENT =

            "select student_id, student_name, password from student where student_id = ?";

    private static final String UPDATE_STUDENT =

            "update student set student_name = ? where student_id = ?";

    private static final String DELETE_STUDENT =

            "delete from student where student_id = ?";

    @Override

    public void create(Student student) {

        jdbcTemplate.update(INSERT_STUDENT,

                student.getStudentId(),

                student.getUsername(),

                student.getPassword());

    }

    @Override

    public Student readById(String studentId) {

        return jdbcTemplate.queryForObject(

                QUERY_STUDENT,

                new StudentRowMapper(),

                studentId

        );

    }

    @Override

    public void updateName(String studentId, String newUsername) {

        jdbcTemplate.update(UPDATE_STUDENT,

                newUsername,

                studentId);

    }

    @Override

    public void deleteById(String studentId) {

        jdbcTemplate.update(DELETE_STUDENT, studentId);

    }

    private static final class StudentRowMapper

            implements RowMapper<Student> {

        @Override

        public Student mapRow(ResultSet resultSet, int i) throws SQLException {

            return new Student(

                    resultSet.getString("student_id"),

                    resultSet.getString("student_name"),

                    resultSet.getString("password")

            );

        }

    }

}
使用@Repository注解使得Spring能够自动生成StudentDao的bean,同时注入JDBCTemplatebean用于数据库sql的操作,
需要注意的是,调用JdbcTemplate.queryForObject()方法时,需要一个RowMapper对象用于存放查找的Student对象,因此,
在代码最后我们定义了一个内部类实现了RowMapper接口,并实现了mapRow()方法用于返回一个Student的实例
以上,我们的代码实现就完成了。要运行web项目,我们还需要在Mysql数据库中创建student表以及创建相关视图
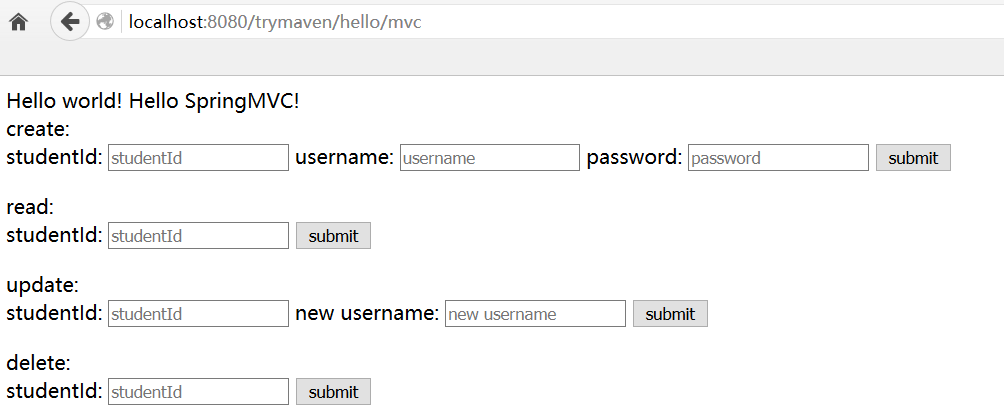
home.jsp
<%--

  Created by IntelliJ IDEA.

  User: asus1

  Date: 2019/1/6

  Time: 12:06

  To change this template use File | Settings | File Templates.

--%>

<%@ page contentType="text/html;charset=UTF-8" language="java" %>

<html>

<head>

    <title>Title</title>

</head>

<body>

    Hello world! Hello SpringMVC!

    <div>

        create:

        <form action="http://localhost:8080/trymaven/student/create" method="post">

            studentId: <input type="text" name="studentId" placeholder="studentId"/>

            username: <input type="text" name="username" placeholder="username"/>

            password: <input type="password" name="password" placeholder="password"/>

            <input type="submit" value="submit"/>

        </form>

    </div>

    <div>

        read:

        <form action="http://localhost:8080/trymaven/student/read" method="get">

            studentId: <input type="text" name="studentId" placeholder="studentId"/>

            <input type="submit" value="submit">

        </form>

    </div>

    <div>

        update:

        <form action="http://localhost:8080/trymaven/student/update" method="post">

            studentId: <input type="text" name="studentId" placeholder="studentId"/>

            new username: <input type="text" name="newUsername" placeholder="new username"/>

            <input type="submit" value="submit"/>

        </form>

    </div>

    <div>

        delete:

        <form action="http://localhost:8080/trymaven/student/delete" method="post">

            studentId: <input type="text" name="studentId" placeholder="studentId"/>

            <input type="submit" value="submit"/>

        </form>

    </div>

</body>

</html>
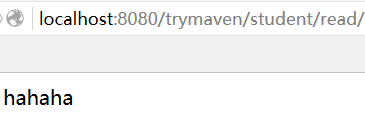
student.jsp
<%@ taglib prefix="c" uri="http://java.sun.com/jsp/jstl/core" %>

<%--

  Created by IntelliJ IDEA.

  User: asus1

  Date: 2019/1/6

  Time: 19:39

  To change this template use File | Settings | File Templates.

--%>

<%@ page contentType="text/html;charset=UTF-8" language="java" %>

<html>

<head>

    <title>student</title>

</head>

<body>

    <div class="studentView">

        <span class="studentId"><c:out value="${student.studentId}"/></span>

        <span class="studentName"><c:out value="${student.username}"/></span>

    </div>

</body>

</html>
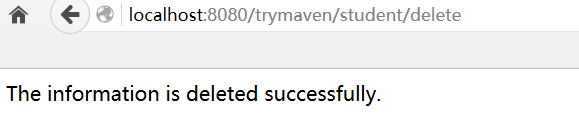
deleteSuccessfully.jsp
<%--

  Created by IntelliJ IDEA.

  User: asus1

  Date: 2019/1/6

  Time: 19:45

  To change this template use File | Settings | File Templates.

--%>

<%@ page contentType="text/html;charset=UTF-8" language="java" %>

<html>

<head>

    <title>deleteState</title>

</head>

<body>

The information is deleted successfully.

</body>

</html>
四、运行web项目
通过Tomcat启动项目:
构建web应用之——SpringMVC实现CRUD的更多相关文章
- IDEA下使用maven构建web项目(SpringMVC+Mybatis整合)
需求背景:由于最近总是接到一些需求,需要配合前端团队快速建设移动端UI应用或web应用及后台业务逻辑支撑的需求,若每次都复用之前复杂业务应用的项目代码,总会携带很多暂时不会用到的功能或组件,这样的初始 ...
- 构建web应用之——maven创建以及SpringMVC配置
构建web应用第一步需要创建以及配置maven项目管理,同时配置启动SpringMVC,这里推荐参考CSDN的一篇文章链接:https://blog.csdn.net/weixin_42222334/ ...
- 基于MVC4+EasyUI的Web开发框架经验总结(2)- 使用EasyUI的树控件构建Web界面
最近花了不少时间在重构和进一步提炼我的Web开发框架上,力求在用户体验和界面设计方面,和Winform开发框架保持一致,而在Web上,我主要采用EasyUI的前端界面处理技术,走MVC的技术路线,在重 ...
- JAVA Eclipse使用Maven构建web项目详解(SSM框架)
tips: 启动项目后,welcome-file的链接即为测试用例 部署maven web项目 Eclipse使用Maven构建web项目详解 pom.xml添加webapp依赖: <depen ...
- Web前后端分离开发(CRUD)及其演变概括
今天学习了前后端分离开发模式又从网上查了一些资料就写了一篇博客分享: 一.为什么分离前后端 1.1早期开发 1.2后段为主mvc模式 1.2.1Structs框架介绍 1.2.2Spring mcv开 ...
- NodeJs+http+fs+request+cheerio 采集,保存数据,并在网页上展示(构建web服务器)
目的: 数据采集 写入本地文件备份 构建web服务器 将文件读取到网页中进行展示 目录结构: package.json文件中的内容与上一篇一样:NodeJs+Request+Cheerio 采集数据 ...
- 使用EXtjs6.2构建web项目
一.项目简介 众所周知ext是一款非常强大的表格控件,尤其是里边的grid为用户提供了非常多的功能,现在主流的还是用extjs4.0-4.2,但是更高一点的版本更加符合人的审美要求.因此,在今天咱们构 ...
- 《深入浅出Node.js》第8章 构建Web应用
@by Ruth92(转载请注明出处) 第8章 构建Web应用 一.基础功能 请求方法:GET.POST.HEAD.DELETE.PUT.CONNECT GET /path?foo=bar HTTP/ ...
- Eclipse中使用maven构建web项目中遇到的问题
构建过程参考: http://blog.csdn.net/smilevt/article/details/8215558/ http://www.cnblogs.com/dcba1112/archiv ...
随机推荐
- 20190410Linux中磁盘管理及LVM(week2day1)
Linux磁盘管理及LVM讲解(week2_day2) 硬盘接口 从整体的角度上,硬盘接口分为IDE.SATA.SCSI和SAS四种,IDE接口硬盘多用于家用产品中,也部分应用于服务器,SCSI接 ...
- tomcat部署jfinal项目
1:创建一个目录: /var/www 2:为将要部署的项目创建一个目录, /var/www/my_project 3:将项目打成 war 包, 然后解压到 /var/www/my_project ...
- python调用远程chromedriver.exe、selenium抓包方法
本地python示例代码: from selenium import webdriver driver = webdriver.Remote(command_executor='http://192. ...
- asp.net 对象转XML,XML转对象
//对象转XML public static string ObjToXml(object obj) { using (MemoryStream Stream = new MemoryStream() ...
- 将vmware虚拟机转换成qcow2格式的方法
将vmware虚拟机转换成qcow2格式的方法 http://blog.51cto.com/13570993/2074071 关于qemu安装出现的问题 1.配置qemu是出现can't find p ...
- 为 pip install 设置 socks5 代理
参考 How to use pip with socks proxy? 为 pip install 设置 socks5 代理 设置方法: pip install pysocks pip install ...
- CI框架简单使用
CodeIgniter框架 1.回忆MVC 1.1.M:模型,提供数据,保存数据 1.2.V:视图,只负责显示,表单form 1.3.C:控制器,协调模型和视图 1.4.action:动作,是控制器中 ...
- vue--简化项目逻辑属性
computed属性对数据变化是实时响应的 因此当项目中某个数值发生变化,并且要在别的地方引用这个数值时,computed即可派上用场 来看一个例子: html部分: <div id=" ...
- P2170 选学霸
传送门 思路: ① 可以把每个学生都看作点,而那些实力相同的学生就处在同一个连通块内,因为连通块内的同学要么都取,要么不取,所以可以将连通块缩成一个点.只需用并查集维护每个连通块的大小. ② 接着采取 ...
- 为wordpress后台登陆添加算术验证码
对于新建站(个人博客-柠檬https://ninmong.com)的站长来说提高后台的安全性,是一件非常重要的事,添加验证可以起到很好的效果,废话少说,贴代码 //后台登陆数学验证码 function ...