python爬虫数据解析之BeautifulSoup
BeautifulSoup是一个可以从HTML或者XML文件中提取数据的python库。它能够通过你喜欢的转换器实现惯用的文档导航,查找,修改文档的方式。
BeautfulSoup是python爬虫三大解析方法之一。
首先来看个例子:
from bs4 import BeautifulSoup

html_doc = """

<html><head><title>The Dormouse's story</title></head>

<body>

<p class="title"><b>The Dormouse's story</b></p>

<p class="story">Once upon a time there were three little sisters; and their names were

<a href="http://example.com/elsie" class="sister" id="link1">Elsie</a>,

<a href="http://example.com/lacie" class="sister" id="link2">Lacie</a> and

<a href="http://example.com/tillie" class="sister" id="link3">Tillie</a>;

and they lived at the bottom of a well.</p>

<p class="story">...</p>

"""

soup = BeautifulSoup(html_doc, 'lxml')

print(soup.prettify())
这个beautiful对象可以按照标准的缩进结构输出。
<html>

 <head>

  <title>

   The Dormouse's story

  </title>

 </head>

 <body>

  <p class="title">

   <b>

    The Dormouse's story

   </b>

  </p>

  <p class="story">

   Once upon a time there were three little sisters; and their names were

   <a class="sister" href="http://example.com/elsie" id="link1">

    Elsie

   </a>

   ,

   <a class="sister" href="http://example.com/lacie" id="link2">

    Lacie

   </a>

   and

   <a class="sister" href="http://example.com/tillie" id="link3">

    Tillie

   </a>

   ;

and they lived at the bottom of a well.

  </p>

  <p class="story">

   ...

  </p>

 </body>

</html>
接下来用以上例子来使用beautifulsoup
# soup.title 找到第一个title标签,其他也一样

print(soup.title)

# soup.title.name 找到title标签的名字

print(soup.title.name)

# 找到第一个p标签的class属性

print(soup.p['class'])

# 找到第一个p标签的属性和属性值,以字典形式呈现

print(soup.p.attrs)
其属性可以修改和删除,操作方法和字典一样.
# 找到title标签的内容,3中方式

print(soup.title.string)

# 找到title标签的内容,并替换

soup.title.string.replace_with("No longer bold")

print(soup.title.string)
# 输出head的子标签

print(soup.head.contents)

# 输出head的第一个子标签

print(soup.head.contents[0])

# 输出head的子标签

print(soup.head.children)

返回一个列表对象,用来做迭代.
# 输出head的所有子孙节点

print(soup.head.descendants)

如果tag包含了多个子节点,tag就无法确定 .string 方法应该调用哪个子节点的内容, .string 的输出结果是 None
如果tag中包含多个字符串 ,可以使用 .strings 来循环获取:
输出的字符串中可能包含了很多空格或空行,使用 .stripped_strings 可以去除多余空白内容:
# 找到title标签的父标签

print(soup.title.parent)

# 找到第一个a标签

link = soup.a

# 找打a节点的所有父节点

for parent in link.parents:

    print(parent.name)
在文档树中,使用 .next_sibling 和 .previous_sibling 属性来查询兄弟节点:
find()
find(name, attrs, recursive, text, **wargs) # recursive 递归的,循环的
# 找到第一个a节点

print(soup.find('a'))

# 找文本为Elsie的第一个a节点

print(soup.find('a', text='Elsie'))

# 通过正则表达式查找第一个包含字符a的标签

print(soup.find(re.compile('a')))

# 找到一个包含id='link3'标签

print(soup.find(id="link3"))

# 找到一个包含id='link3'标签

print(soup.find(attrs={'id':'link3'}))

class是python的保留关键字,所以无法使用class这个关键字。
有2种方法:
第一种:soup.find(attrs={'class':'haha'})
第二种:soup.find(class_='haha')
# 定义函数查找

def search_one(tag):

    return tag.has_attr('id') and tag.get('id')=='link3'

oder = soup.find(search_one)

print(oder)

find_all()
find_all(name, attrs, recursive, text, limit, **kwargs)
调用tag的 find_all() 方法时,Beautiful Soup会检索当前tag的所有子孙节点,如果只想搜索tag的直接子节点,可以使用参数 recursive=False .
# 找到所有的a标签,返回的是列表

print(soup.find_all('a'))
[<a class="sister" href="http://example.com/elsie" id="link1">Elsie</a>, <a class="sister" href="http://example.com/lacie" id="link2">Lacie</a>, <a class="sister" href="http://example.com/tillie" id="link3">Tillie</a>]
# 找到所有的a标签中的第一个

print(soup.find_all('a', limit=1))

# 找到所有包含a字符的标签,返回一个列表

print(soup.find_all(re.compile('a')))
[<head><title>The Dormouse's story</title></head>, <a class="sister" href="http://example.com/elsie" id="link1">Elsie</a>, <a class="sister" href="http://example.com/lacie" id="link2">Lacie</a>, <a class="sister" href="http://example.com/tillie" id="link3">Tillie</a>]
# 找到所有的a标签和b标签

print(soup.find_all(['a', 'b']))
[<b>The Dormouse's story</b>, <a class="sister" href="http://example.com/elsie" id="link1">Elsie</a>, <a class="sister" href="http://example.com/lacie" id="link2">Lacie</a>, <a class="sister" href="http://example.com/tillie" id="link3">Tillie</a>]
# 找到所有的有属性值为sister的a标签

print(soup.find_all("a", "sister"))
[<a class="sister" href="http://example.com/elsie" id="link1">Elsie</a>, <a class="sister" href="http://example.com/lacie" id="link2">Lacie</a>, <a class="sister" href="http://example.com/tillie" id="link3">Tillie</a>]
# 找到所有的有id属性值为link1的a标签

print(soup.find_all(id='link1'))

class是python的保留关键字,所以无法使用class这个关键字。
有2种方法:
第一种:soup.find_all(attrs={'class':'haha'})
第二种:soup.find_all(class_='haha')
# 找到所有的内容为Elsie的内容

print(soup.find_all(text='Elsie'))

print(soup.find_all(text=['Elsie', 'Lacie']))
CSS选择器
Beautiful Soup支持大部分的CSS选择器 [6] ,在 Tag 或 BeautifulSoup 对象的 .select() 方法中传入字符串参数,即可使用CSS选择器的语法找到tag
常见的选择器:标签选择器(a)、类选择器(.)、id选择器(#)、层级选择器
div .dudu #lala .meme .xixi 下面好多级
div > p > a > .lala 只能是下面一级
# 找到select标签

print(soup.select('title'))

# 找到body下的a

print(soup.select('body a'))
[<a class="sister" href="http://example.com/elsie" id="link1">Elsie</a>, <a class="sister" href="http://example.com/lacie" id="link2">Lacie</a>, <a class="sister" href="http://example.com/tillie" id="link3">Tillie</a>]
找到某个tag标签下的直接子标签
# 找到head下的title

print(soup.select('head > title'))

# 找到p下的a

print(soup.select('p > a'))
[<a class="sister" href="http://example.com/elsie" id="link1">Elsie</a>, <a class="sister" href="http://example.com/lacie" id="link2">Lacie</a>, <a class="sister" href="http://example.com/tillie" id="link3">Tillie</a>]
# 找到p下的id选择器link1

print(soup.select('p > #link1'))

 找到第一个有id选择器link1第二个有类选择器sister

print(soup.select('#link1 ~ .sister'))

# 找到有id选择器link1和类选择器sister

print(soup.select('#link1 + .sister'))

# 通过类名查找

print(soup.select('.sister'))

print(soup.select("[class~=sister]"))
[<a class="sister" href="http://example.com/elsie" id="link1">Elsie</a>, <a class="sister" href="http://example.com/lacie" id="link2">Lacie</a>, <a class="sister" href="http://example.com/tillie" id="link3">Tillie</a>]
# 通过id查找

print(soup.select('a#link1'))

# 通过属性查找

print(soup.select('a[id]'))
[<a class="sister" href="http://example.com/elsie" id="link1">Elsie</a>, <a class="sister" href="http://example.com/lacie" id="link2">Lacie</a>, <a class="sister" href="http://example.com/tillie" id="link3">Tillie</a>]
# 通过属性查找

print(soup.select('a[href="http://example.com/elsie"]'))

# 只要包含一部分属性就行

print(soup.select('a[href*="m/el"]'))

# 属性的结尾

print(soup.select('a[href$="elsie"]'))

例子
1 爬取诗词名句网 的水浒传并保存到本地 网址:http://www.shicimingju.com/book/shuihuzhuan.html
import requests

from bs4 import BeautifulSoup

import os

#解析出所有的目录

def main(url, headers):

    response = requests.get(url=url, headers=headers).text

    soup = BeautifulSoup(response, 'lxml')

    titles = soup.find_all(attrs=['class', 'book-mulu'])

    for one_title in titles:

        # 得到一个一个a标签的列表

        mulu_lst = one_title.find_all('a')

        write_in(mulu_lst)

# 写入文件

def write_in(mulu):

    # 创建文件夹

    if not os.path.exists('shuihu'):

        os.mkdir('shuihu')

    # 解析每一章节

    for one_mulu in mulu:

        # 拿到新的页面

        text = requests.get(url='http://www.shicimingju.com'+one_mulu['href'], headers=ua_headers).text

        soup1 = BeautifulSoup(text, 'lxml')

        content = soup1.find_all(attrs=['class', 'chapter_content'])

        # 解析这个div

        for one_content in content:

            # 去出2遍空格

            con = one_content.get_text().strip()

            # 将每段空格换为换行符

            con1 = con.replace('  ', '\n')

            # 以章节为名写入文件夹

            with open('shuihu/'+ one_mulu.string + '.txt', 'w', encoding='utf-8') as f:

                f.write(con1)

if __name__ == '__main__':

    url = 'http://www.shicimingju.com/book/shuihuzhuan.html'

    ua_headers = {"User-Agent":"Mozilla/5.0 (Macintosh; U; Intel Mac OS X 10_6_8; en-us) AppleWebKit/534.50 (KHTML, like Gecko) "

                               "Version/5.1 Safari/534.50"}

    main(url, ua_headers)
得到本地书籍:可以拖到手机上去看
其实上段代码的beautifulsoup可以简化的,但是我为了练习find_all就写了以上代码,可以用其他方式简化的.
2 爬取抽屉网首页的新闻标题和连接 https://dig.chouti.com/
import requests

from bs4 import BeautifulSoup

def main():

    response = requests.get(url=url, headers=ua_headers).text

    soup = BeautifulSoup(response, 'lxml')

    titles = soup.find_all('a', class_="show-content color-chag")

    for one_title in titles:

        print('标题' + one_title.text.strip() + '的链接为:' + one_title['href'])

if __name__ == '__main__':

    url = 'https://dig.chouti.com/'

    ua_headers = { "User-Agent":'Mozilla/4.0 (compatible; MSIE 8.0; Windows NT 6.0; Trident/4.0)'}

    main()
得到输出:

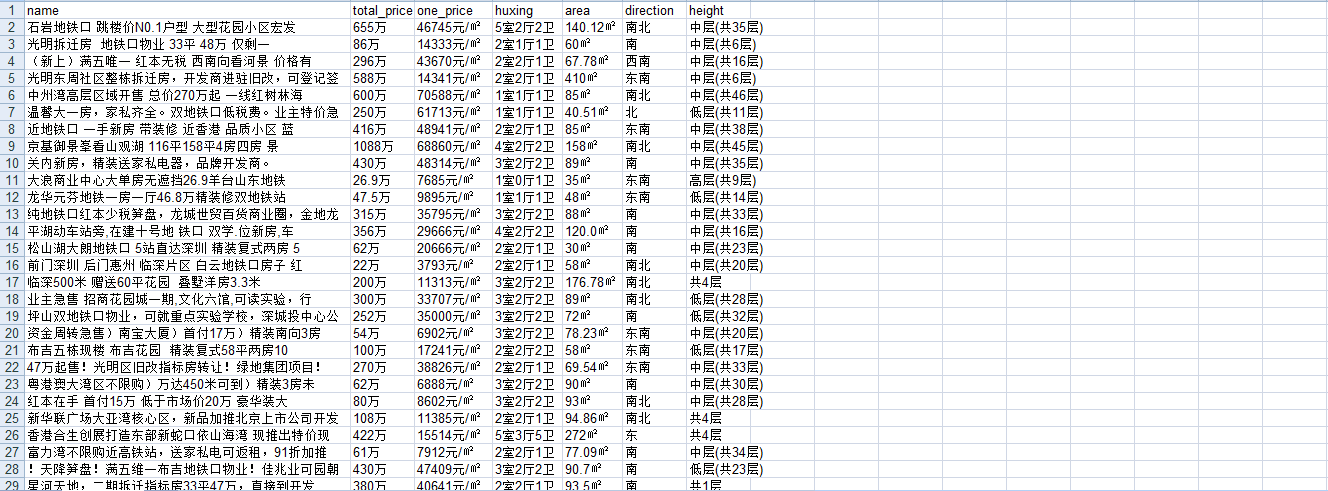
3 爬取58同城的房源信息 深圳二手房,并保存到xls文件
https://sz.58.com/ershoufang/?utm_source=market&spm=u-2d2yxv86y3v43nkddh1.BDPCPZ_BT&PGTID=0d30000c-0000-4591-0324-370565eccba8&ClickID=1
import requests

from bs4 import BeautifulSoup

import xlwt

# 得到soup对象

def main(url,headers):

    response = requests.get(url=url, headers=headers).text

    soup = BeautifulSoup(response, 'lxml')

    parse(soup)

# 解析出数据,写入xls

def parse(soup):

    # 找到带有类选择器house-list-wrap下面的所有li标签

    li_list = soup.select('ul.house-list-wrap > li')

    # 创建xls文件

    wookbook = xlwt.Workbook(encoding='utf-8')

    sheet = wookbook.add_sheet('58 sheet')

    title_lst = ['name', 'total_price', 'one_price', 'huxing', 'area', 'direction', 'height']

    hang, lie = 0, 0

    # 把第零行的标题写进去

    for one in title_lst:

        sheet.write(0, lie, one)

        lie += 1

    # 写入每一行

    hang += 1

    for one_li in li_list:

        sheet.write(hang, 0, one_li.select('h2 > a')[0].text.strip())

        sheet.write(hang, 1, one_li.select('div.price > p.sum')[0].text)

        sheet.write(hang, 2, one_li.select('div.price > p.unit')[0].text)

        sheet.write(hang, 3, one_li.select('div.list-info > p.baseinfo > span')[0].text)

        sheet.write(hang, 4, one_li.select('div.list-info > p.baseinfo > span')[1].text.strip())

        sheet.write(hang, 5, one_li.select('div.list-info > p.baseinfo > span')[2].text)

        sheet.write(hang, 6, one_li.select('div.list-info > p.baseinfo > span')[3].text)

        hang += 1

    wookbook.save('58深圳二手房子.xls')

if __name__ == '__main__':

    url = 'https://sz.58.com/ershoufang/?utm_source=market&spm=u-2d2yxv86y3v43nkddh1.' \

          'BDPCPZ_BT&PGTID=0d30000c-0000-4591-0324-370565eccba8&ClickID=1'

    ua_headers = {"User-Agent": "Mozilla/5.0 (Macintosh; U; Intel Mac OS X 10_6_8; en-us) AppleWebKit/534.50 (KHTML, "

                                "like Gecko) Version/5.1 Safari/534.50"}

    main(url, ua_headers)
得到xls文件.
python爬虫数据解析之BeautifulSoup的更多相关文章
- python爬虫--数据解析
数据解析 什么是数据解析及作用 概念:就是将一组数据中的局部数据进行提取 作用:来实现聚焦爬虫 数据解析的通用原理 标签定位 取文本或者属性 正则解析 正则回顾 单字符: . : 除换行以外所有字符 ...
- python爬虫数据解析之正则表达式
爬虫的一般分为四步,第二个步骤就是对爬取的数据进行解析. python爬虫一般使用三种解析方式,一正则表达式,二xpath,三BeautifulSoup. 这篇博客主要记录下正则表达式的使用. 正则表 ...
- python爬虫数据解析的四种不同选择器Xpath,Beautiful Soup,pyquery,re
这里主要是做一个关于数据爬取以后的数据解析功能的整合,方便查阅,以防混淆 主要讲到的技术有Xpath,BeautifulSoup,PyQuery,re(正则) 首先举出两个作示例的代码,方便后面举例 ...
- python爬虫数据解析之xpath
xpath是一门在xml文档中查找信息的语言.xpath可以用来在xml文档中对元素和属性进行遍历. 在xpath中,有7中类型的节点,元素,属性,文本,命名空间,处理指令,注释及根节点. 节点 首先 ...
- Python爬虫html解析工具beautifulSoup在pycharm中安装及失败的解决办法
1.安装步骤: 首先,你要先进入pycharm的Project Interpreter界面,进入方法是:setting(ctrl+alt+s) ->Project Interpreter,Pro ...
- [转]Python爬虫html解析工具beautifulSoup在pycharm中安装及失败的解决办法
原文地址:https://www.cnblogs.com/yysbolg/p/9040649.html 刚开始学习一门技术最麻烦的问题就是搞定IDE环境,直接在PyCharm里安装BeautifulS ...
- 070.Python聚焦爬虫数据解析
一 聚焦爬虫数据解析 1.1 基本介绍 聚焦爬虫的编码流程 指定url 基于requests模块发起请求 获取响应对象中的数据 数据解析 进行持久化存储 如何实现数据解析 三种数据解析方式 正则表达式 ...
- python爬虫+数据可视化项目(关注、持续更新)
python爬虫+数据可视化项目(一) 爬取目标:中国天气网(起始url:http://www.weather.com.cn/textFC/hb.shtml#) 爬取内容:全国实时温度最低的十个城市气 ...
- 爬虫-数据解析-bs4
1.数据解析 解析: 根据指定的规则对数据进行提取 作用: 实现聚焦爬虫 数据解析方式: - 正则表达式 - bs4 - xpath 数据解析的通用原理: 数据解析需要作用在页面源码中(一组html标 ...
随机推荐
- Mabits简单应用 2017.8.3
http://www.cnblogs.com/wushiqi54719880/archive/2011/07/26/2117601.html
- Python中使用MongoEngine2
mongoengine基本用法实例: from mongoengine import * from datetime import datetime #连接数据库:test # connect('te ...
- distinct的用法
1. Distinct 位置 单独的distinct只能放在开头,否则报错,语法错误 例:SELECT Sid,DISTINCT(Sscore) score from t_student; [SQL ...
- DB2DB 一年多以来的重大更新
由于工作的原因,所以和 DB2DB 有较多的接触.但由于之前的版本一直能满足工作上的需要,所以直到最近才更新为最新版本,而总结了新版本的更新历史后,发现 DB2DB 一年多以来包括了以下重大的更新: ...
- 向combobox控件中添加元素
函数定义: bool FillComboBox(CComboBox* pc, CStringList& slValues, bool bOnlyUniqueValues = false); 函 ...
- 「SDOI 2018」战略游戏
题目大意: 给一个$G=(V,E)$,满足$|V|=n$,$|E|=m$,且保证图联通,有Q个询问,每组询问有s个点,求图中有多少点满足:将其删去后,这s个点中存在一对点集$(a,b)$不联通且删去点 ...
- [Noi2015]软件包管理器 BZOJ4196
分析:水题 每次安装的时候和根节点求lca的过程中区间覆盖+区间查询 每次删除的时候查询子树中安装的数量+区间覆盖 附上代码: #include <cstdio> #include < ...
- Twitter分布式自增ID算法snowflake原理解析
以JAVA为例 Twitter分布式自增ID算法snowflake,生成的是Long类型的id,一个Long类型占8个字节,每个字节占8比特,也就是说一个Long类型占64个比特(0和1). 那么一个 ...
- .net core 注入机制与Autofac
本来是要先出注入机制再出 管道 的,哈哈哈……就是不按计划来…… 这里扯扯题外话:为什么要注入(DI,dependency-injection),而不用 new 对象? 可能我们都很清楚,new 对象 ...
- WebP 在减少图片体积和流量上的效果如何?MIP技术实践分享
作者 | Jackson 编辑 | 尾尾 不论是 PC 还是移动端,图片一直占据着页面流量的大头,在图片的大小和质量之间如何权衡,成为了长期困扰开发者们的问题.而 WebP 技术的出现,为解决该问题提 ...