SpringBoot原理分析与配置
1.1 起步依赖原理分析
1.1.1 分析spring-boot-starter-parent
按住Ctrl点击pom.xml中的spring-boot-starter-parent,跳转到了spring-boot-starter-parent的pom.xml,xml配置如下(只摘抄了部分重点配置):
<parent>

  <groupId>org.springframework.boot</groupId>

  <artifactId>spring-boot-dependencies</artifactId>

  <version>2.0.1.RELEASE</version>

  <relativePath>../../spring-boot-dependencies</relativePath>

</parent>
按住Ctrl点击pom.xml中的spring-boot-starter-dependencies,跳转到了spring-boot-starter-dependencies的pom.xml,xml配置如下(只摘抄了部分重点配置):
<properties>

  	<activemq.version>5.15.3</activemq.version>

  	<antlr2.version>2.7.7</antlr2.version>

  	<appengine-sdk.version>1.9.63</appengine-sdk.version>

  	<artemis.version>2.4.0</artemis.version>

  	<aspectj.version>1.8.13</aspectj.version>

  	<assertj.version>3.9.1</assertj.version>

  	<atomikos.version>4.0.6</atomikos.version>

  	<bitronix.version>2.1.4</bitronix.version>

  	<build-helper-maven-plugin.version>3.0.0</build-helper-maven-plugin.version>

  	<byte-buddy.version>1.7.11</byte-buddy.version>

  	... ... ...

</properties>

<dependencyManagement>

  	<dependencies>

      	<dependency>

        	<groupId>org.springframework.boot</groupId>

        	<artifactId>spring-boot</artifactId>

        	<version>2.0.1.RELEASE</version>

      	</dependency>

      	<dependency>

        	<groupId>org.springframework.boot</groupId>

        	<artifactId>spring-boot-test</artifactId>

        	<version>2.0.1.RELEASE</version>

      	</dependency>

      	... ... ...

	</dependencies>

</dependencyManagement>

<build>

  	<pluginManagement>

    	<plugins>

      		<plugin>

        		<groupId>org.jetbrains.kotlin</groupId>

        		<artifactId>kotlin-maven-plugin</artifactId>

        		<version>${kotlin.version}</version>

      		</plugin>

      		<plugin>

        		<groupId>org.jooq</groupId>

        		<artifactId>jooq-codegen-maven</artifactId>

        		<version>${jooq.version}</version>

      		</plugin>

      		<plugin>

        		<groupId>org.springframework.boot</groupId>

        		<artifactId>spring-boot-maven-plugin</artifactId>

        		<version>2.0.1.RELEASE</version>

      		</plugin>

          	... ... ...

    	</plugins>

  	</pluginManagement>

</build>
从上面的spring-boot-starter-dependencies的pom.xml中我们可以发现,一部分坐标的版本、依赖管理、插件管理已经定义好,所以我们的SpringBoot工程继承spring-boot-starter-parent后已经具备版本锁定等配置了。所以起步依赖的作用就是进行依赖的传递。
1.1.2 分析spring-boot-starter-web
按住Ctrl点击pom.xml中的spring-boot-starter-web,跳转到了spring-boot-starter-web的pom.xml,xml配置如下(只摘抄了部分重点配置):
<?xml version="1.0" encoding="UTF-8"?>

<project xsi:schemaLocation="http://maven.apache.org/POM/4.0.0 http://maven.apache.org/xsd/maven-4.0.0.xsd" xmlns="http://maven.apache.org/POM/4.0.0"

    xmlns:xsi="http://www.w3.org/2001/XMLSchema-instance">

  	<modelVersion>4.0.0</modelVersion>

  	<parent>

    	<groupId>org.springframework.boot</groupId>

    	<artifactId>spring-boot-starters</artifactId>

    	<version>2.0.1.RELEASE</version>

  	</parent>

  	<groupId>org.springframework.boot</groupId>

  	<artifactId>spring-boot-starter-web</artifactId>

  	<version>2.0.1.RELEASE</version>

  	<name>Spring Boot Web Starter</name>

  	<dependencies>

    	<dependency>

      		<groupId>org.springframework.boot</groupId>

      		<artifactId>spring-boot-starter</artifactId>

      		<version>2.0.1.RELEASE</version>

      		<scope>compile</scope>

    	</dependency>

    	<dependency>

      		<groupId>org.springframework.boot</groupId>

      		<artifactId>spring-boot-starter-json</artifactId>

      		<version>2.0.1.RELEASE</version>

      		<scope>compile</scope>

    	</dependency>

    	<dependency>

      		<groupId>org.springframework.boot</groupId>

      		<artifactId>spring-boot-starter-tomcat</artifactId>

      		<version>2.0.1.RELEASE</version>

      		<scope>compile</scope>

    	</dependency>

    	<dependency>

      		<groupId>org.hibernate.validator</groupId>

      		<artifactId>hibernate-validator</artifactId>

      		<version>6.0.9.Final</version>

      		<scope>compile</scope>

    	</dependency>

    	<dependency>

      		<groupId>org.springframework</groupId>

      		<artifactId>spring-web</artifactId>

      		<version>5.0.5.RELEASE</version>

      		<scope>compile</scope>

    	</dependency>

    	<dependency>

      		<groupId>org.springframework</groupId>

      		<artifactId>spring-webmvc</artifactId>

      		<version>5.0.5.RELEASE</version>

      		<scope>compile</scope>

    	</dependency>

  	</dependencies>

</project>
从上面的spring-boot-starter-web的pom.xml中我们可以发现,spring-boot-starter-web就是将web开发要使用的spring-web、spring-webmvc等坐标进行了“打包”,这样我们的工程只要引入spring-boot-starter-web起步依赖的坐标就可以进行web开发了,同样体现了依赖传递的作用。
1.2 自动配置原理解析
按住Ctrl点击查看启动类MySpringBootApplication上的注解@SpringBootApplication
@SpringBootApplication

public class MySpringBootApplication {

    public static void main(String[] args) {

        SpringApplication.run(MySpringBootApplication.class);

    }

}
注解@SpringBootApplication的源码
@Target(ElementType.TYPE)

@Retention(RetentionPolicy.RUNTIME)

@Documented

@Inherited

@SpringBootConfiguration

@EnableAutoConfiguration

@ComponentScan(excludeFilters = {

		@Filter(type = FilterType.CUSTOM, classes = TypeExcludeFilter.class),

		@Filter(type = FilterType.CUSTOM, classes = AutoConfigurationExcludeFilter.class) })

public @interface SpringBootApplication {

	/**

	 * Exclude specific auto-configuration classes such that they will never be applied.

	 * @return the classes to exclude

	 */

	@AliasFor(annotation = EnableAutoConfiguration.class)

	Class<?>[] exclude() default {};

	... ... ...

}
其中,
@SpringBootConfiguration:等同与@Configuration,既标注该类是Spring的一个配置类
@EnableAutoConfiguration:SpringBoot自动配置功能开启
按住Ctrl点击查看注解@EnableAutoConfiguration
@Target(ElementType.TYPE)

@Retention(RetentionPolicy.RUNTIME)

@Documented

@Inherited

@AutoConfigurationPackage

@Import(AutoConfigurationImportSelector.class)

public @interface EnableAutoConfiguration {

	... ... ...

}
其中,@Import(AutoConfigurationImportSelector.class) 导入了AutoConfigurationImportSelector类
按住Ctrl点击查看AutoConfigurationImportSelector源码
public String[] selectImports(AnnotationMetadata annotationMetadata) {

        ... ... ...

        List<String> configurations = getCandidateConfigurations(annotationMetadata,

                                                                   attributes);

        configurations = removeDuplicates(configurations);

        Set<String> exclusions = getExclusions(annotationMetadata, attributes);

        checkExcludedClasses(configurations, exclusions);

        configurations.removeAll(exclusions);

        configurations = filter(configurations, autoConfigurationMetadata);

        fireAutoConfigurationImportEvents(configurations, exclusions);

        return StringUtils.toStringArray(configurations);

}

protected List<String> getCandidateConfigurations(AnnotationMetadata metadata,

			AnnotationAttributes attributes) {

		List<String> configurations = SpringFactoriesLoader.loadFactoryNames(

				getSpringFactoriesLoaderFactoryClass(), getBeanClassLoader());

		return configurations;

}
其中,SpringFactoriesLoader.loadFactoryNames 方法的作用就是从META-INF/spring.factories文件中读取指定类对应的类名称列表

spring.factories 文件中有关自动配置的配置信息如下:
... ... ...

org.springframework.boot.autoconfigure.web.reactive.function.client.WebClientAutoConfiguration,\

org.springframework.boot.autoconfigure.web.servlet.DispatcherServletAutoConfiguration,\

org.springframework.boot.autoconfigure.web.servlet.ServletWebServerFactoryAutoConfiguration,\

org.springframework.boot.autoconfigure.web.servlet.error.ErrorMvcAutoConfiguration,\

org.springframework.boot.autoconfigure.web.servlet.HttpEncodingAutoConfiguration,\

org.springframework.boot.autoconfigure.web.servlet.MultipartAutoConfiguration,\

... ... ...
上面配置文件存在大量的以Configuration为结尾的类名称,这些类就是存有自动配置信息的类,而SpringApplication在获取这些类名后再加载
我们以ServletWebServerFactoryAutoConfiguration为例来分析源码:
@Configuration

@AutoConfigureOrder(Ordered.HIGHEST_PRECEDENCE)

@ConditionalOnClass(ServletRequest.class)

@ConditionalOnWebApplication(type = Type.SERVLET)

@EnableConfigurationProperties(ServerProperties.class)

@Import({ ServletWebServerFactoryAutoConfiguration.BeanPostProcessorsRegistrar.class,

		ServletWebServerFactoryConfiguration.EmbeddedTomcat.class,

		ServletWebServerFactoryConfiguration.EmbeddedJetty.class,

		ServletWebServerFactoryConfiguration.EmbeddedUndertow.class })

public class ServletWebServerFactoryAutoConfiguration {

	... ... ...

}
其中,
@EnableConfigurationProperties(ServerProperties.class) 代表加载ServerProperties服务器配置属性类
进入ServerProperties.class源码如下:
@ConfigurationProperties(prefix = "server", ignoreUnknownFields = true)

public class ServerProperties {

	/**

	 * Server HTTP port.

	 */

	private Integer port;

	/**

	 * Network address to which the server should bind.

	 */

	private InetAddress address;

  	... ... ...

}
其中,
prefix = "server" 表示SpringBoot配置文件中的前缀,SpringBoot会将配置文件中以server开始的属性映射到该类的字段中。映射关系如下:

二、SpringBoot的配置文件
2.1 SpringBoot配置文件类型
2.1.1 SpringBoot配置文件类型和作用
SpringBoot是基于约定的,所以很多配置都有默认值,但如果想使用自己的配置替换默认配置的话,就可以使用application.properties或者application.yml(application.yaml)进行配置。
SpringBoot默认会从Resources目录下加载application.properties或application.yml(application.yaml)文件
其中,application.properties文件是键值对类型的文件,之前一直在使用,所以此处不在对properties文件的格式进行阐述。除了properties文件外,SpringBoot还可以使用yml文件进行配置,下面对yml文件进行讲解。
2.1.2 application.yml配置文件
2.1.2.1 yml配置文件简介
YML文件格式是YAML (YAML Aint Markup Language)编写的文件格式,YAML是一种直观的能够被电脑识别的的数据数据序列化格式,并且容易被人类阅读,容易和脚本语言交互的,可以被支持YAML库的不同的编程语言程序导入,比如: C/C++, Ruby, Python, Java, Perl, C#, PHP等。YML文件是以数据为核心的,比传统的xml方式更加简洁。
YML文件的扩展名可以使用.yml或者.yaml。
2.1.2.2 yml配置文件的语法
2.1.2.2.1 配置普通数据
语法: key: value
示例代码:
name: haohao
注意:value之前有一个空格
2.1.2.2.2 配置对象数据
语法:
key:
key1: value1
key2: value2
或者:
key: {key1: value1,key2: value2}
示例代码:
person:

  name: haohao

  age: 31

  addr: beijing

#或者

person: {name: haohao,age: 31,addr: beijing}
注意:key1前面的空格个数不限定,在yml语法中,相同缩进代表同一个级别
2.1.2.2.2 配置Map数据
同上面的对象写法
2.1.2.2.3 配置数组(List、Set)数据
语法:
key:
- value1
- value2
或者:
key: [value1,value2]
示例代码:
city:

  - beijing

  - tianjin

  - shanghai

  - chongqing

#或者

city: [beijing,tianjin,shanghai,chongqing]

#集合中的元素是对象形式

student:

  - name: zhangsan

    age: 18

    score: 100

  - name: lisi

    age: 28

    score: 88

  - name: wangwu

    age: 38

    score: 90
注意:value1与之间的 - 之间存在一个空格
2.1.3 SpringBoot配置信息的查询
上面提及过,SpringBoot的配置文件,主要的目的就是对配置信息进行修改的,但在配置时的key从哪里去查询呢?我们可以查阅SpringBoot的官方文档
常用的配置摘抄如下:
# QUARTZ SCHEDULER (QuartzProperties)

spring.quartz.jdbc.initialize-schema=embedded # Database schema initialization mode.

spring.quartz.jdbc.schema=classpath:org/quartz/impl/jdbcjobstore/tables_@@platform@@.sql # Path to the SQL file to use to initialize the database schema.

spring.quartz.job-store-type=memory # Quartz job store type.

spring.quartz.properties.*= # Additional Quartz Scheduler properties.

# ----------------------------------------

# WEB PROPERTIES

# ----------------------------------------

# EMBEDDED SERVER CONFIGURATION (ServerProperties)

server.port=8080 # Server HTTP port.

server.servlet.context-path= # Context path of the application.

server.servlet.path=/ # Path of the main dispatcher servlet.

# HTTP encoding (HttpEncodingProperties)

spring.http.encoding.charset=UTF-8 # Charset of HTTP requests and responses. Added to the "Content-Type" header if not set explicitly.

# JACKSON (JacksonProperties)

spring.jackson.date-format= # Date format string or a fully-qualified date format class name. For instance, `yyyy-MM-dd HH:mm:ss`.

# SPRING MVC (WebMvcProperties)

spring.mvc.servlet.load-on-startup=-1 # Load on startup priority of the dispatcher servlet.

spring.mvc.static-path-pattern=/** # Path pattern used for static resources.

spring.mvc.view.prefix= # Spring MVC view prefix.

spring.mvc.view.suffix= # Spring MVC view suffix.

# DATASOURCE (DataSourceAutoConfiguration & DataSourceProperties)

spring.datasource.driver-class-name= # Fully qualified name of the JDBC driver. Auto-detected based on the URL by default.

spring.datasource.password= # Login password of the database.

spring.datasource.url= # JDBC URL of the database.

spring.datasource.username= # Login username of the database.

# JEST (Elasticsearch HTTP client) (JestProperties)

spring.elasticsearch.jest.password= # Login password.

spring.elasticsearch.jest.proxy.host= # Proxy host the HTTP client should use.

spring.elasticsearch.jest.proxy.port= # Proxy port the HTTP client should use.

spring.elasticsearch.jest.read-timeout=3s # Read timeout.

spring.elasticsearch.jest.username= # Login username.
我们可以通过配置application.poperties 或者 application.yml 来修改SpringBoot的默认配置
例如:
application.properties文件
server.port=8888

server.servlet.context-path=demo
application.yml文件
server:

  port: 8888

  servlet:

    context-path: /demo
2.2 配置文件与配置类的属性映射方式
2.2.1 使用注解@Value映射
我们可以通过@Value注解将配置文件中的值映射到一个Spring管理的Bean的字段上
例如:
application.properties配置如下:
person:

  name: zhangsan

  age: 18
或者,application.yml配置如下:
person:

  name: zhangsan

  age: 18
实体Bean代码如下:
@Controller

public class QuickStartController {

    @Value("${person.name}")

    private String name;

    @Value("${person.age}")

    private Integer age;

    @RequestMapping("/quick")

    @ResponseBody

    public String quick(){

        return "springboot 访问成功! name="+name+",age="+age;

    }

}
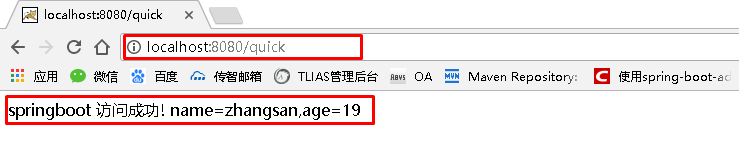
浏览器访问地址:http://localhost:8080/quick 结果如下:
2.2.2 使用注解@ConfigurationProperties映射
通过注解@ConfigurationProperties(prefix="配置文件中的key的前缀")可以将配置文件中的配置自动与实体进行映射
application.properties配置如下:
person:

  name: zhangsan

  age: 18
或者,application.yml配置如下:
person:

  name: zhangsan

  age: 18
实体Bean代码如下:
@Controller

@ConfigurationProperties(prefix = "person")

public class QuickStartController {

    private String name;

    private Integer age;

    @RequestMapping("/quick")

    @ResponseBody

    public String quick(){

        return "springboot 访问成功! name="+name+",age="+age;

    }

    public void setName(String name) {

        this.name = name;

    }

    public void setAge(Integer age) {

        this.age = age;

    }

}
浏览器访问地址:http://localhost:8080/quick
注意:使用@ConfigurationProperties方式可以进行配置文件与实体字段的自动映射,但需要字段必须提供set方法才可以,而使用@Value注解修饰的字段不需要提供set方法
SpringBoot原理分析与配置的更多相关文章
- Azure WAF防火墙工作原理分析和配置向导
Azure WAF工作原理分析和配置向导 本文博客地址为:http://www.cnblogs.com/taosha/p/6716434.html ,转载请保留出处,多谢! 本地数据中心往云端迁移的的 ...
- SpringBoot原理—分析SpringBoot启动机制(starter机制)
一:前言使用过springboot的同学应该已经知道,springboot通过默认配置了很多框架的使用方式帮我们大大简化了项目初始搭建以及开发过程.本文的目的就是一步步分析springboot的启动过 ...
- Memcached的原理分析与配置
一.Why Memcached? • 高并发访问数据库的痛楚:死锁! • 硬盘IO之痛:本机:AspNet:HttpRuntime.Cache • 多客户端共享缓存 • Net+Memory>& ...
- Solr缓存原理分析及配置优化
一.缓存原理 缓存,带来急速性能体验! Solr提供了一系列的内置缓存来优化查询性能.Solr的缓存原理主要涉及以下4个方面: 1.缓存大小及缓存置换法 从缓存大小的角度来看,不能将缓存设置的太大,否 ...
- SpringBoot 原理分析、监控、项目部署
目录 SpringBoot 监控 概述 使用 SpringBoot Admin 概述 使用 SpringBoot 项目部署 SpringBoot 监控 概述 SpringBoot 自带监控功能 Act ...
- DBCP连接池原理分析及配置用法
DBCP连接池介绍 ----------------------------- 目前 DBCP 有两个版本分别是 1.3 和 1.4. DBCP 1.3 版本需要运行于 JDK 1.4-1.5 ,支持 ...
- Redis数据持久化机制AOF原理分析一---转
http://blog.csdn.net/acceptedxukai/article/details/18136903 http://blog.csdn.net/acceptedxukai/artic ...
- SpringBoot入门(0) HelloWorld的实现与原理分析
SpringBoot(0) HelloWorld的实现与原理分析 一.环境准备 1.1 环境约束 –jdk1.8:Spring Boot 推荐jdk1.7及以上:java version “1.8.0 ...
- springboot创建,自动装配原理分析,run方法启动
使用IDEA快速创建一个springboot项目 创建Spring Initializr,然后一直下一步下一步直至完成 选择web,表示创建web项目 运行原理分析 我们先来看看pom.xml文件 核 ...
随机推荐
- hihoCoder#1239 Fibonacci
#1239 : Fibonacci 时间限制:10000ms 单点时限:1000ms 内存限制:256MB 描述 Given a sequence {an}, how many non-empty s ...
- pandas数据框,统计某列或者某行数据元素的个数
版权声明:本文为博主原创文章,遵循 CC 4.0 by-sa 版权协议,转载请附上原文出处链接和本声明.本文链接:https://blog.csdn.net/sinat_38893241/articl ...
- [***]HZOJ 奇袭
C. 奇袭 题目描述 由于各种原因,桐人现在被困在Under World(以下简称UW)中,而UW马上 要迎来最终的压力测试——魔界入侵. 唯一一个神一般存在的Administrator被消灭了,靠原 ...
- 利用伪类选择器与better-scroll的on事件所完成的上拉加载
之前给大家分享过一篇上拉加载 利用了better-scroll的pullUpDown 和DOM元素的删除添加 感觉那样不太好 今天给大家分享一个不同的上拉加载思想 代码如下 class List { ...
- pytorch nn.Embedding
pytorch nn.Embeddingclass torch.nn.Embedding(num_embeddings, embedding_dim, padding_idx=None, max_no ...
- thinkphp 本地配置手机移动端,在pc端访问手机端
- 利用scrapy爬取文件后并基于管道化的持久化存储
我们在pycharm上爬取 首先我们可以在本文件打开命令框或在Terminal下创建 scrapy startproject xiaohuaPro ------------创建文件 scrapy ...
- 2001年NOIP普及组复赛题解
题目涉及算法: 数的计算:动态规划: 最大公约数和最小公倍数问题:质因数分解: 求先序排列:递归: 装箱问题:动态规划(纯0-1背包问题) 数的计算 题目链接:https://www.luogu.or ...
- [转]C# 语言历史版本特性(C# 1.0到C# 8.0汇总)
历史版本 C#作为微软2000年以后.NET平台开发的当家语言,发展至今具有17年的历史,语言本身具有丰富的特性,微软对其更新支持也十分支持.微软将C#提交给标准组织ECMA,C# 5.0目前是ECM ...
- vue-router在新窗口打开页面
1. <router-link>标签实现新窗口打开: <router-link target="_blank" :to="{path:'/app/dat ...