spring之整合Hibernate
spring整合Hibernate整合什么?
1.让IOC容器来管理Hibernate的SessionFactory。
2.让Hibernate使用上spring的声明式事务。
整合步骤:
1.加入Hibernate。
2.加入spring。
3.整合。
一、加入Hibernate
1.加入相应jar包
加入Hibernate所需的依赖包:

将以上包加入到build path。
加入连接数据库所需的依赖包:
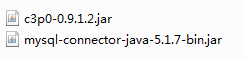
将以上包加入到build path。
2.添加Hibernate配置文件:hibernate.cfg.xml
<?xml version="1.0" encoding="UTF-8"?>

<!DOCTYPE hibernate-configuration PUBLIC

        "-//Hibernate/Hibernate Configuration DTD 3.0//EN"

        "http://www.hibernate.org/dtd/hibernate-configuration-3.0.dtd">

<hibernate-configuration>

    <session-factory>

        <!-- 配置Hibernate的 基本属性-->

        <!-- 1.数据源需配置到IOC容器中,此处不再需要配置数据源 -->

        <!-- 2.关联的.hbm.xml也在IOC容器配置SessionFactory实例时再进行配置 -->

        <!-- 3.配置Hibernate的基本属性:方言、SQL显示及格式化,生成数据表的策略以及二级缓存等 -->

        <property name="hibernate.dialect">org.hibernate.dialect.MySQL5InnoDBDialect</property>

        <property name="hibernate.show_sql">true</property>

        <property name="hibernate.format_sql">true</property>

        <property name="hibernate.hbm2ddl.auto">update</property>

        <!-- 配置二级缓存相关的属性 -->

    </session-factory>

</hibernate-configuration>
3.添加实体类以及其hbm配置文件
Account.java
package com.gong.spring.hibernate.entities;

public class Account {

    private Integer id;

    private String username;

    private int balance;

    public Integer getId() {

        return id;

    }

    public void setId(Integer id) {

        this.id = id;

    }

    public String getUsername() {

        return username;

    }

    public void setUsername(String username) {

        this.username = username;

    }

    public int getBalance() {

        return balance;

    }

    public void setBalance(int balance) {

        this.balance = balance;

    }

}
Book.java
package com.gong.spring.hibernate.entities;

public class Book {

    private Integer id;

    private String bookName;

    private String isbn;

    private int price;

    private int stock;

    public Integer getId() {

        return id;

    }

    public void setId(Integer id) {

        this.id = id;

    }

    public String getBookName() {

        return bookName;

    }

    public void setBookName(String bookName) {

        this.bookName = bookName;

    }

    public String getIsbn() {

        return isbn;

    }

    public void setIsbn(String isbn) {

        this.isbn = isbn;

    }

    public int getPrice() {

        return price;

    }

    public void setPrice(int price) {

        this.price = price;

    }

    public int getStock() {

        return stock;

    }

    public void setStock(int stock) {

        this.stock = stock;

    }

}
Account.hbm.xml
<?xml version="1.0"?>

<!DOCTYPE hibernate-mapping PUBLIC "-//Hibernate/Hibernate Mapping DTD 3.0//EN"

"http://hibernate.sourceforge.net/hibernate-mapping-3.0.dtd">

<!-- Generated 2020-1-9 11:56:28 by Hibernate Tools 3.5.0.Final -->

<hibernate-mapping>

    <class name="com.gong.spring.hibernate.entities.Account" table="SH_ACCOUNT">

        <id name="id" type="java.lang.Integer">

            <column name="ID" />

            <generator class="native" />

        </id>

        <property name="username" type="java.lang.String">

            <column name="USERNAME" />

        </property>

        <property name="balance" type="int">

            <column name="BALANCE" />

        </property>

    </class>

</hibernate-mapping>
Book.hbm.xml
<?xml version="1.0"?>

<!DOCTYPE hibernate-mapping PUBLIC "-//Hibernate/Hibernate Mapping DTD 3.0//EN"

"http://hibernate.sourceforge.net/hibernate-mapping-3.0.dtd">

<!-- Generated 2020-1-9 11:56:28 by Hibernate Tools 3.5.0.Final -->

<hibernate-mapping>

    <class name="com.gong.spring.hibernate.entities.Book" table="SH_BOOK">

        <id name="id" type="java.lang.Integer">

            <column name="ID" />

            <generator class="native" />

        </id>

        <property name="bookName" type="java.lang.String">

            <column name="BOOKNAME" />

        </property>

        <property name="isbn" type="java.lang.String">

            <column name="ISBN" />

        </property>

        <property name="price" type="int">

            <column name="PRICE" />

        </property>

        <property name="stock" type="int">

            <column name="STOCK" />

        </property>

    </class>

</hibernate-mapping>
这里需要说明的是table="SH_BOOK"中SH是表的前缀,我们在写hql语句时不用带上,系统会自动识别。
二、加入spring
1.加入相应的jar包
加入spring所需的jar包:
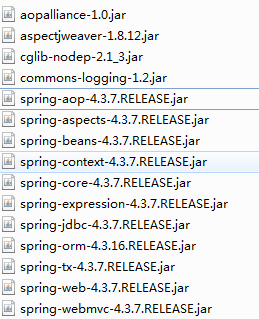
将以上依赖包加入到build path。
2.加入spring配置文件,并进行整合
db.propertites
jdbc.user=root

jdbc.password=123456

jdbc.driverClass=com.mysql.jdbc.Driver

jdbc.jdbcUrl=jdbc:mysql:///spring

jdbc.initPoolSize=5

jdbc.maxPoolSize=10
applicationContex.xml
<?xml version="1.0" encoding="UTF-8"?>

<beans xmlns="http://www.springframework.org/schema/beans"

    xmlns:xsi="http://www.w3.org/2001/XMLSchema-instance"

    xmlns:context="http://www.springframework.org/schema/context"

    xmlns:tx="http://www.springframework.org/schema/tx"

    xmlns:aop="http://www.springframework.org/schema/aop"

    xsi:schemaLocation="http://www.springframework.org/schema/aop http://www.springframework.org/schema/aop/spring-aop-4.0.xsd

        http://www.springframework.org/schema/beans http://www.springframework.org/schema/beans/spring-beans.xsd

        http://www.springframework.org/schema/tx http://www.springframework.org/schema/tx/spring-tx-4.0.xsd

        http://www.springframework.org/schema/context http://www.springframework.org/schema/context/spring-context-4.0.xsd">

    <!-- 配置自动扫描的包 -->

    <context:component-scan base-package="com.gong.spring.hibernate"></context:component-scan>

    <!-- 配置数据源 -->

    <!-- 导入资源文件 -->

    <context:property-placeholder location="classpath:db.properties"/>

    <bean id="dataSource" class="com.mchange.v2.c3p0.ComboPooledDataSource">

        <property name="user" value="${jdbc.user}"></property>

        <property name="password" value="${jdbc.password}"></property>

        <property name="driverClass" value="${jdbc.driverClass}"></property>

        <property name="jdbcUrl" value="${jdbc.jdbcUrl}"></property>

        <property name="initialPoolSize" value="${jdbc.initPoolSize}"></property>

        <property name="maxPoolSize" value="${jdbc.maxPoolSize}"></property>

    </bean>

    <!-- 配置 Hibernate 的 SessionFactory 实例: 通过 Spring 提供的 LocalSessionFactoryBean 进行配置 -->

    <bean id="sessionFactory" class="org.springframework.orm.hibernate4.LocalSessionFactoryBean">

        <!-- 配置数据源属性 -->

        <property name="dataSource" ref="dataSource"></property>

        <!-- 配置 hibernate 配置文件的位置及名称 -->

        <property name="configLocation" value="classpath:hibernate.cfg.xml"></property>

        <!-- 使用 hibernateProperties 属相来配置 Hibernate 原生的属性 -->

        <!--

        <property name="hibernateProperties">

            <props>

                <prop key="hibernate.dialect">org.hibernate.dialect.MySQL5InnoDBDialect</prop>

                <prop key="hibernate.show_sql">true</prop>

                <prop key="hibernate.format_sql">true</prop>

                <prop key="hibernate.hbm2ddl.auto">update</prop>

            </props>

        </property>

        -->

        <!-- 配置 hibernate 映射文件的位置及名称, 可以使用通配符 -->

        <property name="mappingLocations"

            value="classpath:com/gong/spring/hibernate/entities/*.hbm.xml"></property>

    </bean>

    <!-- 配置 Spring 的声明式事务 -->

    <!-- 1. 配置事务管理器 -->

    <bean id="transactionManager" class="org.springframework.orm.hibernate4.HibernateTransactionManager">

        <property name="sessionFactory" ref="sessionFactory"></property>

    </bean>

    <!-- 2. 配置事务属性, 需要事务管理器 -->

    <tx:advice id="txAdvice" transaction-manager="transactionManager">

        <tx:attributes>

            <tx:method name="get*" read-only="true"/>

            <tx:method name="purchase" propagation="REQUIRES_NEW"/>

            <tx:method name="*"/>

        </tx:attributes>

    </tx:advice>

    <!-- 3. 配置事务切点, 并把切点和事务属性关联起来 -->

    <aop:config>

        <aop:pointcut expression="execution(* com.gong.spring.hibernate.service.*.*(..))"

            id="txPointcut"/>

        <aop:advisor advice-ref="txAdvice" pointcut-ref="txPointcut"/>

    </aop:config>

</beans>
需要注意:假设用的是navicat操作Mysql数据库,对于所连接的数据库,先不要打开,否则不会生成相应的数据表。同时,有两种方式配置hibernate的配置文件,一种是引用外部配置,一种是直接在applicaitonContext.xml文件中进行配置。
最后我们在com.gong.spring.hibernate.test中新建一个SpringHibernateTest.java进行测试:
package com.gong.spring.hibernate.test;

import java.sql.SQLException;

import java.util.Arrays;

import javax.sql.DataSource;

import org.junit.Test;

import org.springframework.context.ApplicationContext;

import org.springframework.context.support.ClassPathXmlApplicationContext;

public class SpringHibernateTest {

    private ApplicationContext ctx = null;

    {

        ctx = new ClassPathXmlApplicationContext("applicationContext.xml");

    }

    @Test

    public void testDataSource() throws SQLException {

        DataSource dataSource = ctx.getBean(DataSource.class);

        System.out.println(dataSource.getConnection());

    }

}
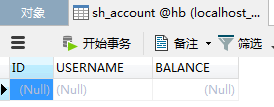
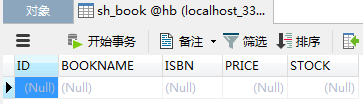
执行testDataSource方法,在数据库hb中会生成两个实体类的表:
3.进行代码测试
现在的目录结构如下:
使用基于注解的方式来配置bean,需要先在applicationContext.xml中加入:
   <!-- 配置自动扫描的包 -->

    <context:component-scan base-package="com.gong.spring.hibernate"></context:component-scan>
BookShopDao.java
package com.gong.spring.hibernate.dao;

public interface BookShopDao {

    //根据书号获取书的单价

    public int findBookPriceByIsbn(String isbn);

    //更新书的库存,使书号对应的库存-1

    public void updateBookStock(String isbn);

    //更新账户余额:使username的balance-price

    public void updateUserAccount(String username, int price);

}
BookShopDaoImpl.java
package com.gong.spring.hibernate.dao.impl;

import org.hibernate.Query;

import org.hibernate.Session;

import org.hibernate.SessionFactory;

import org.springframework.beans.factory.annotation.Autowired;

import org.springframework.stereotype.Repository;

import com.gong.spring.hibernate.dao.BookShopDao;

import com.gong.spring.hibernate.exceptions.BookStockException;

import com.gong.spring.hibernate.exceptions.UserAccountException;

@Repository

public class BookShopDaoImpl implements BookShopDao {

    @Autowired

    private SessionFactory sessionFactory;

    //获取当前绑定的session

    private Session getSession() {

        return sessionFactory.getCurrentSession();

    }

    @Override

    public int findBookPriceByIsbn(String isbn) {

        String hql = "SELECT b.price FROM Book b WHERE b.isbn = ?";

        Query query = getSession().createQuery(hql).setString(0, isbn);

        return (Integer) query.uniqueResult();

    }

    @Override

    public void updateBookStock(String isbn) {

        //验证书的库存是否充足

        String hql2 = "SELECT b.stock FROM Book b WHERE b.isbn = ?";

        //检查书的库存是否足够,如果不够,就抛出异常

        int stock = (int) getSession().createQuery(hql2).setString(0, isbn).uniqueResult();

        if(stock == 0){

            throw new BookStockException("库存不足!");

        }

        String hql = "UPDATE Book b set b.stock = b.stock-1 WHERE b.isbn = ?";

        getSession().createQuery(hql).setString(0, isbn).executeUpdate();

    }

    @Override

    public void updateUserAccount(String username, int price) {

        String hql2 = "SELECT a.balance FROM Account a WHERE a.username = ?";

        int balance = (int) getSession().createQuery(hql2).setString(0, username).uniqueResult();

        if(balance < price){

            throw new UserAccountException("余额不足!");

        }

        String hql = "UPDATE Account a SET a.balance = a.balance - ? WHERE a.username = ?";

        getSession().createQuery(hql).setInteger(0, price).setString(1, username).executeUpdate();

    }

}
这里值得一提的是,hql语句和sql语句是有区别的,会将数据表当作对象来看,因此数据表的首字母要大写。
BookShopException.java和UserAccountException.java是我们自己定义的异常。
BookShopException.java
package com.gong.spring.hibernate.exceptions;

public class BookStockException extends RuntimeException{

    /**

     *

     */

    private static final long serialVersionUID = 1L;

    public BookStockException() {

        super();

        // TODO Auto-generated constructor stub

    }

    public BookStockException(String message, Throwable cause,

            boolean enableSuppression, boolean writableStackTrace) {

        super(message, cause, enableSuppression, writableStackTrace);

        // TODO Auto-generated constructor stub

    }

    public BookStockException(String message, Throwable cause) {

        super(message, cause);

        // TODO Auto-generated constructor stub

    }

    public BookStockException(String message) {

        super(message);

        // TODO Auto-generated constructor stub

    }

    public BookStockException(Throwable cause) {

        super(cause);

        // TODO Auto-generated constructor stub

    }

}
UserAccountException.java
package com.gong.spring.hibernate.exceptions;

public class UserAccountException extends RuntimeException{

    /**

     *

     */

    private static final long serialVersionUID = 1L;

    public UserAccountException() {

        super();

        // TODO Auto-generated constructor stub

    }

    public UserAccountException(String message, Throwable cause,

            boolean enableSuppression, boolean writableStackTrace) {

        super(message, cause, enableSuppression, writableStackTrace);

        // TODO Auto-generated constructor stub

    }

    public UserAccountException(String message, Throwable cause) {

        super(message, cause);

        // TODO Auto-generated constructor stub

    }

    public UserAccountException(String message) {

        super(message);

        // TODO Auto-generated constructor stub

    }

    public UserAccountException(Throwable cause) {

        super(cause);

        // TODO Auto-generated constructor stub

    }

}
其实就是为异常取了个名字,然后改为自己想要输出的错误信息。
BookShopService.java(用于测试买单本书时候的事务)
package com.gong.spring.hibernate.service;

public interface BookShopService {

    public void purchase(String username, String isbn);

}
Cashier.java(用于测试买多本书时候的事务)
package com.gong.spring.hibernate.service;

import java.util.List;

public interface Cashier {

    public void checkout(String username, List<String> isbns);

}
BookShopServiceImpl.java
package com.gong.spring.hibernate.service.impl;

import org.springframework.beans.factory.annotation.Autowired;

import org.springframework.stereotype.Service;

import com.gong.spring.hibernate.dao.BookShopDao;

import com.gong.spring.hibernate.service.BookShopService;

@Service

public class BookShopServiceImpl implements BookShopService {

    @Autowired

    private BookShopDao bookShopDao;

    public void purchase(String username, String isbn) {

        //1. 获取书的单价

        int price = bookShopDao.findBookPriceByIsbn(isbn);

        //2. 更新库存

        bookShopDao.updateBookStock(isbn);

        //3. 更新余额

        bookShopDao.updateUserAccount(username, price);

    }

}
CashierImpl.java
package com.gong.spring.hibernate.service.impl;

import java.util.List;

import org.springframework.beans.factory.annotation.Autowired;

import org.springframework.stereotype.Service;

import org.springframework.transaction.annotation.Propagation;

import org.springframework.transaction.annotation.Transactional;

import com.gong.spring.hibernate.service.BookShopService;

import com.gong.spring.hibernate.service.Cashier;

@Service

public class CashierImpl implements Cashier {

    @Autowired

    private BookShopService bookShopService;

    @Override

    public void checkout(String username, List<String> isbns) {

        for(String isbn: isbns){

            bookShopService.purchase(username, isbn);

        }

    }

}
最后,我们在SpringHibernateTest.java中进行测试:
package com.gong.spring.hibernate.test;

import java.sql.SQLException;

import java.util.Arrays;

import javax.sql.DataSource;

import org.junit.Test;

import org.springframework.context.ApplicationContext;

import org.springframework.context.support.ClassPathXmlApplicationContext;

import com.gong.spring.hibernate.service.BookShopService;

import com.gong.spring.hibernate.service.Cashier;

public class SpringHibernateTest {

    private ApplicationContext ctx = null;

    private BookShopService bookShopService = null;

    private Cashier cashier = null;

    {

        ctx = new ClassPathXmlApplicationContext("applicationContext.xml");

        bookShopService = ctx.getBean(BookShopService.class);

        cashier = ctx.getBean(Cashier.class);

    }

    @Test

    public void testCashier(){

        cashier.checkout("AA", Arrays.asList("1001","1002"));

    }

    @Test

    public void testBookShopService(){

        bookShopService.purchase("AA", "1001");

    }

    @Test

    public void testDataSource() throws SQLException {

        DataSource dataSource = ctx.getBean(DataSource.class);

        System.out.println(dataSource.getConnection());

    }

}
首先我们往数据库中添加如下数据:
先测试 testBookShopService方法,结果如下:成功购买了一本java书。

再执行一次该方法:出现异常,余额不足,结果为:
说明我们的spring+hibernate事务是配置成功。
接下来我们测试事务的传播方式,即testCashier方法,首先我们将数据设置为:


第一次执行后的结果:成功买到两本书:

再执行一次:

只买了第一本书,第二本余额不足,因为我们在配置时指定了<tx:method name="purchase" propagation="REQUIRES_NEW"/>。如果设置 propagation="REQUIRD,那么就会一本都买不成功。具体原因可以参考之前所写的博客。
4.总结
至此,spring整合hibernate就基本完成了。
最后补充一些:
Spring Hibernate事务的流程:
(1)在方法执行之前获取session;
(2)把session和当前线程绑定,这样就可以在Dao中使用SessionFactory的getCurrentSession()来获取session;
(3)开启事务;
(4)若方法正常结束,即没有出现异常,则先提交事务,然后使当前线程绑定的session解除绑定,最后关闭session;
(5)若方法出现异常,则先回滚事务,然后使当前线程绑定的session解除绑定,最后关闭session;
spring之整合Hibernate的更多相关文章
- 【Hibernate学习笔记-3】在Spring下整合Hibernate时, 关于sessionFactory的类型的说明
摘要 在Spring下整合Hibernate时,关于sessionFactory的配置方式主要有两种,分别为注解配置方式,和xml配置方式,下面将对这两种配置方式进行介绍. 1. sessionFac ...
- Spring Boot 整合Hibernate Validator
Spring Boot 整合Hibernate Validator 依赖 <dependencies> <dependency> <groupId>org.spri ...
- Spring笔记⑤--整合hibernate代码测试
String整合hibernate代码测试 在上节生成的表中插入数据: 注意:使用myeclipse2014生成的整合项目可能存在问题需要我们自己导入. 第一步 我们写dao接口 packag ...
- Spring Data-Spring整合Hibernate基于JPA规范
JPA:由 Sun 公司提供了一对对于持久层操作的标准(接口+文档) Hibernate:是 Gavin King 开发的一套对于持久层操作的自动的 ORM 框架. Hibernate JPA:是在 ...
- Java框架:spring框架整合hibernate框架的xml配置(使用注解的方式)
<?xml version="1.0" encoding="UTF-8"?> <beans xmlns="http://www.sp ...
- 基于注解的Spring MVC整合Hibernate(所需jar包,spring和Hibernate整合配置,springMVC配置,重定向,批量删除)
1.导入jar watermark/2/text/aHR0cDovL2Jsb2cuY3Nkbi5uZXQvdG90b3R1enVvcXVhbg==/font/5a6L5L2T/fontsize/400 ...
- spring框架整合hibernate框架简单操作数据库
1.配置文件: <?xml version="1.0" encoding="UTF-8"?><beans xmlns="http:/ ...
- Spring整合Hibernate。。。。
环境搭建,在eclipse中导入spring和hibernate框架的插件,和导入所有使用到的架包 首先,hibernate的创建: 建立两个封装类,其中封装了数据库中表的属性,这儿只写属性,gett ...
- 【Spring实战-3】Spring整合Hibernate、Struts
作者:ssslinppp 1. 摘要 版本: Spring4.0.4:Hibernate4.3.5:struts2.3.16: 主要介绍了如下内容: 项目结构的规划: Spring下整合Hi ...
随机推荐
- python基础之包的导入
包的导入 python是一门灵活性的语言 ,也可以说python是一门胶水语言,顾名思义,就是可一导入各类的包, python的包可是说是所有语言中最多的.当然导入包大部分是为了更方便,更简便,效率更 ...
- HDU3336 Count the string 题解 KMP算法
题目链接:http://acm.hdu.edu.cn/showproblem.php?pid=3336 题目大意:找出字符串s中和s的前缀相同的所有子串的个数. 题目分析:KMP模板题.这道题考虑 n ...
- PPP验证对比
- Python--day47--mysql执行计划
1,什么是mysql执行计划? 让mysql预估执行操作:在要执行的语句前面加explain,就不会真的执行sql语句,只是给出了要执行的数据的情况,如大约有多少条,查询类型.
- HDU 6621"K-th Closest Distance"(二分+主席树)
传送门 •题意 有 $m$ 次询问,每次询问求 $n$ 个数中, $[L,R]$ 区间距 $p$ 第 $k$ 近的数与 $p$ 差值的绝对值: •题解 二分答案,假设当前二分的答案为 $x$,那么如何 ...
- 【u202】家庭作业
Time Limit: 1 second Memory Limit: 128 MB [问题描述] 老师在开学第一天就把所有作业都布置了,每个作业如果在规定的时间内交上来的话才有学分.每个作业的截止日期 ...
- 2019-8-31-C#-获取-PC-序列号
title author date CreateTime categories C# 获取 PC 序列号 lindexi 2019-08-31 16:55:58 +0800 2018-7-30 10: ...
- 关于git命令
1在自己电脑上生成一个密钥然后给老大,老大在github上设置后,你这台电脑才可以访问他的项目ssh-keygen -t rsa -C <邮件名称> ------->获取秘钥 cat ...
- dotnet core 输出调试信息到 DebugView 软件
本文告诉大家如何在 dotnet core 输出调试信息到 DebugView 软件 在之前告诉小伙伴,如何在 WPF 输出调试信息到 DebugView 软件,请看文章 WPF 调试 获得追踪输出 ...
- How to fix nuget Unrecognized license type MIT when pack
When I packaging license within the nupkg, I will using License to replace licentUrl. I using this c ...