redis整合Spring之序列化对象与反序列化
写在最前面
1.Spring必须是4.2.6及以上版本才支持redis
2.jar包版本建议统一
需要准备jar包
1.aopalliance-1.0.jar
2.spring-data-commons-1.8.4.RELEASE.jar
3.spring-data-redis-1.8.4.RELEASE.jar
正文
1.在spring配置文件中添加配置
<!-- 连接池配置 -->

    <bean id="jedisPoolConfig" class="redis.clients.jedis.JedisPoolConfig">

        <!-- 最大连接数 -->

        <property name="maxTotal" value="30" />

        <!-- 最大空闲连接数 -->

        <property name="maxIdle" value="10" />

        <!-- 每次释放连接的最大数目 -->

        <property name="numTestsPerEvictionRun" value="1024" />

        <!-- 释放连接的扫描间隔(毫秒) -->

        <property name="timeBetweenEvictionRunsMillis" value="30000" />

        <!-- 连接最小空闲时间 -->

        <property name="minEvictableIdleTimeMillis" value="1800000" />

        <!-- 连接空闲多久后释放, 当空闲时间>该值 且 空闲连接>最大空闲连接数 时直接释放 -->

        <property name="softMinEvictableIdleTimeMillis" value="10000" />

        <!-- 获取连接时的最大等待毫秒数,小于零:阻塞不确定的时间,默认-1 -->

        <property name="maxWaitMillis" value="1500" />

        <!-- 在获取连接的时候检查有效性, 默认false -->

        <property name="testOnBorrow" value="false" />

        <!-- 在空闲时检查有效性, 默认false -->

        <property name="testWhileIdle" value="true" />

        <!-- 连接耗尽时是否阻塞, false报异常,ture阻塞直到超时, 默认true -->

        <property name="blockWhenExhausted" value="false" />

    </bean>

    <!-- redis单机 通过连接池 -->

    <bean id="connectionFactory" class="org.springframework.data.redis.connection.jedis.JedisConnectionFactory">

        <property name="poolConfig" ref="jedisPoolConfig" />

        <property name="hostName" value="127.0.0.1" />

        <property name="port" value="6379" />

    </bean>
<bean id="redisTemplate"

      class="org.springframework.data.redis.core.RedisTemplate">

       <property name="connectionFactory" ref="connectionFactory"/>

        <property name="keySerializer">

        <bean class="org.springframework.data.redis.serializer.StringRedisSerializer"/>

               </property>

       <property name="hashKeySerializer">

        <bean class="org.springframework.data.redis.serializer.StringRedisSerializer"/>

       </property>

       <property name="valueSerializer">

        <bean class="org.springframework.data.redis.serializer.JdkSerializationRedisSerializer"/>

       </property>

       <property name="hashValueSerializer">

        <bean class="org.springframework.data.redis.serializer.JdkSerializationRedisSerializer"/>

       </property>

       </bean>
3.测试一下
首先创建一个User的model类(必须继承Serializable类才可序列化)
public class User implements Serializable{

    private String name;

    private String age;

    private String sex;

    public String getName() {

        return name;

    }

    public void setName(String name) {

        this.name = name;

    }

    public String getAge() {

        return age;

    }

    public void setAge(String age) {

        this.age = age;

    }

    public String getSex() {

        return sex;

    }

    public void setSex(String sex) {

        this.sex = sex;

    }

    public void print(){

        System.out.println("姓名:"+name);

        System.out.println("年龄:"+age);

        System.out.println("性别:"+sex);

    }

}
写一个测试类
public class TestOrder {

    @Test

    public void test(){

    ApplicationContext context=new ClassPathXmlApplicationContext("bean1.xml");

    RedisTemplate r = context.getBean(RedisTemplate.class);;

    User user = new User();

    user.setName("冯吉荣");

    user.setAge("22");

    user.setSex("男");

    r.opsForValue().set("user_1", user);

    User user1 = (User)r.opsForValue().get("user_1");

    user1.print();

    }

}
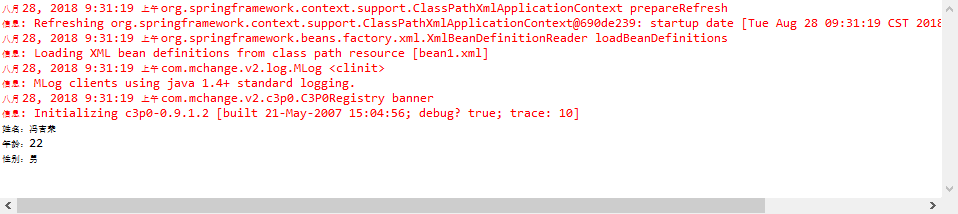
结果
这次真有图
写在最后
对象的存储是hash,保证jar包的版本统一,同时保证redis服务在运行,即可成功
redis整合Spring之序列化对象与反序列化的更多相关文章
- Redis windows环境安装 以及 redis整合spring
Redis对于Linux是官方支持的,安装和使用没有什么好说的,普通使用按照官方指导,5分钟以内就能搞定.详情请参考: http://redis.io/download Redis官方是不支持wind ...
- redis整合Spring入门
首先 衷心感谢这篇博客给我入门时的启发 三颗心脏 你需要知道,spring的官方文档中已经注明,与redis整合时,spring的jar包版本不能低于4.2.6,否则不支持,会报错的哟 测试的时候请 ...
- Redis整合spring总结
一:Redis简介: Redis是一个开源(BSD许可)的内存数据结构存储,用作数据库,缓存和消息代理. 简单来说,它是一个以(key,value)的形式存储数据的数据库. 官网:https://re ...
- redis整合spring @Bean写法
jedis是一款java连接redis的客户端,spring基于jedis进行了封装,提供了简洁的操作redis的方法. 使用maven进行管理jar包之间的依赖: <dependency> ...
- Redis + Jedis + Spring 实例(对象的操作)
目录(?)[+] 不得不说,用哈希操作来存对象,有点自讨苦吃! 不过,既然吃了苦,也做个记录,也许以后API升级后,能好用些呢?! 或许,是我的理解不对,没有真正的理解哈希表. 一.预期 接上 ...
- Redis整合Spring实现分布式锁
spring把专门的数据操作独立封装在spring-data系列中,spring-data-redis是对Redis的封装 <dependencies> <!-- 添加spring- ...
- Redis整合Spring结合使用缓存实例
林炳文Evankaka原创作品.转载请注明出处http://blog.csdn.net/evankaka 摘要:本文介绍了如何在Spring中配置redis,并通过Spring中AOP的思想,将缓存的 ...
- Redis整合Spring结合使用缓存实例(转)
林炳文Evankaka原创作品.转载请注明出处http://blog.csdn.net/evankaka 摘要:本文介绍了如何在Spring中配置redis,并通过Spring中AOP的思想,将缓存的 ...
- Redis学习总结(3)——Redis整合Spring结合使用缓存实例
摘要:本文介绍了如何在Spring中配置redis,并通过Spring中AOP的思想,将缓存的方法切入到有需要进入缓存的类或方法前面. 一.Redis介绍 什么是Redis? redis是一个key- ...
随机推荐
- Python unittest模块心得(二)
基础概念介绍请参看: http://www.cnblogs.com/frost-hit/p/8295818.html 组织测试用例 unittest.TestSuite(tests=()): 除了使用 ...
- 解决maven工程无法创建src/main/java包名的方法
我的maven工程不知道为什么无法创建src/main/java这样的包,我创建好的maven工程只有src/main/resources包,其他的主要包都没有,而且不能创建包,new出来的包都是一个 ...
- DESCRIBE:When you mouse click right-side is open an application and click left-side is attribution.
DESCRIBE:When you mouse click right-side is open an application and click left-side is attribution. ...
- linux误删文件导致系统无法启动
因虚拟机RedHat误删了/etc/inittab文件导致系统无法启动启动系统提示enter runlevel尝试输入0-5都不好使.因为实验环境直接忽略了错误,重新搭建了虚拟机. 如果想尝试修复,可 ...
- C# 之 Request
Request.QueryString(取得地址栏参数值)获取地址栏中的参数,意思就是取得”?"号后面的参数值.如果是多个是用这”&”符号连接起来的.Request.form取得表单 ...
- System IPC 与Posix IPC(semaphore信号灯)
POSIX下IPC主要包括三种: posix message queue posix semaphores posix shared memory sysytem v IPC包括: system v ...
- UOJ #62. 【UR #5】怎样跑得更快
题目分析 显然不可能高斯消元. 考虑反演. \(b_i=\sum\limits_{j=1}^n\gcd(i,j)^C\cdot \text{lcm}(i,j)^D\cdot x_j\) \(b_i=\ ...
- Nginx卸载重装问题
1.删除nginx,-purge包括配置文件 sudo apt-get --purge remove nginx 2.移除全部不使用的软件包 sudo apt-get autoremove 3 ...
- Perl 修改文件内容
把test.txt文件中的字符aaa替换成bbb perl -pi -e "s/aaa/bbb/gi" test.txt 把test.txt文件中的字符aaa替换成bbb,并生成一 ...
- Jenkins+maven(testng)项目(本地项目配置)
一.前提: 1. Jenkins下载安装. 2. testng的Maven项目. 二.检测: maven项目自身配置及检测. 1. POM.XML配置文件增加: <build> <p ...