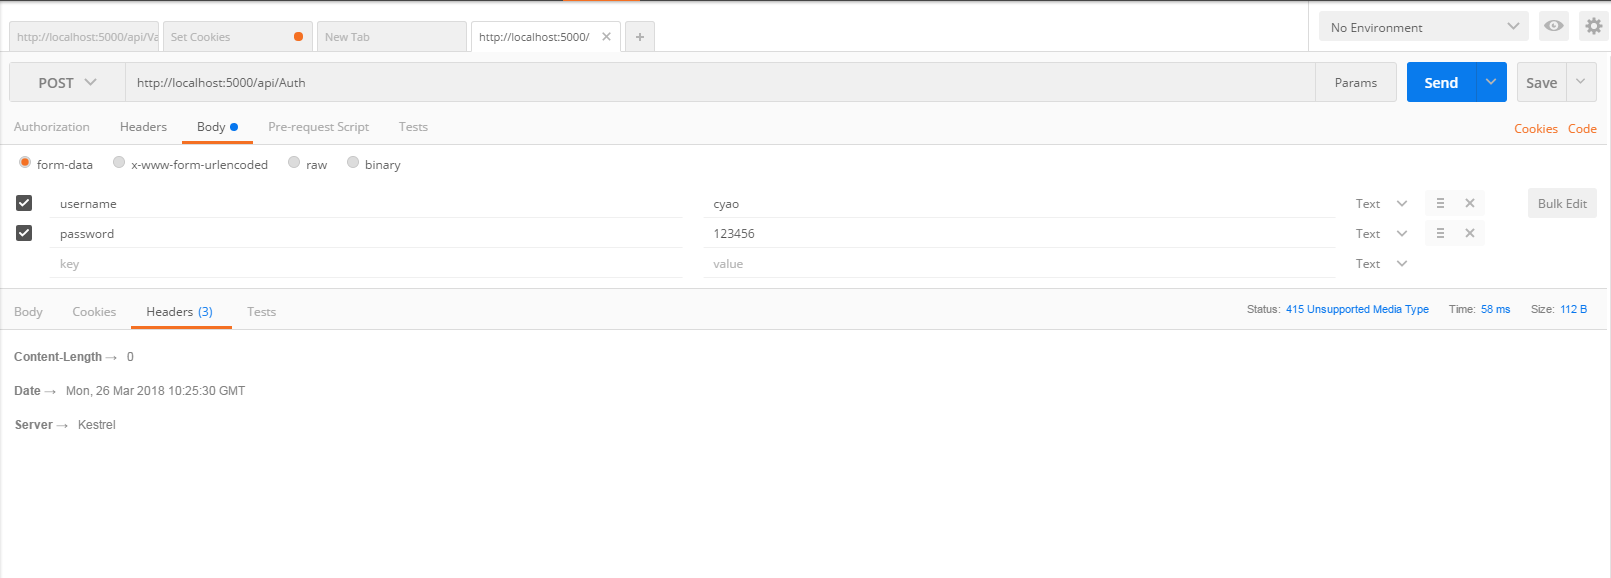
.net core 学习小结之 PostMan报415
- 首先415的官方解释是:对于当前请求的方法和所请求的资源,请求中提交的实体并不是服务器中所支持的格式,因此请求被拒绝。
- 也就是说我所准备的数据格式并不是后台代码使用的数据格式
- 后台代码如下
using System;

using System.Collections.Generic;

using System.ComponentModel.DataAnnotations;

using System.Linq;

using System.Threading.Tasks;

using Microsoft.AspNetCore.Mvc;

namespace JwtAuth.Controllers

{

    using System.Security.Claims;

    using Microsoft.Extensions.Options;

    using Microsoft.IdentityModel.Tokens;

    using Microsoft.AspNetCore.Authentication.JwtBearer;

    //添加dll的引用 Nuget Microsoft.AspNetCore.Authentication.JwtBearer;

    using System.IdentityModel.Tokens.Jwt;

     [Route("api/[controller]")]

    public class AuthController : Controller

    {

        public JwtSettings settings;

        public AuthController(IOptions<JwtSettings> jwtsettings)

        {

            settings = jwtsettings.Value;

        }

        [HttpPost]

        public IActionResult Token([FromBody]LoginInfo model)

        {

            if (ModelState.IsValid)

            {

                if (model.username == "cyao" && model.password == "")

                {

                    //用户合法情况

                    //添加授权信息

                    var claims = new Claim[] { new Claim(ClaimTypes.Name, "cyao"), new Claim(ClaimTypes.Role, "admin") };

                    var key = new SymmetricSecurityKey(System.Text.Encoding.UTF8.GetBytes(settings.SecretKey));

                    var creds = new SigningCredentials(key, SecurityAlgorithms.HmacSha256);

                    var token = new JwtSecurityToken(

                        settings.Issuer,

                        settings.Audience,

                        claims,

                        DateTime.Now,

                        DateTime.Now.AddMinutes(),//过期时间

                        creds);

                    return Ok(new { token = new JwtSecurityTokenHandler().WriteToken(token) });

                }

            }

            return BadRequest();

        }

    }

    public class LoginInfo

    {

        [Required]

        public string username { get; set; }

        [Required]

        public string password { get; set; }

    }

} - 使用POSTMan如何构造一个
[FromBody]?错误示例
 (图1.0)
 - 正确示例如下图2.0
 (图2.0)
 - 或者使用图1.0的配置将后台代码参数的标签改成[FromForm]
.net core 学习小结之 PostMan报415的更多相关文章
- .net core 学习小结之环境配置篇
安装IIs对 netcore 的支持 https://docs.microsoft.com/en-us/aspnet/core/fundamentals/servers/aspnet-core-mod ...
- .net core 学习小结之 自定义JWT授权
自定义token的验证类 using System; using System.Collections.Generic; using System.IO; using System.Linq; usi ...
- .net core 学习小结之 JWT 认证授权
新增配置文件 { "Logging": { "IncludeScopes": false, "Debug": { "LogLeve ...
- .net core 学习小结之 Cookie-based认证
在startup中添加授权相关的管道 using System; using System.Collections.Generic; using System.Linq; using System.T ...
- .net core 学习小结之 配置介绍(config)以及热更新
命令行的配置 var settings = new Dictionary<string, string>{ { "name","cyao"}, {& ...
- objective-c基础教程——学习小结
objective-c基础教程——学习小结 提纲: 简介 与C语言相比要注意的地方 objective-c高级特性 开发工具介绍(cocoa 工具包的功能,框架,源文件组织:XCode使用介绍) ...
- SpringMVC过程中@RequestBody接收Json的问题 总是报415
在SpringMVC中用@RequestBody接收Json的问题,总是报415,经过一翻查找 前台js的post: var postdata = '{"title":" ...
- EntityFramework Core 学习系列(一)Creating Model
EntityFramework Core 学习系列(一)Creating Model Getting Started 使用Command Line 来添加 Package dotnet add pa ...
- python --- 字符编码学习小结(二)
距离上一篇的python --- 字符编码学习小结(一)已经过去2年了,2年的时间里,确实也遇到了各种各样的字符编码问题,也能解决,但是每次都是把所有的方法都试一遍,然后终于正常.这种方法显然是不科学 ...
随机推荐
- 浅谈java虚拟机|系列1|架构简介
今天开了一个专题.谈谈我们java程序员每天面对的java虚拟机(jvm). 本质上来说,jvm分两部分:编译器(compiler)和运行时(runtime). 所谓的编译器,简单来说,他就是个翻译机 ...
- UEditor富文本编辑器简单使用
UEditor富文本编辑器简单使用 一.下载地址:https://ueditor.baidu.com/website/ 官网中并没有 python 版本的 UEditor 富文本编辑器,本文简单介绍 ...
- shiro框架学习-5-自定义Realm
1. 自定义Realm基础 步骤: 创建一个类 ,继承AuthorizingRealm->AuthenticatingRealm->CachingRealm->Realm 重写授权方 ...
- HTTS TTLS 433
HTTP和HTTPS协议,看一篇就够了 版权声明:本文为博主原创文章,遵循 CC 4.0 BY-SA 版权协议,转载请附上原文出处链接和本声明.本文链接:https://blog.csdn.net/x ...
- Mysql安装及用简单用法
Mysql安装和初始化 初见: Mysql软件 - 服务端软件 - 服务端程序 - 解析指令 - 对文件的操作 - 客户端软件 - 客户端程序 - 发送指令(sql语句) - 解析指令 其他类似软件: ...
- 【BZOJ2118】墨墨的等式(同余最短路)
题意: 思路:From https://www.cnblogs.com/GavinZheng/p/11709153.html#4421510 写的1e9,int范围的 #include<bits ...
- 【Leetcode】2的幂(整数的二进制形式,与运算)
class Solution { public: bool isPowerOfTwo(int n) { ) return false; )) == ; } }; 注: 1) 2的幂函数,其y值大于0: ...
- go语言系列--golang在windows上的安装和开发环境goland的配置
在windows上安装golang软件 golang中国网址为:https://studygolang.com/dl 我的学习选择版本:1.12.5 golang 1.12.5版本更新的内容:gola ...
- http三次握手,四次挥手
本文经过借鉴书籍资料.他人博客总结出的知识点,欢迎提问 序列号seq:占4个字节,用来标记数据段的顺序,TCP把连接中发送的所有数据字节都编上一个序号,第一个字节的编号由本地随机产生:给字节编上序号后 ...
- mssql的sql注入拿后台
0x01判断数据 ①判断数据库类型 and exists (select * from sysobjects)--返回正常为mssql(也名sql server) and exists (select ...
