SpringBoot在Kotlin中的实现(二)
根据现在的开发模式和网上的一些资料,SpringBoot需要对业务和操作进行分层,通常分为controller、entity、service、respository等结构。下面以Kotlin官网的例子,讲解在分层的时候,需要做什么配置。
1、在包com.SpringBootUseKotlin中新建包entity,添加新的class,命名为People
package com.kotlinSpringBoot.entity

import java.util.*
import javax.persistence.Entity
import javax.persistence.GeneratedValue
import javax.persistence.GenerationType
import javax.persistence.Id

@Entity
class People(
        @Id @GeneratedValue(strategy = GenerationType.AUTO)
        val id: Long?,
        val firstName: String?,
        val lastName: String?,
        val gender: String?,
        val age: Int?,
        val gmtCreated: Date,
        val gmtModified: Date
) {
    override fun toString(): String {
        return "People(id=$id, firstName='$firstName', lastName='$lastName', gender='$gender', age=$age, gmtCreated=$gmtCreated, gmtModified=$gmtModified)"
    }
}
根据官网写的代码,结果却标红了:
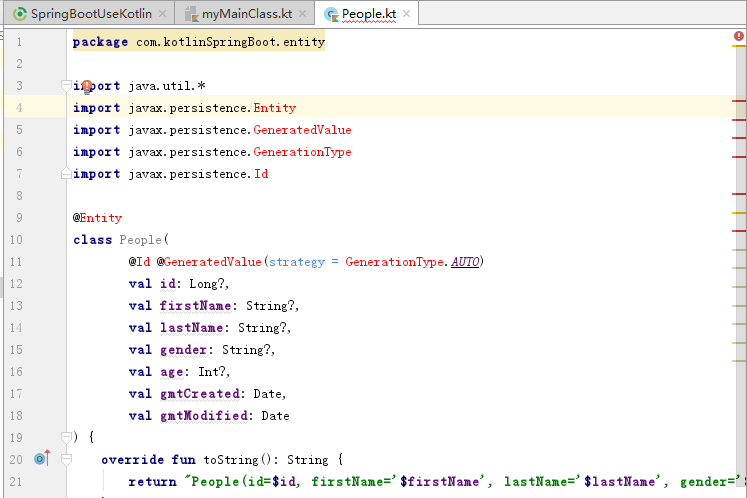
因为上面的代码使用了JPA,但是没有引入相关的文件,在build.gradle中的dependencies添加相应的依赖即可解决该错误:
compile 'org.springframework.boot:spring-boot-starter-data-jpa:1.3.3.RELEASE'
2、在包com.SpringBootUseKotlin中新建包respository,新增class,命名为:PeopleRepository
package com.kotlinSpringBoot.repository

import com.kotlinSpringBoot.entity.People
import org.springframework.data.repository.CrudRepository

interface PeopleRepository : CrudRepository<People, Long> {
    fun findByLastName(lastName: String): List<People>?
}
3、在包com.SpringBootUseKotlin中新建包service,新增class,命名为:PeopleService
package com.kotlinSpringBoot.service

import com.kotlinSpringBoot.entity.People
import com.kotlinSpringBoot.repository.PeopleRepository
import org.springframework.beans.factory.annotation.Autowired
import org.springframework.stereotype.Service

class PeopleService {
    @Autowired
    val peopleRepository: PeopleRepository? = null

    fun findByLastName(lastName: String): List<People>? {
        return peopleRepository?.findByLastName(lastName)
    }

    fun <S : People?> save(entity: S): S? {
        return peopleRepository?.save(entity)
    }

    fun <S : People?> save(entities: MutableIterable<S>?): MutableIterable<S>? {
        return peopleRepository?.save(entities)
    }

    fun delete(entities: MutableIterable<People>?) {
    }

    fun delete(entity: People?) {
    }

    fun delete(id: Long?) {
    }

    fun findAll(ids: MutableIterable<Long>?): MutableIterable<People>? {
        return peopleRepository?.findAll(ids)
    }

    fun findAll(): MutableIterable<People>? {
        return peopleRepository?.findAll()
    }

    fun exists(id: Long?): Boolean {
        return peopleRepository?.exists(id)!!
    }

    fun count(): Long {
        return peopleRepository?.count()!!
    }

    fun findOne(id: Long?): People? {
        return peopleRepository?.findOne(id)
    }

    fun deleteAll() {
    }
}
4、在包com.SpringBootUseKotlin中新建包controller,新增class,命名为:PeopleController
package com.kotlinSpringBoot.controller

import com.kotlinSpringBoot.service.PeopleService
import org.springframework.beans.factory.annotation.Autowired
import org.springframework.stereotype.Controller
import org.springframework.web.bind.annotation.GetMapping
import org.springframework.web.bind.annotation.RequestParam
import org.springframework.web.bind.annotation.ResponseBody

@Controller
class PeopleController {
    @Autowired
    val peopleService: PeopleService? = null

    @GetMapping(value = "/hello")
    @ResponseBody
    fun hello(@RequestParam(value = "lastName") lastName: String): Any {
        val peoples = peopleService?.findByLastName(lastName)
        val map = HashMap<Any, Any>()
        map.put("hello", peoples!!)
        return map
    }
}
在controller包内新增类HelloWorldController
package com.kotlinSpringBoot.controller

import org.springframework.web.bind.annotation.GetMapping
import org.springframework.web.bind.annotation.RestController

@RestController
class HelloWorldController {
    @GetMapping(value = *arrayOf("/helloworld", "/"))
    fun helloworld(): Any {
        return "Hello,World!"
    }
}
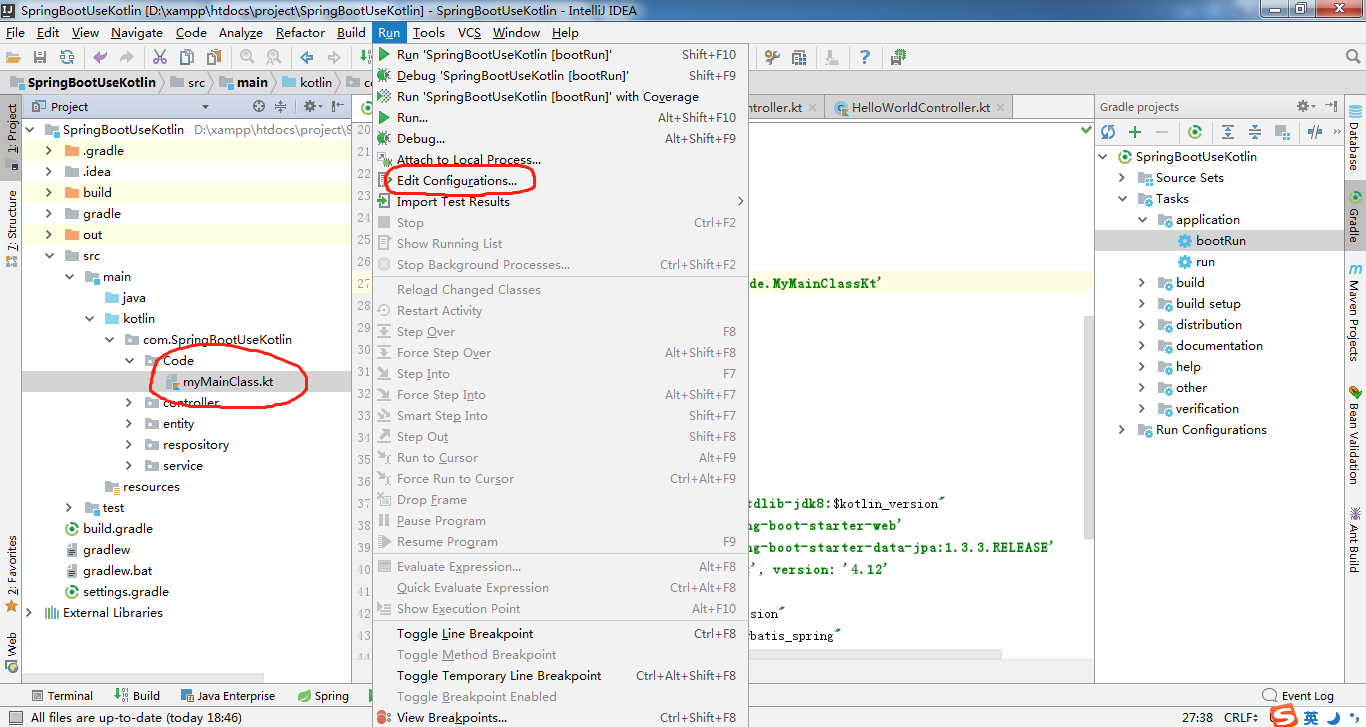
分层结束,下面说一下执行主类的另一种方法

点击图中的bootrun运行程序,报错:没有指定的主类myMainClass。上一节中我们建立了主类,如下:
package com.SpringBootUseKotlin.Code

import org.springframework.boot.SpringApplication
import org.springframework.boot.autoconfigure.SpringBootApplication

@SpringBootApplication
open class myMainClass{

}

fun main(args:Array<String>){
    SpringApplication.run(myMainClass::class.java, *args)
}
我们在build.gradle里加上mainClassName属性。注意,mainClassName依赖于插件application,如果报错说该属性未定义,则在build.gradle中添加:
apply plugin: 'application'
那么这个属性的值是多少呢?这个类名是myMainClass,那么mainClassName的值是否为:com.SpringBootUseKotlin.Code.MyMainClass ?其实并不是。
我们可以通过下面的操作查看到类的名称(点击主类,在Run的菜单中选择设置):
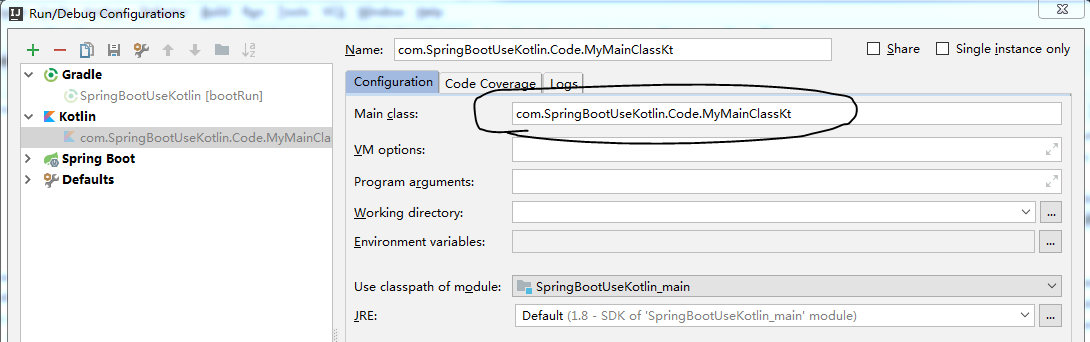
所以真正的mainClassName应该设置为com.SpringBootUseKotlin.Code.MyMainClassKt,注意,后面多了个Kt。
设了类名之后,需要在主类中加上注解:
package com.kotlinSpringBoot

import org.springframework.boot.SpringApplication
import org.springframework.boot.autoconfigure.SpringBootApplication

//注解MapperScan需要import该jar包import org.mybatis.spring.annotation.MapperScan;

@SpringBootApplication @MapperScan("com.kotlinSpringBoot.mapper") //这个是刚加的注解,以便主类可以被扫描到 open class Application {

 } fun main(args: Array<String>) {     SpringApplication.run(Application::class.java, *args) }
上面的代码中,需要引入org.mybatis.spring.annotation.MapperScan,因此需要在build.gradle的配置文件中增加下面的配置:
buildscript {
    ext.mybatisVersion = '3.3.1'
    ext.mybatis_spring = '1.2.5'
}

dependencies {
    compile "org.mybatis:mybatis:$mybatisVersion"
    compile "org.mybatis:mybatis-spring:$mybatis_spring"
}
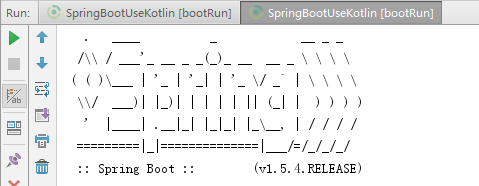
配置完成后再点击一次gradle的bootrun,则可以看到下面的输出了:
SpringBoot在Kotlin中的实现(二)的更多相关文章
- SpringBoot在Kotlin中的实现(一)
本节记录如何用Kotlin初步搭建一个SpringBoot的环境(使用Gradle自动化构建工具). 1.新建一个Gradle的Kotlin 配置完成后,build.gradle的配置如下: buil ...
- springboot 与 mybatis 中事务特性讲解
1 MyBatis自动参与到 spring 事务管理中,无需额外配置,只要org.mybatis.spring.SqlSessionFactoryBean引用的数据源与 DataSourceTrans ...
- Kotlin中的object 与companion object的区别
之前写了一篇Kotlin中常量和静态方法的文章,最近有人提出一个问题,在companion object中调用外部的成员变量会调用不到,这才意识到问题,本篇文章会带着这个疑问来解决问题. 一. obj ...
- DB数据源之SpringBoot+MyBatis踏坑过程(二)手工配置数据源与加载Mapper.xml扫描
DB数据源之SpringBoot+MyBatis踏坑过程(二)手工配置数据源与加载Mapper.xml扫描 liuyuhang原创,未经允许进制转载 吐槽之后应该有所改了,该方式可以作为一种过渡方式 ...
- Kotlin——中级篇(二): 属性与字段详解
在前面的章节中,详细的为大家讲解到了Kotlin中对类的类的定义.使用.初始化.初始化.类继承等内容,但是在一个类中,几乎上是不可能不出现属性与字段(field)的,这一篇文章就为大家奉上Kotlin ...
- Kotlin——高级篇(二):高阶函数详解与标准的高阶函数使用
在上面一个章节中,详细的讲解了Kotlin中关于Lambda表达式的语法以及运用,如果还您对其还不甚理解,请参见Kotlin--高级篇(一):Lambda表达式详解.在这篇文章中,多次提到了Kotli ...
- Kotlin——初级篇(二):变量、常量、注释
在Kotlin中的变量.常量以及注释多多少少和Java语言是有着不同之处的.不管是变量.常量的定义方式,还是注释的使用.下面详细的介绍Kotlin中的变量.常量.注释的使用.以及和Java的对比. 如 ...
- SpringBoot初始教程之日志处理(二)
SpringBoot初始教程之日志处理(二) 1.介绍 SpringBoot默认是采用logback进行日志处理.Logback是由log4j创始人设计的又一个开源日志组件.Logback是由log4 ...
- Kotlin 中文文档
Kotlin 中文文档 标签: Kotlinkotlin中文文档 2017-02-14 18:14 4673人阅读 评论(0) 收藏 举报 分类: kotlin 转载地址:http://www.tu ...
随机推荐
- 原生js实现的瀑布流布局
<!doctype html> <html lang="en"> <head> <meta charset="UTF-8&quo ...
- MySQL 的数据类型,有哪些?
table th:first-of-type { width: 100px; } MySQL数据类型选择指南:https://www.awaimai.com/1146.html 实数: 数据类型 多少 ...
- gitlab 可以上传代码,但是 不能 上传 tag 问题
原因是 puttygen 生成的 公私钥不能用, 换 git 私钥后 ( 默认不能导入到 pageant ),再用 puttygen 转一次就可以了.
- secureCRT 设置证书免密登陆
1 第一步 2 第二步 3 第三步 4 第4 步 ,然后选择你的 私钥文件
- 安装ES
ES环境搭建 1.创建用户组2.目录授权3.安装jdk4.vi /etc/sysctl.confvm.map_maxcount=65535vm.swappiness=5 sysctl -p 生效5.修 ...
- unicodedata.normalize()/使用strip()、rstrip()和lstrip()/encode和decode 笔记(具体可看 《Python Cookbook》3rd Edition 2.9~2.11)
unicodedata.normalize()清理字符串 # normalize()的第一个参数指定字符串标准化的方式,分别有NFD/NFC >>> s1 = 'Spicy Jala ...
- spring boot 整合dubbo
dubbo与springboot的集成和使用dubbo-spring-boot-starter SpringBoot整合Dubbo2.5.10(官方的spring-boot-starter0.1.0) ...
- jersey2+freemarker+spring3的集成
由于即将开始的新项目,是一个对外网开放访问权限的web应用.所以,公司技术管理层不允许使用struts以及spring mvc这一套.所以,我们开始转战曾经用作REST API的框架jersey及其周 ...
- Centos 使用find查找
CentOS查找目录或文件 find / -name svn 查找目录:find /(查找范围) -name '查找关键字' -type d查找文件:find /(查找范围) -name 查找关键字 ...
- mass种子模块看完了
作者当然也不容易,要考虑各种兼容问题,要考虑效率问题(他真的考虑过吗,我表示强烈怀疑,貌似仅仅是风格上模仿其他源码) 相当无语. 本来我是知道的,代码 调试的过程中逐渐完善,逐渐与各种兼容问题和预想不 ...