Django+Uwsgi+Nginx项目部署文档
一、基本环境搭建
1)查看服务器
[root@Myjumpserver ~]# cat /etc/sysconfig/selinux

SELINUX=disabled

SELINUXTYPE=targeted

[root@Myjumpserver ~]# cat /etc/redhat-release

CentOS release 6.6 (Final)

[root@Myjumpserver ~]# uname -r

2.6.-.el6.x86_64
2)安装基本的依赖包
yum -y install gcc

yum -y install gcc-c++

yum -y install glibc.i686

yum -y install dos2unix

yum -y install vsftpd

yum install -y redhat-lsb

yum -y install zlib*

yum install nss -y
二、搭建mysql,nginx,python环境
1.1)安装mysql5.6版本
rpm -ivh http://dev.mysql.com/get/mysql-community-release-el6-5.noarch.rpm

yum install -y mysql-server mysql-devel
1.2)设置mysql
修改my.cnf文件

vim /etc/my.cnf

[mysqld]

innodb_file_per_table  #独立表空间模式

service mysqld start           #启动

mysql_secure_installation    #MySQL安全配置向导

Enter current password for root (enter for none):  <–初次运行直接回车

Set root password? [Y/n]   <– 是否设置root用户密码,输入y并回车或直接回车

Remove anonymous users? [Y/n]   <– 是否删除匿名用户,生产环境建议删除,所以直接回车

Disallow root login remotely? [Y/n]  <–是否禁止root远程登录,根据自己的需求选择Y/n并回车,建议禁止

Remove test database and access to it? [Y/n]   <– 是否删除test数据库,直接回车

Reload privilege tables now? [Y/n]   <– 是否重新加载权限表,直接回车

mysql -uroot -p        # 进入mysql

CREATE DATABASE myjumpserver CHARACTER SET utf8 COLLATE utf8_bin;

GRANT ALL PRIVILEGES ON myjumpserver.* TO user@'%' IDENTIFIED BY '';

FLUSH PRIVILEGES;

创建库  myjumpserver

授权用户 user

用户密码

连接地址 任意网段
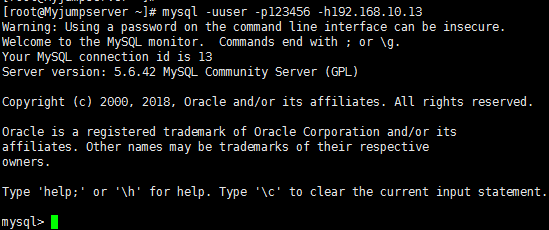
1.3)测试连接
2.1)安装nginx
yum install -y  gcc-c++ autoconf automake zlib zlib-devel openssl openssl-devel pcre pcre-devel  安装依赖包

cd /opt/

wget http://nginx.org/download/nginx-1.9.9.tar.gz

cd nginx-1.9.

useradd nginx -s /sbin/nologin -M

./configure --user=nginx --group=nginx   # 编译参数

make && make install

[root@Myjumpserver nginx]# ll /usr/local/nginx/

total

drwx------  nginx root  Nov  : client_body_temp

drwxr-xr-x  root  root  Nov  : conf

drwx------  nginx root  Nov  : fastcgi_temp

drwxr-xr-x  root  root  Nov  : html

drwxr-xr-x  root  root  Nov  : logs

drwx------  nginx root  Nov  : proxy_temp

drwxr-xr-x  root  root  Nov  : sbin

drwx------  nginx root  Nov  : scgi_temp

drwx------  nginx root  Nov  : uwsgi_temp

[root@Myjumpserver nginx-1.9.]# /usr/local/nginx/sbin/nginx -t

nginx: the configuration file /usr/local/nginx/conf/nginx.conf syntax is ok

nginx: configuration file /usr/local/nginx/conf/nginx.conf test is successful
2.2)常用的编译参数
./configure \

--prefix=/home/nginx \

--sbin-path=/usr/sbin/nginx \

--user=nginx \

--group=nginx \

--conf-path=/etc/nginx/nginx.conf \

--error-log-path=/home/log/nginx/error.log \

--http-log-path=/home/log/nginx/access.log \

--with-http_ssl_module \

--with-http_gzip_static_module \

--with-http_stub_status_module \

--with-http_realip_module \

--pid-path=/home/run/nginx.pid \

--with-pcre=/home/software/pcre-8.35 \

--with-zlib=/home/software/zlib-1.2. \

--with-openssl=/home/software/openssl-1.0.1i
编译参数说明
-prefix=/home/nginx \ Nginx安装的根路径,所有其它路径都要依赖该选项

--sbin-path=/usr/sbin/nginx \ nginx的可执行文件的路径(nginx)

--user=nginx \ worker进程运行的用户

--group=nginx \ worker进程运行的组

--conf-path=/etc/nginx/nginx.conf \  指向配置文件(nginx.conf)

--error-log-path=/var/log/nginx/error.log \ 指向错误日志目录

--http-log-path=/var/log/nginx/access.log \  设置主请求的HTTP服务器的日志文件的名称

--with-http_ssl_module \  使用https协议模块。默认情况下,该模块没有被构建。前提是openssl与openssl-devel已安装

--with-http_gzip_static_module \  启用ngx_http_gzip_static_module支持(在线实时压缩输出数据流)

--with-http_stub_status_module \  启用ngx_http_stub_status_module支持(获取nginx自上次启动以来的工作状态)

--with-http_realip_module \  启用ngx_http_realip_module支持(这个模块允许从请求标头更改客户端的IP地址值,默认为关)

--pid-path=/var/run/nginx.pid \  指向pid文件(nginx.pid)

设置PCRE库的源码路径,如果已通过yum方式安装,使用–with-pcre自动找到库文件。使用–with-pcre=PATH时,需要从PCRE网站下载pcre库的源码(版本4. – 8.30)并解压,

剩下的就交给Nginx的./configure和make来完成。perl正则表达式使用在location指令和 ngx_http_rewrite_module模块中。

--with-pcre=/home/software/pcre-8.35 \

指定 zlib(版本1.1.3 – 1.2.)的源码解压目录。在默认就启用的网络传输压缩模块ngx_http_gzip_module时需要使用zlib 。

--with-zlib=/home/software/zlib-1.2. \

指向openssl安装目录

--with-openssl=/home/software/openssl-1.0.1i
2.3)nginx文件夹说明
conf: 配置文件夹,最重要文件是nginx.conf

html: 静态网页文件夹

logs: 日志文件夹

sbin: nginx 的可执行文件,启动、停止等操作
2.4)nginx启动命令
/usr/local/nginx/sbin/nginx                启动

/usr/local/nginx/sbin/nginx -s stop        停止

/usr/local/nginx/sbin/nginx -s reload      平滑重启
2.5)修改nginx配置文件
user nginx;

worker_processes  ;

worker_cpu_affinity    ;

worker_rlimit_nofile ;

pid        /var/run/nginx.pid;

events {

    worker_connections  ;

    use epoll;

    multi_accept off;

}

http {

    include       /usr/local/nginx/conf/mime.types;

    default_type  application/octet-stream;

    log_format  main  '$remote_addr --- $remote_user --- [$time_local] --- $request --- '

                      '"$status" --- $body_bytes_sent --- "$http_referer" --- '

                      '"$http_user_agent" --- "$http_x_forwarded_for"';

    log_format  mtr  '$remote_addr [$time_local] "$request_uri" '

                      '$status "$http_referer" '

                      '"$http_user_agent" "$host"';

    sendfile        on;

    keepalive_timeout  ;

    client_header_timeout    ;

    client_body_timeout    ;

    server_tokens off;

    tcp_nodelay        on;

    gzip  on;

    include /usr/local/nginx/conf/vhost/*.conf;

    fastcgi_send_timeout 300;

    fastcgi_read_timeout 300;

    #fastcgi_buffer_size 16k;

    #fastcgi_buffers 16 16k;

    #fastcgi_busy_buffers_size 16k;

    fastcgi_buffer_size 64k;

    fastcgi_buffers 4 64k;

    fastcgi_busy_buffers_size 128k;

    server_names_hash_bucket_size 128;

    client_header_buffer_size 2k;

    large_client_header_buffers 4 4k;

    client_max_body_size 100k;

    open_file_cache max=51200 inactive=20s;

    open_file_cache_valid   30s;

    open_file_cache_min_uses 1;

}
nginx.conf
在子文件夹(vhost),创建jumpserver.conf
[root@Myjumpserver vhost]# cat jumpserver.conf

server {

    listen       ;

    server_name  localhost;

    #charset koi8-r;

    #access_log  logs/host.access.log  main;

        access_log  /data/log/nginx/myjumpserver_access.log  main;

        error_log  /data/log/nginx/myjumpserver_error.log;

    location / {

            uwsgi_pass   192.168.10.13:;

            include uwsgi_params;

    }

        location /static {

            alias /opt/wwwroot/MyJumpserver/static/;

        }

    #error_page                /.html;

    # redirect server error pages to the static page /50x.html

    #

    error_page        /50x.html;

    location = /50x.html {

        root   html;

    }

    # proxy the PHP scripts to Apache listening on 127.0.0.1:

    #

    #location ~ \.php$ {

    #    proxy_pass   http://127.0.0.1;

    #}

    # pass the PHP scripts to FastCGI server listening on 127.0.0.1:

    #

    #location ~ \.php$ {

    #    root           html;

    #    fastcgi_pass   127.0.0.1:;

    #    fastcgi_index  index.php;

    #    fastcgi_param  SCRIPT_FILENAME  /scripts$fastcgi_script_name;

    #    include        fastcgi_params;

    #}

    # deny access to .htaccess files, if Apache's document root

    # concurs with nginx's one

    #

    #location ~ /\.ht {

    #    deny  all;

    #}

}
jumpserver.conf
语法测试
[root@Myjumpserver vhost]# /usr/local/nginx/sbin/nginx -t

nginx: the configuration file /usr/local/nginx/conf/nginx.conf syntax is ok

nginx: [emerg] open() "/data/log/nginx/myjumpserver_access.log" failed (: No such file or directory)

nginx: configuration file /usr/local/nginx/conf/nginx.conf test failed

[root@Myjumpserver vhost]# mkdir -p /data/log/nginx/

[root@Myjumpserver vhost]# touch myjumpserver_access.log

[root@Myjumpserver vhost]# /usr/local/nginx/sbin/nginx -t

nginx: the configuration file /usr/local/nginx/conf/nginx.conf syntax is ok

nginx: configuration file /usr/local/nginx/conf/nginx.conf test is successful
关于jumpserver.conf配置文件说明
[root@Myjumpserver vhost]# cat jumpserver.conf

server {

    listen       ;

    server_name  localhost;

        access_log  /data/log/nginx/myjumpserver_access.log  main;

        error_log  /data/log/nginx/myjumpserver_error.log;

    location / {

            uwsgi_pass   192.168.10.13:;

            include uwsgi_params;

    }

        # django项目文件, MyJumpserver,静态资源这里加载

        location /static {

            alias /opt/wwwroot/MyJumpserver/static/;

        }

    # redirect server error pages to the static page /50x.html

    error_page        /50x.html;

    location = /50x.html {

        root   html;

    }

}

# 访问localhost: ===>192.168.10.13:(uwsgi服务提供的)
3.1)python3环境的安装
python3 安装文档:https://www.cnblogs.com/linu/articles/9879572.html
[root@Myjumpserver Python-3.6.]# python3 -V

Python 3.6.

[root@Myjumpserver Python-3.6.]# pip3 -V

pip 9.0. from /usr/local/python3/lib/python3./site-packages (python 3.6)
3.2)python3模块安装
pip3 install django==1.11. -i http://pypi.douban.com/simple --trusted-host pypi.douban.com

pip3 install pymysql -i http://pypi.douban.com/simple --trusted-host pypi.douban.com

pip3 install uwsgi -i http://pypi.douban.com/simple --trusted-host pypi.douban.com

ln -s /usr/local/python3/bin/uwsgi /usr/bin/uwsgi            # 特别重要
三、拷贝代码到nginx代码目录测试
1)python测试
[root@Myjumpserver wwwroot]# ls /opt/wwwroot/

MyJumpserver

[root@Myjumpserver wwwroot]# cd MyJumpserver/

[root@Myjumpserver MyJumpserver]# python3 manage.py runserver 192.168.10.13:

Performing system checks...

System check identified no issues ( silenced).

November ,  - ::

Django version 1.11., using settings 'MyJumpserver.settings'

Starting development server at http://192.168.10.13:888/

Quit the server with CONTROL-C.
2)使用uwsgi测试,http方式启动
[root@Myjumpserver MyJumpserver]# ls

backup  manage.py  MyJumpserver  static  static_time.py  templates  test.py  uwsgi.ini  uwsgi.log  uwsgi.pid  web01

[root@Myjumpserver MyJumpserver]# vim uwsgi.ini

[root@Myjumpserver MyJumpserver]# pwd

/opt/wwwroot/MyJumpserver

[root@Myjumpserver MyJumpserver]# ls

backup  manage.py  MyJumpserver  static  static_time.py  templates  test.py  uwsgi.ini  uwsgi.log  uwsgi.pid  web01

[root@Myjumpserver MyJumpserver]# cat uwsgi.ini

[uwsgi]

# 使用nginx 连接时使用

# socket=192.168.10.13:

# 直接做web服务器使用

http=192.168.10.13:

# 项目目录

chdir=/opt/wwwroot/MyJumpserver

# 项目中wsgi.py 文件的目录,相对于项目目录

wsgi-file=MyJumpserver/wsgi.py

processes=

threads=

master=True

pidfile=uwsgi.pid

daemonize=uwsgi.log
启动命令
uwsgi --ini uwsgi.ini

ps ajx|grep uwsgi

停止

、uwsgi --stop uwsgi.pid(不好用,经常报pid找不到)

、sudo pkill -f uwsgi -(不好用,有可能报错,无效的-)

、killall - uwsgi(该命令最好用)    yum install psmisc -y  安装killall命令
启动程序
[root@Myjumpserver MyJumpserver]# uwsgi --ini uwsgi.ini

[uWSGI] getting INI configuration from uwsgi.ini

[root@Myjumpserver MyJumpserver]# ps -ef|grep uwsgi

root             : ?        :: uwsgi --ini uwsgi.ini

root         : ?        :: uwsgi --ini uwsgi.ini

root         : ?        :: uwsgi --ini uwsgi.ini

root         : ?        :: uwsgi --ini uwsgi.ini

root         : ?        :: uwsgi --ini uwsgi.ini

root          : pts/    :: grep uwsgi
没有加载静态文件,说明成功。因为uwsgi不能使用Django的路径加载
3)使用socket方式启动,并配合nginx检查
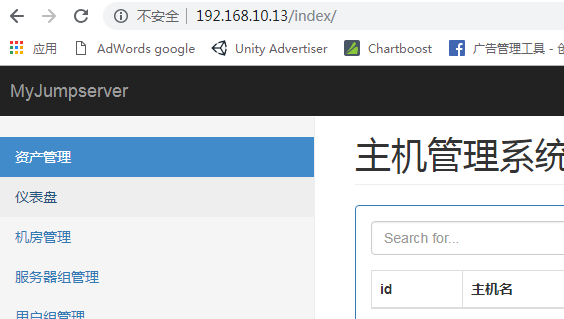
访问网页
四、重点总结
1)uwsgi.ini文件
[root@Myjumpserver MyJumpserver]# cat uwsgi.ini

[uwsgi]

# 使用nginx 连接时使用

socket=192.168.10.13:

# 直接做web服务器使用

#http=192.168.10.13:

# 项目目录

chdir=/opt/wwwroot/MyJumpserver

# 项目中wsgi.py 文件的目录,相对于项目目录

wsgi-file=MyJumpserver/wsgi.py

processes=

threads=

master=True

pidfile=uwsgi.pid

daemonize=uwsgi.log
2)nginx的配置文件,
[root@Myjumpserver vhost]# cat jumpserver.conf

server {

    listen       ;

    server_name  localhost;

        access_log  /data/log/nginx/myjumpserver_access.log  main;

        error_log  /data/log/nginx/myjumpserver_error.log;

    location / {

            uwsgi_pass   192.168.10.13:;

            include uwsgi_params;

    }

        # django项目文件, MyJumpserver,静态资源这里加载

        location /static {

            alias /opt/wwwroot/MyJumpserver/static/;

        }

    # redirect server error pages to the static page /50x.html

    error_page        /50x.html;

    location = /50x.html {

        root   html;

    }

}

# 访问localhost: ===>192.168.10.13:(uwsgi服务提供的)
3) django的后台静态资源加载
server {

    listen       ;

    server_name  localhost;

        access_log  /data/log/nginx/pvzstar_access.log  main;

        error_log  /data/log/nginx/pvzstar_error.log;

    location / {

            uwsgi_pass   192.168.2.155:;

            include uwsgi_params;

    }

        # django项目文件, MyJumpserver,静态资源这里加载

        location /static {

            alias /usr/local/python3/lib/python3./site-packages/django/contrib/admin/static/;

        }

    # redirect server error pages to the static page /50x.html

    error_page        /50x.html;

    location = /50x.html {

        root   html;

    }

}
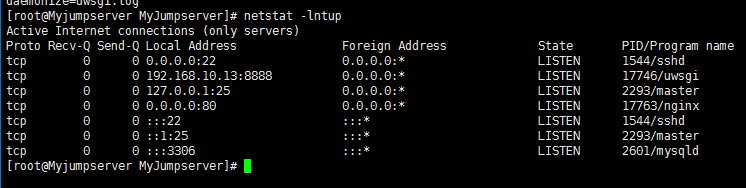
实质
返回nginx的80端口实质指向了uwsgi的socket连接对象
即 http:192.168.10.13 ==>socket 192.168.10.13:8888
Django+Uwsgi+Nginx项目部署文档的更多相关文章
- docker简单使用+django+uwsgi+nginx项目部署
使用docker 搭建 centos7 环境: 主机环境:windows 10专业版 一.安装docker Hub.docker.com官网下载 docker for windows 安装完成后,任务 ...
- kettle开源项目部署文档
kettle开源项目部署文档 1.kettle简介 kettle是一款国外开源的ETL(Extract Transform Load)工具,纯java编写,可以在Windows.Linux.Unix上 ...
- Diango + uwsgi + nginx 项目部署(可外网访问)
自己通过nginx uwsgi 部署django项目,查询了很多资料,遇到了很多问题,最终完成了部署,趁着心情愉悦,写个随笔,为曾像我一样苦寻解决方案的小伙伴们提供些思路. 安装Nginx: #安装n ...
- 阿里云 centos7 django + uWSGI+Nginx + python3 部署攻略
centos7+nginx+python3+django+uwsgi配置Django 项目部署 1.租的服务器(选择centos)的话,需要在阿里云后台控制台开放几个端口,克隆一下已开放的端口,t ...
- Django部署,Django+uWSGI+nginx+Centos部署
说明:系统是在windows上开发的,使用django1.11.4+python3.6.3开发,需要部署在centos6.4服务器上. 第一步:在Centos6.4上安装Python3.6.2 安装请 ...
- django+uwsgi+nginx的部署
1.下载与项目对应的django版本pip3 install django==1.11.16 -i https://pypi.douban.com/simple/2.用django内置的wsgi模块测 ...
- Django+uwsgi+Nginx安装部署
安装 安装Nginx Nginx是最流行的高性能HTTP服务器. 安装pcre: wget https://sourceforge.net/projects/pcre/files/pcre/8.37/ ...
- django+uwsgi+nginx+sqlite3部署+screen
note:可通过该命令查找文件未知 sudo find / -name filename 一:项目(github) ssh root@server ip # 连接你的服务器 git ...
- centos7 nginx配置httpsCenos(6.6/7.1)下从源码安装Python+Django+uwsgi+nginx环境部署(二)
1.yum安装nginx 下载对应当前系统版本的nginx包(package) # wget http://nginx.org/packages/centos/7/noarch/RPMS/ngin ...
随机推荐
- PAT1103
1103. Integer Factorization (30) 时间限制 1200 ms 内存限制 65536 kB 代码长度限制 16000 B 判题程序 Standard 作者 CHEN, Yu ...
- phpStudy安装教程
1.在phpStudy官网下载安装包(http://phpstudy.php.cn/)2.解压安装后,若提示没有“VC9.VC11.VC14运行库,注意是X86 32位”,则在phpStudy下载对应 ...
- AIO编程
AIO编程,在NIO基础之上引入了异步通道的概念,并提供了异步文件和异步套接字通道的实现,从而在真正意义上实现了异步非阻塞,之前我们学习的NIO只是非阻塞而并非异步.而AIO它不需要通过多路复用器对注 ...
- Linux 线程】线程同步《四》
1.信号量 (1)概念 信号量和互斥锁(mutex)的区别:互斥锁只允许一个线程进入临界区,而信号量允许多个线程同时进入临界区. 不多做解释,要使用信号量同步,需要包含头文件semaphore.h. ...
- python使用elasticsearch模块操作elasticsearch
1.创建索引 命令如下 from elasticsearch import Elasticsearch es = Elasticsearch([{"host":"10.8 ...
- xadmin系列之django的url分发的方式
一.先介绍一下我们自己的urls中是如何进行路由分发的 一.一级路由 urlpatterns = [ url(r'^upload/', views.upload,name="upload&q ...
- Validate常用校验
1.首先将jQuery.js和jquery.validate.js加入对应的页面中,如果要中文的提示语还要把messages_zh.js加入,以及对应的css文件. <link href=&qu ...
- ios 获取当前时间
1.第一种返回的时间是一个整个的字符串. NSDate *timeDate = [NSDate date]; NSDateFormatter *dateFormatter = [[NSDateForm ...
- centos实现两种秒级任务的简单方法
1.通过写shell脚本,死循环,守护进程运行 > vi /data/sec.sh #!/bin/bash while true do #写上自已的命令 echo "hello wor ...
- Oracle_SQL(3) DML增删改
sql语言按功能分为:数据定义语言DDL.数据操纵语言DML.数据查询语言DQL.数据控制语言DCL 一.数据操纵语言DML1.insert 新增 语法:insert into <表名> ...