oracle 19c dataguard silent install (oracle 19c dataguard 静默安装)
环境说明

1.关闭透明大页
RHEL 6:
# cat /sys/kernel/mm/redhat_transparent_hugepage/enabled
[oracle@rhel 6 ~]$ cat /sys/kernel/mm/redhat_transparent_hugepage/enabled
[always] madvise never
RHEL 7:
# cat /sys/kernel/mm/transparent_hugepage/enabled
[root@rhel 7 ~]# cat /sys/kernel/mm/transparent_hugepage/enabled
[always] madvise never
2.禁用透明大页
RHEL 6:
(1).编辑/etc/grub.conf 文件,在kernel 那一行后面追加transparent_hugepage=never
例如:
default=0
timeout=5
splashimage=(hd0,0)/grub/splash.xpm.gz
hiddenmenu
title Red Hat Enterprise Linux 6 (2.6.32-642.el6.x86_64)
root (hd0,0)
kernel /vmlinuz-2.6.32-642.el6.x86_64 ro root=/dev/mapper/rootvg-lvroot rd_NO_LUKS KEYBOARDTYPE=pc KEYTABLE=us LANG=en_US.UTF-8 rd_LVM_LV=rootvg/lvswap rd_NO_MD SYSFONT=latarcyrheb-sun16 crashkernel=auto rd_LVM_LV=rootvg/lvroot rd_NO_DM rhgb quiet transparent_hugepage=never
initrd /initramfs-2.6.32-642.el6.x86_64.img
(2).重启系统生效。
RHEL 7:
(1).编辑/etc/sysconfig/grub 文件,在 GRUB_CMDLINE_LINUX 那一行后面追加 transparent_hugepage=never

例如:
GRUB_TIMEOUT=5
GRUB_DISTRIBUTOR="$(sed 's, release .*$,,g' /etc/system-release)"
GRUB_DEFAULT=saved
GRUB_DISABLE_SUBMENU=true
GRUB_TERMINAL_OUTPUT="console"
GRUB_CMDLINE_LINUX="crashkernel=auto rd.lvm.lv=rootvg/root rd.lvm.lv=rootvg/swap rhgb quiet transparent_hugepage=never"
GRUB_DISABLE_RECOVERY="true"
(2).再使用 grub2-mkconfig 生成grub.cfg配置文件。
# grub2-mkconfig -o /boot/grub2/grub.cfg(3).重启系统使配置生效。
grep Huge /proc/meminfo
2.HugePages 启用大页(oracle安装完成启动好后设置)
查看是否启用
$cat /proc/sys/vm/nr_hugepages

$ grep -i HugePages_Total /proc/meminfo

HugePages_Total:     0
HugePages_Total为0,说明hugepage没有使用。 nr_hugepages为0,意味着没有设置。
计算合适的大页数量:
hugepages_settings.sh
#!/bin/bash

#

# hugepages_settings.sh

#

# Linux bash script to compute values for the

# recommended HugePages/HugeTLB configuration

# on Oracle Linux

#

# Note: This script does calculation for all shared memory

# segments available when the script is run, no matter it

# is an Oracle RDBMS shared memory segment or not.

#

# This script is provided by Doc ID 401749.1 from My Oracle Support

# http://support.oracle.com

# Welcome text

echo "

This script is provided by Doc ID 401749.1 from My Oracle Support

(http://support.oracle.com) where it is intended to compute values for

the recommended HugePages/HugeTLB configuration for the current shared

memory segments on Oracle Linux. Before proceeding with the execution please note following:

 * For ASM instance, it needs to configure ASMM instead of AMM.

 * The 'pga_aggregate_target' is outside the SGA and

   you should accommodate this while calculating the overall size.

 * In case you changes the DB SGA size,

   as the new SGA will not fit in the previous HugePages configuration,

   it had better disable the whole HugePages,

   start the DB with new SGA size and run the script again.

And make sure that:

 * Oracle Database instance(s) are up and running

 * Oracle Database 11g Automatic Memory Management (AMM) is not setup

   (See Doc ID 749851.1)

 * The shared memory segments can be listed by command:

     # ipcs -m

Press Enter to proceed..."

read

# Check for the kernel version

KERN=`uname -r | awk -F. '{ printf("%d.%d\n",$1,$2); }'`

# Find out the HugePage size

HPG_SZ=`grep Hugepagesize /proc/meminfo | awk '{print $2}'`

if [ -z "$HPG_SZ" ];then

    echo "The hugepages may not be supported in the system where the script is being executed."

    exit 1

fi

# Initialize the counter

NUM_PG=0

# Cumulative number of pages required to handle the running shared memory segments

for SEG_BYTES in `ipcs -m | cut -c44-300 | awk '{print $1}' | grep "[0-9][0-9]*"`

do

    MIN_PG=`echo "$SEG_BYTES/($HPG_SZ*1024)" | bc -q`

    if [ $MIN_PG -gt 0 ]; then

        NUM_PG=`echo "$NUM_PG+$MIN_PG+1" | bc -q`

    fi

done

RES_BYTES=`echo "$NUM_PG * $HPG_SZ * 1024" | bc -q`

# An SGA less than 100MB does not make sense

# Bail out if that is the case

if [ $RES_BYTES -lt 100000000 ]; then

    echo "***********"

    echo "** ERROR **"

    echo "***********"

    echo "Sorry! There are not enough total of shared memory segments allocated for

HugePages configuration. HugePages can only be used for shared memory segments

that you can list by command:

    # ipcs -m

of a size that can match an Oracle Database SGA. Please make sure that:

 * Oracle Database instance is up and running

 * Oracle Database 11g Automatic Memory Management (AMM) is not configured"

    exit 1

fi

# Finish with results

case $KERN in

    '2.4') HUGETLB_POOL=`echo "$NUM_PG*$HPG_SZ/1024" | bc -q`;

           echo "Recommended setting: vm.hugetlb_pool = $HUGETLB_POOL" ;;

    '2.6') echo "Recommended setting: vm.nr_hugepages = $NUM_PG" ;;

    '3.8') echo "Recommended setting: vm.nr_hugepages = $NUM_PG" ;;

    '3.10') echo "Recommended setting: vm.nr_hugepages = $NUM_PG" ;;

    '4.1') echo "Recommended setting: vm.nr_hugepages = $NUM_PG" ;;

    '4.14') echo "Recommended setting: vm.nr_hugepages = $NUM_PG" ;;

    *) echo "Kernel version $KERN is not supported by this script (yet). Exiting." ;;

esac
示例:
For 2.4 kernel systems:

$ ./hugepages_settings.sh

...

Recommended setting: vm.hugetlb_pool = 764

For 2.6 and later kernel systems:

$ ./hugepages_settings.sh

...

Recommended setting: vm.nr_hugepages = 67
修改/etc/sysctl.conf
echo "vm.nr_hugepages = 4098" >> /etc/sysctl.conf
- 重启数据库
检查大页使用情况
grep -i huge /proc/meminfo
一.安装软件初始化环境脚本(yun已经配置好了)
cat 19cinstall.sh
#!/bin/bash
##需要7.0+ 版本的Linux
#关闭selinux
sed -i 's\SELINUX=enforcing\SELINUX=disabled\' /etc/selinux/config
setenforce 0
#关闭防火墙
systemctl stop firewalld
systemctl disable firewalld
#禁用avahi-daemon
systemctl stop avahi-daemon
systemctl disable avahi-daemon
systemctl status avahi-daemon
#关闭 NetworkManager
systemctl stop NetworkManager
systemctl disable NetworkManager
#设置RemoveIPC=false
echo "RemoveIPC=no" >> /etc/systemd/logind.conf
#配置/etc/hosts文件 添加
cat >> /etc/hosts<<EOF
##XXXX HOSTNAME
EOF
#增大共享内存
#mount -t tmpfs shmfs -o size=7g /dev/shm
#echo 'shmfs /dev/shm tmpfs size=24g' >> /etc/fstab
#添加组
groupadd -g 1200 oinstall
groupadd -g 1201 dba
groupadd -g 1202 oper
groupadd -g 1203 backupdba
groupadd -g 1204 dgdba
groupadd -g 1205 kmdba
#添加用户
useradd -m -d /home/oracle -u 1101 -g oinstall -G dba,oper,backupdba,dgdba,kmdba oracle
echo 'oracle' | passwd --stdin oracle
#创建安装目录
mkdir -p /u01/app/oracle/product/19c/dbhome_1
mkdir -p /u01/app/oracle/oradata/
mkdir -p /u01/app/oraInventory
#更改目录权限
chown -R oracle:oinstall /u01/app/oracle
chown -R oracle:oinstall /u01/app/oraInventory
chmod -R 775 /u01
#改变内核参数
cat >> /etc/sysctl.conf<<EOF
#Kernel for Oracle 19c
fs.aio-max-nr = 1048576
fs.file-max = 6815744
#kernel.shmall = 2097152
#kernel.shmmax = 4294967295
kernel.shmall = 16097152
kernel.shmmax = 128849018880
kernel.shmmni = 4096
kernel.sem = 250 32000 100 128
net.ipv4.ip_local_port_range = 9000 65500
net.core.rmem_default = 262144
net.core.rmem_max = 4194304
net.core.wmem_default = 262144
net.core.wmem_max = 1048576
EOF
#使内核参数立即生效
sysctl -p
#添加用户资源限制
cat >> /etc/security/limits.conf<<EOF
#limits for Oracle users
oracle soft nproc 2047
oracle hard nproc 16384
oracle soft nofile 1024
oracle hard nofile 65536
oracle soft stack 10240
oracle hard stack 32768
oracle hard memlock 3145728
oracle soft memlock 3145728
#编辑配置文件
cat >> /etc/profile<<EOF
#this is for oracle user
if [ \$USER = "oracle" ]; then
if [ \$SHELL = "/bin/ksh" ]; then
ulimit -p 16384
ulimit -n 65536
else
ulimit -u 16384 -n 65536
fi
umask 022
fi
EOF
#编辑登陆配置文件
cat >> /etc/pam.d/login<<EOF
#this is for oracle user
session required pam_limits.so
EOF
#为oracle用户添加环境变量 dg加一个 export DB_UNIQUE_NAME=ttfcdg
cat >> /home/oracle/.bash_profile<<EOF
export ORACLE_BASE=/u01/app/oracle
export ORACLE_SID=ttfc
export PDB_NAME=ttfcpdb
export ORACLE_HOME=/u01/app/oracle/product/19c/dbhome_1
export PATH=\$ORACLE_HOME/bin:\$PATH
export LD_LIBRARY_PATH=\$ORACLE_HOME/lib:\$LD_LIBRARY_PATH
EOF
source /home/oracle/.bash_profile
#关闭ntpd服务
/sbin/service ntpd stop
chkconfig ntpd off
mv /etc/ntp.conf /etc/ntp.conf.org
systemctl stop chronyd
systemctl disable chrnyd
#安装oracle所需要的包
yum clean all
yum install -y bc

yum install -y binutils

yum install -y compat-libcap1

yum install -y compat-libstdc++-33

#yum install -y dtrace-modules

#yum install -y dtrace-modules-headers

#yum install -y dtrace-modules-provider-headers

yum install -y dtrace-utils

yum install -y elfutils-libelf

yum install -y elfutils-libelf-devel

yum install -y fontconfig-devel

yum install -y glibc

yum install -y glibc-devel

yum install -y ksh

yum install -y libaio

yum install -y libaio-devel

yum install -y libdtrace-ctf-devel

yum install -y libXrender

yum install -y libXrender-devel

yum install -y libX11

yum install -y libXau

yum install -y libXi

yum install -y libXtst

yum install -y libgcc

yum install -y librdmacm-devel

yum install -y libstdc++

yum install -y libstdc++-devel

yum install -y libxcb

yum install -y make

yum install -y net-tools # Clusterware

yum install -y nfs-utils # ACFS

yum install -y python # ACFS

yum install -y python-configshell # ACFS

yum install -y python-rtslib # ACFS

yum install -y python-six # ACFS

yum install -y targetcli # ACFS

yum install -y smartmontools

yum install -y sysstat

# Added by me.

yum install -y unixODBC
二.静默安装19c软件
cd /u01/app/oracle/product/19c/dbhome_1/
chown -R oracle:oinstall *
oracle 用户执行一下:
/u01/app/oracle/product/19c/dbhome_1/runInstaller -ignorePrereq -waitforcompletion -silent \
-responseFile ${ORACLE_HOME}/install/response/db_install.rsp \
oracle.install.option=INSTALL_DB_SWONLY \
ORACLE_HOSTNAME=${ORACLE_HOSTNAME} \
UNIX_GROUP_NAME=oinstall \
INVENTORY_LOCATION=/u01/app/oraInventory \
SELECTED_LANGUAGES=en,en_GB \
ORACLE_HOME=${ORACLE_HOME} \
ORACLE_BASE=${ORACLE_BASE} \
oracle.install.db.InstallEdition=EE \
oracle.install.db.OSDBA_GROUP=dba \
oracle.install.db.OSBACKUPDBA_GROUP=dba \
oracle.install.db.OSDGDBA_GROUP=dba \
oracle.install.db.OSKMDBA_GROUP=dba \
oracle.install.db.OSRACDBA_GROUP=dba \
SECURITY_UPDATES_VIA_MYORACLESUPPORT=false \
DECLINE_SECURITY_UPDATES=true
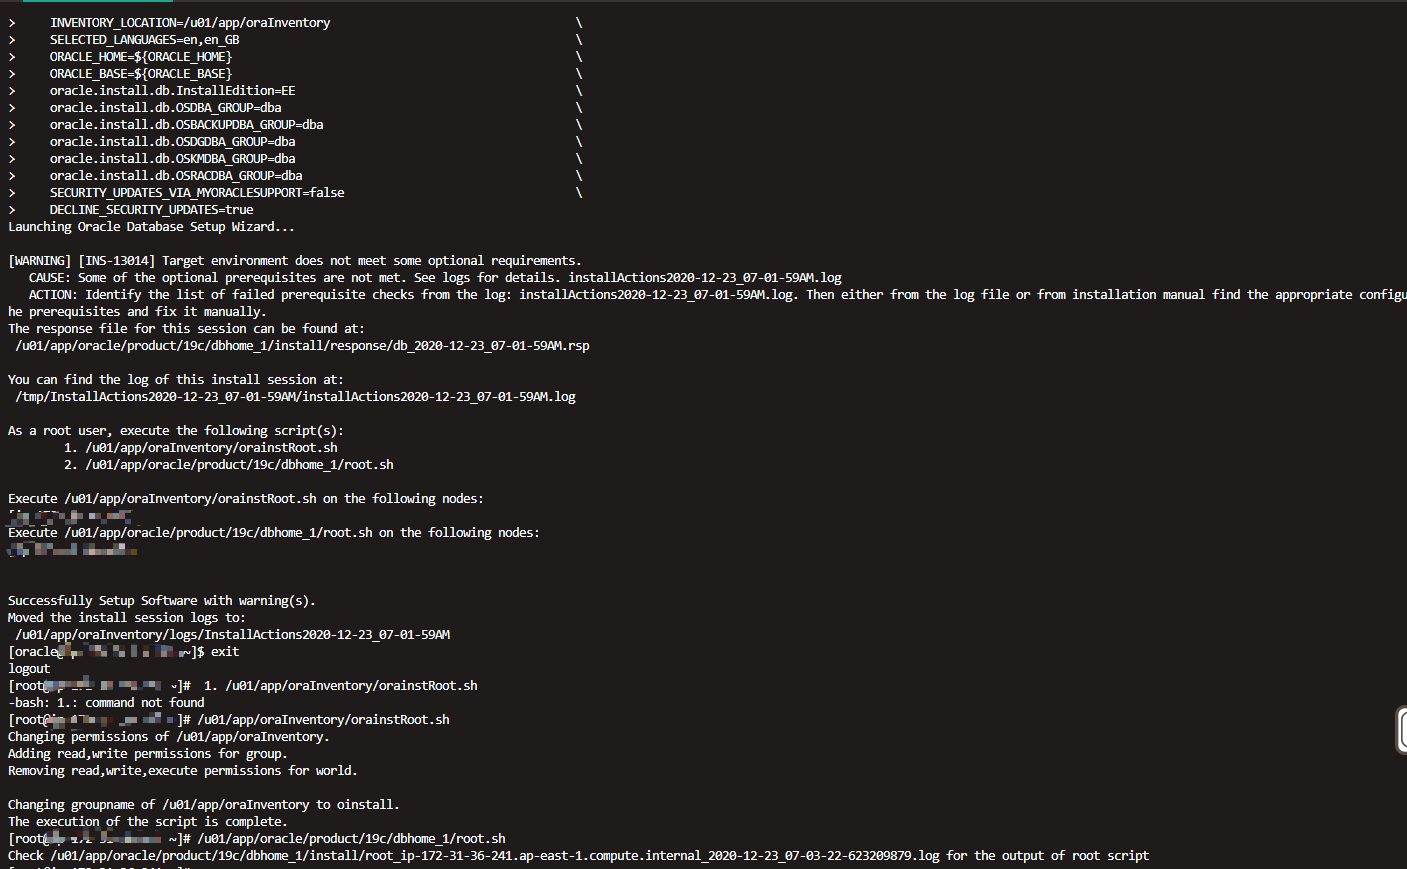
As a root user, execute the following script(s):
root用户执行以下脚本:


        /u01/app/oraInventory/orainstRoot.sh

        /u01/app/oracle/product/19.0.0/dbhome_1/root.sh
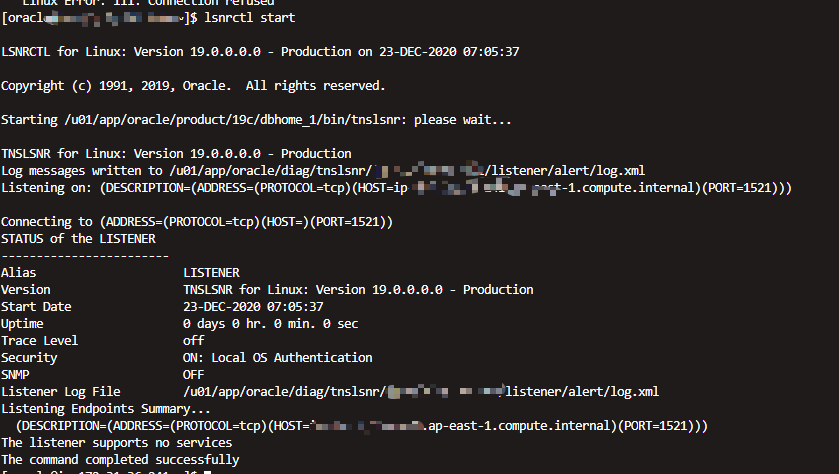
启动监听就可以啦!!
三.静默安装数据库
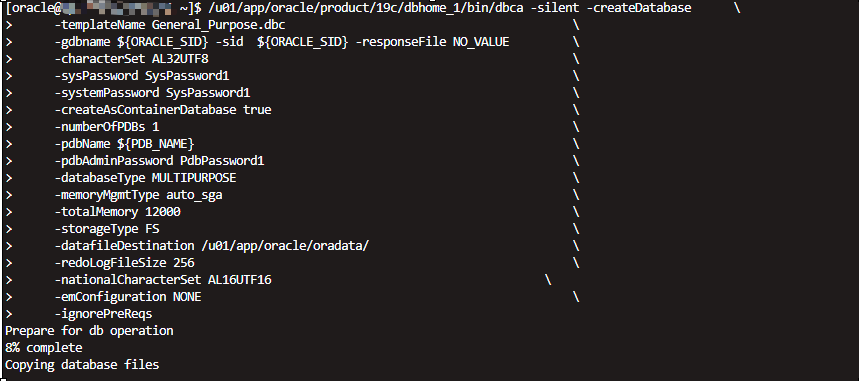
设置了1个PDB,sys,system 密码SysPassword1,内存12000M,redo日志256M
/u01/app/oracle/product/19c/dbhome_1/bin/dbca -silent -createDatabase \
-templateName General_Purpose.dbc \
-gdbname ${ORACLE_SID} -sid ${ORACLE_SID} -responseFile NO_VALUE \
-characterSet AL32UTF8 \
-sysPassword SysPassword1 \
-systemPassword SysPassword1 \
-createAsContainerDatabase true \
-numberOfPDBs 1 \
-pdbName ${PDB_NAME} \
-pdbAdminPassword PdbPassword1 \
-databaseType MULTIPURPOSE \
-memoryMgmtType auto_sga \
-totalMemory 12000 \
-storageType FS \
-datafileDestination /u01/app/oracle/oradata/ \
-redoLogFileSize 256 \
-nationalCharacterSet AL16UTF16 \
-emConfiguration NONE \
-ignorePreReqs
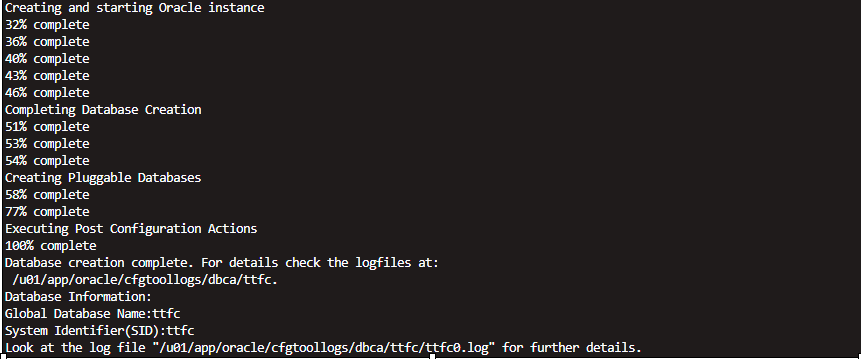

/u01/app/oracle/product/19c/dbhome_1/bin/dbca -silent -createDatabase \
-templateName General_Purpose.dbc \
-gdbname ${ORACLE_SID} -sid ${ORACLE_SID} -responseFile NO_VALUE \
-characterSet AL32UTF8 \
-sysPassword SysPassword1 \
-systemPassword SysPassword1 \
-createAsContainerDatabase false \
-databaseType MULTIPURPOSE \
-memoryMgmtType auto_sga \
-totalMemory 10000 \
-storageType FS \
-datafileDestination /u01/app/oracle/oradata/ \
-redoLogFileSize 256 \
-nationalCharacterSet AL16UTF16 \
-emConfiguration NONE \
-ignorePreReqs
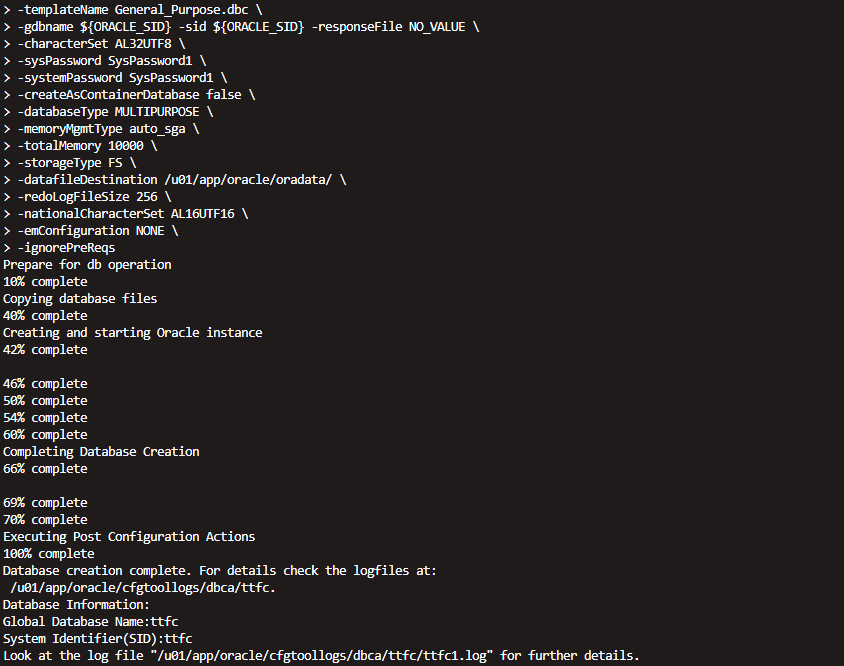
编辑 /etc/oratab 文件,将每个实例的重启标志设置为“ Y”。
vi /etc/oratab
ttfc:/u01/app/oracle/product/19c/dbhome_1/:Y

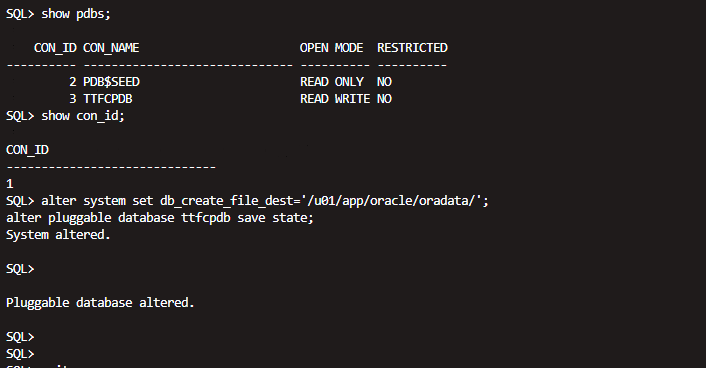
启用Oracle托管文件(OMF),并确保在实例启动时启动PDB。
sqlplus / as sysdba

alter system set db_create_file_dest='/u01/app/oracle/oradata/';
alter pluggable database ttfcpdb save state;
show pdbs;
show con_id;
四.DG的搭建和配置
在 12cR2 ( 12.2.0.1 )之前创建物理备库的方法有:
1 、Oracle 10g可以使用 RMAN 备份恢复方法;
2 、在 11g 时可以选择 duplicate 方式创建物理备库;通过这种方式直接在线从主库搭建物理备库。
到 12cR2 ( 12.2.0.1 )后, Oracle 又提供更简单的方式来创建物理备库,即使用 DBCA 方式直接建立物理备库。这个功能再次简化了创建备库的复杂度。
通过 DBCA 提供的参数 createDuplicateDB 可以很容易的搭建一个物理备库。
虽然通过 DBCA 能非常简单的创建一个物理备库,但是要使用这个功能,必须满足以下条件:
① 主库必须是单机环境,非 RAC 数据库;
② 主库必须是非 CDB 环境;
也就说通过 DBCA 搭建出来的备库也是一个单机非 CDB 的备库。
需要注意的是,在 12cR2 ( 12.2.0.1 )中,通过 DBCA 创建物理需要保证主库是单机非 CDB 的库,但是从 Oracle 18c ( 12.2.0.2 )开始,这些限制条件已经取消了,即主库是 CDB 或 rac 环境都可以通过 dbca 来创建物理备库。
4.1主库启动FORCE LOGGING
select name,open_mode from v$pdbs;
select force_logging from v$database;
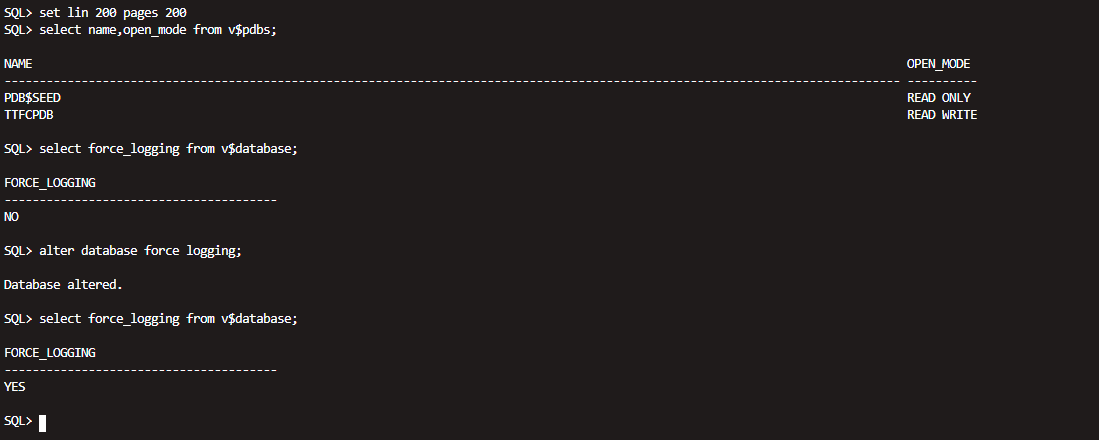
alter database force logging;select force_logging from v$database;4.2主库启动归档模式
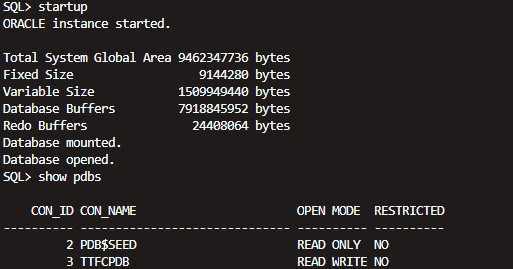
archive log list;

我的已经开启了归档模式了。
alter system set log_archive_dest_1='location=/u01/app/oracle/archivelog' scope=spfile ;
alter system set log_archive_format='arch_%t_%s_%r.arc' scope=spfile;设置好后重启。
4 .3 在主库添加 standby redo logfile
在Oracle 19c的多租户架构里,online redo log 和控制文件是保存在CDB中的,PDB中只有运行需要的数据文件,所以我们这里加standby redo log,也是在CDB中加。
alter database add standby logfile thread 1 group 11 '/u01/app/oracle/oradata/TTFC/standby01.log' size 256M;
alter database add standby logfile thread 1 group 12 '/u01/app/oracle/oradata/TTFC/standby02.log' size 256M;
alter database add standby logfile thread 1 group 13 '/u01/app/oracle/oradata/TTFC/standby03.log' size 256M;
alter database add standby logfile thread 1 group 14 '/u01/app/oracle/oradata/TTFC/standby04.log' size 256M;
alter database add standby logfile thread 1 group 15 '/u01/app/oracle/oradata/TTFC/standby05.log' size 256M;
alter database add standby logfile thread 1 group 16 '/u01/app/oracle/oradata/TTFC/standby06.log' size 256M;
alter database add standby logfile thread 1 group 17 '/u01/app/oracle/oradata/TTFC/standby07.log' size 256M;
alter database add standby logfile thread 1 group 18 '/u01/app/oracle/oradata/TTFC/standby08.log' size 256M;
standby logfile比logfile要多一组7+1=8组(logfile我的有7组,调整参数后加了三组)
4.4 在主库创建备库pfile 文件并修改pfile 内容
如果主库与备库数据文件位置不相同,则需要使用db_file_name_convert来转换,如果主库与备库在线日志文件位置不相同,则需要使用log_file_name_convert来转换。
LOG_ARCHIVE_DEST_1,LOG_ARCHIVE_DEST_2可以不用重启生效,但是db_file_name_convert,log_file_name_convert必须要重启生效。
alter system set LOG_ARCHIVE_DEST_1='LOCATION=/u01/app/oracle/archivelog VALID_FOR=(ALL_LOGFILES,ALL_ROLES) DB_UNIQUE_NAME=ttfc' ;
alter system set LOG_ARCHIVE_DEST_2='service=ttfcdg SYNC VALID_FOR=(online_logfiles,primary_role) DB_UNIQUE_NAME=ttfcdg' scope=both;
alter system set log_archive_config='dg_config=(ttfc,ttfcdg)';
alter system set db_file_name_convert='/u01/app/oracle/oradata/TTFCDG','/u01/app/oracle/oradata/TTFC' scope=spfile;
alter system set log_file_name_convert='/u01/app/oracle/oradata/TTFCDG','/u01/app/oracle/oradata/TTFC' scope=spfile;
alter system set standby_file_management=auto scope=spfile;
alter system set fal_server='ttfcdg' sid='*';
alter system set log_archive_dest_state_1 = ENABLE;
alter system set log_archive_dest_state_2 = ENABLE;
alter system set local_listener='(DESCRIPTION=(ADDRESS=(PROTOCOL=tcp)(HOST=XXX)(PORT=1521)))','(DESCRIPTION=(ADDRESS=(PROTOCOL=tcp)(HOST=XXX)(PORT=1521)))';
4.5 修改备库pfile 文件
后主库数据库进行重启,并且配置
shutdown immediate;
startup;
create pfile='/home/oracle/standby.ora' from spfile;
vi /home/oracle/standby.ora
备库修改后参数如下:
*.audit_file_dest='/u01/app/oracle/admin/ttfcdg/adump'
*.audit_trail='NONE'
*.compatible='19.0.0'
*.control_files='/u01/app/oracle/oradata/TTFCDG/control01.ctl','/u01/app/oracle/oradata/TTFCDG/control02.ctl'#Restore Controlfile
*.db_block_size=8192
*.db_create_file_dest='/u01/app/oracle/oradata/'
*.db_file_name_convert='/u01/app/oracle/oradata/TTFC','/u01/app/oracle/oradata/TTFCDG'
*.db_files=2000
*.db_name='ttfc'
*.db_recovery_file_dest_size=53687091200
*.db_recovery_file_dest='/u01/app/oracle/flashback'
*.db_unique_name='ttfcdg'
*.diagnostic_dest='/u01/app/oracle'
*.dispatchers='(PROTOCOL=TCP) (SERVICE=ttfcXDB)'
*.enable_pluggable_database=true
*.fal_client='ttfcdg'
*.fal_server='ttfc'
*.fast_start_mttr_target=300
*.local_listener='(DESCRIPTION=(ADDRESS=(PROTOCOL=tcp)(HOST=XXX)(PORT=1521)))','(DESCRIPTION=(ADDRESS=(PROTOCOL=tcp)(HOST=XXX)(PORT=1521)))'
*.log_archive_config='dg_config=(ttfcdg,ttfc)'
*.log_archive_dest_1='LOCATION=/u01/app/oracle/archivelog VALID_FOR=(ALL_LOGFILES,ALL_ROLES) DB_UNIQUE_NAME=ttfcdg'
*.log_archive_dest_2='service=ttfc ASYNC VALID_FOR=(online_logfiles,primary_role) DB_UNIQUE_NAME=ttfc'
*.log_archive_format='arch_%t_%s_%r.arc'
*.log_archive_max_processes=10
*.log_file_name_convert='/u01/app/oracle/oradata/TTFC','/u01/app/oracle/oradata/TTFCDG'
*.nls_date_format='yyyy-mm-dd hh24:mi:ss'
*.nls_language='AMERICAN'
*.nls_territory='AMERICA'
*.open_cursors=3000
*.pga_aggregate_target=3000m
*.processes=1000
*.remote_login_passwordfile='EXCLUSIVE'
*.sga_target=9000m
*.standby_file_management='AUTO'
*.undo_tablespace='UNDOTBS1'
同时建目录如下:
mkdir -p /u01/app/oracle/admin/ttfcdg/adump
mkdir -p /u01/app/oracle/oradata/TTFCDG
4.6 配置主备tns和监听
/u01/app/oracle/product/19c/dbhome_1/network/admin
主库监听
vi listener.ora
SID_LIST_LISTENER =
(SID_LIST =
(SID_DESC =
(GLOBAL_DBNAME = ttfc)
(ORACLE_HOME = /u01/app/oracle/product/19c/dbhome_1)
(SID_NAME = ttfc)
)
)
LISTENER =
(DESCRIPTION =
(ADDRESS = (PROTOCOL = TCP)(HOST = xx)(PORT = 1521))
)
ADR_BASE_LISTENER = /u01/app/oracle
备库监听
SID_LIST_LISTENER =
(SID_LIST =
(SID_DESC =
(GLOBAL_DBNAME = ttfcdg)
(ORACLE_HOME = /u01/app/oracle/product/19c/dbhome_1)
(SID_NAME = ttfc)
)
)
LISTENER =
(DESCRIPTION =
(ADDRESS = (PROTOCOL = TCP)(HOST = xxx)(PORT = 1521))
)
ADR_BASE_LISTENER = /u01/app/oracle
主备库tns如下:
vi tnsnames.ora
ttfc =
(DESCRIPTION =
(ADDRESS = (PROTOCOL = TCP)(HOST = xx)(PORT = 1521))
(CONNECT_DATA =
(SERVER = DEDICATED)
(SERVICE_NAME = ttfc)
)
)
ttfcdg =
(DESCRIPTION =
(ADDRESS = (PROTOCOL = TCP)(HOST = xxx)(PORT = 1521))
(CONNECT_DATA =
(SERVER = DEDICATED)
(SERVICE_NAME = ttfcdg)
)
)
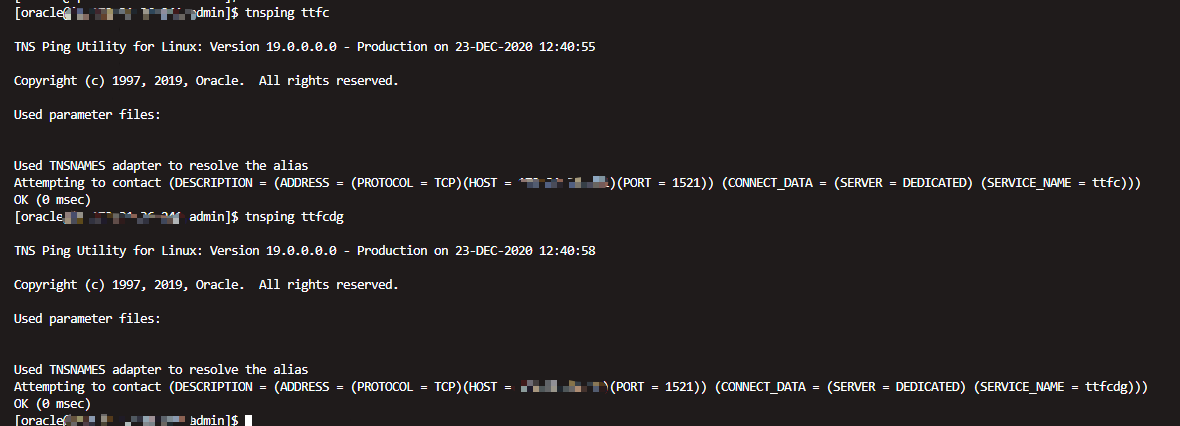
tnsping ttfc
tnsping ttfcdg
配置sqlnet.ora
NAMES.DIRECTORY_PATH= (TNSNAMES, EZCONNECT)
ADR_BASE = /u01/app/oracle
SQLNET.ALLOWED_LOGON_VERSION_SERVER=10
SQLNET.ALLOWED_LOGON_VERSION_CLIENT=10
将主库的口令文件copy到备库
scp /u01/app/oracle/product/19c/dbhome_1/dbs/orapwttfc oracle@stanby_IP:/u01/app/oracle/product/19c/dbhome_1/dbs
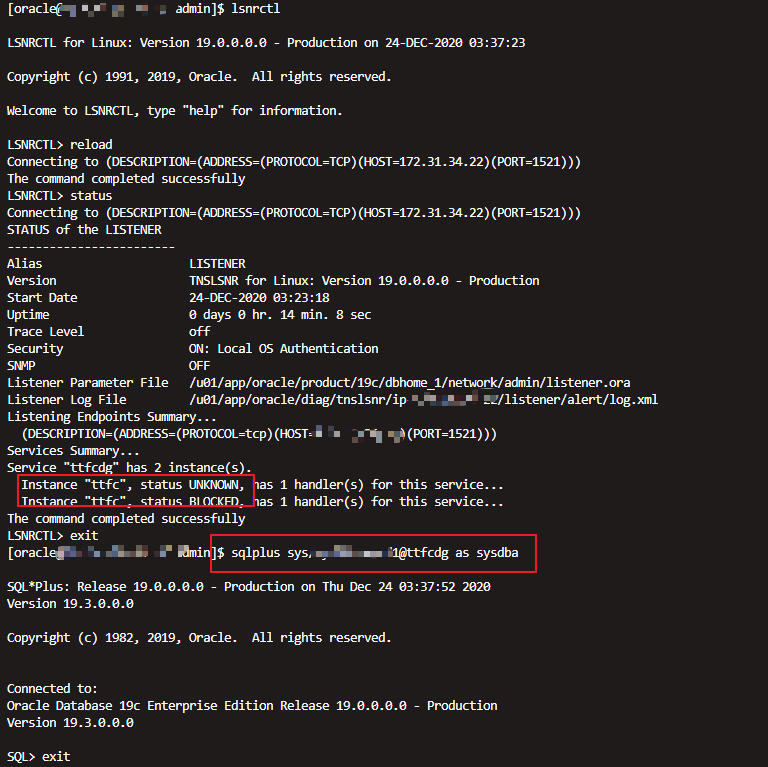
sqlplus sys/xx@ttfc as sysdba
sqlplus sys/xx@ttfcdg as sysdba
测试连接没有问题。
4.6在备库创建必要的目录(根据自己配置的情况)
oracle用户执行:
mkdir -p /u01/app/oracle/oradata/TTFCDG
mkdir -p /u01/app/oracle/flashback/
mkdir -p /u01/app/oracle/admin/ttfcdg/adump
mkdir -p /u01/app/oracle/expdp_dir
4.7 开始进行Active duplicate
将备库启动到nomount 状态,主库
执行:
rman target sys/xx@ttfc auxiliary sys/xx@ttfcdg
duplicate target database for standby from active database nofilenamecheck dorecover;

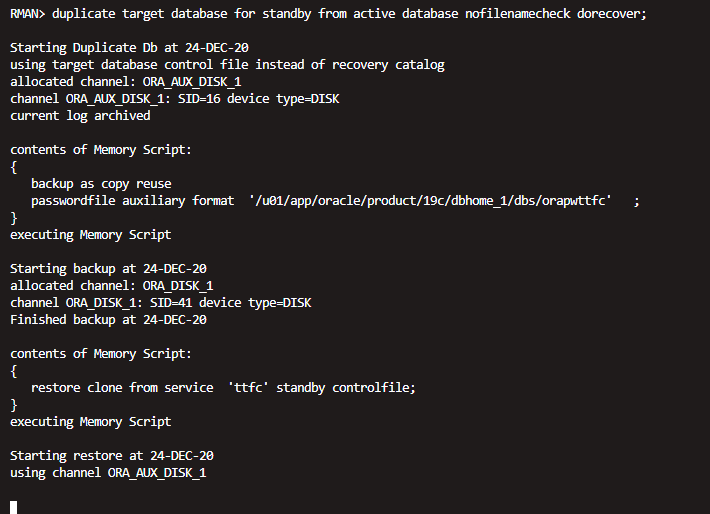
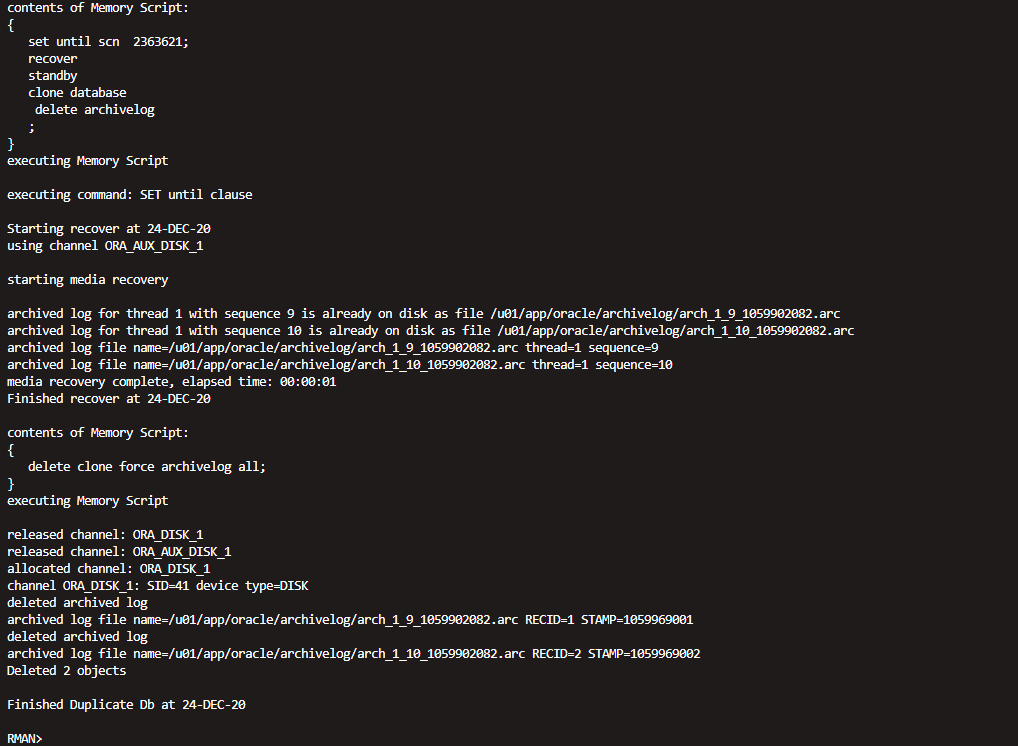
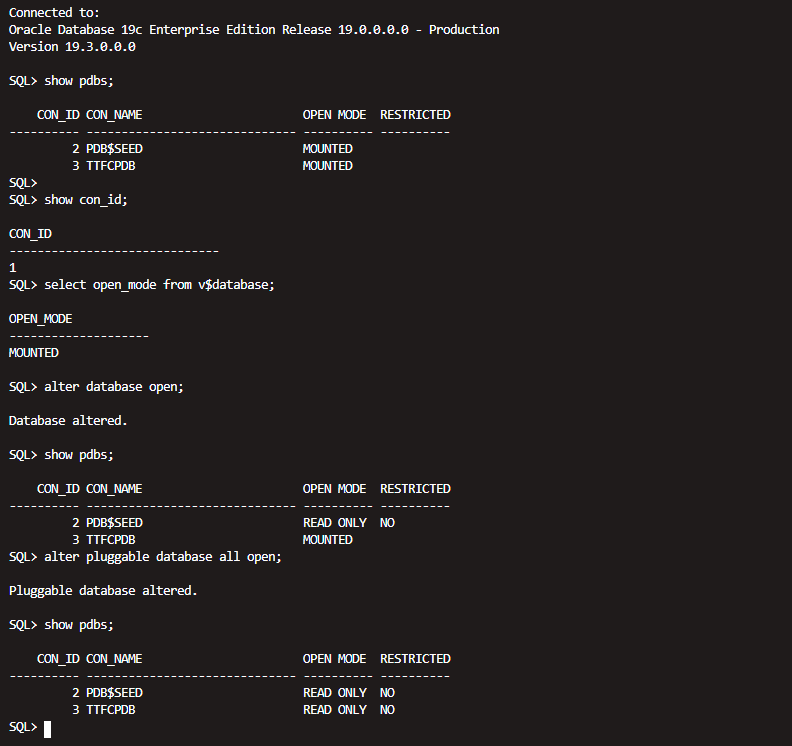
duplicate 完成之后,备库是mount的。

show pdbs;
show con_id;
select open_mode from v$database;
alter database open;
show pdbs;
alter pluggable database all open;
show pdbs;
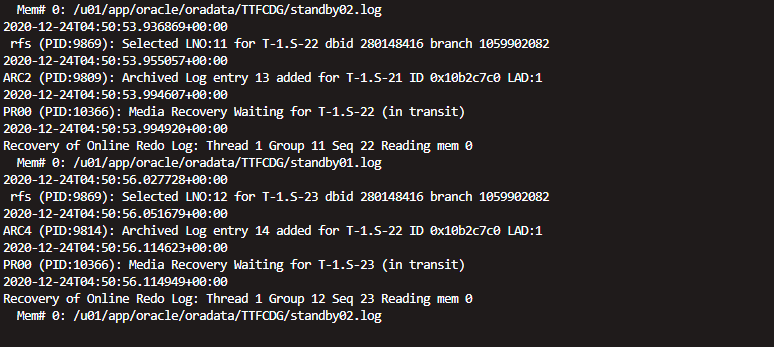
alter database recover managed standby database disconnect using current logfile;
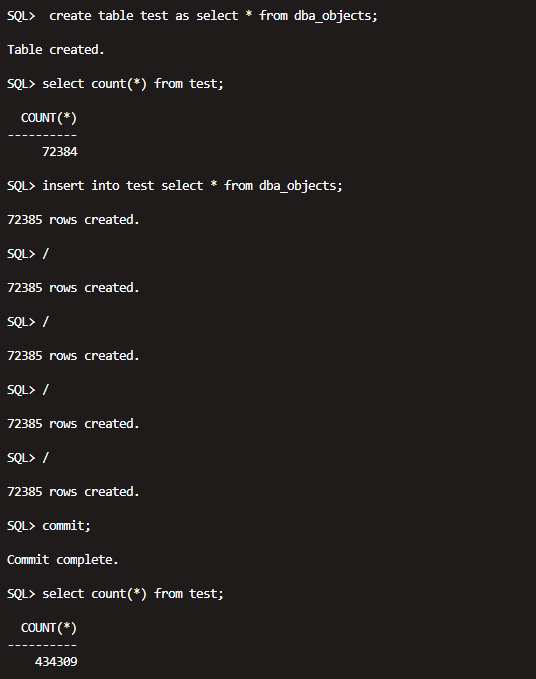
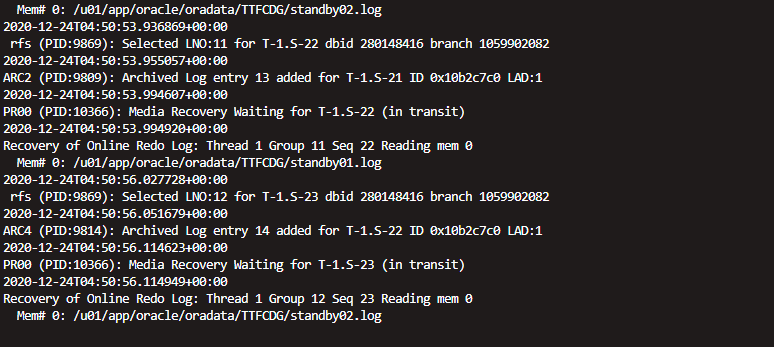
4.8 开始进行验证(自行验证)
大多数我都是写好failover的脚本(并做failover测试,闪回备库),个人不做switchover,因为真正发生故障直接是failover,故障的那一台服务器弄好了在重新搭建备库就好;
主库:
备库:

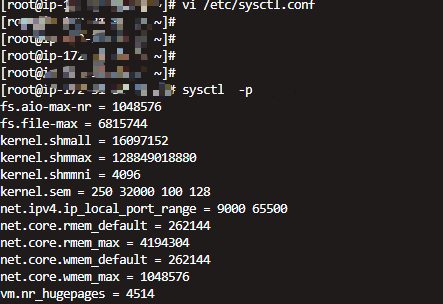
五.主备HugePages 启用大页
vi /etc/sysctl.conf
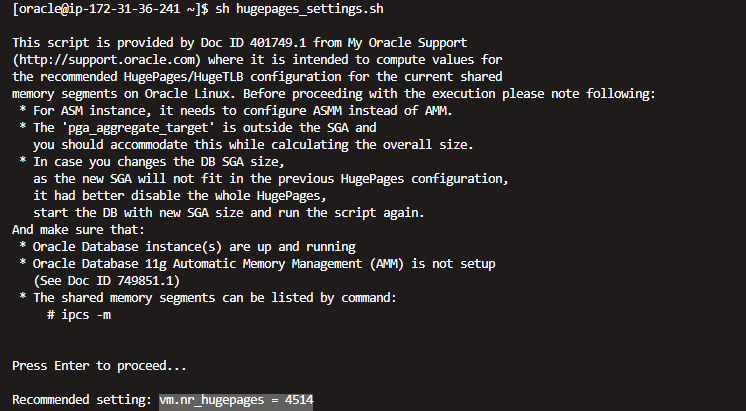
vm.nr_hugepages = 4514
sysctl -p
cat /proc/sys/vm/nr_hugepages

grep -i HugePages_Total /proc/meminfo

oracle 19c dataguard silent install (oracle 19c dataguard 静默安装)的更多相关文章
- silent install oracle 11.2.0.1 x86_64 for linux
su - root#groupadd oinstall#useradd -g oinstall oracle#passwd oracle#mkdir -p /u01/app/oracle#chown ...
- Oracle 19C的下载和安装部署(图形安装和静默安装)
Oracle 19C的下载和安装部署(图形安装和静默安装) https://docs.oracle.com/en/database/oracle/oracle-database/19/ladbi/ ...
- Oracle 12c(12.1.0.5) oem agent silent install(静默安装agent)
注释: 文章自oracle support 文档 ID 1360083.1,静默安装agent采用的是把OMS服务端(即oem server端)的agent用压缩包download,远程传到agent ...
- Install Oracle 11G Release 2 (11.2) on Oracle Linux 7 (OEL7)
Install Oracle 11G Release 2 (11.2) on Oracle Linux 7 (OEL7) This article presents how to install Or ...
- Oracle 11g静默安装简明版
环境:RHEL 6.5 + Oracle 11.2.0.4 1. 初步处理应答文件 2. 静默安装软件 3. 静默安装监听 4. 静默dbca建库 说明: 本文默认安装软件前的步骤已经设置完毕 如果没 ...
- [转]Oracle 11g 基于CentOS7静默安装教程(无图形界面,远程安装) --有部份地方有问题
Oracle 11g 基于CentOS7静默安装教程(无图形界面,远程安装) [转载]原文地址:http://canonind.blog.51cto.com/8239025/1883066 一.安装前 ...
- Linux平台 Oracle 10gR2(10.2.0.5)RAC安装 Part3:db安装和升级
Linux平台 Oracle 10gR2(10.2.0.5)RAC安装 Part3:db安装和升级 环境:OEL 5.7 + Oracle 10.2.0.5 RAC 5.安装Database软件 5. ...
- OL8.0静默安装Oracle 19C
首先在edelivery中下载Oracle Linux 8.0 然后就默认安装系统 环境准备工具目前不支持OL8,所以需要手动安装,首先设置内核参数,在/etc/sysctl.conf追加 [root ...
- oracle 19C 静默安装(单机版)
一.前期环境准备 1.硬件信息 (1)主机版本 [root@localhost ~]# cat /etc/redhat-release Red Hat Enterprise Linux Server ...
随机推荐
- 题解 洛谷 P3396 【哈希冲突】(根号分治)
根号分治 前言 本题是一道讲解根号分治思想的论文题(然鹅我并没有找到论文),正 如论文中所说,根号算法--不仅是分块,根号分治利用的思想和分块像 似却又不同,某一篇洛谷日报中说过,分块算法实质上是一种 ...
- JavaWeb知识梳理
目录 JavaWeb Web服务器 技术讲解 Web服务器 Tomcat Http Maven pom.xml Servlet HelloServlet Servlet原理 Mapping Servl ...
- 转:为什么说Python是最值得学习的编程语言
老猿作为一个老程序员,研究生毕业后就没有这么用心的学过一门新的语言,而今年4月开始学Python以来,疯狂的迷上了它,有时很想写一篇为什么要学Python的文章,可一直懒没动笔,今天看到博友" ...
- PyQt(Python+Qt)学习随笔:containers容器类部件QMdiArea多文档界面的QMdiSubWindow子窗口相关属性和操作方法
专栏:Python基础教程目录 专栏:使用PyQt开发图形界面Python应用 专栏:PyQt入门学习 老猿Python博文目录 1.增加子窗口 QMdiArea中的子窗口类型是QMdiSubWind ...
- PyQt(Python+Qt)学习随笔:树型部件QTreeWidget中判断项是否首列跨所有列展示的isFirstItemColumnSpanned方法
老猿Python博文目录 专栏:使用PyQt开发图形界面Python应用 老猿Python博客地址 在前面<PyQt(Python+Qt)学习随笔:QTreeWidgetItem项是否首列跨所有 ...
- RSA简单实践
RSA公钥文件解密密文的原理分析 前言 最近在学习 RSA 加解密过程中遇到一个这样的难题:假设已知 publickey 公钥文件和加密后的密文 flag ,如何对其密文进行解密,转换成明文~~ 分析 ...
- numpy 中的堆叠 stack
参考: https://blog.csdn.net/Riverhope/article/details/78922006 vstack,vertical 垂直堆叠 hstack, horizontal ...
- ripple Failed to load resource: the server responded with a status of 404 (Not Found)
在VS2015中使用Cordova + typescript开发中,遇到个问题. 在javascript console 中提示: Failed to load resource: the serve ...
- jQuery插件的2种类型
1.封装方法插件 封装方法插件在本质上来说,是一个对象级别的插件,这类插件首先通过jQuery选择器获取对象,并为对象添加方法,然后,将方法进行打包,封闭成一个插件,这种类型的插件编写简单,极易调用 ...
- JavaScript异步编程的四种方法
1.回调函数 f1(f2); 回调函数是异步编程的基本方法.其优点是易编写.易理解和易部署:缺点是不利于代码的阅读和维护,各个部分之间高度耦合 (Coupling),流程比较混乱,而且每个任务只能指定 ...


