[02] SpringBoot的项目属性配置
1、application.properties 简述
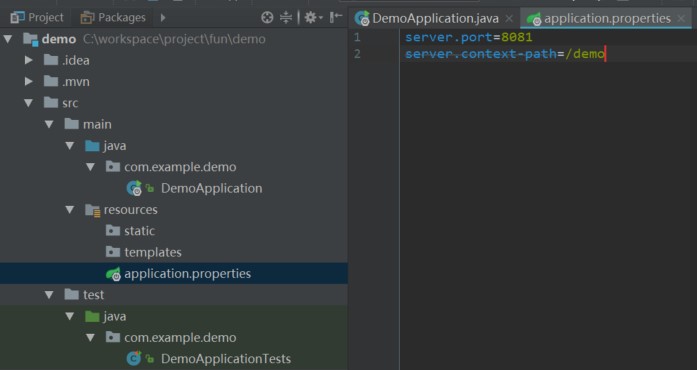

2、配置文件的加载顺序
- 当前目录下的 /config 目录
- 当前目录
- classpath下的 /config 目录
- classpath 根目录
- /demo/config/application.properties
- /demo/application.properties
- /demo/springboot-demo.jar/BOOT-INF/classes/config/application.properties
- /demo/springboot-demo.jar/BOOT-INF/classes/application.properties
3、自定义属性与加载
server:

  port: 8081

person:

  name: zhangsan

age: 18server:
port: 8081
person:
name: zhangsan
age: 18
@Component

public class Person {

    @Value("${person.name}")

    private String name;

    @Value("${person.age}")

    private int age;

    public String getName() {

        return name;

    }

    public void setName(String name) {

        this.name = name;

    }

    public int getAge() {

        return age;

    }

    public void setAge(int age) {

        this.age = age;

    }

    @Override

    public String toString() {

        return "Person{" +

                "name='" + name + '\'' +

                ", age=" + age +

                '}';

    }

}@Component
public class Person {
@Value("${person.name}")
private String name;
@Value("${person.age}")
private int age;
public String getName() {
return name;
}
public void setName(String name) {
this.name = name;
}
public int getAge() {
return age;
}
public void setAge(int age) {
this.age = age;
}
@Override
public String toString() {
return "Person{" +
"name='" + name + '\'' +
", age=" + age +
'}';
}
}
4、@ConfigurationProperties
@Component

@ConfigurationProperties(prefix = "person")

public class Person {

    private String name;

    private int age;

    public String getName() {

        return name;

    }

    public void setName(String name) {

        this.name = name;

    }

    public int getAge() {

        return age;

    }

    public void setAge(int age) {

        this.age = age;

    }

    @Override

    public String toString() {

        return "Person{" +

                "name='" + name + '\'' +

                ", age=" + age +

                '}';

    }

}@Component
@ConfigurationProperties(prefix = "person")
public class Person {
private String name;
private int age;
public String getName() {
return name;
}
public void setName(String name) {
this.name = name;
}
public int getAge() {
return age;
}
public void setAge(int age) {
this.age = age;
}
@Override
public String toString() {
return "Person{" +
"name='" + name + '\'' +
", age=" + age +
'}';
}
}
<dependency>

    <groupId>org.springframework.boot</groupId>

    <artifactId>spring-boot-configuration-processor</artifactId>

    <optional>true</optional>

</dependency><dependency>
<groupId>org.springframework.boot</groupId>
<artifactId>spring-boot-configuration-processor</artifactId>
<optional>true</optional>
</dependency>
5、参数间的引用
server:

  port: 8081

person:

  name: zhangsan

  age: 18

zhangsan:

  name: ${person.name}

age: ${person.age}server:
port: 8081
person:
name: zhangsan
age: 18
zhangsan:
name: ${person.name}
age: ${person.age}
6、使用随机值
# 随机字符串

person.value=${random.value}

person.name=${random.string}

# uuid

person.name=${random.uuid}

# 随机int

person.age=${random.int}

# 随机long

person.height=${random.long}

# 10以内的随机数

preson.age=${random.int(100)}

# 10-20的随机数

person.name=${random.int[10,20]}# 随机字符串
person.value=${random.value}
person.name=${random.string}
# uuid
person.name=${random.uuid}
# 随机int
person.age=${random.int}
# 随机long
person.height=${random.long}
# 10以内的随机数
preson.age=${random.int(100)}
# 10-20的随机数
person.name=${random.int[10,20]}
7、Environment
@RestController
@RequestMapping("/demo/")
public class DemoController {
@Autowired
private Environment environment;
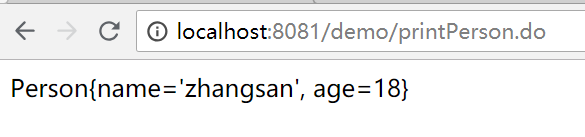
@RequestMapping("/printPerson.do")
public String printPerson() {
String personName = environment.getProperty("person.name");
return personName;
}
}@RestController
@RequestMapping("/demo/")
public class DemoController {
@Autowired
private Environment environment;
@RequestMapping("/printPerson.do")
public String printPerson() {
String personName = environment.getProperty("person.name");
return personName;
}
}
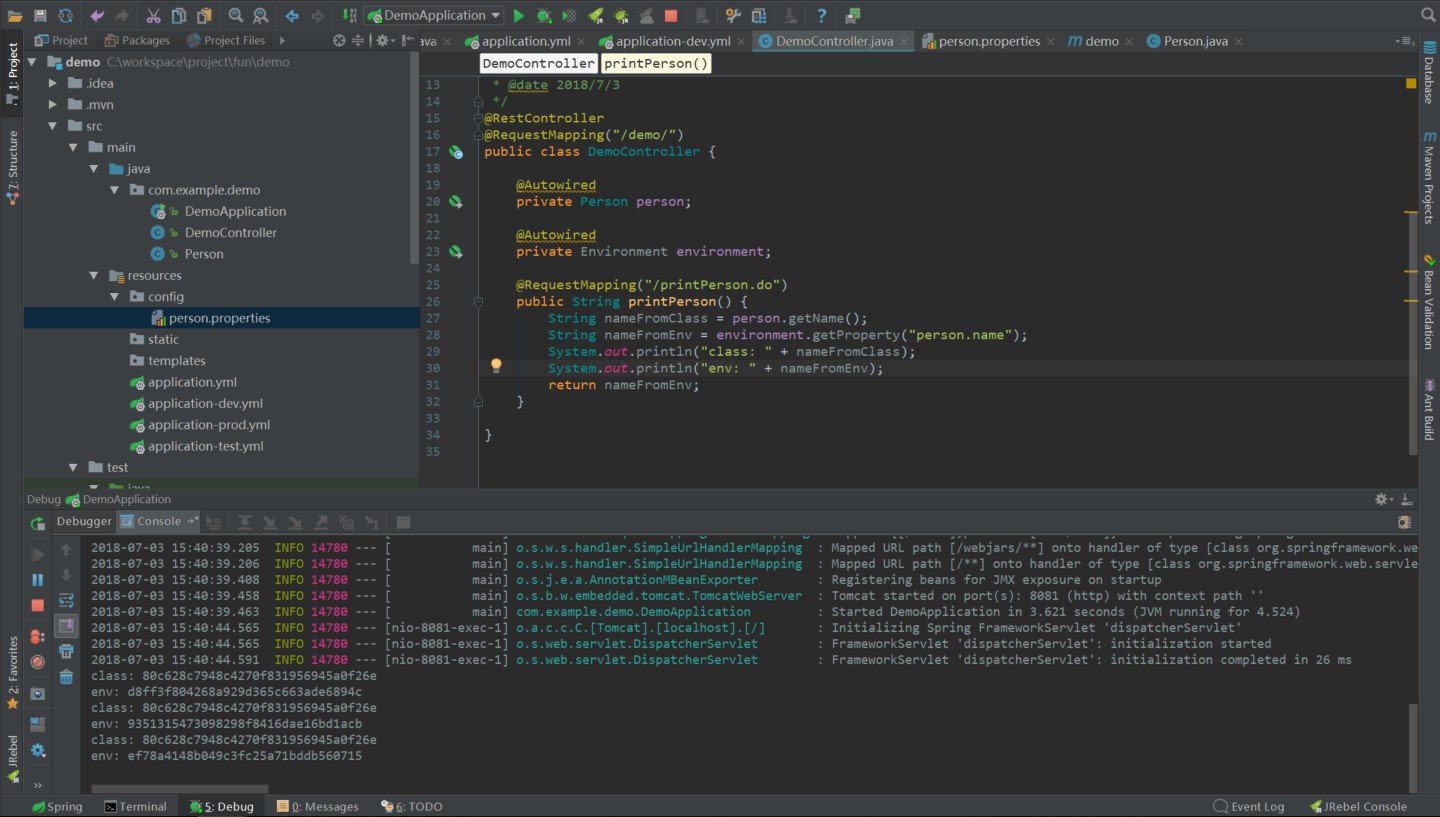
@RestController

@RequestMapping("/demo/")

public class DemoController {

    @Autowired

    private Person person;

    @Autowired

    private Environment environment;

    @RequestMapping("/printPerson.do")

    public String printPerson() {

        String nameFromClass = person.getName();

        String nameFromEnv = environment.getProperty("person.name");

        System.out.println("class: " + nameFromClass);

        System.out.println("env: " + nameFromEnv);

        return nameFromEnv;

    }

}@RestController
@RequestMapping("/demo/")
public class DemoController {
@Autowired
private Person person;
@Autowired
private Environment environment;
@RequestMapping("/printPerson.do")
public String printPerson() {
String nameFromClass = person.getName();
String nameFromEnv = environment.getProperty("person.name");
System.out.println("class: " + nameFromClass);
System.out.println("env: " + nameFromEnv);
return nameFromEnv;
}
}
class: 80c628c7948c4270f831956945a0f26e

env: d8ff3f804268a929d365c663ade6894c

class: 80c628c7948c4270f831956945a0f26e

env: 9351315473098298f8416dae16bd1acb

class: 80c628c7948c4270f831956945a0f26e

env: ef78a4148b049c3fc25a71bddb560715class: 80c628c7948c4270f831956945a0f26e
env: d8ff3f804268a929d365c663ade6894c
class: 80c628c7948c4270f831956945a0f26e
env: 9351315473098298f8416dae16bd1acb
class: 80c628c7948c4270f831956945a0f26e
env: ef78a4148b049c3fc25a71bddb560715
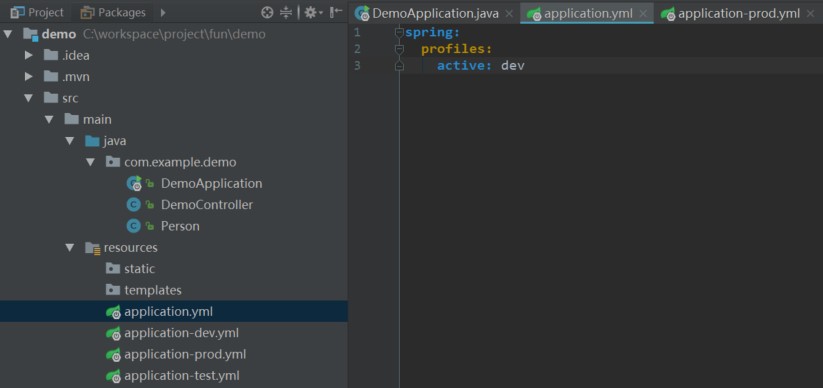
8、多环境配置 application-{profile}
- application-dev.yml
- application-test.yml
- application-prod.yml
java -jar xxx.jar --spring.profiles.active=prodjava -jar xxx.jar --spring.profiles.active=prod
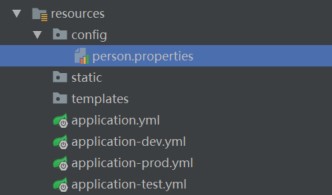
9、加载多个自定义配置文件
@Component

@Configuration

@PropertySource("classpath:config/person.properties")

@ConfigurationProperties(prefix = "person")

public class Person {

    private String name;

    private int age;

    public String getName() {

        return name;

    }

    public void setName(String name) {

        this.name = name;

    }

    public int getAge() {

        return age;

    }

    public void setAge(int age) {

        this.age = age;

    }

    @Override

    public String toString() {

        return "Person{" +

                "name='" + name + '\'' +

                ", age=" + age +

                '}';

    }

}@Component
@Configuration
@PropertySource("classpath:config/person.properties")
@ConfigurationProperties(prefix = "person")
public class Person {
private String name;
private int age;
public String getName() {
return name;
}
public void setName(String name) {
this.name = name;
}
public int getAge() {
return age;
}
public void setAge(int age) {
this.age = age;
}
@Override
public String toString() {
return "Person{" +
"name='" + name + '\'' +
", age=" + age +
'}';
}
}
10、打包jar时需要注意的自定义配置文件打包
<build>

    <!-- 打包资源文件 -->

    <resources>

        <resource>

            <directory>src/main/resources</directory>

            <includes>

                <include>**/*</include>

            </includes>

        </resource>

    </resources>

</build><build>
<!-- 打包资源文件 -->
<resources>
<resource>
<directory>src/main/resources</directory>
<includes>
<include>**/*</include>
</includes>
</resource>
</resources>
</build>
11、@Configuration 和 @Bean
- @Configuration 标注在类上,相当于spring的xml配置文件中的 <beans>,作用为配置spring容器(应用上下文)
- @Bean 标注在方法上(返回某个实例的方法),等价于spring的xml配置文件中的 <bean>,作用为注册bean对象
12、参考链接
[02] SpringBoot的项目属性配置的更多相关文章
- SpringBoot 入门:项目属性配置
开发一个SpringBoot 项目,首当其冲,必然是配置项目 一.项目属性配置 1. SpringBoot自带了Tomcat服务器,通过使用项目配置文件来修改项目的配置,如图配置了部署在80端口,目录 ...
- Spring Boot项目属性配置
接着上面的入门教程,我们来学习下Spring Boot的项目属性配置. 1.配置项目内置属性 属性配置主要是在application.properties文件里配置的(编写时有自动提示)这里我们将se ...
- VS项目属性配置实验过程
(原创,转载注明出处:http://www.cnblogs.com/binxindoudou/p/4017975.html ) 一.实验背景 cocos2d-x已经发展的相对完善了,从项目的创建.编译 ...
- VS IDE 中Visual C++ 中的项目属性配置
VS IDE 中Visual C++ 中的项目属性配置 一. Visual C++ 项目系统基于 MSBuild. 虽然可以直接在命令行上编辑 XML 项目文件和属性表,我们仍建议你使用 VS IDE ...
- springboot快速入门(二)——项目属性配置(日志详解)
一.概述 application.properties就是springboot的属性配置文件 在使用spring boot过程中,可以发现项目中只需要极少的配置就能完成相应的功能,这归功于spring ...
- SpringBoot项目属性配置-第二章
SpringBoot入门 1. 相信很多人选择Spring Boot主要是考虑到它既能兼顾Spring的强大功能,还能实现快速开发的便捷.我们在Spring Boot使用过程中,最直观的感受就是没有了 ...
- SpringBoot总结之属性配置
一.SpringBoot简介 SpringBoot是spring团队提供的全新框架,主要目的是抛弃传统Spring应用繁琐的配置,该框架使用了特定的方式来进行配置,从而使开发人员不再需要定义样板化的配 ...
- 转载:VS项目属性配置总结
本文来自:http://www.mamicode.com/info-detail-232474.html https://www.cnblogs.com/alinh/p/8066820.h ...
- VS项目属性配置总结
以下是针对VS2013下的VC++项目: Debug和Release说明: Debug 通常称为调试版本,它包含调试信息,并且不作任何优化,便于程序员调试程序.Release 称为发布版本,它往往是进 ...
随机推荐
- CSS中的sprites
CSS的sprites(雪碧图,精灵图) *三个名字都要记住 定义:就是将界面上需要的小的导航按钮图标,小图标整合成一张背景图片 然后用background-position来实现背 ...
- 【读书笔记】iOS-iOS的UI自动化测试
1,Instruments iOS自带的自动化测试工具. 2,TuneupJs 最早的iOS自动化测试工具 https://github.com/alexvollmer/tuneup_js 3,yn ...
- TurboLinux系统管理习题一
TurboLinux系统管理习题一 1. 使用vi编辑文本只读时,强制存盘并退出的命令是?(单选题)A :w! B :q! C :wq! D :e!答案 ...
- spring使用BeanPostProcesor实现AOP源码分析
源码 AbstractApplicationContext#public void refresh() throws BeansException, IllegalStateException { f ...
- TensorFlow实现梯度下降
# -*- coding: utf-8 -*- """ Created on Mon Oct 15 17:38:39 2018 @author: zhen "& ...
- python第一百零二天-----第十七周作业
由于内容众多 直接使用 git 链接 : https://github.com/uge3/hosts_masg 主机管理WEB页面 使用 SQLALchemy 主机管理(8列) ip 用户表: 用户名 ...
- MySQL复制ERROR 1794 (HY000): Slave is not configured or failed to initialize properly.
ERROR 1794 (HY000): Slave is not configured or failed to initialize properly. You must at least set ...
- 深入 kernel panic 流程【转】
一.前言 我们在项目开发过程中,很多时候会出现由于某种原因经常会导致手机系统死机重启的情况(重启分Android重启跟kernel重启,而我们这里只讨论kernel重启也就是 kernel panic ...
- Frameworks(不定时更新)
iOS8.4 Frameworks 更新时间:2015年8月17日 Accelerate iOS4.0引入了Accelerate框架,该框架的接口可用于执行数学.大数字以及DSP运算.和开发者个人编写 ...
- mysql中case的一个例子
最近遇到一个问题: year amount num 1991 1 1.1 1991 2 1.2 1991 3 1.3 1992 1 2.1 1992 2 2.2 1992 3 3.3 把上面表格的数据 ...