spring-data-redis2.0以上配置redis连接
1.所需的maven依赖
     <dependency>

          <groupId>org.springframework.data</groupId>

          <artifactId>spring-data-redis</artifactId>

          <version>2.0.0.RELEASE</version>

      </dependency>

      <dependency>

          <groupId>redis.clients</groupId>

          <artifactId>jedis</artifactId>

          <version>2.9.0</version>

      </dependency>

   <dependency>

       <groupId>org.springframework</groupId>

       <artifactId>spring-xxx</artifactId>

    </dependency>
此处需要注意的是spring-data-redis2.0以上版本所需的jedis版本为2.9.0 目前最新的版本也为2.9.0 否则会报ClassNotFoundException或者NoSuchMethodError等异常
spring-xxx即为spring其他依赖的包,网上很多 找到粘贴吧
此外如果想查看工程用的包所依赖的包的版本可以去http://mvnrepository.com/ 网上输入对应的包如spring-data-redis
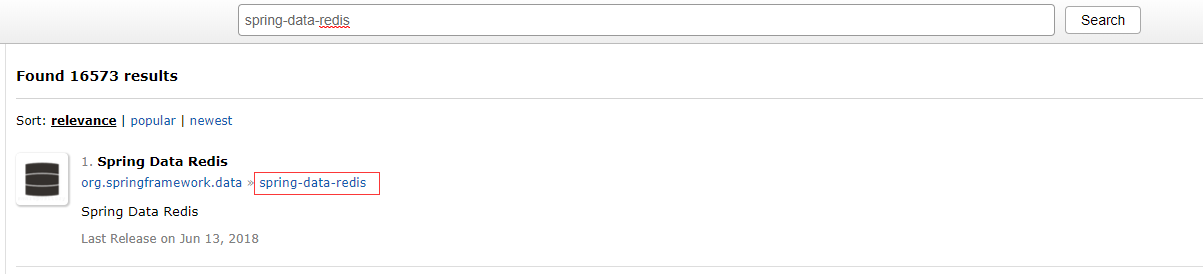
点击后会罗列出maven仓库里所包含的版本 点击当前使用的版本如案例中的2.0.0 往下翻则会展示出所选包依赖的包
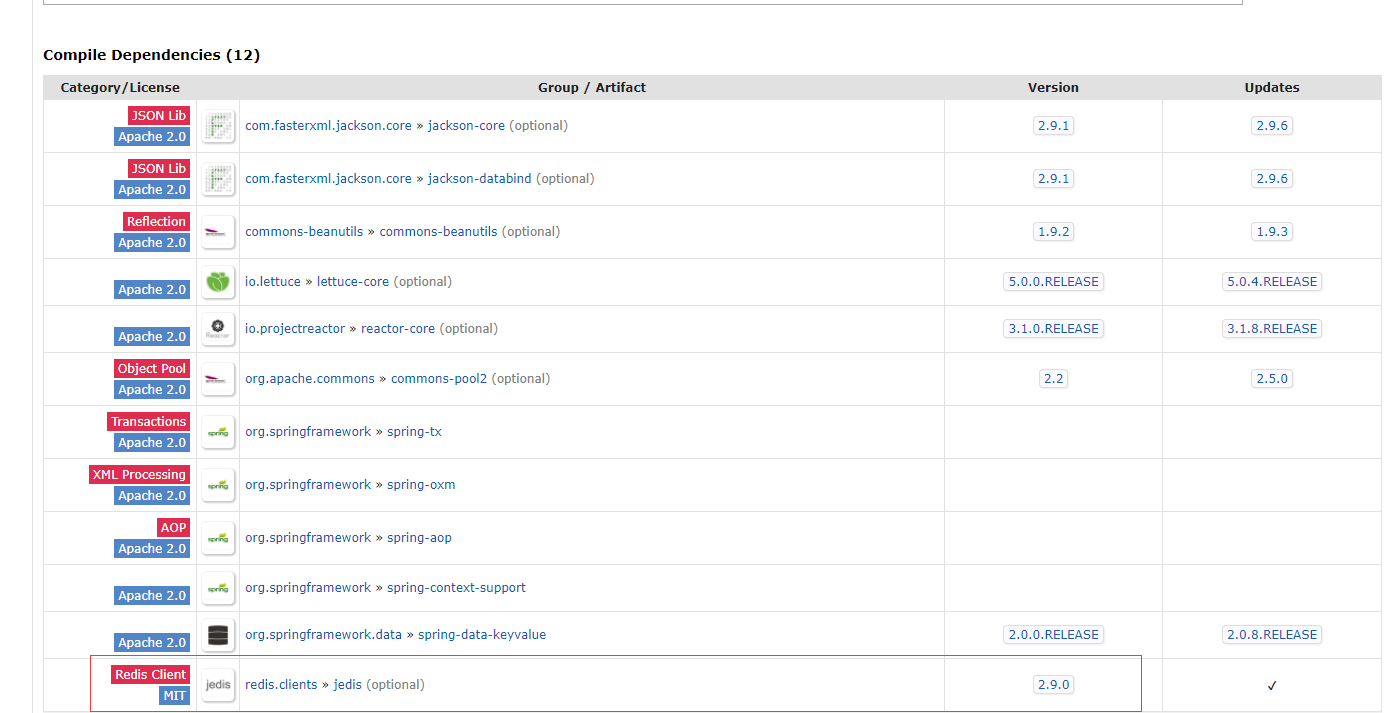
这儿就会指明依赖jedis的包且最低版本为2.9.0
2.配置redis.properties
redis.host = 172.25.12.123

redis.port = 6379

redis.auth = admin

redis.maxTotal = 100

redis.maxIdle = 20

redis.maxWaitMillis = 10000

redis.testOnBorrow = true

redis.testOnReturn = true

redis.dbIndex = 3
3.配置spring-redis.xml
<?xml version="1.0" encoding="UTF-8"?>

<beans xmlns="http://www.springframework.org/schema/beans"

       xmlns:xsi="http://www.w3.org/2001/XMLSchema-instance"

       xmlns:context="http://www.springframework.org/schema/context"

       xsi:schemaLocation="http://www.springframework.org/schema/beans

       http://www.springframework.org/schema/beans/spring-beans.xsd

       http://www.springframework.org/schema/context

       http://www.springframework.org/schema/context/spring-context.xsd

">

    <!--引入配置文件-->

    <context:property-placeholder location="redis.properties" ignore-unresolvable="true"></context:property-placeholder>

    <!--设置jedisPool链接池的配置-->

    <bean id="jedisPoolConfig" class="redis.clients.jedis.JedisPoolConfig">

        <property name="maxTotal" value="${redis.maxTotal}"/>

        <property name="maxIdle" value="${redis.maxIdle}"/>

        <property name="maxWaitMillis" value="${redis.maxWaitMillis}"/>

        <property name="testOnBorrow" value="${redis.testOnBorrow}"/>

        <property name="testOnReturn" value="${redis.testOnReturn}"/>

    </bean>

    <!--redis链接密码-->

    <bean id="redisPassword" class="org.springframework.data.redis.connection.RedisPassword">

        <constructor-arg name="thePassword" value="${redis.auth}"></constructor-arg>

    </bean>

    <!--spring-data-redis2.0以上的配置-->

    <bean id="redisStandaloneConfiguration" class="org.springframework.data.redis.connection.RedisStandaloneConfiguration">

        <property name="hostName" value="${redis.host}"/>

        <property name="port" value="${redis.port}"/>

        <property name="password" ref="redisPassword" />

        <property name="database" value="${redis.dbIndex}"/>

    </bean>

    <!--配置jedis链接工厂 spring-data-redis2.0中

        建议改为构造器传入一个RedisStandaloneConfiguration  单机

                            RedisSentinelConfiguration  主从复制

                            RedisClusterConfiguration  集群-->

    <bean id="jedisConnectionFactory" class="org.springframework.data.redis.connection.jedis.JedisConnectionFactory">

        <!--注销掉的部分为spring-data-redis2.0以下的版本配置的方式-->

      <!--  <property name="hostName" value="${redis.host}"/>

        <property name="port" value="${redis.port}"/>

        <property name="poolConfig" ref="jedisPoolConfig"/>

        <property name="password" value="${redis.auth}" />

        <property name="database" value="${redis.dbIndex}"/>-->

        <!--spring-data-redis2.0以上建议获取的方式-->

        <constructor-arg name="standaloneConfig" ref="redisStandaloneConfiguration"></constructor-arg>

    </bean>

    <!--手动设置 key  与 value的序列化方式-->

    <bean id="keySerializer" class="org.springframework.data.redis.serializer.StringRedisSerializer"/>

    <bean id="valueSerializer" class="org.springframework.data.redis.serializer.GenericJackson2JsonRedisSerializer"/>

    <!--配置jedis模板  -->

    <bean id = "redisTemplate" class="org.springframework.data.redis.core.RedisTemplate">

        <property name="connectionFactory" ref="jedisConnectionFactory" />

        <property name="keySerializer" ref="keySerializer" />

        <property name="valueSerializer" ref="valueSerializer" />

        <property name="hashKeySerializer" ref="keySerializer" />

        <property name="hashValueSerializer" ref="valueSerializer" />

    </bean>

    <!--也可以StringRedisTemplate  专注于String的操作  -->

    <bean id="stringRedisTemplate" class="org.springframework.data.redis.core.StringRedisTemplate">

        <!--<property name="connectionFactory" ref="jedisConnectionFactory"></property>-->

        <!--在StringRedisTemplate与redisTemplate不同,可以直接造构造器中传入ConnectionFactory-->

        <constructor-arg name="connectionFactory" ref="jedisConnectionFactory"></constructor-arg>

        <property name="keySerializer" ref="keySerializer" />

        <property name="valueSerializer" ref="valueSerializer" />

        <property name="hashKeySerializer" ref="keySerializer" />

        <property name="hashValueSerializer" ref="valueSerializer" />

    </bean>

</beans>
上面需要注意一点的是
在spring-data-redis2.0以上的版本中在配置密码的时候不能像老版本直接设置密码值,需要注入一个RedisPassword的bean 在RedisPassword的构造方法中设置密码
3.最后进行测试测试
package com.springactul.splx.nosql.redis;

import org.junit.Test;

import org.junit.runner.RunWith;

import org.springframework.beans.factory.annotation.Autowired;

import org.springframework.data.redis.core.RedisTemplate;

import org.springframework.data.redis.core.StringRedisTemplate;

import org.springframework.data.redis.core.ValueOperations;

import org.springframework.test.context.ContextConfiguration;

import org.springframework.test.context.junit4.SpringJUnit4ClassRunner;

/**

 * Created by zhoum on 2018-06-22.

 */

@RunWith(SpringJUnit4ClassRunner.class)

@ContextConfiguration(locations = {"classpath*:spring-*.xml"})

public class RedisTest {

    @Autowired

    private RedisTemplate redisTemplate;

    @Autowired

    private StringRedisTemplate stringRedisTemplate;

    @Test

    public void test1(){

        ValueOperations valueOperations = redisTemplate.opsForValue();

        valueOperations.set("first","hellow word");

        System.out.println(valueOperations.get("first"));

    }

    @Test

    public void test2(){

        ValueOperations<String, String> stringStringValueOperations = stringRedisTemplate.opsForValue();

        stringStringValueOperations.set("secound","hello everyone");

        System.out.println(stringStringValueOperations.get("secound"));

    }

}
注意:在本篇博客中只讲了RedisStandalongConfiguration的配置方式 ,并且测试本着以能连通redis的目的进行非常简单的测试,如果想要了解更详细的使用或者配置
可以参考 https://gitee.com/wjtree/codes/itcdnko9f5zqwr8u4gejs95 这篇文章
spring-data-redis2.0以上配置redis连接的更多相关文章
- Spring Boot 2.0 教程 | 配置 Undertow 容器
欢迎关注个人微信公众号: 小哈学Java, 文末分享阿里 P8 资深架构师吐血总结的 <Java 核心知识整理&面试.pdf>资源链接!! 文章首发于个人网站 https://ww ...
- [每日短篇] 1C - Spring Data JPA (0)
2019独角兽企业重金招聘Python工程师标准>>> 准备把 Spring Data JPA 完整看一遍,顺便把关键要点记录一下.在写这篇文章的今天,再不用 Spring Boot ...
- Spring Boot 2.0 的配置绑定类Bindable居然如此强大
1. 前言 在开发Spring Boot应用时会用到根据条件来向Spring IoC容器注入Bean.比如配置文件存在了某个配置属性才注入Bean : 图中红色的部分是说,只有ali.pay.v1.a ...
- spring Data Jpa的依赖+配置
spring data jpa 是spring基于的orm框架,jpa规范的基础上封装的一套JPA应用框架 添加的相关依赖: <properties> <spring.version ...
- python 基础 10.0 nosql 简介--redis 连接池及管道
一. NOSQL 数据库简介 NoSQL 泛指非关系型的数据库.非关系型数据库与关系型数据库的差别 非关系型数据库的优势: 1.性能NOSQL 是基于键值对的,可以想象成表中的主键和值的对应关系,而且 ...
- Spring DM 2.0 环境配置 解决Log4j问题
搭建 spring dm 2.0 环境出的问题 log4j 的问题解决办法是 一.引入SpringDM2.0的Bundle,最后完成如下图所示:注意:要引入slf4j.api.slf4j.log4j. ...
- Spring Boot 2.0 教程 - 配置详解
Spring Boot 可以通过properties文件,YAML文件,环境变量和命令行参数进行配置.属性值可以通过,@Value注解,Environment或者ConfigurationProper ...
- yii2.0 手动配置redis
手动安装yii2.0-redis扩展 1.点击下载:yii2.0-redis扩展 2.把下载的扩展文件放到vendor/yiisoft/下,命名为yii2-redis 3.修改vender/yiiso ...
- Django项目settings配置redis连接
CACHES = { "default": { "BACKEND": "django_redis.cache.RedisCache", &q ...
随机推荐
- 【原创】大叔算法分享(5)聚类算法DBSCAN
一 简介 DBSCAN:Density-based spatial clustering of applications with noise is a data clustering algorit ...
- Java框架中Struts框架的优缺点
Struts 优缺点优点:1. 实现 MVC 模式,结构清晰,使开发者只关注业务逻辑的实现.2.有丰富的 tag 可以用 ,Struts 的标记库(Taglib),如能灵活动用,则能大大提高开发效率3 ...
- 主席树入门——询问区间第k大pos2104,询问区间<=k的元素个数hdu4417
poj2104找了个板子..,但是各种IO还可以进行优化 /* 找区间[l,r]第k大的数 */ #include<iostream> #include<cstring> #i ...
- iOS开发多线程之NSThread
一.NSThread的属性与方法 1.NSThread 类方法 类方法,顾名思义通过类名直接调用的方法 1. + (void)detachNewThreadWithBlock:(void (^)(vo ...
- Java Callable使用
1. 创建线程的三种方式: 继承Thread,重写run方法 实现Runnable接口,重新run方法 实现Callable接口,重写call方法 2. Callable接口实际上是属于Executo ...
- 【Bootstrap】 typeahead自动补全
typeahead 这篇文章记录了我在使用typeahead的一些问题,不是很全,但是基本够用. Bootstrap提供typeahead组件来完成自动补全功能. 两种用法: 直接给标签添加属性 &l ...
- 你好!酷痞 Coolpy
欢迎你进入酷痞的物联网世界.这里有着自由的空气和自然的气息.接下来我将告诉你如果一步步建立一个自己专属的物联网平台. 由于目前的酷痞的官方域名还没有通过备案所以现在用临时域名解说本说明. 最终酷痞的官 ...
- Linux安装Tomcat-Nginx-FastDFS-Redis-Solr-集群——【第六集之基本命令使用】
学习命令的方法:linux中所有操作都是命令操作,可想而知命令有多少,更严重的是每个命令有很多参数,记命令容易,记参数就难了,所以建议: 自己准备一个博客,把通常用到的命令及其功能记载下来,用到的时候 ...
- 反转链表II(根据指定的索引,逆转链表)
反转从位置 m 到 n 的链表.请使用一趟扫描完成反转 思想:首先判断链表是否合法,并且判断输入的m和n是否合法 定义dummyHead结点,让它指向头结点的前驱,再定义cur,让它指向dummyHe ...
- fastadmin表单验证
Unexpected token < in JSON at position 0 注意: if (!form.is("form"))//form的选择器不是form直接返回所 ...