CAS部署在Windows上
我这里有下载好的cas.war和tomcat7,然后我在将cas.war放在tomcat目录下的webapps下,启动tomcat自动解压war包.浏览器输入http://localhost:8080/cas/login,可看到登录页面.
因为我在电脑上安装的是tomcat8所以只能再下载一个tomcat7,在这个目录下进行启动.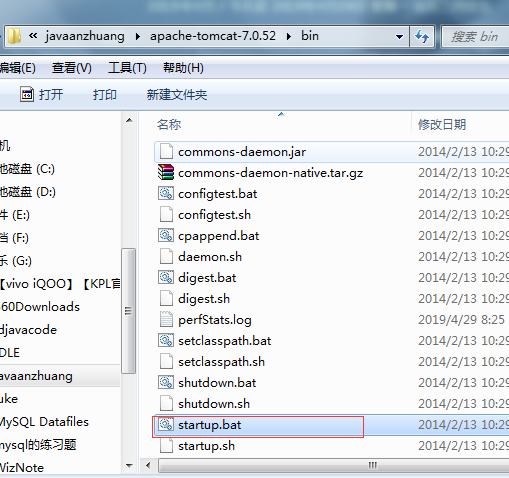
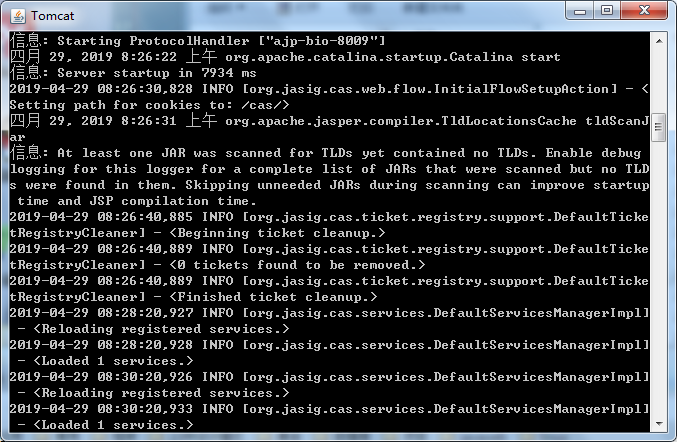
黑窗口中,进行解压打开浏览器
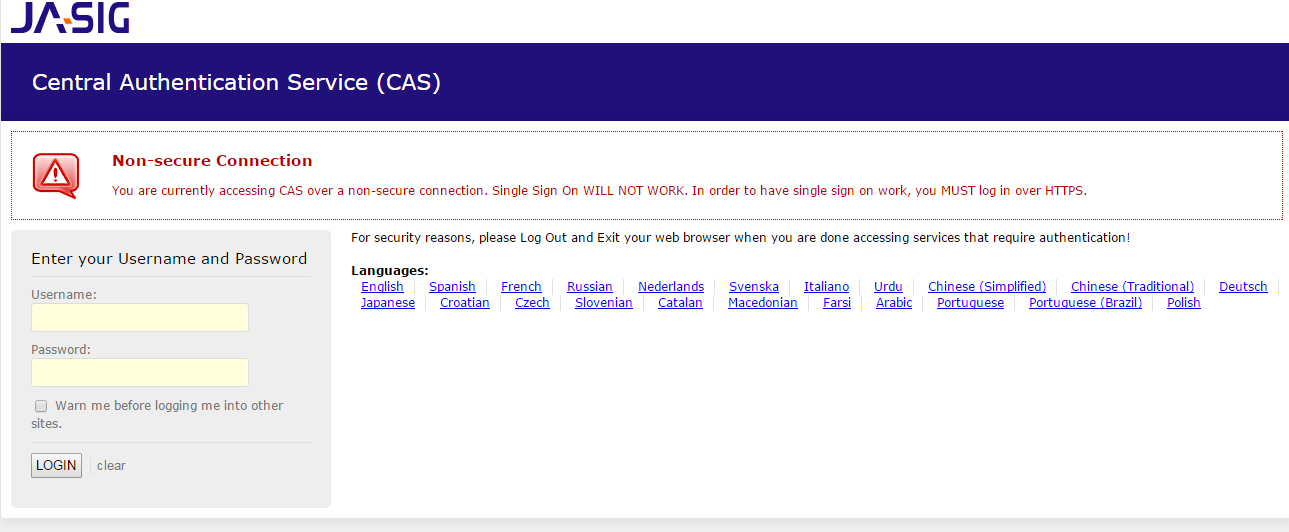
在页面上打开http://localhost:8080/cas/login,可以看到
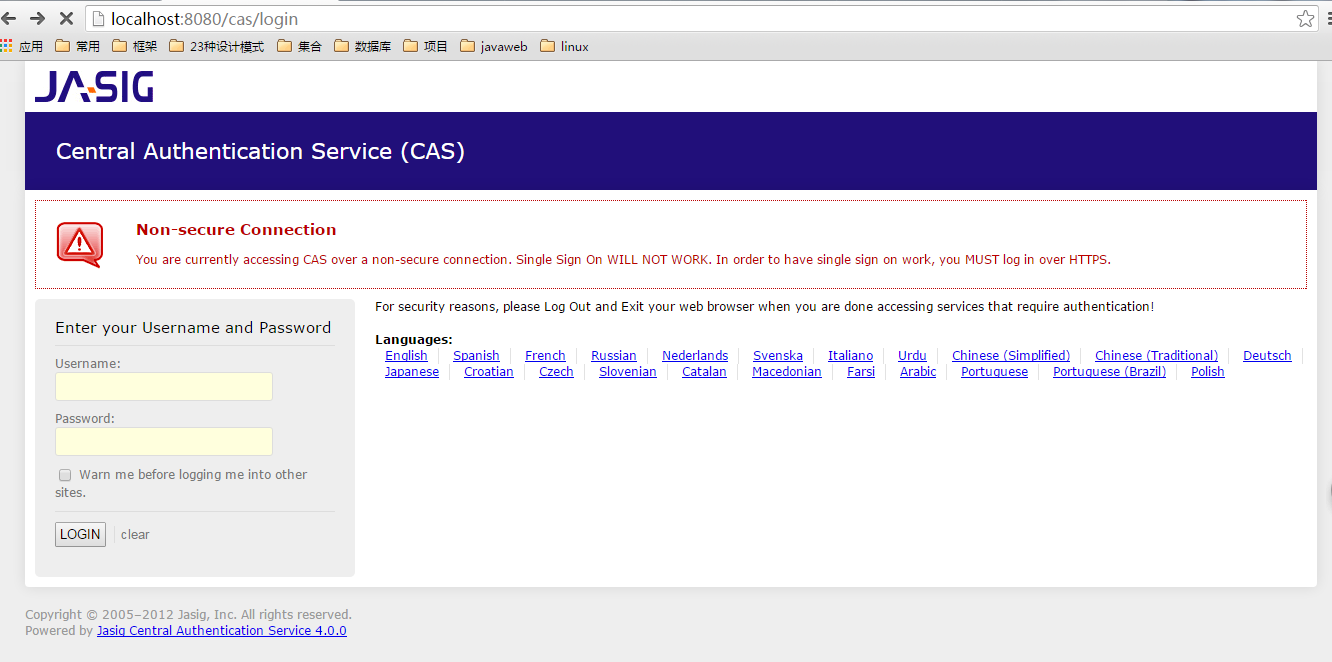
使用登录名和密码:casuser/Mellon
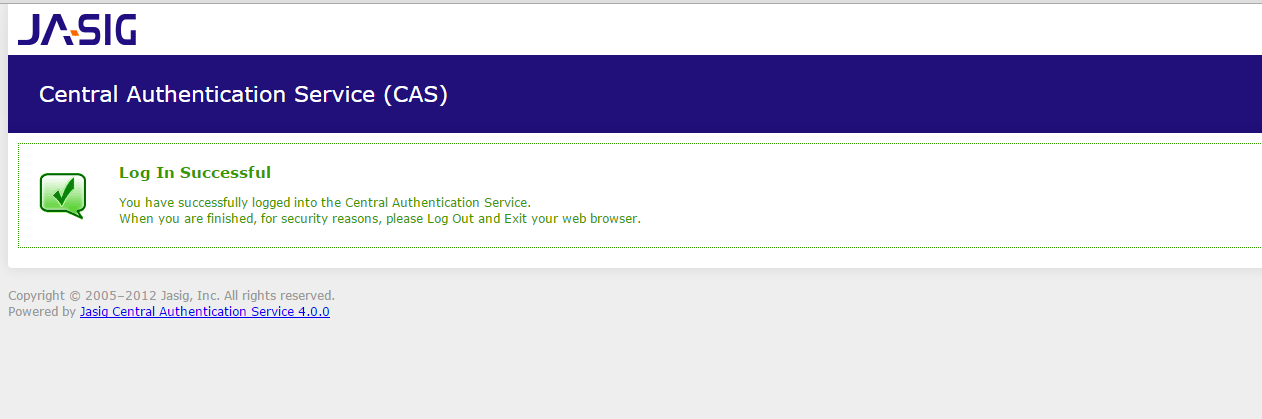
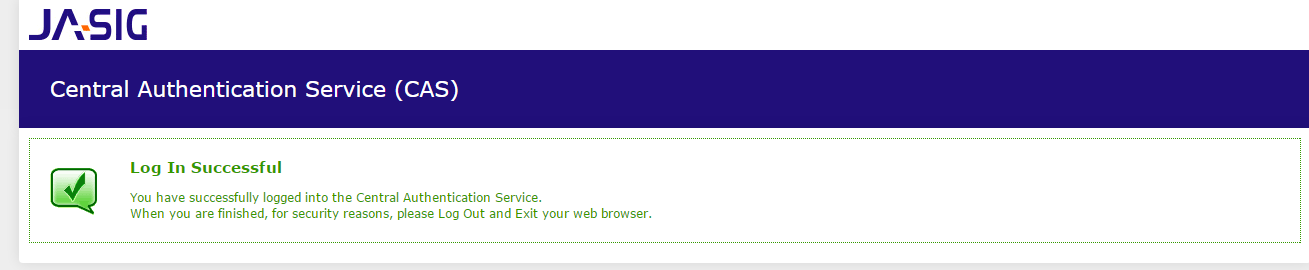
可以登录,登录成功!!!
如果不想使用默认的端口号,可以在下面的文件中进行修改,
1.打开tomcat 目录 conf\server.xml 找到下面的配置(如果你不想使用8080的端口号的话可以修改这个配置文件)
    <Connector port="8080" protocol="HTTP/1.1"

               connectionTimeout="20000"

               redirectPort="8443" />
将8080改为你需要的端口号 9100
然后访问http://localhost:9100/cas/login这个路径,就可以到达
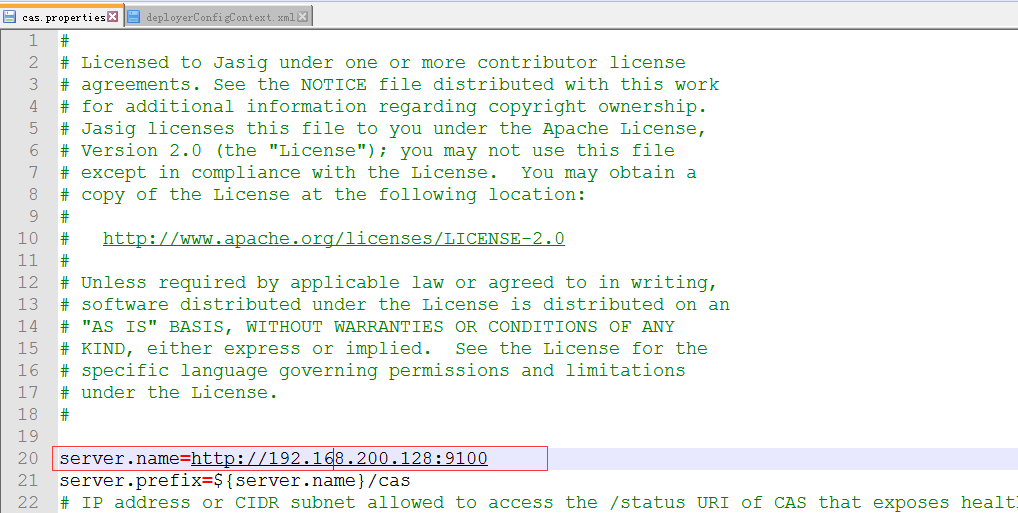
2.修改CAS的配置文件
修改cas的WEB-INF/cas.properties
server.name=http://localhost:9011这里也需要进行修改.
去除https认证
CAS默认使用的是HTTPS协议,如果使用HTTPS协议需要SSL安全证书(需向特定的机构申请和购买).如果对安全要求不高或是在开发测试阶段,可使用HTTP协议.我们这里讲解通过修改配置,让CAS使用HTTP协议.
修改cas的WEB-INF/deployerConfigContext.xml
找到下面的配置
    <bean id="proxyAuthenticationHandler"

          class="org.jasig.cas.authentication.handler.support.HttpBasedServiceCredentialsAuthenticationHandler"

          p:httpClient-ref="httpClient" p:requireSecure="false" />
这里需要增加参数p:requireSecure="false",requireSecure属性意思为是否需要安全验证,即HTTPS,false为不采用
(2)修改cas的/WEB-INF/spring-configuration/ticketGrantingTicketCookieGenerator.xml
找到下面配置
<bean id="ticketGrantingTicketCookieGenerator" class="org.jasig.cas.web.support.CookieRetrievingCookieGenerator"

      p:cookieSecure="false"

      p:cookieMaxAge="3600"

      p:cookieName="CASTGC"

      p:cookiePath="/cas" />
参数p:cookieSecure="true",同理为HTTPS验证相关,TRUE为采用HTTPS验证,FALSE为不采用https验证。
参数p:cookieMaxAge="-1",是COOKIE的最大生命周期,-1为无生命周期,即只在当前打开的窗口有效,关闭或重新打开其它窗口,仍会要求验证。可以根据需要修改为大于0的数字,比如3600等,意思是在3600秒内,打开任意窗口,都不需要验证。
我们这里将cookieSecure改为false , cookieMaxAge 改为3600
3)修改cas的WEB-INF/spring-configuration/warnCookieGenerator.xml
找到下面配置
<bean id="warnCookieGenerator" class="org.jasig.cas.web.support.CookieRetrievingCookieGenerator"

p:cookieSecure="false"

p:cookieMaxAge="3600"

p:cookieName="CASPRIVACY"

p:cookiePath="/cas" />
我们这里将cookieSecure改为false , cookieMaxAge 改为3600
创建一个用来测试的小demo来测试单点登录
创建一个(war)demo1 引入cas客户端依赖并指定tomcat运行端口为8001
    <dependencies>

        <!-- cas -->

        <dependency>

            <groupId>org.jasig.cas.client</groupId>

            <artifactId>cas-client-core</artifactId>

            <version>3.3.3</version>

        </dependency>

        <dependency>

            <groupId>javax.servlet</groupId>

            <artifactId>servlet-api</artifactId>

            <version>2.5</version>

            <scope>provided</scope>

        </dependency>

    </dependencies>

  <build>

      <plugins>

          <plugin>

              <groupId>org.apache.maven.plugins</groupId>

              <artifactId>maven-compiler-plugin</artifactId>

              <version>2.3.2</version>

              <configuration>

                  <source>1.7</source>

                  <target>1.7</target>

              </configuration>

          </plugin>

          <plugin>

                <groupId>org.apache.tomcat.maven</groupId>

                <artifactId>tomcat7-maven-plugin</artifactId>

                <configuration>

                    <!-- 指定端口 -->

                    <port>9001</port>

                    <!-- 请求路径 -->

                    <path>/</path>

                </configuration>

            </plugin>

      </plugins>

    </build>
2.添加web.xml为
<?xml version="1.0" encoding="UTF-8"?>

<web-app xmlns:xsi="http://www.w3.org/2001/XMLSchema-instance"

    xmlns="http://java.sun.com/xml/ns/javaee"

    xsi:schemaLocation="http://java.sun.com/xml/ns/javaee http://java.sun.com/xml/ns/javaee/web-app_2_5.xsd"

    version="2.5">

    <!-- 用于单点退出,该过滤器用于实现单点登出功能,可选配置 -->

    <listener>

     <listener-class>org.jasig.cas.client.session.SingleSignOutHttpSessionListener</listener-class>

    </listener>

    <!-- 该过滤器用于实现单点登出功能,可选配置。 -->

    <filter>

        <filter-name>CAS Single Sign Out Filter</filter-name>

       <filter-class>org.jasig.cas.client.session.SingleSignOutFilter</filter-class>

    </filter>

    <filter-mapping>

        <filter-name>CAS Single Sign Out Filter</filter-name>

        <url-pattern>/*</url-pattern>

    </filter-mapping>

    <!-- 该过滤器负责用户的认证工作,必须启用它 -->

    <filter>

        <filter-name>CASFilter</filter-name>       <filter-class>org.jasig.cas.client.authentication.AuthenticationFilter</filter-class>

        <init-param>

            <param-name>casServerLoginUrl</param-name>

            <param-value>http://192.168.200.128:9100/cas/login</param-value>

            <!--这里的server是服务端的IP -->

        </init-param>

        <init-param>

            <param-name>serverName</param-name>

            <param-value>http://localhost:9001</param-value>

        </init-param>

    </filter>

    <filter-mapping>

        <filter-name>CASFilter</filter-name>

        <url-pattern>/*</url-pattern>

    </filter-mapping>

    <!-- 该过滤器负责对Ticket的校验工作,必须启用它 -->

    <filter>

        <filter-name>CAS Validation Filter</filter-name>

        <filter-class>     org.jasig.cas.client.validation.Cas20ProxyReceivingTicketValidationFilter</filter-class>

        <init-param>

            <param-name>casServerUrlPrefix</param-name>

            <param-value>http://192.168.200.128:9100/cas</param-value>

        </init-param>

        <init-param>

            <param-name>serverName</param-name>

            <param-value>http://localhost:9001</param-value>

        </init-param>

    </filter>

    <filter-mapping>

        <filter-name>CAS Validation Filter</filter-name>

        <url-pattern>/*</url-pattern>

    </filter-mapping>

    <!-- 该过滤器负责实现HttpServletRequest请求的包裹, 比如允许开发者通过HttpServletRequest的getRemoteUser()方法获得SSO登录用户的登录名,可选配置。 -->

    <filter>

        <filter-name>CAS HttpServletRequest Wrapper Filter</filter-name>

        <filter-class>

            org.jasig.cas.client.util.HttpServletRequestWrapperFilter</filter-class>

    </filter>

    <filter-mapping>

        <filter-name>CAS HttpServletRequest Wrapper Filter</filter-name>

        <url-pattern>/*</url-pattern>

    </filter-mapping>

    <!-- 该过滤器使得开发者可以通过org.jasig.cas.client.util.AssertionHolder来获取用户的登录名。 比如AssertionHolder.getAssertion().getPrincipal().getName()。 -->

    <filter>

        <filter-name>CAS Assertion Thread Local Filter</filter-name>       <filter-class>org.jasig.cas.client.util.AssertionThreadLocalFilter</filter-class>

    </filter>

    <filter-mapping>

        <filter-name>CAS Assertion Thread Local Filter</filter-name>

        <url-pattern>/*</url-pattern>

    </filter-mapping>

</web-app>
webapp目录下编写index.jsp
<%@ page language="java" contentType="text/html; charset=utf-8"

    pageEncoding="utf-8"%>

<!DOCTYPE html PUBLIC "-//W3C//DTD HTML 4.01 Transitional//EN" "http://www.w3.org/TR/html4/loose.dtd">

<html>

<head>

<meta http-equiv="Content-Type" content="text/html; charset=utf-8">

<title>一页面</title>

</head>

<body> 欢迎来到一页面 <%=request.getRemoteUser()%> </body>

 </html>
request.getRemoteUser()为获取远程登录名
1.5.2客户端工程2搭建
1.创建Maven工程(war)demgo2,引入cas客户端依赖并指定tomcat运行端口为8002
2.创建web.xml,参照demo1,将serverName的值改为http://localhost:8002,共两处
3.创建index.jsp,内容显示"欢迎来到二页面"
单点登录测试:
1.启动cas部署的tomcat
2.启动客户端工程1和工程2
3.地址栏输入http://localhost:8001/和http://locathost:8002/,均会跳转到登录页
4.输入用户名和密码后,页面跳转到8002,再次访问到8001也可以打开主页面.
单点登录退出
地址栏输入:http://localhost:9100/cas/logout
我们可以将这个连接添加到index.jsp中
<a href="http://192.168.200.128:9100/cas/logout">退出登录</a>
但是我们更希望退出登录后,能自动跳转到某个页面,那如何处理呢?
修改cas系统的配置文件WEB-INF目录下的cas-servlet.xml
 <bean id="logoutAction" class="org.jasig.cas.web.flow.LogoutAction"

        p:servicesManager-ref="servicesManager"

        p:followServiceRedirects="${cas.logout.followServiceRedirects:true}"/>
改为true后,可以在退出时跳转页面到目标页面,修改index.jsp的退出链接
<a href="http://192.168.200.128:9100/cas/logout?service=http://www.baidu.com">退出登录</a>
CAS服务端数据源设置
让用户名和密码从我们的数据库中获取
配置数据源:
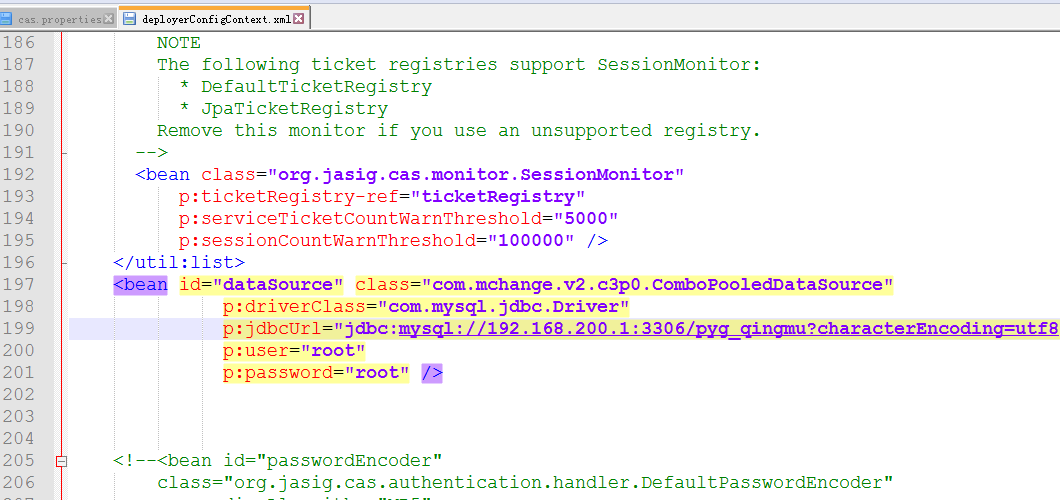
(1)修改cas服务端中web-inf下deployerConfigContext.xml ,添加如下配置
<bean id="dataSource" class="com.mchange.v2.c3p0.ComboPooledDataSource"

              p:driverClass="com.mysql.jdbc.Driver"

              p:jdbcUrl="jdbc:mysql://192.168.200.128:3306/pinyougoudb?characterEncoding=utf8"

              p:user="root"

              p:password="root" />

<bean id="passwordEncoder"

class="org.jasig.cas.authentication.handler.DefaultPasswordEncoder"

        c:encodingAlgorithm="MD5"

        p:characterEncoding="UTF-8" />

<bean id="dbAuthHandler"

          class="org.jasig.cas.adaptors.jdbc.QueryDatabaseAuthenticationHandler"

          p:dataSource-ref="dataSource"

          p:sql="select password from tb_user where username = ?"

          p:passwordEncoder-ref="passwordEncoder"/>
然后在配置文件开始部分找到如下配置
<bean id="authenticationManager" class="org.jasig.cas.authentication.PolicyBasedAuthenticationManager">
<constructor-arg>
<map>
<entry key-ref="proxyAuthenticationHandler" value-ref="proxyPrincipalResolver" />
<!-- <entry key-ref="primaryAuthenticationHandler" value-ref="primaryPrincipalResolver" />
<entry key-ref="dbAuthHandler" value-ref="primaryPrincipalResolver"/>
</map>
</constructor-arg>
<property name="authenticationPolicy">
<bean class="org.jasig.cas.authentication.AnyAuthenticationPolicy" />
</property>
</bean>
其中:
<entry key-ref="primaryAuthenticationHandler" value-ref="primaryPrincipalResolver" />
一句是使用固定的用户名和密码,我们在下面可以看到这两个bean ,如果我们使用数据库认证用户名和密码,需要将这句注释掉。
添加下面这一句配置
<entry key-ref="dbAuthHandler" value-ref="primaryPrincipalResolver"/>
(2)将以下三个jar包放入webapps\cas\WEB-INF\lib下

(这三个jar包在\10配套软件\CAS\jar目录下)
可以现在window环境下进行配置文件,等文件全部配完成以后,然后在复制到linux中,将需要修改的端口号修改一下.
因为是本机的虚拟机,所以使用的是192.168.200.1
还有一处需要修改的地方时这里.
CAS部署在Windows上的更多相关文章
- 同“窗”的较量:部署在 Windows 上的 .NET Core 版博客站点发布上线
为了验证 docker swarm 在高并发下的性能问题,周一我们发布了使用 docker-compose 部署的 .net core 版博客站点(博文链接),但由于有1行代码请求后端 web api ...
- 【转】jenkins自动化部署项目7 -- 新建job(将服务代码部署在windows上)
关于构建结束后jenkins会kill所有衍生子进程的官方解决方案:https://wiki.jenkins.io/display/JENKINS/Spawning+processes+from+bu ...
- 解决Activiti5.22流程图部署在Windows上正常,但在linux上部署后出现中文变方块的问题
总结/朱季谦 楼主最近在做公司的工作流平台,发现一个很无语的事情,Activiti5.22的流程图在Windows环境上部署,是可以正常查看的,但发布到公司的Linux服务器上后,在上面进行流程图在线 ...
- .net core 部署到windows上的方法与 系统中相关问题的解决
前言 Net core 项目部门在Windows有很多种方式,大致有以下几种, dotnet 命令, iis(windowshosts), 一些开源的应用容器(docker ) 基于一些exe 程序, ...
- jenkins自动化部署项目7 -- 新建job(将服务代码部署在windows上)
关于构建结束后jenkins会kill所有衍生子进程的官方解决方案:https://wiki.jenkins.io/display/JENKINS/Spawning+processes+from+bu ...
- Angular部署到windows上
1. 确保已经打开了IIS服务. 如果没有打开可参考 http://jingyan.baidu.com/article/eb9f7b6d9e73d1869364e8d8.html 2. 编译angul ...
- mac与windows上部署使用Redis
windows下Redis安装 在Redis的官网下载页上有各种各样的版本,由于redis官网不支持windows,但是我们伟大的windows家族还是召唤了一群小伙伴开发了win版的redis.要在 ...
- Asp.net core使用IIS在windows上进行托管
摘要 最近项目中,尝试使用asp.net core开发,在部署的时候,考虑现有硬件,只能部署在windows上,linux服务器暂时没有. 部署注意事项 代码中启用iis和Kestrel public ...
- 在 Windows 上搭建 PHP 网站
PHP(全称:PHP:Hypertext Preprocessor,即“PHP:超文本预处理器”)是一种开源的通用计算机脚本语言,尤其适用于网络开发并可嵌入HTML中使用.PHP的语法借鉴吸收C语言. ...
随机推荐
- CodeForces #549 Div.2 ELynyrd Skynyrd 倍增算法
题目 这道题目实际上可以用动态规划来做. 对于每个区间,我们从右边边界,往左边走,如果能走n-1次,那说明以右边边界为起点存在一个题目中说的子链. 利用倍增算法,实际上倍增也是动态规划.f[i][j] ...
- mysql 编码问题
有时候insert数据的时候,会报以下异常: ERROR 1366 (HY000): Incorrect string value: '\xE6\x9D\x83\xE9\x99\x90...' for ...
- Python 学习笔记9 循环语句 For in
For in 循环主要适用于遍历一个对象中的所有元素.我们可以使用它遍历列表,元组和字典等等. 其主要的流程如下:(图片来源于: https://www.yiibai.com/python/pytho ...
- 如何组织AxTOCControl里面的数据
如何组织AxTOCControl里面的数据,实际上是组织AXMapControl的数据,将添加的数据进行整理.代码在最后面. 思路参考自: https://blog.csdn.net/u0124887 ...
- 异想-天开 python---while、for、if-else 循环学习
for循环: for i in range(10): # i循环10次 print('------',i) for j in range(10): print(j) if j > 2 : bre ...
- Linux netfilter 学习笔记
https://blog.csdn.net/lickylin/article/details/33321905
- Eclipse集成Hadoop插件
一.Eclipse集成Hadoop插件 1.在这之前我们需要配置真机上的hadoop环境变量 注:在解压tar包的时候普通解压会出现缺文件的现象,所以在这里我们需要用管理员的方式启动我们的解压软件(我 ...
- 《图解HTTP》读书笔记(一:网络基础TCP/IP)
好书什么时候开始读都不晚.作为一个测试人员,是一定要掌握一些网络的基础知识的.希望能够边读书边在这里记录笔记,便于加深理解以及日后查阅. 一.TCP/IP协议族 计算机与网络设备要互相通信,双方必须基 ...
- selenium操作浏览器cookies
package test; import java.io.BufferedReader; import java.io.BufferedWriter; import java.io.File; imp ...
- C# 按不同的字节编码,通过字节数去截取字符串
/// <summary> /// 按不同的字节编码,通过字节数去截取字符串 /// 数据库UTF-8 1个数字.字母.英文符号算1个长度 1个中文.中文符号算3个长度 /// </ ...