UnityShader实现物体被遮挡描边
之前在网上看到物体遮挡描边的功能,自己也拿来实现了一番。算作第一篇博客的开篇。
先贴出几张效果图,也是个人思路和方案的改进路线吧。


//////////////////////////////////////////////////////////////////方案实现////////////////////////////////////////////////////////////////////////////////////////
看到描边的功能,最先想到的就是用stencil的方法实现。功能最主要的部分就是如何判断边界像素,之后在FragmentShader中将该像素颜色设置成需要描边的颜色。
方案一:
一个简单的VF Shader:
 Shader "Unlit/Shape"

 {

     Properties

     {

         _MainTex ("Texture", 2D) = "white" {}

         _ShapeLineWidth("ShapeWidth",float) = 0.1

         _ShapeColor("ShapeColor",COLOR) = (,,,)

     }

     SubShader

     {

         Tags { "Queue"="Geometry" }

         LOD

         //output origin color

         Pass

         {

             CGPROGRAM

             #pragma vertex vert

             #pragma fragment frag

             #include "UnityCG.cginc"

             struct appdata

             {

                 float4 vertex : POSITION;

                 float2 uv : TEXCOORD0;

             };

             struct v2f

             {

                 float2 uv : TEXCOORD0;

                 float4 vertex : SV_POSITION;

             };

             sampler2D _MainTex;

             float4 _MainTex_ST;

             v2f vert (appdata v)

             {

                 v2f o;

                 o.vertex = UnityObjectToClipPos(v.vertex);

                 o.uv = TRANSFORM_TEX(v.uv, _MainTex);

                 return o;

             }

             fixed4 frag (v2f i) : SV_Target

             {

                 fixed4 col = tex2D(_MainTex, i.uv);

                 return col;

             }

             ENDCG

         }

         //output stencil to define occlued area

         Pass

         {

             ColorMask

             ZTest Off

             Stencil

             {

                 Ref

                 Comp Always

                 Pass Replace

             }

             CGPROGRAM

             #pragma vertex vert

             #pragma fragment frag

             #include "UnityCG.cginc"

             struct appdata

             {

                 float4 vertex : POSITION;

             };

             struct v2f

             {

                 float4 vertex : SV_POSITION;

             };

             v2f vert (appdata v)

             {

                 v2f o;

                 o.vertex = UnityObjectToClipPos(v.vertex);

                 return o;

             }

             fixed4 frag (v2f i) : SV_Target

             {

                 return fixed4(,,,);

             }

             ENDCG

         }

         //output outlinecolor

         Pass

         {

             Stencil

             {

                 Ref

                 Comp Equal

                 Pass Keep

             }

             ZWrite Off

             ZTest Off

             CGPROGRAM

             #pragma vertex vert

             #pragma fragment frag

             #include "UnityCG.cginc"

             struct v2f

             {

                 float2 uv : TEXCOORD0;

                 float4 vertex : SV_POSITION;

             };

             float _ShapeLineWidth;

             fixed4 _ShapeColor;

             v2f vert (appdata_base v)

             {

                 v2f o;

                 v.vertex.xyz += v.normal * _ShapeLineWidth;

                 o.vertex = UnityObjectToClipPos(v.vertex);

                 return o;

             }

             [earlyDepthStencil]

             fixed4 frag (v2f i) : SV_Target

             {

                 fixed4 col = _ShapeColor;

                 return col;

             }

             ENDCG

         }

     }

 }
主要功能在第三个pass中:将所有像素沿法线方向延伸(相当于将物体略微放大一些),再通过第二个pass写入的stencil剔除中间区域,剩下就是边缘的像素了。虽然成功实现了描边的功能,但是未遮挡部位也被描边了。
方案二:
利用后期渲染的技术,将所有描边的物体轮廓先输出到一张图上,在最后与原图叠加在一起。这种方案的优点更加灵活了。在Unity中,我们可以定义不同的相机来渲染出各种想要的图像包含着丰富的信息。例如本例中在后期渲染中先后得到shadowmap,颜色缓存等图像信息。
由于该方案比较复杂,先贴出思路:
1.获得场景除去要描边物体的depthmap
2.通过比较depthmap判定被遮挡区域,并将该区域放大
3.将放大区域剔除遮挡区域就是描边的像素区域了,将该像素区域叠加到原图像中。
工程代码如下:
 using UnityEngine;

 using System.Collections;

 public class ShapeOutline : MonoBehaviour {

     public Camera objectCamera = null;

     public Color outlineColor = Color.green;

     Camera mainCamera;

     RenderTexture depthTexture;

     RenderTexture occlusionTexture;

     RenderTexture strechTexture;

     // Use this for initialization

     void Start()

     {

         mainCamera = Camera.main;

         mainCamera.depthTextureMode = DepthTextureMode.Depth;

         objectCamera.depthTextureMode = DepthTextureMode.None;

         objectCamera.cullingMask =  << LayerMask.NameToLayer("Outline");

         objectCamera.fieldOfView = mainCamera.fieldOfView;

         objectCamera.clearFlags = CameraClearFlags.Color;

         objectCamera.projectionMatrix = mainCamera.projectionMatrix;

         objectCamera.nearClipPlane = mainCamera.nearClipPlane;

         objectCamera.farClipPlane = mainCamera.farClipPlane;

         objectCamera.aspect = mainCamera.aspect;

         objectCamera.orthographic = false;

         objectCamera.enabled = false;

     }

     void OnRenderImage(RenderTexture srcTex, RenderTexture dstTex)

     {

         depthTexture = RenderTexture.GetTemporary(Screen.width, Screen.height, , RenderTextureFormat.Depth);

         occlusionTexture = RenderTexture.GetTemporary(Screen.width, Screen.height, );

         strechTexture = RenderTexture.GetTemporary(Screen.width, Screen.height, );

         objectCamera.targetTexture = depthTexture;

         objectCamera.RenderWithShader(Shader.Find("ShapeOutline/Depth"), string.Empty);

         Material mat = new Material(Shader.Find("ShapeOutline/Occlusion"));

         mat.SetColor("_OutlineColor", outlineColor);

         Graphics.Blit(depthTexture, occlusionTexture, mat);

         mat = new Material(Shader.Find("ShapeOutline/StrechOcclusion"));

         mat.SetColor("_OutlineColor", outlineColor);

         Graphics.Blit(occlusionTexture, strechTexture, mat);

         mat = new Material(Shader.Find("ShapeOutline/Mix"));

         mat.SetColor("_OutlineColor", outlineColor);

         mat.SetTexture("_occlusionTex", occlusionTexture);

         mat.SetTexture("_strechTex", strechTexture);

         Graphics.Blit(srcTex, dstTex, mat);

         RenderTexture.ReleaseTemporary(depthTexture);

         RenderTexture.ReleaseTemporary(occlusionTexture);

         RenderTexture.ReleaseTemporary(strechTexture);

     }

 }
16-27行:创建一个专门用来渲染描边的相机。该相机渲染出一个剔除了待描边物体的depthmap用于判断遮挡的区域。17将相机渲染模式设置为depth,这样在之后的shader中就可以调用Unity的内置变量_CameraDepthTexture来获取深度图了。
30行:OnRenderImage()是Unity引擎内置的函数,在相机最终输出图像时会调用该函数,很多后期渲染处理都放在该函数中。具体的可以搜一下“Unity流程图”,直观的了解在一帧中Unity是如何调用各种内置的函数的。注意将该.cs脚本挂在对应相机对象上才启用。
32-34行:调用RenderTexture.GetTemporary()来分配一个texture内存。为什么不用New呢?Unity的官方文档解释说这个比new快很多,也确实是。学习了。但使用后记得马上ReleaseTemporary。另外特别注意的是在创建一个RenderTexture(不论是用new还是gettemporary)时对depthBuffer的设置,如果将33,34行的depthBuffer设置为16/24/32,Blit输出的图像始终就都是相机渲染的图像?关于RenderTexture中depthBuffer这块还不是很理解,之后还需要查下资料,这里暂标记下。有兄弟了解的可以在评论区交流。
接下来是几个shader的源码
 Shader "ShapeOutline/Depth"

 {

     Properties

     {

     }

     SubShader

     {

         Tags { "RenderType"="Opaque" }

         LOD

         Pass

         {

             CGPROGRAM

             #pragma vertex vert

             #pragma fragment frag

             #include "UnityCG.cginc"

             struct appdata

             {

                 float4 vertex : POSITION;

                 float2 uv : TEXCOORD0;

             };

             struct v2f

             {

                 float2 depth : TEXCOORD0;

                 float4 vertex : SV_POSITION;

             };

             v2f vert (appdata v)

             {

                 v2f o;

                 o.vertex = UnityObjectToClipPos(v.vertex);

                 o.depth  = o.vertex.zw;

                 return o;

             }

             fixed4 frag (v2f i) : SV_Target

             {

                 float depth = i.vertex.z/i.vertex.w;

                 return fixed4(depth,depth,depth,);

             }

             ENDCG

         }

     }

 }
这段代码没什么好说的了,就是输出outline层物体的depthmap,注意下输出的格式。(DepthMap的要求?这里也做个标记)
 Shader "ShapeOutline/Occlusion"

 {

     Properties

     {

         _MainTex ("Texture", 2D) = "white" {}

     }

     SubShader

     {

         Tags { "RenderType"="Opaque" }

         LOD

         Pass

         {

             CGPROGRAM

             #pragma vertex vert

             #pragma fragment frag

             #include "UnityCG.cginc"

             struct appdata

             {

                 float4 vertex : POSITION;

                 float2 uv : TEXCOORD0;

             };

             struct v2f

             {

                 float4 ScreenPos : TEXCOORD0;

                 float4 vertex : SV_POSITION;

             };

             sampler2D _MainTex;

             float4 _MainTex_ST;

             uniform sampler2D _CameraDepthTexture;

             fixed4 _OutlineColor;

             v2f vert (appdata v)

             {

                 v2f o;

                 o.vertex = UnityObjectToClipPos(v.vertex);

                 o.ScreenPos = ComputeScreenPos(o.vertex);

                 return o;

             }

             fixed4 frag (v2f i) : SV_Target

             {

                 i.ScreenPos.xy = i.ScreenPos.xy/i.ScreenPos.w;

                 float2 uv = float2(i.ScreenPos.x,i.ScreenPos.y);

                 float depth = UNITY_SAMPLE_DEPTH(tex2D(_CameraDepthTexture, uv));

                 float depthTex = tex2D(_MainTex,i.ScreenPos.xy);

                 if((depthTex > depth) && depthTex!= )

                     return fixed4(_OutlineColor.rgb,i.vertex.z);

                 else

                     return fixed4(,,,);

             }

             ENDCG

         }

     }

 }
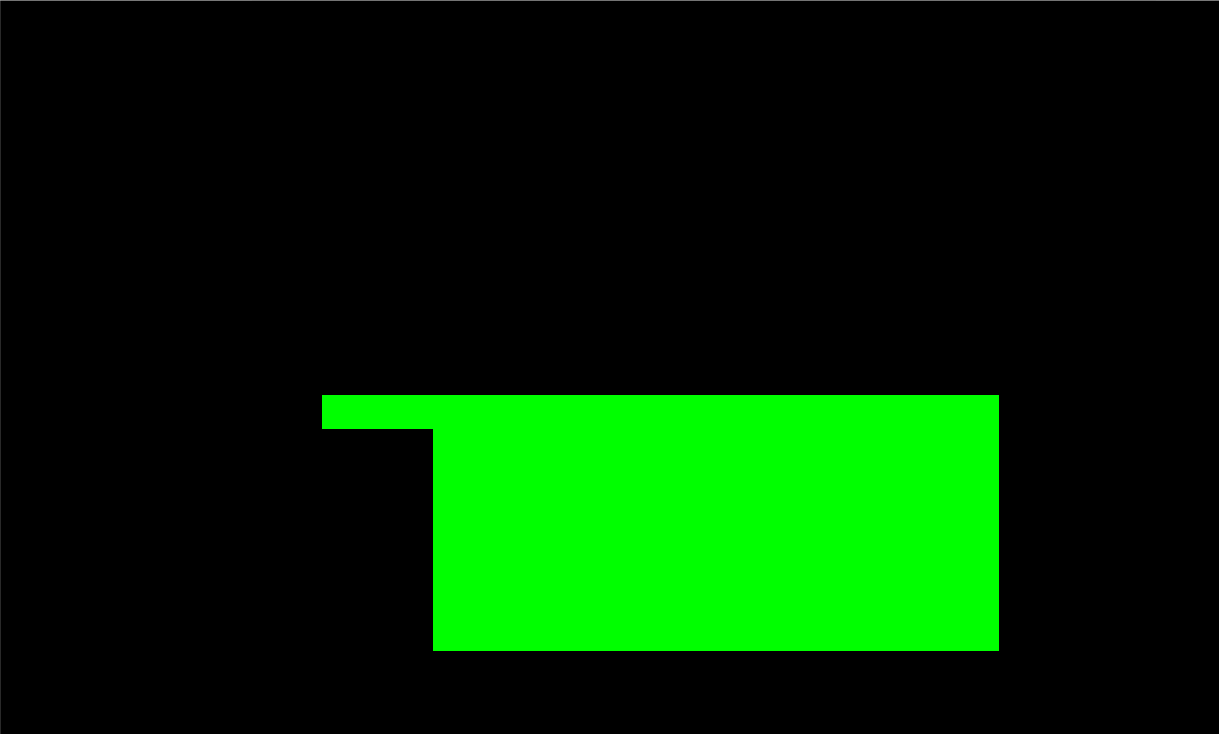
输出Outline层物体被其他物体遮挡的部分。注意_CameraTexture变量的来源,上文已经提到了。另外就是在对输入的Texture进行采样时,不再是直接根据模型UV坐标来采样了,而是应该用屏幕坐标来采样。模型顶点坐标如何转换为屏幕坐标请看37,38,43。这里贴一张OcclusionTexture方便理解
 Shader "ShapeOutline/StrechOcclusion"

 {

     Properties

     {

         _MainTex ("Texture", 2D) = "white" {}

     }

     SubShader

     {

         Tags { "RenderType"="Opaque" }

         LOD

         Pass

         {

             CGPROGRAM

             #pragma vertex vert

             #pragma fragment frag

             #include "UnityCG.cginc"

             struct appdata

             {

                 float4 vertex : POSITION;

                 float2 uv : TEXCOORD0;

             };

             struct v2f

             {

                 float4 screenPos : TEXCOORD0;

                 float4 vertex : SV_POSITION;

             };

             sampler2D _MainTex;

             float4 _MainTex_ST;

             uniform fixed4 _OutlineColor;

             v2f vert (appdata v)

             {

                 v2f o;

                 o.vertex = UnityObjectToClipPos(v.vertex);

                 o.screenPos = ComputeScreenPos(o.vertex);

                 return o;

             }

             fixed4 frag (v2f i) : SV_Target

             {

                 i.screenPos.xy = i.screenPos.xy/i.screenPos.w;

                 fixed4 col1 = tex2D(_MainTex,i.screenPos.xy);

                 fixed4 col2 = tex2D(_MainTex,float2(i.screenPos.x + /_ScreenParams.x,i.screenPos.y));

                 fixed4 col3 = tex2D(_MainTex,float2(i.screenPos.x - /_ScreenParams.x,i.screenPos.y));

                 fixed4 col4 = tex2D(_MainTex,i.screenPos.xy);

                 fixed4 col5 = tex2D(_MainTex,float2(i.screenPos.x ,i.screenPos.y+ /_ScreenParams.y));

                 fixed4 col6 = tex2D(_MainTex,float2(i.screenPos.x ,i.screenPos.y- /_ScreenParams.y));

                 if((col1.x + col1.y + col1.z

                  + col2.x + col2.y + col2.z

                  + col3.x + col3.y + col3.z

                  + col4.x + col4.y + col4.z

                  + col5.x + col5.y + col5.z

                  + col6.x + col6.y + col6.z

                  )>0.01)

                 return fixed4(_OutlineColor.rgb,i.vertex.z);

                 else

                 return fixed4(,,,);

             }

             ENDCG

         }

     }

 }
这段Shader功能是对原来遮挡输出的图像进行上下左右放大一个像素,之后将这张图的图像剔除遮挡部分就是描边的线条了。
 Shader "ShapeOutline/Mix"

 {

     Properties

     {

         _MainTex ("Texture", 2D) = "white" {}

     }

     SubShader

     {

         Tags { "RenderType"="Opaque" }

         LOD

         Pass

         {

             CGPROGRAM

             #pragma vertex vert

             #pragma fragment frag

             #include "UnityCG.cginc"

             struct appdata

             {

                 float4 vertex : POSITION;

                 float2 uv : TEXCOORD0;

             };

             struct v2f

             {

                 float4 screenPos : TEXCOORD0;

                 float4 vertex : SV_POSITION;

             };

             sampler2D _MainTex;

             float4 _MainTex_ST;

             uniform sampler2D _occlusionTex;

             uniform sampler2D _strechTex;

             uniform fixed4 _OutlineColor;

             v2f vert (appdata v)

             {

                 v2f o;

                 o.vertex = UnityObjectToClipPos(v.vertex);

                 o.screenPos = ComputeScreenPos(o.vertex);

                 return o;

             }

             fixed4 frag (v2f i) : SV_Target

             {

                 i.screenPos.xy /= i.screenPos.w;

                 fixed4 srcCol = tex2D(_MainTex,float2(i.screenPos.x,-i.screenPos.y));

                 fixed4 occlusionCol = tex2D(_occlusionTex,fixed2(i.screenPos.x,i.screenPos.y));

                 fixed4 strechCol = tex2D(_strechTex,fixed2(i.screenPos.x,i.screenPos.y));

                 float isOcclusion = occlusionCol.x + occlusionCol.y + occlusionCol.z;

                 float isStrech = strechCol.x + strechCol.y + strechCol.z;

                 if(isStrech > 0.5 && isOcclusion<0.1)

                     return _OutlineColor;

                 else

                     return srcCol;

             }

             ENDCG

         }

     }

 }
最终混合的Shader,即将拉伸的图像剔除遮挡部分,并与原相机的图像进行叠加。
该方案实现了遮挡描边的效果,但是问题又来了。图2中如果蓝方块在红方块后面,则无法描绘出边框,如果全部位于红色方块后,则描边的效果就消失了。
这部分代码参考了EsFog前辈的博客,原文地址:http://www.cnblogs.com/Esfog/p/CoverOutline_Shader.html
方案三:
基于方案二的优化,在渲染depthmap时仅剔除自身。
改进的思路:记录所有待描边的物体,描绘当前物体时仅将当前物体设为“Outline”层,讲所有描边的物体绘制出边框轮廓后再与原相机渲染的图像叠加。
工程代码如下
 using UnityEngine;

 using System.Collections;

 using System.Collections.Generic;

 public class MultiShapeOutline : MonoBehaviour {

     public Camera objectCamera = null;

     public Color outlineColor = Color.green;

     Camera mainCamera;

     RenderTexture depthTexture;

     RenderTexture occlusionTexture;

     RenderTexture strechTexture;

     RenderTexture outputTexture;

     RenderTexture inputTexture;

     Material m;

    [SerializeField]

     List<GameObject> renderObjects = new List<GameObject>();

     // Use this for initialization

     void Start () {

         mainCamera = Camera.main;

         mainCamera.depthTextureMode = DepthTextureMode.Depth;

         objectCamera.depthTextureMode = DepthTextureMode.None;

         objectCamera.cullingMask =  << LayerMask.NameToLayer("Outline");

         objectCamera.fieldOfView = mainCamera.fieldOfView;

         objectCamera.clearFlags = CameraClearFlags.Color;

         objectCamera.projectionMatrix = mainCamera.projectionMatrix;

         objectCamera.nearClipPlane = mainCamera.nearClipPlane;

         objectCamera.farClipPlane = mainCamera.farClipPlane;

         objectCamera.targetTexture = depthTexture;

         objectCamera.aspect = mainCamera.aspect;

         objectCamera.orthographic = false;

         objectCamera.enabled = false;

         m = new Material(Shader.Find("ShapeOutline/DoNothing"));

     }

     // Update is called once per frame

     void Update () {

     }

     void OnRenderImage(RenderTexture srcTex, RenderTexture dstTex)

     {

         outputTexture = RenderTexture.GetTemporary(Screen.width, Screen.height, );

         inputTexture = RenderTexture.GetTemporary(Screen.width, Screen.height, );

         Graphics.Blit(srcTex, inputTexture, m);

         for (int i = ; i < renderObjects.Count; i++)

         {

             depthTexture = RenderTexture.GetTemporary(Screen.width, Screen.height, , RenderTextureFormat.Depth);

             occlusionTexture = RenderTexture.GetTemporary(Screen.width, Screen.height, );

             strechTexture = RenderTexture.GetTemporary(Screen.width, Screen.height, );

             int orgLayer = renderObjects[i].layer;

             renderObjects[i].layer = LayerMask.NameToLayer("Outline");

             objectCamera.targetTexture = depthTexture;

             objectCamera.RenderWithShader(Shader.Find("ShapeOutline/Depth"), string.Empty);

             Material mat = new Material(Shader.Find("ShapeOutline/Occlusion"));

             mat.SetColor("_OutlineColor", outlineColor);

             Graphics.Blit(depthTexture, occlusionTexture, mat);

             mat = new Material(Shader.Find("ShapeOutline/StrechOcclusion"));

             mat.SetColor("_OutlineColor", outlineColor);

             Graphics.Blit(occlusionTexture, strechTexture, mat);

             mat = new Material(Shader.Find("ShapeOutline/MultiMix"));

             mat.SetColor("_OutlineColor", outlineColor);

             mat.SetTexture("_occlusionTex", occlusionTexture);

             mat.SetTexture("_strechTex", strechTexture);

             Graphics.Blit(inputTexture, outputTexture, mat);

             RenderTexture.ReleaseTemporary(depthTexture);

             RenderTexture.ReleaseTemporary(occlusionTexture);

             RenderTexture.ReleaseTemporary(strechTexture);

             renderObjects[i].layer = orgLayer;

             Graphics.Blit(outputTexture, inputTexture, m);

         }

         Graphics.Blit(outputTexture, dstTex, m);

         RenderTexture.ReleaseTemporary(inputTexture);

         RenderTexture.ReleaseTemporary(outputTexture);

     }

 }
17行:记录所有待描边的物体
44、45行:定义了两张临时的RenderTexture,其实主要目的就是为了将上一次的图像输出用作下一次的图像输入。当然,实现这种功能第一想法就是Graphics.Blit(renderTexture,renderTexture,material),但实际Blit函数并不允许这样的参数操作,各位兄弟可以自己实际测试下。
53、54、77行:将描边的物体单独设置为描边渲染的层。
68行:shader改了名字而已,和上面贴出的代码一致。
功能写到这就结束了,当然根据各种不同的需求可以对功能进行修改。这是自己第一篇博文,不足之处请大家指出,也欢迎大家一起评论交流。
UnityShader实现物体被遮挡描边的更多相关文章
- Esfog_UnityShader教程_遮挡描边(实现篇)
在上一篇中,我们基本上说明了遮挡描边实现的一种基本原理.这一篇中我们将了解一下基于这种原理的具体实现代码.本篇中的内容和前几篇教程相比,相对比较难一些,建议先有一些基本的Unity的C#脚本编程经验 ...
- Esfog_UnityShader教程_遮挡描边(原理篇)
咳咳,有段时间没有更新了,最近有点懒!把不少精力都放在C++身上了.闲言少叙,今天要讲的可和之前的几篇有所不同了,这次是一个次综合应用.这篇内容中与之前不同主要体现在下面几点上. 1.之前我们写的都是 ...
- Cesium源码剖析---Post Processing之物体描边(Silhouette)
Cesium在1.46版本中新增了对整个场景的后期处理(Post Processing)功能,包括模型描边.黑白图.明亮度调整.夜视效果.环境光遮蔽等.对于这么炫酷的功能,我们绝不犹豫,先去翻一翻它的 ...
- UnityShader 表面着色器简单例程集合
0.前言 这些简单的shader程序都是写于2015年的暑假.当时实验室空调坏了,30多个人在实验室中挥汗如雨,闷热中学习shader的日子还历历在目.这些文章闲置在我个人博客中,一年将过,师弟也到了 ...
- [UnityShader]点染队列、ZWrite和ZTest
转载自:http://www.myexception.cn/mobile/1902628.html [UnityShader]渲染队列.ZWrite和ZTest 参考链接:http://blog.cs ...
- UnityShader快速上手指南(三)
简介 这一篇还是一些基本的shader操作:裁剪.透明和法向量的应用 (纠结了很久写不写这些,因为代码很简单,主要是些概念上的东西) 先来看下大概的效果图:(从左到右依次是裁剪,透明,加了法向量的透明 ...
- [UnityShader基础]02.深度测试 & 深度写入
参考链接: https://blog.csdn.net/v_xchen_v/article/details/79380222 前面说到了渲染队列,对于两个不透明的物体A和B,它们处于同一个渲染队列中. ...
- OpenGL 遮挡查询
原文地址:http://www.linuxidc.com/Linux/2015-02/114036.htm 在一个场景中,如果有有些物体被其他物体遮住了不可见.那么我们就不需要绘制它.在复杂的场景中, ...
- 遮挡剔除 Occlusion Culling(转)
一.首先介绍下draw call(这个东西越少你的游戏跑的越快): 在游戏中每一个被展示的独立的部分都被放在了一个特别的包中,我们称之为“描绘指令”(draw call),然后这个包传递到3D部分在屏 ...
随机推荐
- php登录注册
php 登录注册 注册代码:register.php <style type="text/css"> form{ width:300px; background-col ...
- Python模块 2
collections模块 在内置数据类型(dict.list.set.tuple)的基础上,collections模块还提供了几个额外的数据类型: 1.namedtuple: 生成可以使用名字来访问 ...
- Logstash使用介绍
Logstash介绍 Logstash是一个数据收集处理转发系统,是 Java开源项目. 它只做三件事: 数据输入 数据加工(不是必须的):如过滤,改写等 数据输出 下载安装 logstash是基 ...
- 西安理工大学 李爱民 Xi'an University of Technology, Aimin Li
李爱民-西安理工大学计算机科学与工程学院 ● 简介(Introduction)-> 李爱民(Aimin Li),男,湖北随州人,西安电子科学大学博士(PhD),中共党员.中国计算机学会会员,CS ...
- 前端学习之CSS
CSS介绍 CSS(Cascading Style Sheet, 层叠样式表)定义如何显示HTML元素, 给HTML设置样式, 让它更加美观. 当浏览器读到一个样式表, 它就会按照这个样式表来对文档进 ...
- C语言-第6次作业
1.本章学习总结 1.1思维导图 1.2 本章学习体会 学习感受:先是接触到网络工程导论的建立文件的方式,觉得很方便很好用,而后直接从代码的层面建立文件,觉得很新奇,更加方便,随着大作业的一步一步升级 ...
- out对象
<%@ page language="java" contentType="text/html; charset=UTF-8" pageEncoding= ...
- laravel 框架的 csrf
由于 laravel 框架自带 csrf 防护, 也就是通过中间件验证请求的 token, 所以 form 表单必须如下设置才可以正常提交, 否则会 419: <form method=&quo ...
- 基于redis的分布式锁(转)
基于redis的分布式锁 1 介绍 这篇博文讲介绍如何一步步构建一个基于Redis的分布式锁.会从最原始的版本开始,然后根据问题进行调整,最后完成一个较为合理的分布式锁. 本篇文章会将分布式锁的实现分 ...
- 业务限流场景简单实现方案:RateLimiter
前因:因为本系统中,有大数据高并发的场景.在向下游系统发送请求的时候,需要限流.否则会造成下游系统的堵塞. 实现方案1: Thread.sleep(ms). 优点:简单粗暴,一行代码搞定 缺点:有点l ...