在WINDOWS中安装使用GSL(MinGW64+Sublime Text3 & Visual Studio)
本文介绍在Windows下安装使用GSL库,涉及GSL两个版本(官方最新版及GSL1.8 VC版)、msys shell、GCC、G++等内容,最终实现对GSL安装及示例基于MinGW64在Sublime Text3下的编译运行,并实现GSL在Visual Studio下的使用及部分示例测试。还介绍了GSL1.8 VC版本的编译使用过程。
目录
一、GSL简介
二、在WINDOWS下安装介绍
三、安装使用GSL (GNU)
1. 安装过程(32bit & 64bit)
2. 使用过程(基于MinGW-w64命令行及Sublime Text3和Visual Studio)
四、安装使用Gsl1.8(GnuWin32)
总结
一、GSL简介
(官方介绍,不做累述)
GSL简介及下载地址:GSL - GNU Scientific Library
l Introduction
The GNU Scientific Library (GSL) is a numerical library for C and C++ programmers. It is free software under the GNU General Public License.
The library provides a wide range of mathematical routines such as random number generators, special functions and least-squares fitting. There are over 1000 functions in total with an extensive test suite.
The complete range of subject areas covered by the library includes,
|
Complex Numbers |
Roots of Polynomials |
|
Special Functions |
Vectors and Matrices |
|
Permutations |
Sorting |
|
BLAS Support |
Linear Algebra |
|
Eigensystems |
Fast Fourier Transforms |
|
Quadrature |
Random Numbers |
|
Quasi-Random Sequences |
Random Distributions |
|
Statistics |
Histograms |
|
N-Tuples |
Monte Carlo Integration |
|
Simulated Annealing |
Differential Equations |
|
Interpolation |
Numerical Differentiation |
|
Chebyshev Approximation |
Series Acceleration |
|
Discrete Hankel Transforms |
Root-Finding |
|
Minimization |
Least-Squares Fitting |
|
Physical Constants |
IEEE Floating-Point |
|
Discrete Wavelet Transforms |
Basis splines |
|
Running Statistics |
Sparse Matrices and Linear Algebra |
Unlike the licenses of proprietary numerical libraries the license of GSL does not restrict scientific cooperation. It allows you to share your programs freely with others.
l Downloading GSL
The current stable version is GSL-2.4. It was released on 19 June 2017. Details of recent changes can be found in the NEWS file.
GSL can be found in the gsl subdirectory on your nearest GNU mirror http://ftpmirror.gnu.org/gsl/.
- Main GNU ftp site: ftp://ftp.gnu.org/gnu/gsl/
For other ways to obtain GSL, please read How to get GNU Software
Installation instructions can be found in the included README and INSTALL files.
Precompiled binary packages are included in most GNU/Linux distributions.
A compiled version of GSL is available as part of Cygwin on Windows.
l Documentation
GSL includes a reference manual in reStructuredText format. You can view the manual in HTML and PDF, or read it on your system using the shell command info gsl-ref (if the library is installed).
The GSL Reference Manual is available online,
二、在WINDOWS下安装介绍
GSL在Windows下,可通过安装Cygwin使用,因其自带GSL库;本文主要介绍在MinGW下用msys生成GSL最新版的静态库、导入库及动态库过程,并通过命令行、Sublime Text3或Visual Studio编译使用GSL库;另外介绍了GSL1.8 VC版在Visual Studio2015下的编译使用。
三、安装使用GSL (GNU)
官方建议的最简单编译安装方式:
1. `cd' to the directory containing the package's source code and type `./configure' to configure the package for your system. Running `configure' might take a while. While running, it prints some messages telling which features it is checking for.
2. Type `make' to compile the package.
3. Type `make install' to install the programs and any data files and documentation. When installing into a prefix owned by root, it is recommended that the package be configured and built as a regular user, and only the `make install' phase executed with root privileges. OR For example, `make install prefix=/alternate/directory'。
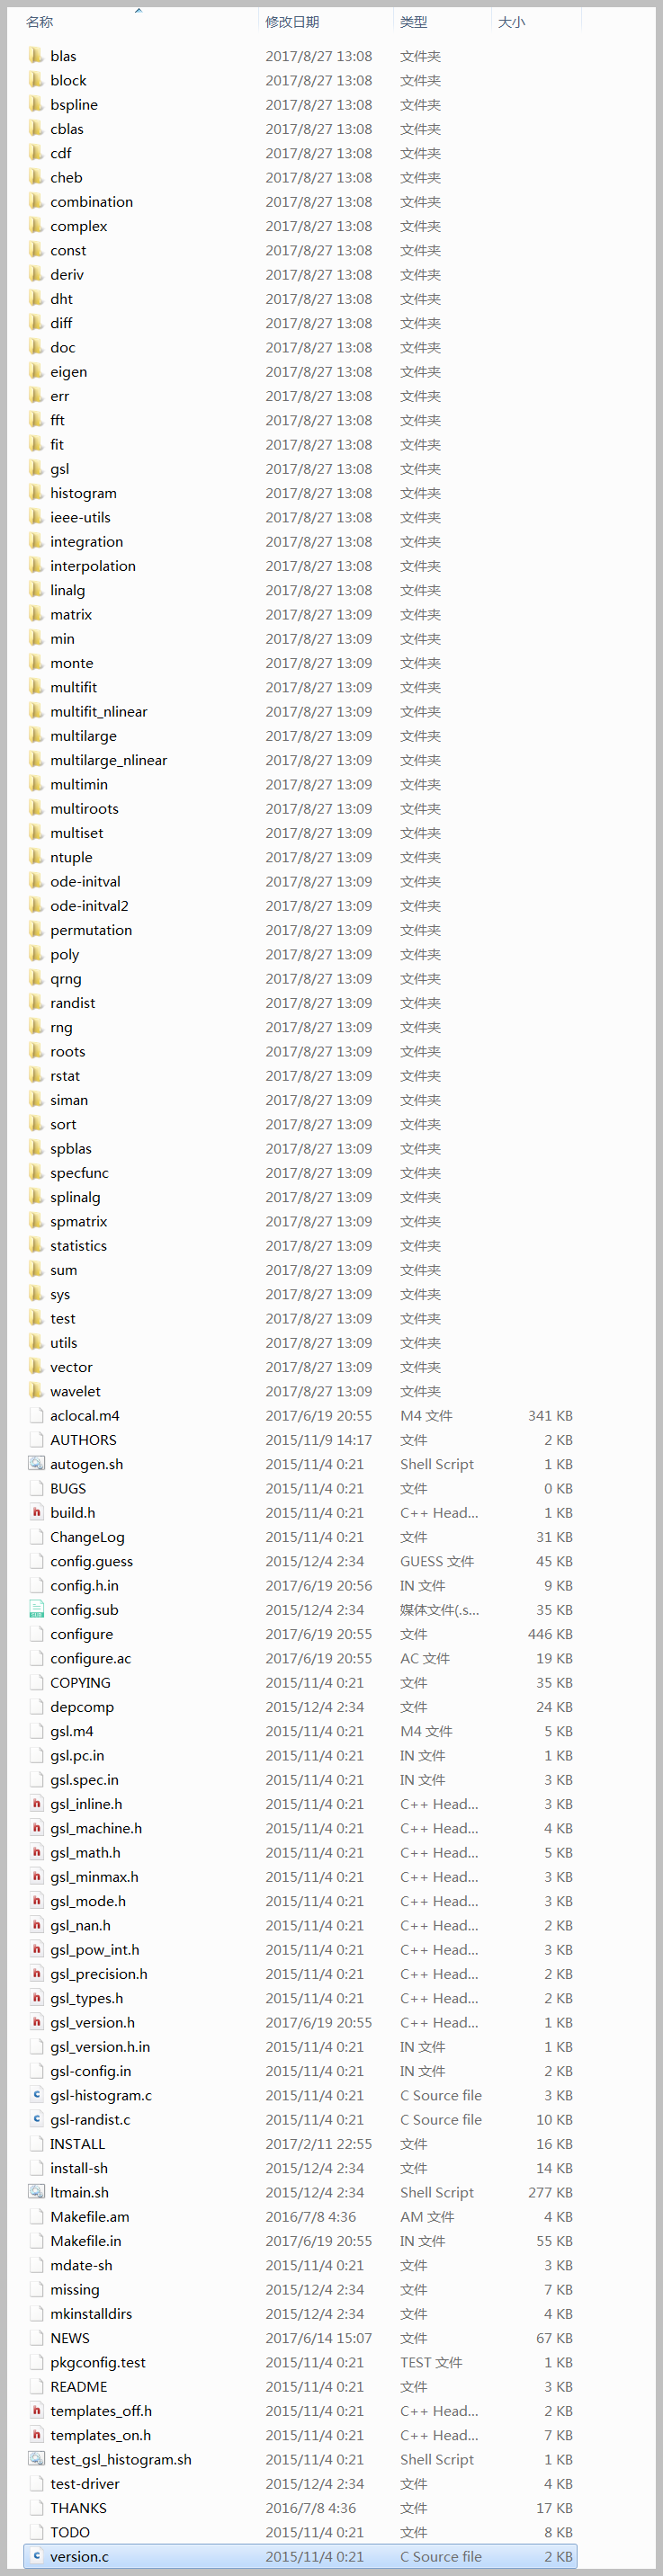
GSL最新版源码解压后目录内容如下:
1. 安装过程(32bit & 64bit)
要执行上面的三个步骤,首先需要一个UNIX环境,在Windows下,可以使用msys来模拟,MSYS是一个小型的GNU环境,是一个通过将Linux源代码在Win32上编译而成的UNIX工作环境;MSYS类似于Cygwin,但是由于工作原理的不同,速度更快、体积更小、功能强大、便于携带;使用MSYS可以取代商业的VC环境,同样开发出商业版权的程序而不受任何版权限制;可从MinGW32官方下载,在此推荐一个集成版下载,其集成了多个实用工具,本文采用集成版msys。将下载的msys集成版压缩包解压后,将msys文件夹直接复制到自己喜欢的地方,建议放在MinGW目录下,便于明确归属。然后将<msys install dir>/bin目录加到系统PATH中。

另外,还需要准备MinGW编译工具,在此就MinGW做一下简单介绍,MinGW 的全称是:Minimalist GNU on Windows 。它提供了一套简单方便的Windows下的基于GCC 程序开发环境,是从Cygwin里fork出来的。当初只考虑32位,和Cygwin相比,不强调POSIX兼容性而相对强调性能和减小依赖。目前还存在的版本有MinGW-w64, MinGW-w64 与 MinGW 的区别在于 MinGW 只能编译生成32位可执行程序,而 MinGW-w64 则可以编译生成 64位 或 32位 可执行程序。(据说,MinGW-W64的主要维护者Kai Tietz因为工作需要,他想让MinGW提供扩充x64支持,但对方态度很不友好,于是愤而fork出来,这就是MinGW-W64的由来:)。现在推荐使用MinGW-w64,因GSL的按照会根据本地系统平台自动生成,也就是说在64位系统下会自动匹配64位的GCC,这样生成的库文件无法在x86的项目中编译通过,因此,需要在本地下载配置32位和64位的MinGW-w64。
先进入MinGW-w64下载地址:https://sourceforge.net/projects/mingw-w64/files/,在此页面根据平台需要链接64位<Toolchains targetting Win64//Personal Builds/mingw-builds/版本号/threads-posix/seh/>或32位<Toolchains targetting Win32/Personal Builds/mingw-builds/版本号/threads-posix/dwarf/>,本示例使用的版本是:x86_64-7.1.0-release-posix-seh-rt_v5-rev2.7z和i686-7.1.0-release-posix-dwarf-rt_v5-rev2.7z,解压后,将bin目录添加到系统路径中(系统路径中应仅存在一个版本的bin目录),在命令行提示符下输入"gcc -v"或"g++ -v"来查看版本信息。
对应关系:
32bit g++.exe —> i686-w64-mingw32-g++
32bit gcc.exe —> i686-w64-mingw32-gcc
64bit g++.exe —> x86_64-w64-mingw32-g++
64bit gcc.exe —> x86_64-w64-mingw32-gcc
根据拟编译GSL的平台环境,配置好MinGW-w64后,进入msys目录,在此目录中执行msys.bat(直接双击运行或以超级管理员身份运行),在$提示符下输入help的界面如下图:

在$提示符下输入:
cd空格/盘符/gsl源码目录/——如:cd /c/gnu/gslmsys_code
进入该目录后,进行GSL安装的三个步骤,先后执行:
1) ./configure —— 此过程较慢,耐心等待即可(针对32位编译,执行CFLAGS="-m32" CXXFLAGS="-m32" ./configure)
2) make —— 编译生成过程
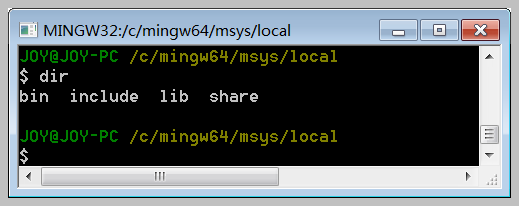
3) make install —— 将编译好的库和头文件等安装在<msys install dir>\local目录中。
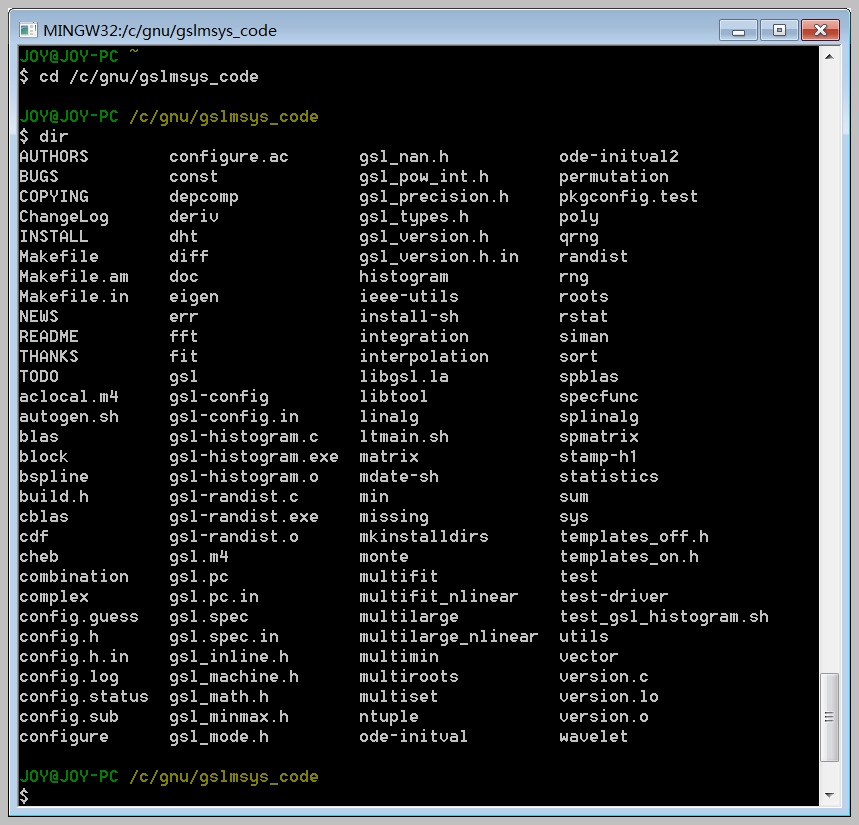
安装后的GSL目录中含有bin、lib、include、share四个文件夹
至此,GSL最新版安装完成,GSL库目录结构如下:
\bin (libgsl-23.dll、libgslcblas-0.dll)
\include (\gsl\gsl_*.h)
\lib (libgsl.a、libgsl.la、libgsl.dll.a、libgslcblas.a、libgslcblas.la、libgslcblas.dll.a)
\share
2. 使用过程(基于MinGW-w64命令行及Sublime Text3和Visual Studio)
- 示例代码
在自己的示例代码目录下新建一个C或CPP文件,复制示例代码并保存。
C示例代码:(gsldemo.c)
#include <stdio.h>

#include <gsl/gsl_sf_bessel.h>

int main ()

{

  double x = 5.0;

  double y = gsl_sf_bessel_J0 (x);

  printf ("J0(%g) = %.18e\n", x, y);

  return ;

  // Expected output: J0(5) = -1.775967713143382600e-001

}
CPP示例代码:(gsldemo.cpp)
//#include <stdio.h>

#include <iostream>

#include <iomanip> //for use std::setprecision()

#include <gsl/gsl_sf_bessel.h>

using namespace std;

int main ()

{

  double x = 5.0;

  double y = gsl_sf_bessel_J0 (x);

  //printf ("J0(%g) = %.18e\n", x, y);

  cout << "J0(" << x <<") = " << std::setprecision() << std::scientific << y << endl;

  return ;

  // Expected output: J0(5) = -1.775967713143382642e-001

}
- Visual Studio
- 使用此库,在Dubug和Release配置下设置方式一样,根据不同编译平台(x86或x64)选择对应库目录即可。
- 在项目的属性页,选择VC++目录的的常规选项页,在包含目录添加"<GSL install dir>\<GSLxXX>\include",在库目录添加"<GSL install dir>\<GSLxXX>\lib",可在源目录添加"<GSL install dir>\src\gsl-2.4";
- 选择C/C++目录的预处理器选项页,在预处理器定义中添加"GSL_DLL;";
- 选择链接器目录的输入选项页,在附加依赖项中添加"libgsl.dll.a;libgslcblas.dll.a;";
- 此时可编译生成,成功后,将<GSL install
dir>\<GSLxXX>\bin目录下的libgsl-23.dll和libgslcblas-0.dll复制到项目执行文件生成同目录下,或直接将该bin目录添加到系统路径中。
- MinGW-w64命令行
在Windows命令行提示符下,进入示例目录,执行gcc编译示例:
gcc -o gsldemo gsldemo.c -IC:/gnu/gsl/include -LC:/gnu/gsl/lib -lgsl -lgslcblas –lm
- Sublime Text3
附:使用Sublime Text3编译使用了GSL库的C或CPP源程序,可以在ST3新建一个编译环境文件,复制粘贴下面内容,并对其中引用的路径修改为正确路径,即可在ST3中进行编译使用了。
// Put this file ([Your Build Name].sublime-build) here:

// "C:\Users\[User Name]\AppData\Roaming\Sublime Text 3\Packages\User"

// OR use "Tools -> Build System -> New Build System..." and put the code there and save.

// Use "Ctrl+B" to Build and "Crtl+Shift+B" to Build or Run the project.

{

//根据使用GCC或G++需要取消或添加注释即可

//用G++编译调用了GSL库的CPP程序,可命名为G++_GSL.sublime-build

"shell_cmd": "g++ -o \"${file}\" \"${file_path}/${file_base_name}\" -I\"<GSL install dir>/include/\" -L\"<GSL install dir>/lib\" -lgsl -lgslcblas –lm ",

"file_regex": "^(..[^:]*):([0-9]+):?([0-9]+)?:? (.*)$",

"working_dir": "${file_path}",

"selector": "source.c, source.c++",

"variants":

[

{

"name": "Run",

"shell_cmd": " g++ -o \"${file}\" \"${file_path}/${file_base_name}\" -I\"<GSL install dir>/include/\" -L\"<GSL install dir>/lib\" -lgsl -lgslcblas –lm && start cmd /c \"\"${file_path}/${file_base_name}\" & pause\""

}

]

//命令行G++命令示例

// g++ -o gsldemo gsldemo.cpp -IC:/gnu/gsl/include -LC:/gnu/gsl/lib -lgsl -lgslcblas -lm

//=========================================================

//用GCC编译调用了GSL库的C程序,可命名为GCC_GSL.sublime-build

//"shell_cmd": "gcc -o \"${file}\" \"${file_path}/${file_base_name}\" -I\"<GSL install dir>/include/\" -L\"<GSL install dir>/lib\" -lgsl -lgslcblas –lm ",

//"file_regex": "^(..[^:]*):([0-9]+):?([0-9]+)?:? (.*)$",

//"working_dir": "${file_path}",

//"selector": "source.c",

//"shell": true,

//"variants":

//[

//{

//"name": "Run",

//"shell_cmd": " gcc -o \"${file}\" \"${file_path}/${file_base_name}\" -I\"<GSL install dir>/include/\" -L\"<GSL install dir>/lib\" -lgsl -lgslcblas –lm && start cmd /c \"\"${file_path}/${file_base_name}\" & pause\""

//}

//]

//命令行GCC命令示例

// gcc -o gsldemo gsldemo.c -IC:/gnu/gsl/include -LC:/gnu/gsl/lib -lgsl -lgslcblas –lm

}
四、安装使用Gsl1.8(GnuWin32)
源码压缩包中/VC8/Readme_VC8.htm
下载地址:https://sourceforge.net/projects/gnuwin32/files/gsl/1.8/
或
- Download
|
Description |
Download |
Size |
Last change |
Md5sum |
||||
|
• Complete package, except sources |
|
11 July 2006 |
|
|||||
|
• Sources |
|
11 July 2006 |
|
|||||
|
• Binaries |
|
11 July 2006 |
|
|||||
|
• Developer files |
|
11 July 2006 |
|
|||||
|
• Documentation |
|
11 July 2006 |
|
|||||
|
• Sources |
|
11 July 2006 |
|
You can also download the files from the GnuWin32 files page.
以上下载链接分别对应如下文件:
1) gsl-1.8.exe 2006-07-11 6.5 MB
2) gsl-1.8-src.exe 2006-07-11 2.1 MB
3) gsl-1.8-bin.zip 2006-07-11 982.3 kB
4) gsl-1.8-lib.zip 2006-07-11 1.2 MB
5) gsl-1.8-doc.zip 2006-07-11 5.1 MB
6) gsl-1.8-src.zip 2006-07-11 4.4 MB
先不急于马上安装,分析一下这些文件的作用,1)项执行后将建立一个GSL目录,并可选择性安装3、4、5项的内容,分别建立bin、lib、include目录;2)项执行后将GSL全部源文件复制到GSL目录的/src/gsl-1.8下而已,1、2完整安装后的文件结构如下:
\contrib\gsl-1.8
AUTHORS original gsl-1.7 contributors
BUGS original gsl-1.7 bug list
ChangeLog gsl-1.7 ChangeLog modified for GnuWin32
COPYING original gsl-1.7 license
INSTALL original gsl-1.7 install instructions
NEWS original gsl-1.7 news
README original gsl-1.7 Readme
Readme_GnuWin32.txt GnuWin32-specific Readme
SUPPORT original gsl-1.7 support notice
THANKS original gsl-1.7 acknowledgements
TODO original gsl-1.7 to-do list
\bin
libgsl.dll gsl-1.7 dynamic link library (release version)
libgsl_d.dll gsl-1.7 dynamic link library (gcc debug) (*)
libgslcblas.dll cblas dynamic link library (release version)
libgslcblas_d.dll cblas dynamic link library (gcc debug) (*)
gsl-histogram.exe program for calculating histograms for data
gsl-randist.exe program for generating data conforming to a specified distribution
\lib
libgsl.a gsl static library (gcc)
libgsl_d.a gsl static library (gcc debug) (*)
libgslcblas.a cblas static library (gcc)
libgslcblas_d.a cblas static library (gcc debug) (*)
libgsl_dll.a gcc import library for libgsl.dll
libgsl_d_dll.a gcc import library for libgsl_d.dll (*)
libgslcblas_dll.a gcc import library for libgslcblas.dll
libgslcblas_d_dll.a gcc import library for libgslcblas_d.dll (*)
libgsl.def export definitions for libgsl.dll
libgslcblas.def export definitions for libgslcblas.dll
\doc (**)
\info
\man1
\man3 gsl help in various formats
\include\gsl gsl include files
在此,仅依靠第6项下载文件:gsl-1.8-src.zip来完成此工作,建议就不要解压或安装其它包了,避免文件混乱。
具体步骤如下:
- 用VS2015打开解压后的目录中的VC8下的libgsl.sln工程文件;
- 对主项目按四种编译配置在x86平台选项下进行生成;【Release-StaticLib Multi-Threaded (/MT)、Release-DLL Multi-Threaded DLL (/MD)、Debug-StaticLib Multi-Threaded Debug (/MTd)、Debug-DLL Multi-Threaded Debug DLL (/MDd)】
- 生成成功后,在VC8项目目录下可找到如下文件:
|
libgsl |
|
||||||||||
|
libgslcblas |
|
- 在VS和MinGW下使用libgsl及libgslcblas,均以Release-DLL和Debug-DLL文件夹下的.lib及.dll进行调用编译即可。
总结
1、 在64bit系统下,强行编译32bit的GSL库,需在msys shell中使用“CFLAGS="-m32" CXXFLAGS="-m32"”参数进行配置。
2、 利用msys环境下make生成的*.dll.a(import library)同样可以在VS下进行调用编译,等同于VS编译生成的*_dll.lib(import library)。
3、关于Static libraries、import library、Dynamic libraries 【原文】
- Static libraries on Linux have the
.afile extension. Static libraries on Windows have the.libfile extension. - Dynamic libraries on Windows have the
.dllextension; on Linux have the.soextension. - The import library is a static library. It contains the code required to load the DLL. in order to link against a DLL, an import library is required. Now you're using GCC (not
cl.exe) to compile on Windows. GCC has another file extension convention for import libraries, it "should be called *.dll.a or *.a", as explained in the doc for the--out-implibyou referred to. Import libraries (.libwith MSVC or.dll.awith GCC) are static libraries: they contain the code to load the DLL. I had the same question the other day. - A DLL may have functions that are exported and functions that are not exported. An import library has to know which functions are exported and which aren't. One of the means of telling it is a DEF file. When building the DLL, the linker uses the .def file to create an export (.exp) file and an import library (.lib) file. The linker then uses the export file to build the DLL file. Executables that implicitly link to the DLL link to the import library when they are built. -- MSDN: Exporting from a DLL Using DEF Files
- Also see MSDN: Exporting Functions from a DLL by Ordinal Rather Than by Name, together that should answer your last question on export by index, or ordinal number.
4、 关于“ -l ”【原文】
How do I specify the libraries to be searched by the linker?
- MinGW supports libraries named according to the "<name>.lib" and "<name>.dll" conventions, in addition to the normal "lib<name>.a" convention common on *nix systems. To include libraries named according to any of these conventions, simply add an associated "-l<name>" specification to the compiler command, ensuring it is placed after the name of the module in which the reference appears.
- Note that, if the library is not found in any of the default library search paths, you may also need to insert an appropriate "-L<dir>"switch to specify its location; (it is recommended that you place the "-L<dir>" switch before the "-l<name>" specification which requires it).
- Also note that the library names "lib<name>.a" and "lib<name>.lib" are not equivalent; if you have a library named according to the aberrant "lib<name>.lib" convention, it will not be found by an "-l<name>" specification -- if you cannot rename the library, you must use the form "-llib<name>" instead.
- Finally, please do not fall into the all-too-common trap of placing any "-l<name>" specification before the name of any source or object module which requires it. Where the source file bar.c has dependencies on the library archive libfoo.a, the command:
$ gcc -lfoo bar.c
is incorrect, and will surely lead to "undefined reference" errors. The correct form for this command is:
$ gcc bar.c -lfoo
5、 相关参考及扩展阅读
- GCC and Make Compiling, Linking and Building C/C++ Applications
- HOWTO Create an Import Library for a DLL using MinGW
- How To Use the C Run-Time
- gcc for Windows
- CMake FAQ
(文中部分内容来源于网络,感谢原作者分享)
在WINDOWS中安装使用GSL(MinGW64+Sublime Text3 & Visual Studio)的更多相关文章
- 在WINDOWS中安装使用SIGPACK(MinGW64+Sublime Text3 &Visual Studio)
本文介绍在Windows下安装使用SigPack库,涉及Armadillo.OpenBLAS安装使用说明,最终实现对SigPack示例CPP基于MinGW64在Sublime Text3下的编译运行, ...
- 在Windows中安装MinGW-w64(有图,一步一步)
在Windows中安装MinGW-w64 发表回复 如需配合Sublime Text 3编译C程序, 请参考本站文章: 使用Sublime Text 3与MinGW-w64编译C语言程序 MinGW, ...
- 怎样把windows中安装的程序列出来?
症状/问题我怎样把windows中安装的程序信息输出到一个文本文件中?解决方法使用 windows 操作系统中的命令:wmic就可以做到.下面的命令就可以把系统中安装的程序都输出到文件ProgramL ...
- windows中安装python
windows中安装python 在windows中安装python的步骤如下. 1.下载python的安装包 python的安装包地址为: https://www.python.org/ftp/py ...
- 在Windows中安装PostgreSQL
在Windows中安装PostgreSQL 虽然PostgreSQL是为类UNIX平台开发的,但它却是可以移植的.从7.1版本开始,PostgreSQL可以编译安装和作为一个PostgreSQL服务器 ...
- Windows中安装Scrapy
在linux中安装Scrapy只需要导入一些非python的支持包,在windows中安装Scrapy则是一波三折. 总之来说,主要分为以下几个步骤,可能由于系统问题(国内个人机子,甚至是小企业的机子 ...
- 下载文件时-修改文件名字 Redis在Windows中安装方法 SVN安装和使用(简单版) WinForm-SQL查询避免UI卡死 Asp.Net MVC Https设置
下载文件时-修改文件名字 1后台代码 /// <summary> /// 文件下载2 /// </summary> /// <param name="Fil ...
- Python原来这么好学-1.1节: 在windows中安装Python
这是一本教同学们彻底学通Python的高质量学习教程,认真地学习每一章节的内容,每天只需学好一节,帮助你成为一名卓越的Python程序员: 本教程面向的是零编程基础的同学,非科班人士,以及有一定编程水 ...
- 在Windows中安装PySpark环境
在Windows中安装PySpark环境 安装Python 可以选择安装官方版本的Python,或是Anaconda,对应的地址如下. 下载地址 Python:https://www.python.o ...
随机推荐
- UI命名规范
Ui控件汇总 按钮 单行文本框 多行文本框 水平滑动条 垂直滑动条 水平滚动条 垂直滚动条 进度条 下拉列表框 复选框 UI命名规范 UI文字做好备份,方便后期维护修改 按钮命名规范:btn_ 第一个 ...
- STL迭代器iterator
一:迭代器原理 迭代器是一个“可遍历STL容器内全部或部分元素”的对象. 迭代器指出容器中的一个特定位置. 迭代器就如同一个指针. 迭代器提供对一个容器中的对象的访问方法,并且可以定义了容器中对象的范 ...
- java 根据经纬度坐标计算两点的距离算法
/** * @Desc 根据经纬度坐标计算两点的距离算法<br> * @Author yangzhenlong <br> * @Data 2018/5/9 18:38 */ p ...
- C#多线程处理
创建多线程,并带参数! using System; using System.Collections; using System.Collections.Generic; using System.I ...
- vue 点击展开显示更多 点击收起部分隐藏
<!DOCTYPE html> <html lang="en"> <head> <meta charset="UTF-8&quo ...
- SVN clean失败解决方法
一.问题描述 1.svn 更新或者提交时,报错:svn cleanup failed–previous operation has not finished; run cleanup if it wa ...
- 前端使用pdf.js预览pdf文件
现在的浏览器基本都支持直接把pdf文件拖到浏览器就可以打开了,不用安装额外的插件.但是不同的浏览器显示的页面不一样.如果我们想在网页上统一预览pdf怎样实现呢? Mozilla开源了一个插件pdf.j ...
- 2018-2019-2 20165337《网络攻防技术》Exp5 MSF基础应用
一.实践目标 1.一个主动攻击实践 ms08_067 2.一个针对浏览器的攻击 ms13-069 3.一个针对客户端的攻击 adobe (Adobe_toolbutton客户端漏洞) 4.成功应用任何 ...
- SQL server 数据库中插入中文变???格式乱码的问题另一种容易忽略的情况(C#操作dapper)
1.先查查 VS2015 中的XXX.cs页面中编码格式,记事本打开另存一下,编码格式可能是ANSI改为unioncode. (中文前面加N或者改排序规则解决不了的情况有可能是以上原因.)
- day08 文件操作
1.三种字符串: (1)u'' 普通字符串 ---> u'abc' ---> 默认的文本方式,以字符作为文本的输出方式 (2)b'' 二进制字符串 ---> b'ASCII码' -- ...