基于licode搭建webrtc服务器
0. 前言
licode官网文档安装教程十分简单, 但是实际搭建过程是很艰辛的. 官方文档没有提示说会遇到什么样的问题, 实际过程中可能遇到各种各样的问题, 在解决的时候费时费力, 我就总结一下自己在安装搭建过程中遇到的问题.
注: 最大的问题就是网络问题, 整个安装过程是边下载资源边安装的, 资源基本都是国外的, 因为墙的缘故, 可能会遇到想不到的错误.
1. 环境
系统: ubuntu16.04.6 ( ubuntu14.04.6也可以 )
用户: root
执行时最好加 sudo
官方安装教程地址: https://licode.readthedocs.io/en/master/from_source/
2. 搭建
下面是我引用licode官方教程中一些主要步骤内容
Clone Licode
Let's start by cloning the Licode repository
git clone https://github.com/lynckia/licode.git
cd licodeThe repository contains scripts for the rest of the steps of this guide.
Install dependencies
This step installs the dependencies of all the Licode components. This is the only step that depends on your OS
./scripts/installUbuntuDeps.shInstall Licode
Here we will install all the Licode components in your computer.
./scripts/installNuve.sh
./scripts/installErizo.shInstall basicExample
The basicExample is a really simple node-based web application that relies on Licode to provide a videoconferencing room.
./scripts/installBasicExample.shStart Licode!
At this points, you have successfully installed all the Licode components in your computer and also a simple application that will let you try it. Let's use the convenience script to start all Licode components:
./scripts/initLicode.shAfter that, we just have to start our node application, we also have a script for that:
./scripts/initBasicExample.shNow you can connect to http://localhost:3001 with Chrome or Firefox and test your basic videoconference example!
What's next?
Well you now have a taste of what Licode can do. You can start by modifying basicExample. You can find the code in licode/extras/basic_example: * basicServer.js is the node.js server that manages the communication between the clients and Nuve. Here you can add your own methods using the server side API (NuveAPI)
Head to Licode Architecture for more information about different Licode components, or start developing your custom service getting into the client or server APIs.
注: 如果可以翻墙, 而且网速还可以, 将会减少很多下载安装的问题
网络问题可能会报一些连接超时问题或找不到包, 建议重试或者更换网络.
licode中nvm需要安装的node版本是6.14.4, 但我这边使用nvm ls-remote 命令看到远程库中只有1.x.x~3.x.x版本.
(其实远程库应该是有nodejs版本的, iojs和nodejs在两个不同地址的版本库, 很可能因为墙的原因, 导致版本库加载不出来)
1.x.x~3.x.x 是iojs版本
0.x.x 以及4.x.x~10+.x.x是nodejs版本
开始尝试更改licod路径下的.nvmrc配置, 把6.14.4版本号换成3.1.0版本号.
于是nvm安装的为iojs3.1.0, 前面都很成功.
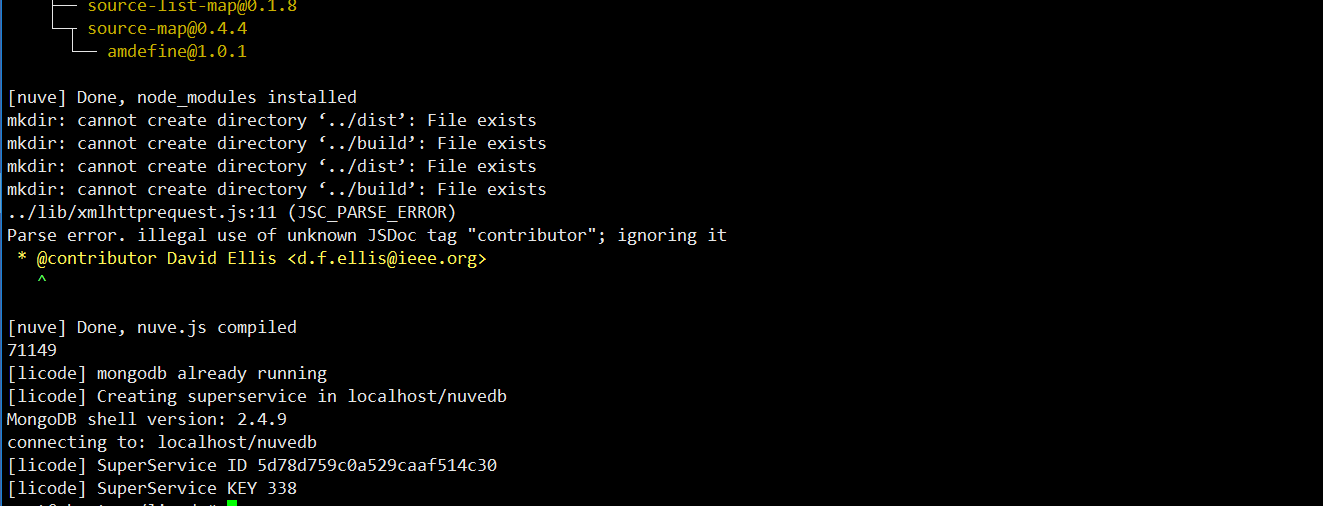
但是到后面编译时发现
安装低版本的node发现执行 ./scripts/installNuve.sh 会报错
之后又更改安装脚本代码, 更换了国内源, 可以加载iojs版本和nodejs版本, 成功安装了6.14.4版本nodejs
在nvm.sh(路径: ./licode/build/libdeps/nvm/)中修改源地址为国内源 如: https://npm.taobao.org/dist

或者在installUbuntuDeps.sh中对应位置添加如下框起来的代码(临时环境变量, 把国内源临时添加上去)
export NVM_NODEJS_ORG_MIRROR=https://npm.taobao.org/dist

这样就可以找到合适版本的nodejs了.
nodejs可执行程序路径(./licode/build/libdeps/nvm/versions/node/v6.14.4/bin/)
注: iojs版本对应的是(./licode/build/libdeps/nvm/versions/io.js/vx.x.x/bin)
npm是安装node时一块儿安装的.是和node绑定的. 在node可执行程序对应的路径下.
npm的可执行程序路径(./licode/build/libdeps/nvm/versions/node/v6.14.4/bin/)
npm使用的源默认是国外的, 速度可能很慢, 很容易发生中连接失败中断错误.
我尝试更换国内源
- # 更换源地址, 如国内源: https://registry.npm.taobao.org
- npm config set registry 源的访问地址
- # 查看配置源地址
- npm config get registry
注: 1. 更换源地址使用绝对路径或相对路径(保证使用的是licode下的npm), 否则直接用npm命令使用的是系统的npm, 而不是licode的npm.
2. 使用tabao源虽然解决了6.14.4版本问题, 但是发现后面的过程很慢很慢, 反而换成原来的很快.
安装conan部分
conan错误, 这个是安装conan错误, 首先去python的dist-packages目录下, 删除setuptools-3.3.egg-info文件夹, 然后再使用pip命令下载setuptools, 后面的就交给licode的安装脚本就行了.

- pip3 install setuptools -U
- Downloading setuptools-41.2.-py2.py3-none-any.whl (576kB): 576kB downloaded
- Installing collected packages: setuptools
- Found existing installation: setuptools 3.3
- Not uninstalling setuptools at /usr/lib/python3/dist-packages, owned by OS
- Successfully installed setuptools
- Cleaning up...
- root@ubuntu:~/licode# cd /usr/lib/python3/dist-packages/
- root@ubuntu:/usr/lib/python3/dist-packages# sudo rm -fr setuptools-3.3.egg-info/
- root@ubuntu:~/licode# pip3 install setuptools -U
下载的各种依赖环境(都是脚本自动下载安装的, 可能有些因网络问题等会失败,可以自行下载对应压缩包放入对应路径):
详细大小:

第一步./scripts/installUbuntuDeps.sh执行成功.

或者

第二步./scripts/installNuve.sh执行成功

第三步 ./scripts/installErizo.sh
编译时遇到错误: 提示识别错误, ld共享库损坏

执行ld -v 查看版本

更新ld.
- apt-get update
- apt-get install binutils-2.26
- // 默认是把新版本的安装到了 /usr/lib/binutils-2.26/ 下了, 把旧的/usr/bin/ld 备份, 建立新的软连接 /usr/bin/ld --> /usr/lib/binutils-2.26/bin/ld
- // 也可以用源码安装(源码安装三部曲):
- // 源码地址: https://ftp.gnu.org/gnu/binutils/
- // ./configure --prefix=/xx/xx 执行configure时添加安装路径.
更新后查看版本

下载nodejs的header
下载nodejs的header失败, 其实这个是源的问题,因为国外源, 导致访问不到.( 另因: 我手动点这个地址, 发现进去需要输入验证码, 很有可能是因为需要输入验证码, 才导致找不到资源.)

在node-gyp可执行程序的路径下执行如下命令手动下载安装(通过国内源下载) (路径:./licode/build/libdeps/nvm/versions/node/v6.14.4/bin/)
- ./node-gyp install --dist-url https://npm.taobao.org/mirrors/node
执行成功打印

注: node-gyp文档地址: https://www.npmjs.com/package/node-gyp
第三步 ./scripts/installErizo.sh 执行成功.

不常见错误:
执行npm时可能出现的报错:
报错: CERT_UNTRUSTED
解决办法: ssl验证问题,使用下面的命令取消ssl验证即可解决 npm config set strict-ssl false
nvm相关
nvm的github地址: https://github.com/nvm-sh/nvm
nvm 常用命令
● nvm install stable 安装最新稳定版 node
● nvm install <version> 安装指定版本,如:安装v4.4.0,nvm install v4.4.0
● nvm uninstall <version> 删除已安装的指定版本,语法与install类似
● nvm use <version> 切换使用指定的版本node
● nvm ls 列出所有安装的版本
● nvm alias default <version> 如: nvm alias default v11.1.0
其它
window 打开浏览器
cmd /c start http://www.baidu.com
linux打开浏览器
x-www-browser http://www.baidu.com
中科大源
http://npmreg.mirrors.ustc.edu.cn
-----------------------------------------------------------------------------------------------------
目前通过谷歌浏览器和69版本的火狐浏览器无法使用摄像头采集, 也不能正常拉流, 推测是因为安全问题, 需要使用https才能正常使用.
基于licode搭建webrtc服务器的更多相关文章
- windows环境下基于nginx搭建rtmp服务器
基于nginx搭建rtmp服务器需要引入rtmp模块,引入之后需重新编译nginx linux环境几个命令行就能实现编译,笔者未尝试,网上有很多教程. windows环境还需要安装一系列的编译环境,例 ...
- 【腾讯云服务器】基于centos7搭建ftp服务器(vsftpd)
该博客分为三部分设置,1.ftp服务器搭建.2.防火墙设置 3.腾讯云安全组 一.ftp服务器搭建 1.1 安装vsftpd yum install vsftpd -y 1.2 启动vsftpd服 ...
- 基于openssl搭建https服务器
1. 搭建web环境 我这里使用源码编译安装方式安装httpd.详情可以参加我的一篇博客http://www.cnblogs.com/zhaojiedi1992/p/zhaojiedi_linux_1 ...
- 基于Docker搭建GitLab服务器
运行环境:CentOS 7.4 一.安装Docker Docker安装可以参照runoob教程(http://www.runoob.com/docker/centos-docker-install.h ...
- 基于 BaGet 搭建 Nuget 服务器
1 前言 1.1 BaGet 介绍 BaGet 是一个轻量级的,开源的,跨平台的 Nuget 和 symbol 服务器. 1.2 环境介绍 操作系统:CentOS 7 使用 Docker 安装 2 安 ...
- Linux下基于vsftpd搭建ftp服务器
1.先用检查是否已经安装rpm -qa| grep vsftpd2.然后再进行在线安装vsftpd这个服务yum install vsftpd -y3.修改vi /etc/vsftpd/vsftpd. ...
- WebRTC服务器——Licode 环境搭建
WebRTC服务器--Licode 环境搭建 系统配置 阿里云服务器 Ubuntu 14.04.5 LTS Docker 环境搭建 在一台空的机器上搭建docker环境,先要安装docker,执行下面 ...
- p2p webrtc服务器搭建系列1: 房间,信令,coturn打洞服务器
中继(relay) 在RTCPeeConnection中,使用ICE框架来保证RTCPeerConnection能实现NAT穿越 ICE,全名叫交互式连接建立(Interactive Connecti ...
- (转)基于即时通信和LBS技术的位置感知服务(三):搭建Openfire服务器+测试2款IM客户端
主要包含4个章节: 1. Java 领域的即时通信的解决方案 2. 搭建 Openfire 服务器 3. 使用客户端测试我们搭建的 Openfire 服务器 4. Smack 和 ASmack 一.J ...
随机推荐
- C和汇编混联合的问题
关键时刻出现了问题: 关于packed的问题,一定要注意这个问题http://stackoverflow.com/questions/4306186/structure-padding-and-str ...
- linux如何查看ip地址
使用命令: ifconfig -a 例如:
- Sqlite3错误:Recursive use of cursors not allowed 的解决方案
感悟] 写完这篇日志后,有调了一段时间程序,又有了一点心得分享下: 一)爬稳定的数(dong)据(xi)最好存储下来,特别是数据库在国外的那种,下载时间成本太高昂了,存起来再处理,会节约很多时间: 二 ...
- oracal 游标
一. CREATE OR REPLACE PROCEDURE PRC_WAP_ACTIVEUSERS(RETCODE OUT VARCHAR2) /************************** ...
- Ubuntu桌面版与服务器版的区别(转)
Ubuntu桌面版vs服务器版 提到安装Linux,Ubuntu可谓是最受欢迎的.为了满足每个人的需求,出现了不少版本或风格的Ubuntu:其中两项便是桌面版与服务器版.只要发布版本号一致,这两者从核 ...
- phpinfo中敏感信息记录
比赛中或者渗透中如果遇到phpinfo,从里面发现的一些线索能够对后续的渗透和解题帮助很大,这里记录总结一下目前网上比较常用的的. 下图来源于:https://seaii-blog.com/index ...
- 使用create-react-app创建项目(一)——端口配置
在package.json文件中找到 "scripts",在start中添加"set PORT=8000" "scripts": { &qu ...
- 尚硅谷周阳老师-redis脑图课件
因为脑图原件是.mmap格式,使用wps和xmind打开都会有格式不兼容的问题,这里我们可以使用mindmanager存为html5交互式格式, 提供在线阅读.因为阿里云学生服务器带宽有限,这里打开加 ...
- arcgis python获得字段唯一值
arcgis python获得字段唯一值 # Import native arcgisscripting moduleimport arcgisscripting, sys# Create the g ...
- Google Protocol Buffers 快速入门(带生成C#源码的方法)
Google Protocol Buffers是google出品的一个协议生成工具,特点就是跨平台,效率高,速度快,对我们自己的程序定义和使用私有协议很有帮助. Protocol Buffers入门: ...
