(七)CXF添加拦截器
今天开始讲下拦截器,前面大家学过servlet,struts2 都有拦截器概念,主要作用是做一些权限过滤,编码处理等;
webservice也可以加上拦截器,我们可以给webservice请求加权限判断功能;
webservice分服务端和客户端,服务端和客户端都是可以加拦截器的,无论是服务端还是客户端,都分进,出(In,Out)拦截器;
我们先来改下服务端的Server类:
- package com.wishwzp.webservice;
- import javax.xml.ws.Endpoint;
- import org.apache.cxf.interceptor.LoggingInInterceptor;
- import org.apache.cxf.interceptor.LoggingOutInterceptor;
- import org.apache.cxf.jaxws.JaxWsServerFactoryBean;
- import com.wishwzp.webservice.impl.HelloWorldImpl;
- public class Server {
- public static void main(String[] args) {
- System.out.println("web service start");
- HelloWorld implementor = new HelloWorldImpl();
- String address = "http://192.168.0.110/helloWorld";
- //Endpoint.publish(address, implementor); // JDK实现 暴露webservice接口
- JaxWsServerFactoryBean factoryBean = new JaxWsServerFactoryBean();
- factoryBean.setAddress(address); // 设置暴露地址
- factoryBean.setServiceClass(HelloWorld.class); // 接口类
- factoryBean.setServiceBean(implementor); // 设置实现类
- factoryBean.getInInterceptors().add(new LoggingInInterceptor()); // 添加in拦截器 日志拦截器
- factoryBean.getOutInterceptors().add(new LoggingOutInterceptor()); // 添加out拦截器
- factoryBean.create();
- System.out.println("web service started");
- }
- }
这里的话,我们通过factoryBean对象可以获取拦截器组,添加进或者出拦截器,这里有个经典的拦截器,我们开发的时候经常用,就是日志拦截器,
我们可以把客户端的请求,以及服务端返回的信息打印出来,可以打印控制台,也可以打印到执行文件;这里为了演示方便,直接搞无参的拦截器,
打印到控制台;
无论是自定义的拦截器,还是CXF自带的拦截器,都必须实现Interceptor接口。
我们执行下Server类:
然后我们再来执行下客户端的Client类,结果:

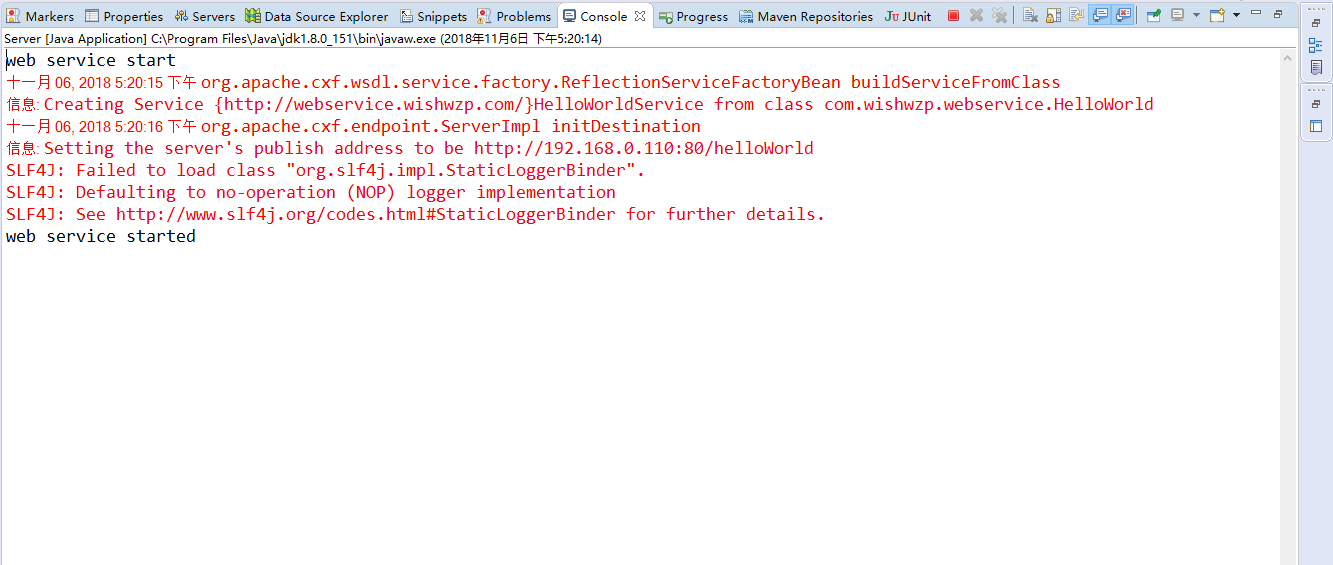
然后我们仔细观察Server端的控制台:
- web service start
- 十一月 06, 2018 5:20:15 下午 org.apache.cxf.wsdl.service.factory.ReflectionServiceFactoryBean buildServiceFromClass
- 信息: Creating Service {http://webservice.wishwzp.com/}HelloWorldService from class com.wishwzp.webservice.HelloWorld
- 十一月 06, 2018 5:20:16 下午 org.apache.cxf.endpoint.ServerImpl initDestination
- 信息: Setting the server's publish address to be http://192.168.0.110:80/helloWorld
- SLF4J: Failed to load class "org.slf4j.impl.StaticLoggerBinder".
- SLF4J: Defaulting to no-operation (NOP) logger implementation
- SLF4J: See http://www.slf4j.org/codes.html#StaticLoggerBinder for further details.
- web service started
- 十一月 06, 2018 5:20:50 下午 org.apache.cxf.services.HelloWorldService.HelloWorldPort.HelloWorld
- 信息: Inbound Message
- ----------------------------
- ID: 1
- Address: http://192.168.0.110/helloWorld?wsdl
- Http-Method: GET
- Content-Type:
- Headers: {Accept=[text/html, image/gif, image/jpeg, *; q=.2, */*; q=.2], connection=[keep-alive], Content-Type=[null], Host=[192.168.0.110], User-Agent=[Java/1.8.0_151]}
- --------------------------------------
- 十一月 06, 2018 5:20:51 下午 org.apache.cxf.services.HelloWorldService.HelloWorldPort.HelloWorld
- 信息: Inbound Message
- ----------------------------
- ID: 2
- Address: http://192.168.0.110/helloWorld
- Encoding: UTF-8
- Http-Method: POST
- Content-Type: text/xml; charset=UTF-8
- Headers: {Accept=[text/xml, multipart/related], connection=[keep-alive], Content-Length=[188], content-type=[text/xml; charset=UTF-8], Host=[192.168.0.110], SOAPAction=[""], User-Agent=[JAX-WS RI 2.2.9-b130926.1035 svn-revision#5f6196f2b90e9460065a4c2f4e30e065b245e51e]}
- Payload: <?xml version="1.0" ?><S:Envelope xmlns:S="http://schemas.xmlsoap.org/soap/envelope/"><S:Body><ns2:getRoles xmlns:ns2="http://webservice.wishwzp.com/"></ns2:getRoles></S:Body></S:Envelope>
- --------------------------------------
- 十一月 06, 2018 5:20:51 下午 org.apache.cxf.services.HelloWorldService.HelloWorldPort.HelloWorld
- 信息: Outbound Message
- ---------------------------
- ID: 2
- Response-Code: 200
- Encoding: UTF-8
- Content-Type: text/xml
- Headers: {}
- Payload: <soap:Envelope xmlns:soap="http://schemas.xmlsoap.org/soap/envelope/"><soap:Body><ns2:getRolesResponse xmlns:ns2="http://webservice.wishwzp.com/"><return><item><key>wishwzp</key><value><id>1</id><roleName>技术总监</roleName></value><value><id>2</id><roleName>架构师</roleName></value></item><item><key>jack</key><value><id>1</id><roleName>程序员</roleName></value></item></return></ns2:getRolesResponse></soap:Body></soap:Envelope>
- --------------------------------------
这里的打印出来的就是日志信息:Inbound 进信息 Outbound 是出信息,进的时候,大家会看到有个Headers SOAP消息。后面我们可以在里面加我们的数据;
在Outbound Message里,Payload消息里我们可以找到webservice返回的数据 SOAP消息;
同理,我们在客户端也可以加进出拦截器,修改Client代码:
- package com.wishwzp.webservice;
- import java.util.List;
- import org.apache.cxf.frontend.ClientProxy;
- import org.apache.cxf.interceptor.LoggingInInterceptor;
- import org.apache.cxf.interceptor.LoggingOutInterceptor;
- public class Client {
- public static void main(String[] args) {
- HelloWorldService service=new HelloWorldService();
- HelloWorld helloWorld=service.getHelloWorldPort();
- org.apache.cxf.endpoint.Client client=ClientProxy.getClient(helloWorld);
- client.getInInterceptors().add(new LoggingInInterceptor()); // 添加in拦截器 日志拦截器
- client.getOutInterceptors().add(new LoggingOutInterceptor()); // 添加out拦截器
- //System.out.println(helloWorld.say("wishwzp测试"));
- // User user=new User();
- // user.setUserName("jack");
- // user.setPassword("123456");
- // List<Role> roleList=helloWorld.getRoleByUser(user);
- // for(Role role:roleList){
- // System.out.println(role.getId()+","+role.getRoleName());
- // }
- MyRoleArray array=helloWorld.getRoles();
- List<MyRole> roleList=array.item;
- for(int i=0;i<roleList.size();i++){
- MyRole my=roleList.get(i);
- System.out.print(my.key+":");
- for(Role r:my.value){
- System.out.print(r.getId()+","+r.getRoleName()+" ");
- }
- System.out.println();
- }
- }
- }
这里的话,我们用到了ClientProxy,客户端代理。所以也是需要导入对应cxfjar包的,这里我直接将pox.xml的复制到client项目中
- <dependencies>
- <dependency>
- <groupId>org.apache.cxf</groupId>
- <artifactId>cxf-core</artifactId>
- <version>3.1.5</version>
- </dependency>
- <dependency>
- <groupId>org.apache.cxf</groupId>
- <artifactId>cxf-rt-frontend-jaxws</artifactId>
- <version>3.1.5</version>
- </dependency>
- <dependency>
- <groupId>org.apache.cxf</groupId>
- <artifactId>cxf-rt-transports-http-jetty</artifactId>
- <version>3.1.5</version>
- </dependency>
- </dependencies>
我们请求的时候,可以看到控制台的日志信息:
- 十一月 06, 2018 5:28:44 下午 org.apache.cxf.wsdl.service.factory.ReflectionServiceFactoryBean buildServiceFromWSDL
- 信息: Creating Service {http://webservice.wishwzp.com/}HelloWorldService from WSDL: http://192.168.0.110/helloWorld?wsdl
- 十一月 06, 2018 5:28:46 下午 org.apache.cxf.services.HelloWorldService.HelloWorldPort.HelloWorld
- 信息: Outbound Message
- ---------------------------
- ID: 1
- Address: http://192.168.0.110/helloWorld
- Encoding: UTF-8
- Http-Method: POST
- Content-Type: text/xml
- Headers: {Accept=[*/*], SOAPAction=[""]}
- Payload: <soap:Envelope xmlns:soap="http://schemas.xmlsoap.org/soap/envelope/"><soap:Body><ns2:getRoles xmlns:ns2="http://webservice.wishwzp.com/"/></soap:Body></soap:Envelope>
- --------------------------------------
- 十一月 06, 2018 5:28:46 下午 org.apache.cxf.services.HelloWorldService.HelloWorldPort.HelloWorld
- 信息: Inbound Message
- ----------------------------
- ID: 1
- Response-Code: 200
- Encoding: UTF-8
- Content-Type: text/xml; charset=UTF-8
- Headers: {content-type=[text/xml; charset=UTF-8], Date=[Tue, 06 Nov 2018 09:28:46 GMT], Server=[Jetty(9.2.11.v20150529)], transfer-encoding=[chunked]}
- Payload: <soap:Envelope xmlns:soap="http://schemas.xmlsoap.org/soap/envelope/"><soap:Body><ns2:getRolesResponse xmlns:ns2="http://webservice.wishwzp.com/"><return><item><key>wishwzp</key><value><id>1</id><roleName>技术总监</roleName></value><value><id>2</id><roleName>架构师</roleName></value></item><item><key>jack</key><value><id>1</id><roleName>程序员</roleName></value></item></return></ns2:getRolesResponse></soap:Body></soap:Envelope>
- --------------------------------------
- wishwzp:1,技术总监 2,架构师
- jack:1,程序员
这里也是出进的日志信息,和上面那个类似;
OK到这里的话,添加拦截器已经讲完了;
(七)CXF添加拦截器的更多相关文章
- CXF添加拦截器和自定义拦截器
前面讲了如何采用CXF开发webservice,现在来讲如何添加拦截器和自定义拦截器. 服务端代码: HelloWorld implementor=new HelloWorldImpl(); Stri ...
- 使用CXF为webservice添加拦截器
拦截器分为Service端和Client端 拦截器是在发送soap消息包的某一个时机拦截soap消息包,对soap消息包的数据进行分析或处理.分为CXF自带的拦截器和自定义的拦截器 1.Servi ...
- (八)CXF之用spring添加拦截器
一.案例 本章案例是基于CXF之自定义拦截器基础之上改造的,目的是在服务端中用spring添加拦截器 配置web.xml <?xml version="1.0" encodi ...
- (五)CXF之添加拦截器
一.需求分析 webService中的拦截器类似于servlet的Filter过滤器.一般用于调用服务前后先调用拦截器的方法. 二.案例 本章案例是基于上一章节的基础上添加拦截器的 2.1 服务端添加 ...
- CXF之五 拦截器Interceptor
拦截器(Interceptor)是CXF功能最主要的扩展点,可以在不对核心模块进行修改的情况下,动态添加很多功能.拦截器和JAX-WS Handler.Filter的功能类似,当服务被调用时,就会创建 ...
- 【WebService】WebService之CXF的拦截器(五)
CXF拦截器介绍 CXF拦截器是功能的主要实现单元,也是主要的扩展点,可以在不对核心模块进行修改的情况下,动态添加功能.当服务被调用时,会经过多个拦截器链(Interceptor Chain)处理,拦 ...
- WebService学习总结(五)--CXF的拦截器
拦截器是Cxf的基础,Cxf中很多的功能都是由内置的拦截器来实现的,拦截器在Cxf中由Interceptor表示.拦截器的作用类似axis2中handle.Cxf的拦截器包括入拦截器和出拦截器,所有的 ...
- spring boot 添加拦截器
构建一个spring boot项目. 添加拦截器需要添加一个configuration @Configuration @ComponentScan(basePackageClasses = Appli ...
- javaweb添加拦截器
js请求后台代码添加拦截器: package com.ctzj.biz.isale.deploy.controller; import java.io.IOException; import java ...
随机推荐
- 学习windows编程 day4 之 绘制随机矩形和peekMessage
#include <windows.h> #include <strsafe.h> LRESULT CALLBACK WndProc(HWND hwnd, UINT messa ...
- 在同一个类中,一个方法调用另外一个有注解(比如@Async,@Transational)的方法,注解失效的原因和解决方法
参考原贴地址:https://blog.csdn.net/clementad/article/details/47339519 在同一个类中,一个方法调用另外一个有注解(比如@Async,@Trans ...
- Win记录-配置Windows Server R 2008多用户远程连接(仅做参考)
1.计算机管理下用户组下新建用户 2.系统属性下远程控制加入用户,设置允许运行任何远程桌面 3.运行->gpedit.msc->计算机配置->管理模板->windows 组件- ...
- Study 3 —— 表格
表格基本格式: <table> <tr> <td></td> <td></td> </tr> <tr> ...
- HDU - 3564 Another LIS(LIS+线段树)
http://acm.hdu.edu.cn/showproblem.php?pid=3564 题意 给出1~n的插入顺序,要求每次插入之后的LIS 分析 首先用线段树还原出最终序列.因为插入的顺序是按 ...
- 获取客户端的请求IP地址
获取客户端的请求IP地址 package com.microClass.util; import javax.servlet.http.HttpServletRequest; import java. ...
- Java实现DOS中的Copy命令
import java.io.*; import java.util.Scanner; public class fileCopy { public static void main(String [ ...
- 25. Spring Boot与缓存 JSR-107、Spring缓存抽象
JSR107 Java Caching定义了5个核心接口,分别是CachingProvider, CacheManager, Cache, Entry和Expiry. CachingProvider ...
- TCP 链接 存在大量 close_wait 等待
大量 close_wait 等待 调整linux下 /etc/sysctl.conf参数,里面设置参数: # net.ipv4.tcp_keepalive_time 然后执行 # sysctl -p
- Postfix 邮件服务 - 基础服务
环境 centos 6.5 x64 测试 IP:172.16.2.18 1.关闭selinux # cat /etc/selinux/config SELINUX=disabled 2.配置 ipta ...