PyQt5教程——布局管理(4)
PyQt5中的布局管理
布局管理是GUI编程中的一个重要方面。布局管理是一种如何在应用窗口上防止组件的一种方法。我们可以通过两种基础方式来管理布局。我们可以使用绝对定位和布局类。
绝对定位
程序指定了组件的位置并且每个组件的大小用像素作为单位来丈量。当你使用了绝对定位,我们需要知道下面的几点限制:
- 如果我们改变了窗口大小,组件的位置和大小并不会发生改变。
- 在不同平台上,应用的外观可能不同
- 改变我们应用中的字体的话可能会把应用弄得一团糟。
- 如果我们决定改变我们的布局,我们必须完全重写我们的布局,这样非常乏味和浪费时间。
下面的例子中,使用了绝对坐标来定位组件
#!/usr/bin/python3

# -*- coding: utf-8 -*-

"""

ZetCode PyQt5 tutorial

This example shows three labels on a window

using absolute positioning.

author: Jan Bodnar

website: zetcode.com

last edited: January 2015

"""

import sys

from PyQt5.QtWidgets import QWidget, QLabel, QApplication

class Example(QWidget):

    def __init__(self):

        super().__init__()

        self.initUI()

    def initUI(self):

        lbl1 = QLabel('Zetcode', self)

        lbl1.move(15, 10)

        lbl2 = QLabel('tutorials', self)

        lbl2.move(35, 40)

        lbl3 = QLabel('for programmers', self)

        lbl3.move(55, 70)

        self.setGeometry(300, 300, 250, 150)

        self.setWindowTitle('Absolute')

        self.show()

if __name__ == '__main__':

    app = QApplication(sys.argv)

    ex = Example()

    sys.exit(app.exec_())
我们使用move()方法来定位我们的组件。在上面的例子中我们使用move()方法定位了一些标签组件。在使用move()方法时,我们给move()方法提供了x和y坐标作为参数。move()使用的坐标系统是从左上角开始计算的。x值从左到右增长。y值从上到下增长。
lbl1 = QLabel('Zetcode', self)

lbl1.move(15, 10)
将标签组件定位在x=15,y=10的坐标位置。
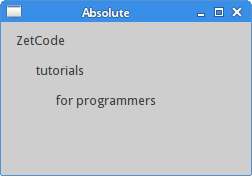 Figure: Absolute positioning
箱布局
布局管理器的布局管理类非常灵活,实用。它是将组件定位在窗口上的首选方式。QHBoxLayout和QVBoxLayout是两个基础布局管理类,他们水平或垂直的线性排列组件。想象一下我们需要在右下角排列两个按钮。为了使用箱布局,我们将使用一个水平箱布局和垂直箱布局来实现。同样为了使用一些必要的空白,我们将添加一些拉伸因子。
#!/usr/bin/python3

# -*- coding: utf-8 -*-

"""

ZetCode PyQt5 tutorial

In this example, we position two push

buttons in the bottom-right corner

of the window.

author: Jan Bodnar

website: zetcode.com

last edited: January 2015

"""

import sys

from PyQt5.QtWidgets import (QWidget, QPushButton,

    QHBoxLayout, QVBoxLayout, QApplication)

class Example(QWidget):

    def __init__(self):

        super().__init__()

        self.initUI()

    def initUI(self):

        okButton = QPushButton("OK")

        cancelButton = QPushButton("Cancel")

        hbox = QHBoxLayout()

        hbox.addStretch(1)

        hbox.addWidget(okButton)

        hbox.addWidget(cancelButton)

        vbox = QVBoxLayout()

        vbox.addStretch(1)

        vbox.addLayout(hbox)

        self.setLayout(vbox)

        self.setGeometry(300, 300, 300, 150)

        self.setWindowTitle('Buttons')

        self.show()

if __name__ == '__main__':

    app = QApplication(sys.argv)

    ex = Example()

    sys.exit(app.exec_())
例子在右下角放置了两个按钮。当我们改变应用窗口大小时,它们会相对于应用窗口不改变位置。在这个例子中我们使用了QHBoxLayout和QVBoxLayout两个布局类。
okButton = QPushButton("OK")

cancelButton = QPushButton("Cancel")
在这里我们创建了两个按钮。
hbox = QHBoxLayout()

hbox.addStretch(1)

hbox.addWidget(okButton)

hbox.addWidget(cancelButton)
这里我们创建了一个水平箱布局,并且增加了一个拉伸因子和两个按钮。拉伸因子在两个按钮之前增加了一个可伸缩空间。这会将按钮推到窗口的右边。
vbox = QVBoxLayout()

vbox.addStretch(1)

vbox.addLayout(hbox)
为了创建必要的布局,我们把水平布局放置在垂直布局内。拉伸因子将把包含两个按钮的水平箱布局推到窗口的底边。
self.setLayout(vbox)
最后,我们设置一下窗口的主布局。
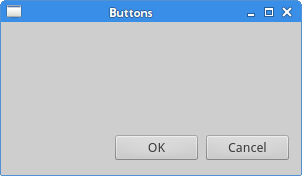 Figure: Buttons
网格布局
最常用的布局类是网格布局。这个布局使用行了列分割空间。要创建一个网格布局,我们需要使用QGridLayout类。
#!/usr/bin/python3

# -*- coding: utf-8 -*-

"""

ZetCode PyQt5 tutorial

In this example, we create a skeleton

of a calculator using a QGridLayout.

author: Jan Bodnar

website: zetcode.com

last edited: January 2015

"""

import sys

from PyQt5.QtWidgets import (QWidget, QGridLayout,

    QPushButton, QApplication)

class Example(QWidget):

    def __init__(self):

        super().__init__()

        self.initUI()

    def initUI(self):

        grid = QGridLayout()

        self.setLayout(grid)

        names = ['Cls', 'Bck', '', 'Close',

                 '7', '8', '9', '/',

                '4', '5', '6', '*',

                 '1', '2', '3', '-',

                '0', '.', '=', '+']

        positions = [(i,j) for i in range(5) for j in range(4)]

        for position, name in zip(positions, names):

            if name == '':

                continue

            button = QPushButton(name)

            grid.addWidget(button, *position)

        self.move(300, 150)

        self.setWindowTitle('Calculator')

        self.show()

if __name__ == '__main__':

    app = QApplication(sys.argv)

    ex = Example()

    sys.exit(app.exec_())
在我们的例子中,我们创建了一个全是按钮的网格布局。
grid = QGridLayout()

self.setLayout(grid)
实例化QGridLayout类,并且把这个类设为应用窗口的布局。
names = ['Cls', 'Bck', '', 'Close',

            '7', '8', '9', '/',

        '4', '5', '6', '*',

            '1', '2', '3', '-',

        '0', '.', '=', '+']
这些标签会在之后的按钮中使用。
positions = [(i,j) for i in range(5) for j in range(4)]
我们创建了一个网格的定位列表。
for position, name in zip(positions, names):

    if name == '':

        continue

    button = QPushButton(name)

    grid.addWidget(button, *position)
创建出按钮组件,并使用addWidget()方法向布局中添加按钮。
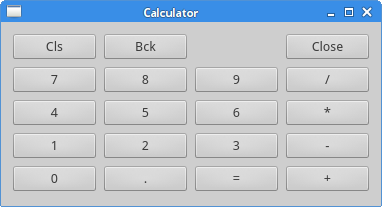 Figure: Calculator skeleton
文本审阅窗口示例
在网格中,组件可以跨多列或多行。在这个例子中,我们对它进行一下说明。
#!/usr/bin/python3

# -*- coding: utf-8 -*-

"""

ZetCode PyQt5 tutorial

In this example, we create a bit

more complicated window layout using

the QGridLayout manager.

author: Jan Bodnar

website: zetcode.com

last edited: January 2015

"""

import sys

from PyQt5.QtWidgets import (QWidget, QLabel, QLineEdit,

    QTextEdit, QGridLayout, QApplication)

class Example(QWidget):

    def __init__(self):

        super().__init__()

        self.initUI()

    def initUI(self):

        title = QLabel('Title')

        author = QLabel('Author')

        review = QLabel('Review')

        titleEdit = QLineEdit()

        authorEdit = QLineEdit()

        reviewEdit = QTextEdit()

        grid = QGridLayout()

        grid.setSpacing(10)

        grid.addWidget(title, 1, 0)

        grid.addWidget(titleEdit, 1, 1)

        grid.addWidget(author, 2, 0)

        grid.addWidget(authorEdit, 2, 1)

        grid.addWidget(review, 3, 0)

        grid.addWidget(reviewEdit, 3, 1, 5, 1)

        self.setLayout(grid)

        self.setGeometry(300, 300, 350, 300)

        self.setWindowTitle('Review')

        self.show()

if __name__ == '__main__':

    app = QApplication(sys.argv)

    ex = Example()

    sys.exit(app.exec_())
我们创建了包含三个标签,两个单行编辑框和一个文本编辑框组件的窗口。布局使用了QGridLayout布局。
grid = QGridLayout()

grid.setSpacing(10)
我们创建了一个网格布局并且设置了组件之间的间距。
grid.addWidget(reviewEdit, 3, 1, 5, 1)
如果我们向网格布局中增加一个组件,我们可以提供组件的跨行和跨列参数。在这个例子中,我们让reviewEdit组件跨了5行。
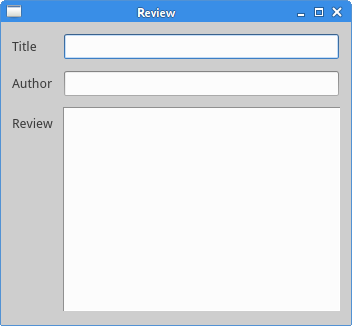 Figure: Review example
这部分的PyQt5教程专门用于讲述布局管理。
PyQt5教程——布局管理(4)的更多相关文章
- PyQt5之布局管理
目录 一 写在开头 1.1 本文内容 二 绝对布局 三 布局类 3.1 水平布局(QHBoxLayout)和垂直布局(QVBoxLayout) 3.2 水平布局和垂直布局实例 3.3 网格布局(QGr ...
- [Tkinter 教程] 布局管理 (Pack Place Grid)
原系列地址: Python Tkinter 简介: 本文讲述如何使用 tkinter 的布局管理 (被称作 layout managers 或 geometry managers). tkinter ...
- PyQT5基础布局管理
绝对定位布局 使用move(x, y)可以对窗口进行布局,以窗口左上角为原点,向右为 x 轴正方向,向下为 y 轴正方向,移动(x,y); import sys from PyQt5.QtGui im ...
- PyQT5速成教程-3 布局管理
本文由 沈庆阳 所有,转载请与作者取得联系! 布局(Layout)管理 Qt Designer中,在工具箱中最上方可以看到有4种布局.分别是垂直布局.水平布局.栅格布局和表单布局. 四种布局 布局 ...
- PyQt5——布局管理
PyQt5布局管理使用方法详见:https://blog.csdn.net/jia666666/article/list/3?t=1& PyQt5布局管理汇总: 1.QHBoxLayout 2 ...
- 四、PyQt5布局管理(绝对&相对、水平、垂直、格栅、表单)
目录 一.绝对布局 二.盒布局 三.格栅布局 四.格栅布局跨行跨列显示 布局管理即设置窗体上各个控件的位置,对于新手来说,这是学习的难点. 布局管理根据绝对坐标是否变动分为绝对布局和相对布局两大类.采 ...
- PyQt5(2)——调整布局(布局管理器)第一个程序
我们拖拽一个UI文件,转为PY文件后生成一个类Ui_MainWindow 此时,我们新建一个文件,用来控制业务逻辑(继承界面中的类),跟界面分开,这样我们就完成了界面和逻辑相分离(这段代码使用率基本1 ...
- PyQt5笔记之布局管理
代码:界面与逻辑分离 这是使用Designer做出的GUI,然后通过转换得到的Py代码.(界面文件) # -*- coding: utf-8 -*- # Form implementation gen ...
- PyQt5布局管理器
布局分类 绝对定位:使用move方法将空间直接定死在某个坐标,不会随着窗口大小的改变而改变 可变布局:使用各种布局管理器,实现组件的位置和大小随着窗口的变化而变化 布局管理器 QHBoxLayout: ...
随机推荐
- 监听当点击微信等app的返回按钮或者浏览器的上一页或后退按钮的事件
在实际的应用中,我们常常需要实现在移动app和浏览器中点击返回.后退.上一页等按钮实现自己的关闭页面.调整到指定页面或执行一些其它操作的 需求,那在代码中怎样监听当点击微信.支付宝.百度糯米.百度钱包 ...
- 几张图理解Roll, Pitch, Yaw的含义
Roll:翻滚 Pitch:俯仰 Yaw:偏航 有时候不知道它到底绕着哪个轴旋转得到的角,一个比较容易的记法是根据字母的排列顺序PRY分别对应XYZ轴进行旋转得到的角,即: Pitch是绕 ...
- Spring_Spring集成Quartz定时任务框架介绍和Cron表达式详解
在JavaEE系统中,我们会经常用到定时任务,比如每天凌晨生成前天报表,每一小时生成汇总数据等等.我们可以使用java.util.Timer结合java.util.TimerTask来完成这项工作,但 ...
- [Node.js]OS模块
摘要 Node.js有很多工具模块,比如os,path,net,dns,domain模块.这里先介绍os模块的使用方法.os模块提供了一些基本的系统操作函数. os模块 引入os模块 var os=r ...
- 如何在发型不乱的前提下应对单日十亿计Web请求
原文地址:http://developer.51cto.com/art/201502/464640.htm 就在不久之前,AppLovin移动广告平台的单一广告请求数量突破了200亿大关——相当于每一 ...
- arcgis python添加几何属性
import arcpy import numpy import math def AddGeometryAttributes(fc, geomProperties, lUnit, aUnit, cs ...
- Selenium2+python自动化29-js处理多窗口
前言 在打开页面上链接的时候,经常会弹出另外一个窗口(多窗口情况前面这篇有讲解:Selenium2+python自动化13-多窗口.句柄(handle)),这样在多个窗口之间来回切换比较复杂,那么有没 ...
- linux内核数据包转发流程(一):网络设备驱动
[版权声明:转载请保留出处:blog.csdn.net/gentleliu.邮箱:shallnew*163.com] 网卡驱动为每一个新的接口在一个全局的网络设备列表里插入一个数据结构.每一个接口由一 ...
- oracle转义符
要使用_,则需要做如下转义 select column_name from user_tab_columns where table_name = 'SYS_TERMINAL_MAPPING' AND ...
- Lua简明教程
这几天系统地学习了一下Lua这个脚本语言,Lua脚本是一个很轻量级的脚本,也是号称性能最高的脚本,用在很多需要性能的地方,比如:游戏脚本,nginx,wireshark的脚本,当你把他的源码下下来编译 ...