微服务(入门三):netcore ocelot api网关结合consul服务发现
简介
api网关是提供给外部调用的统一入口,类似于dns,所有的请求统一先到api网关,由api网关进行指定内网链接。
ocelot是基于netcore开发的开源API网关项目,功能强大,使用方便,它包含了负载均衡、路由、请求聚合、服务发现、权限认证等功能。
基础准备
开发环境:vs2017
netcore:2.1
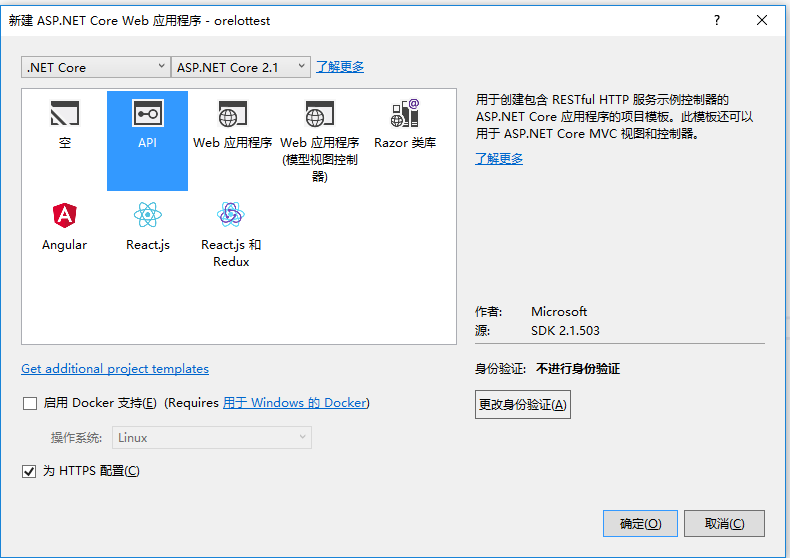
新建项目

netcore安装ocelot
- install-package Ocelot 安装ocelot组件
配置ocelot
1.添加ocelotSettings.json文件,并且在program.cs文件当中添加配置信息
using System;

using System.Collections.Generic;

using System.IO;

using System.Linq;

using System.Threading.Tasks;

using Microsoft.AspNetCore;

using Microsoft.AspNetCore.Hosting;

using Microsoft.Extensions.Configuration;

using Microsoft.Extensions.Logging;

namespace ocelotTest

{

    public class Program

    {

        public static void Main(string[] args)

        {

            BuildWebHost(args).Run();

        }

        public static IWebHost BuildWebHost(string[] args) =>

         WebHost.CreateDefaultBuilder(args)

             .UseStartup<Startup>()

            .UseUrls("http://localhost:8683")

         .ConfigureAppConfiguration(conf => {

             conf.AddJsonFile("OcelotSettings.json", optional: false, reloadOnChange: true);

         })

             .Build();

    }

}
2.注入ocelot服务
using System;

using System.Collections.Generic;

using System.Linq;

using System.Threading.Tasks;

using Microsoft.AspNetCore.Builder;

using Microsoft.AspNetCore.Hosting;

using Microsoft.AspNetCore.Mvc;

using Microsoft.Extensions.Configuration;

using Microsoft.Extensions.DependencyInjection;

using Microsoft.Extensions.Logging;

using Microsoft.Extensions.Options;

using Ocelot.DependencyInjection;

using Ocelot.Middleware;

using Ocelot.Provider.Consul;

using Ocelot.Provider.Polly;

namespace ocelotTest

{

    public class Startup

    {

        public Startup(IConfiguration configuration)

        {

            Configuration = configuration;

        }

        public IConfiguration Configuration { get; }

        // This method gets called by the runtime. Use this method to add services to the container.

        public void ConfigureServices(IServiceCollection services)

        {

            //注入ocelot服务

            services.AddOcelot(Configuration).AddConsul().AddPolly();

        }

        // This method gets called by the runtime. Use this method to configure the HTTP request pipeline.

        public void Configure(IApplicationBuilder app, IHostingEnvironment env)

        {

            if (env.IsDevelopment())

            {

                app.UseDeveloperExceptionPage();

            }

            app.UseOcelot().Wait();

        }

    }

}
3.配置ocelotSettings.json
{

  "ReRoutes": [

    {

      //下游路由模板,真实请求的路径

      "DownstreamPathTemplate": "/api/{everything}",

      //请求的方式,例如:http,https

      "DownstreamScheme": "http",

      //服务器名称

      "ServiceName": "zyz",

      //启用consul服务

      "UseServiceDiscovery": true,

      //服务熔断

      "QoSOptions": {

        "ExceptionsAllowedBeforeBreaking": , //允许多少次异常请求

        "DurationOfBreak": , //熔断时间,单位为秒

        "TimeoutValue":  //如果下游请求的处理时间超过多少则自动设置超时

      },

      "HttpHandlerOptions": {

        "AllowAutoRedirect": false,

        "UseCookieContainer": false,

        "UseTracing": false

      },

      "ReRouteIsCaseSensitive": false,

      //负载均衡:

      //RoundRobin轮流发送;

      //LeastConnection – 将请求发往最空闲的那个服务器

      //NoLoadBalance – 总是发往第一个请求或者是服务发现

      "LoadBalancerOptions": {

        "Type": "RoundRobin"

      },

      //上游地址配置

      "UpstreamPathTemplate": "/test/{everything}",

      //上游支持的请求类型

      "UpstreamHttpMethod": [ "Post", "Get" ]

    }

  ],

  "GlobalConfiguration": {

    "BaseUrl": "https://localhost:8683",

    //consul服务器地址和ip

    "ServiceDiscoveryProvider": {

      "Host": "localhost",

      "Port":

    }

  }

}
4.启动ocelot项目和consul服务。
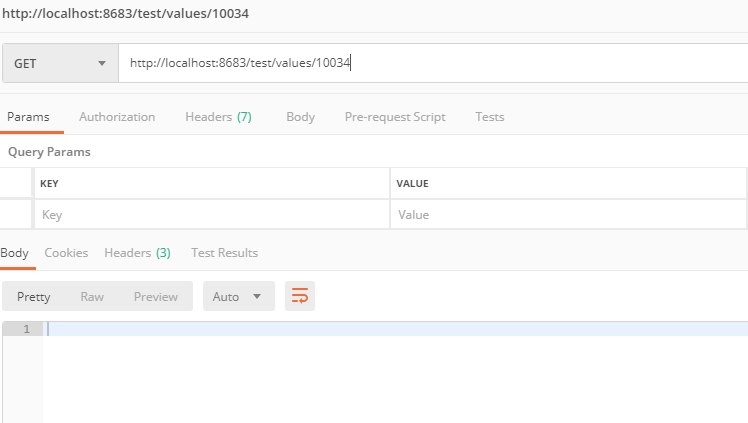
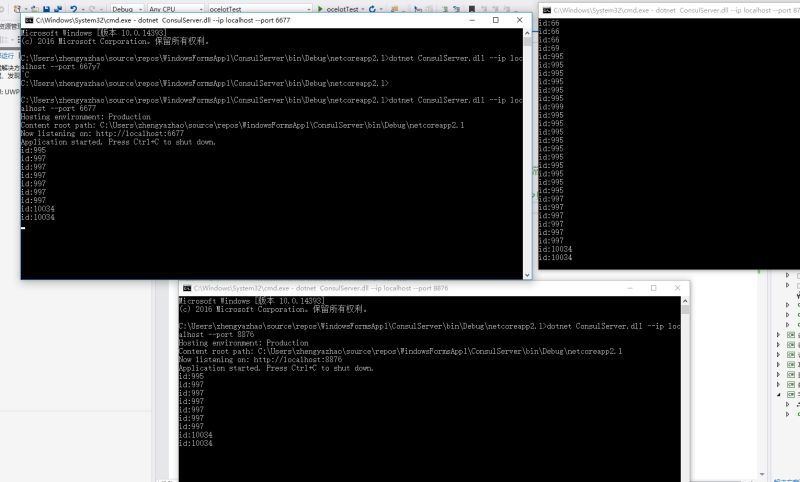
把服务注册到consul当中,通过postman发送请求测试,成功转发消息,并且实现负载均衡。


小结:简单的ocelot搭建完成,后续的一些扩展功能慢慢在研究。
快速入口:微服务(入门一):netcore安装部署consul
快速入口: 微服务(入门二):netcore通过consul注册服务
快速入口: 微服务(入门三):netcore ocelot api网关结合consul服务发现
快速入口:微服务(入门四):identityServer的简单使用(客户端授权)
微服务(入门三):netcore ocelot api网关结合consul服务发现的更多相关文章
- .NET Core微服务二:Ocelot API网关
.NET Core微服务一:Consul服务中心 .NET Core微服务二:Ocelot API网关 .NET Core微服务三:polly熔断与降级 本文的项目代码,在文章结尾处可以下载. 本文使 ...
- .Netcore 2.0 Ocelot Api网关教程(2)- 路由
.Netcore 2.0 Ocelot Api网关教程(1) 路由介绍 上一篇文章搭建了一个简单的Api网关,可以实现简单的Api路由,本文介绍一下路由,即配置文件中ReRoutes,ReRoutes ...
- Angular SPA基于Ocelot API网关与IdentityServer4的身份认证与授权(三)
在前面两篇文章中,我介绍了基于IdentityServer4的一个Identity Service的实现,并且实现了一个Weather API和基于Ocelot的API网关,然后实现了通过Ocelot ...
- 微服务基础——厉害了!API网关
微服务刚刚诞生的时候,人们将服务进行拆分,实现服务之间的松耦合,并且每个服务有专门的团队维护,然后客户端直接和各个子服务进行交互.比如,订单,商品,会员服务. 那么这种客户端直接和后端服务交互的方式会 ...
- .Netcore 2.0 Ocelot Api网关教程(7)- 限流
本文介绍Ocelot中的限流,限流允许Api网关控制一段时间内特定api的总访问次数.限流的使用非常简单,只需要添加配置即可. 1.添加限流 修改 configuration.json 配置文件,对 ...
- .Netcore 2.0 Ocelot Api网关教程(6)- 配置管理
本文介绍Ocelot中的配置管理,配置管理允许在Api网关运行时动态通过Http Api查看/修改当前配置.由于该功能权限很高,所以需要授权才能进行相关操作.有两种方式来认证,外部Identity S ...
- Angular SPA基于Ocelot API网关与IdentityServer4的身份认证与授权(四)
在上一讲中,我们已经完成了一个完整的案例,在这个案例中,我们可以通过Angular单页面应用(SPA)进行登录,然后通过后端的Ocelot API网关整合IdentityServer4完成身份认证.在 ...
- Angular SPA基于Ocelot API网关与IdentityServer4的身份认证与授权(二)
上文已经介绍了Identity Service的实现过程.今天我们继续,实现一个简单的Weather API和一个基于Ocelot的API网关. 回顾 <Angular SPA基于Ocelot ...
- ASP.NET Core on K8S学习之旅(13)Ocelot API网关接入
本篇已加入<.NET Core on K8S学习实践系列文章索引>,可以点击查看更多容器化技术相关系列文章. 上一篇介绍了Ingress的基本概念和Nginx Ingress的基本配置和使 ...
随机推荐
- lambda隐藏函数的嵌套
# 隐藏函数嵌套 f = (lambda a,b :a if a>b else b)(1000, 2000008) print((lambda a,g:a if a > g else g) ...
- python爬虫入门(二)Opener和Requests
Handler和Opener Handler处理器和自定义Opener opener是urllib2.OpenerDirector的实例,我们之前一直在使用urlopen,它是一个特殊的opener( ...
- JAVA小记 (1)
JVM: Java虚拟机 JVM个数取决于同时执行的程序个数 JDK:JAVA 开发工具包 Java利用JVM实行跨平台 JRE:Java运行环境 JavaSE:企业版 GC:垃圾回收机制 命名规范 ...
- tomcat启动报错:Address already in use: JVM_Bind
tomcat启动时出现Address already in use: JVM_Bind 的原因是因为端口被占用,有可能是因为多次启动tomcat或者启动了多个tomcat,或者是其他应用程序或者服务占 ...
- Java 使用BigDecimal类处理高精度计算
Java在java.math包中提供的API类BigDecimal,用来对超过16位有效位的数进行精确的运算.双精度浮点型变量double可以处理16位有效数,但在实际应用中,可能需要对更大或者更小的 ...
- AspectJ切入点语法详解
在看这篇文章前,建议首先看下 spring aop与aspectj的区别 aop是对oop的补充. 参阅:https://blog.csdn.net/column/details/aspectj.ht ...
- Boyer-Moore(BM)算法,文本查找,字符串匹配问题
KMP算法的时间复杂度是O(m + n),而Boyer-Moore算法的时间复杂度是O(n/m).文本查找中“ctrl + f”一般就是采用的BM算法. Boyer-Moore算法的关键点: 从右遍历 ...
- PHP之连接mysql小练习
mysql Test.sql 1 -- phpMyAdmin SQL Dump -- version 4.6.6 -- https://www.phpmyadmin.net/ -- -- Host: ...
- React从入门到放弃之前奏(2):React简介
本系列将尽可能使用ES6(ES2015)语法.所以均在上节webpack的基础上做开发. React是Facebook开发的一款JS库,因为基于Virtual DOM,所以响应速度快,以及支持跨平台. ...
- 关于PHP处理Json数据的例子
最近工作需要在原来静态看板(大屏)页面的基础上,实现数据的动态展示,而且需要定时刷新. 接到任务后就马不停蹄的开始修改页面: 显然这个需求最好的解决方法就是用Ajax对后台数据进行定时请求,在前端页面 ...
