第7步:安装Grid
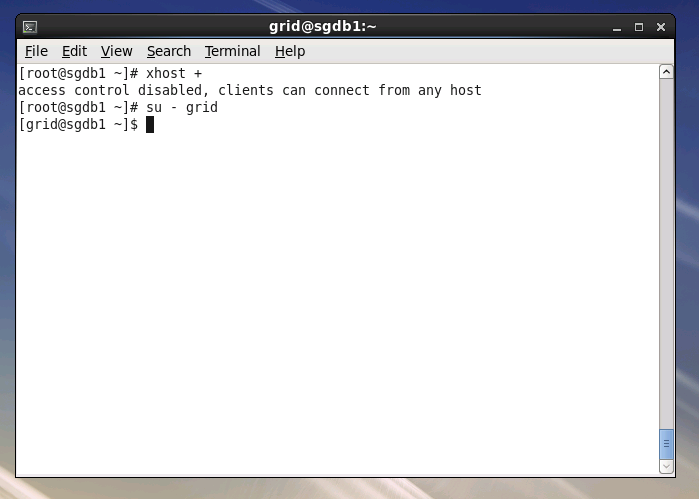
| [root@sgdb1~]# xhost+
[root@sgdb1~]# su - grid
[grid@sgdb1~]$ unzip /tmp/p10404530_112030_Linux-x86-64_3of7.zip
|
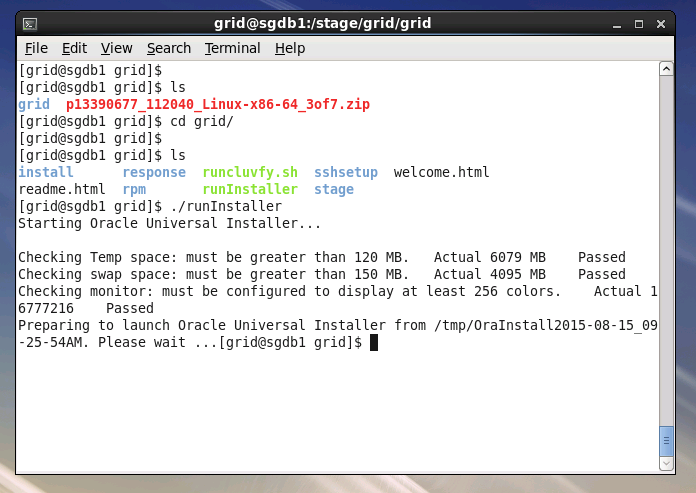
| [grid@sgdb1~]$ cd /tmp/grid
[grid@sgdb1~]$ ./runInstaller
|
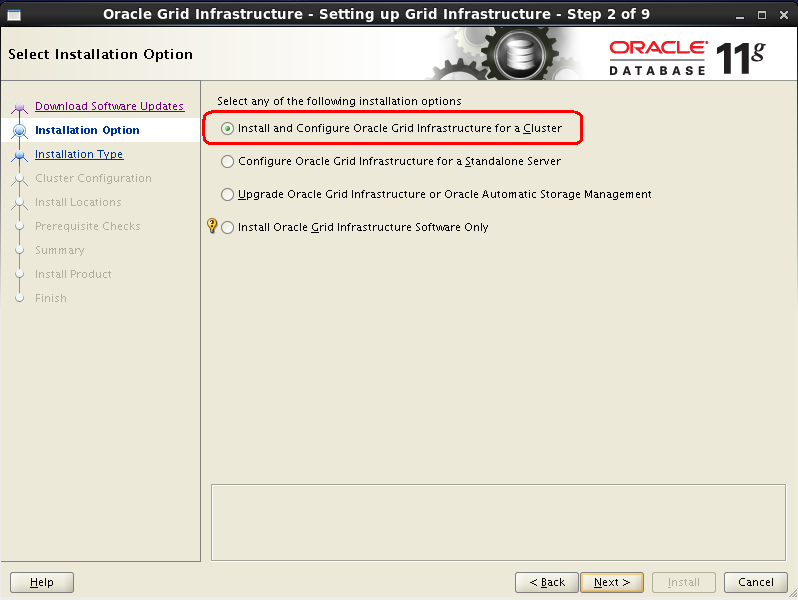
7.3 Grid安装选项
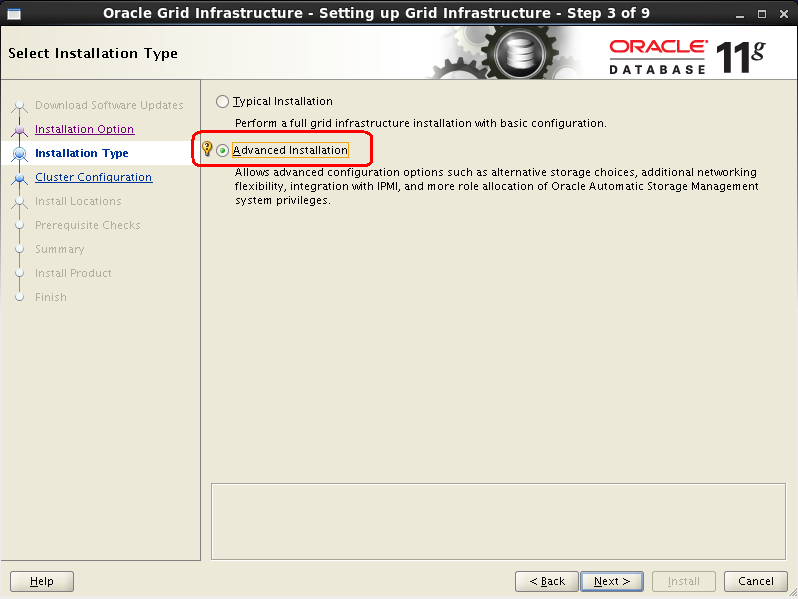
7.4 Grid安装方式
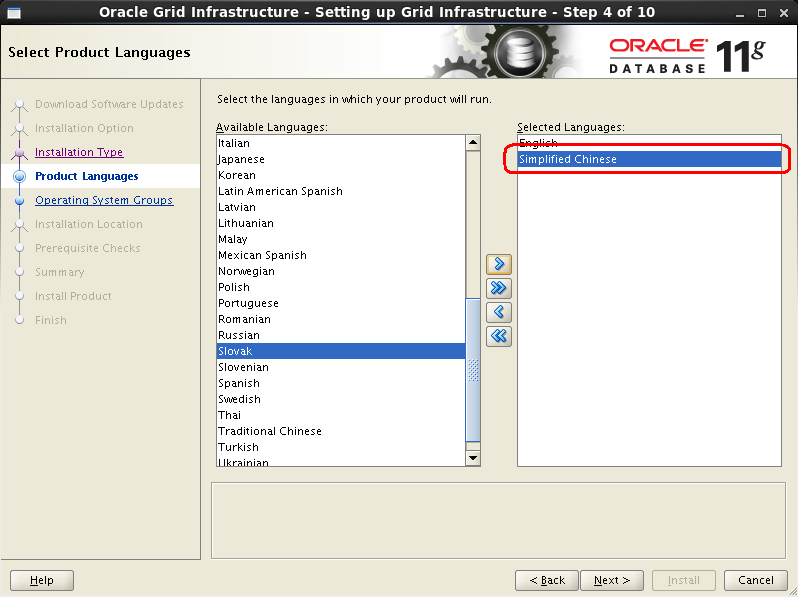
7.5 Grid安装语言
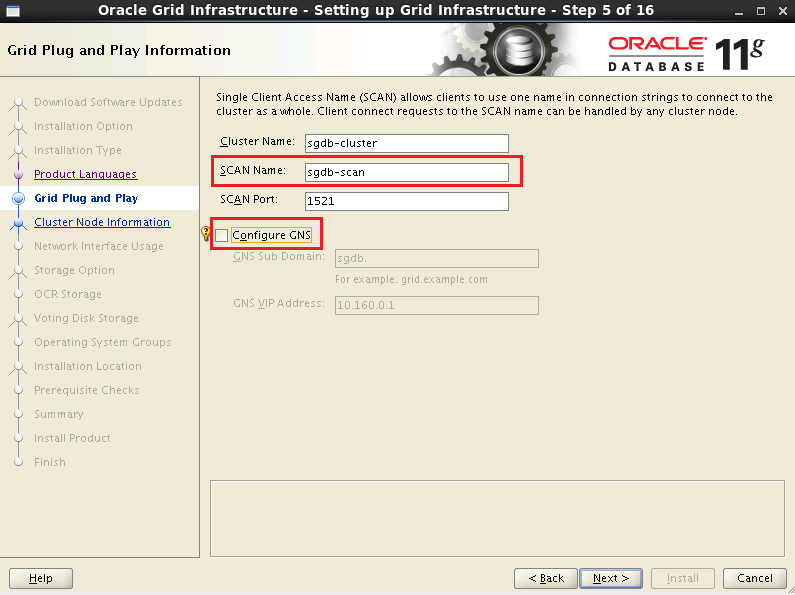
7.6 设置SCAN IP
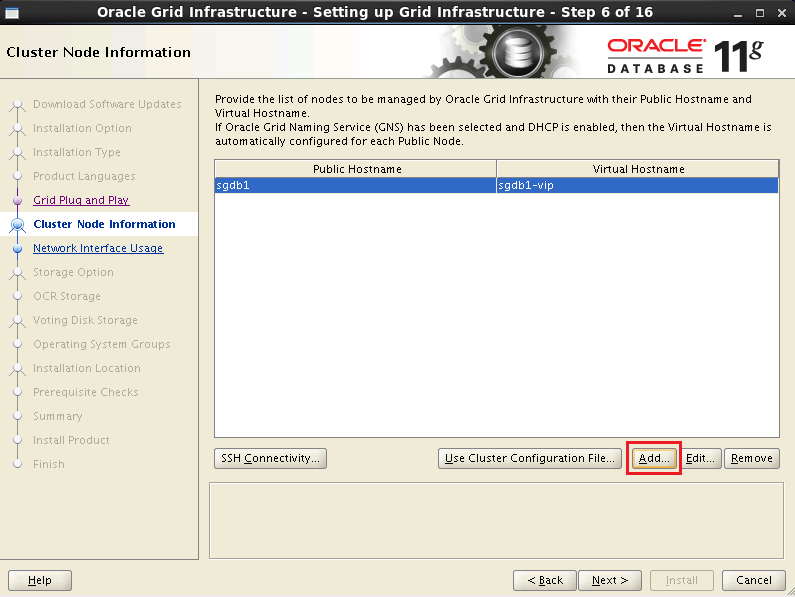
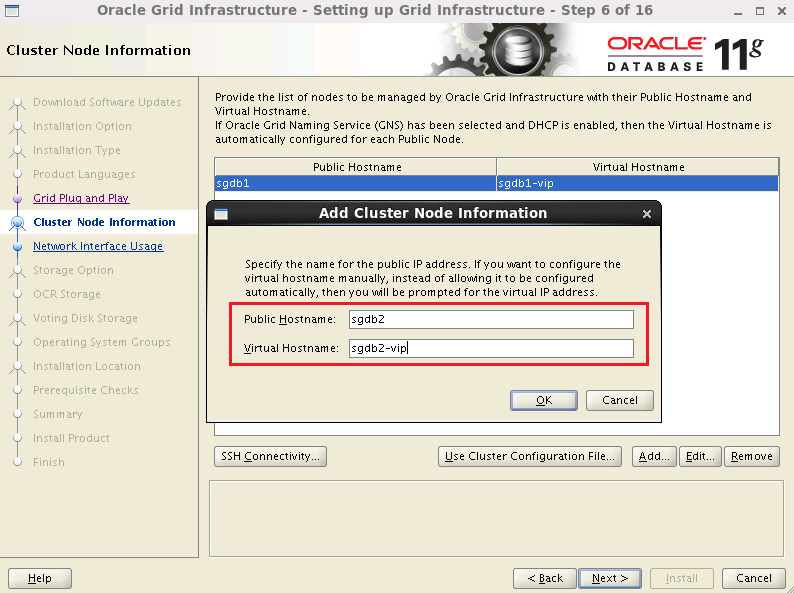
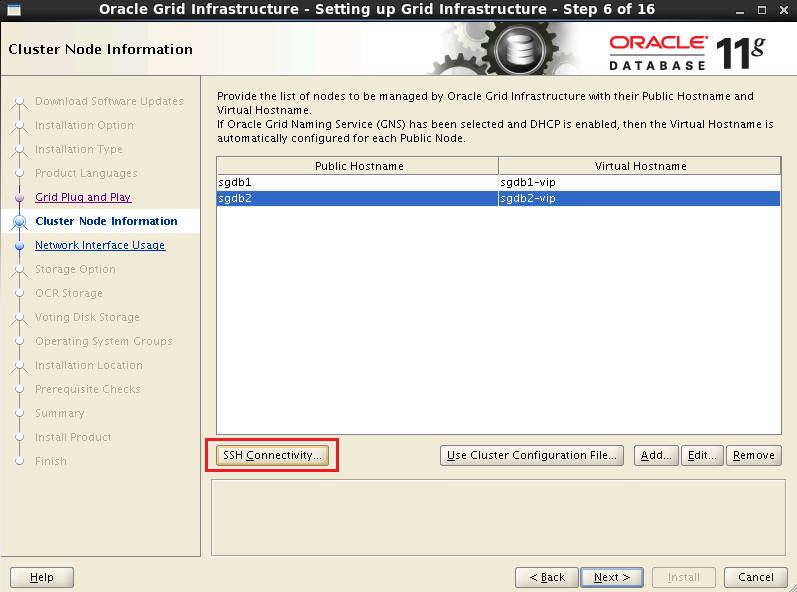
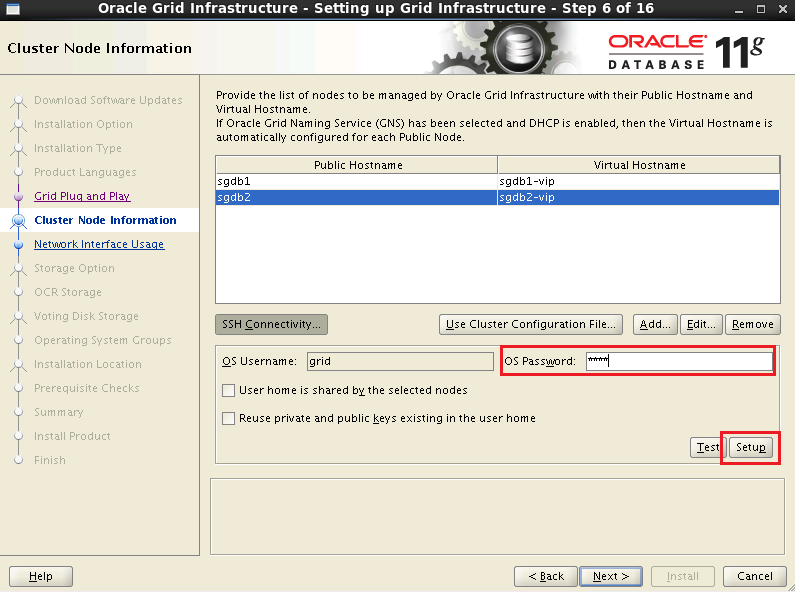
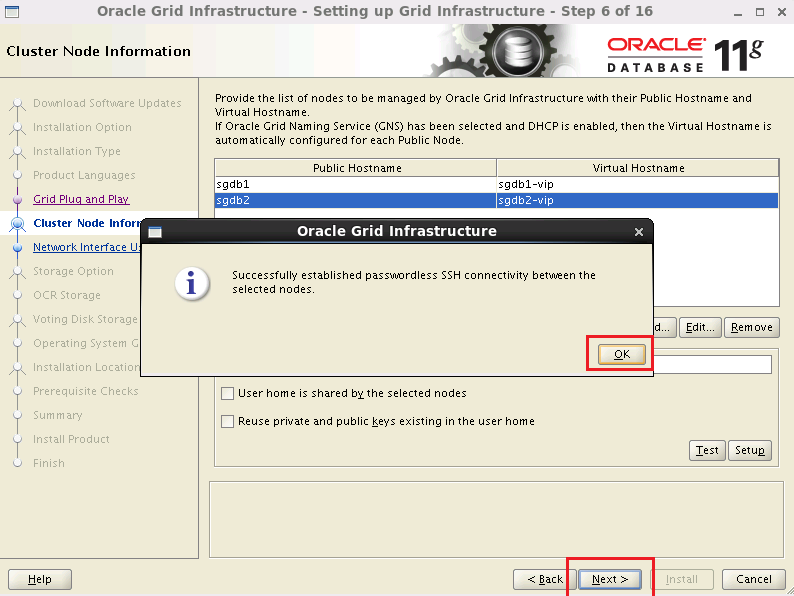
7.7 配置集群服务器SSH服务
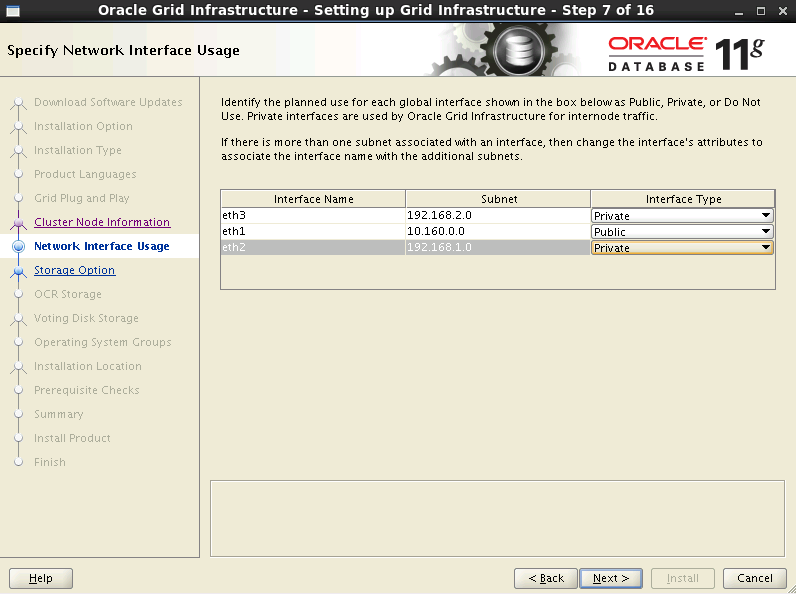
7.8 设置网络
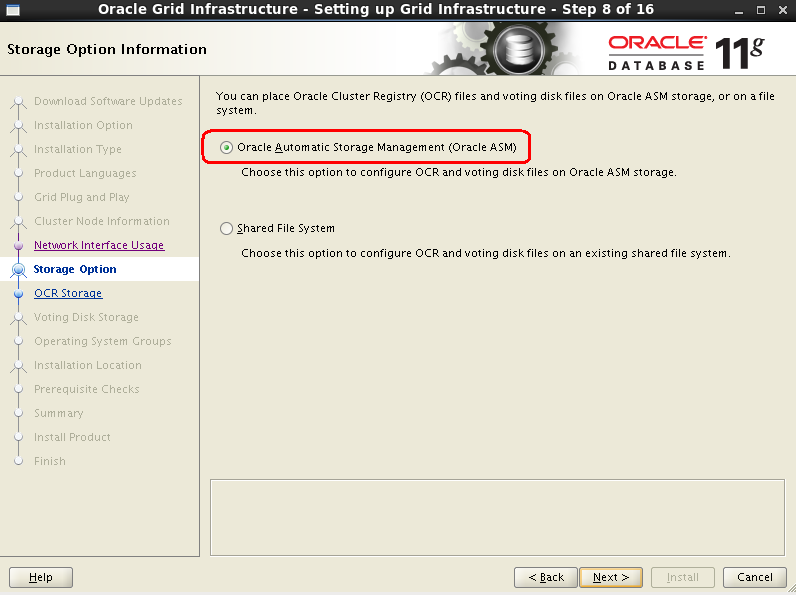
7.9 选择存储方式
7.10 选择OCR+投票盘
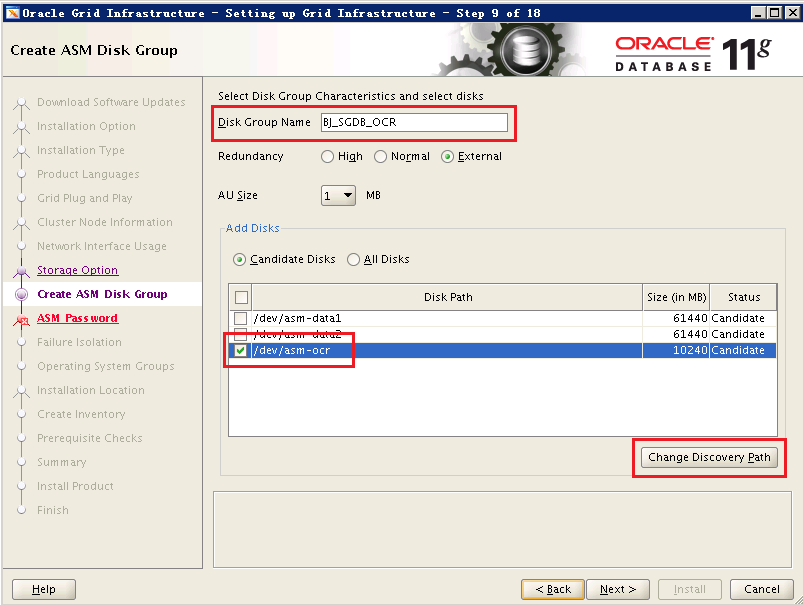
图15 选择投票盘
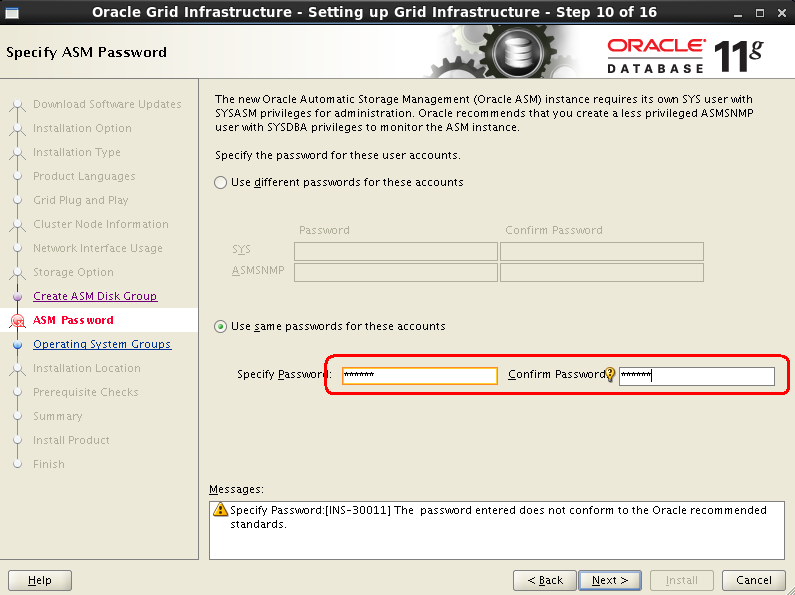
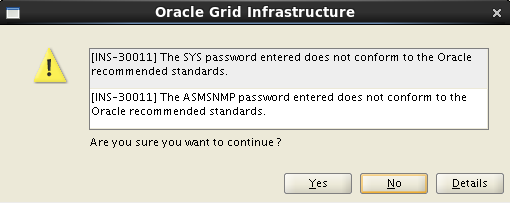
7.11 设置ASM管理用户密码
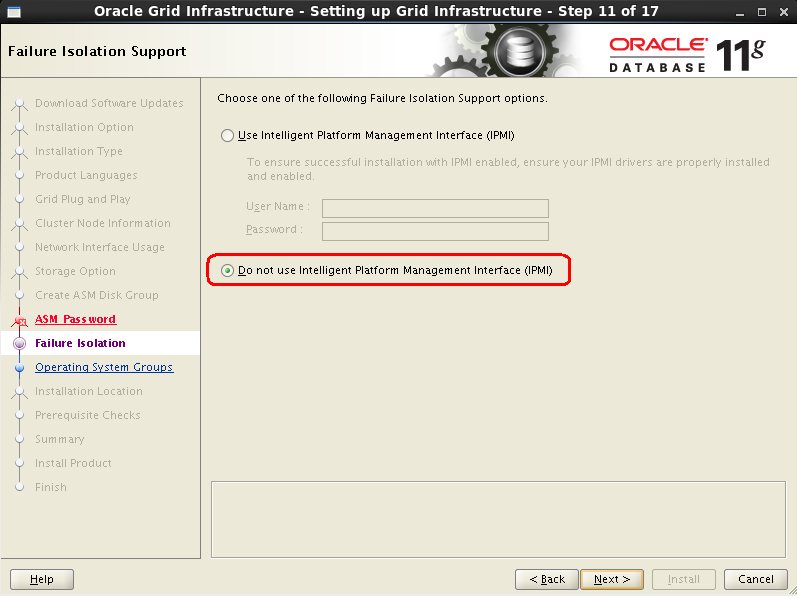
7.12 设置IPM
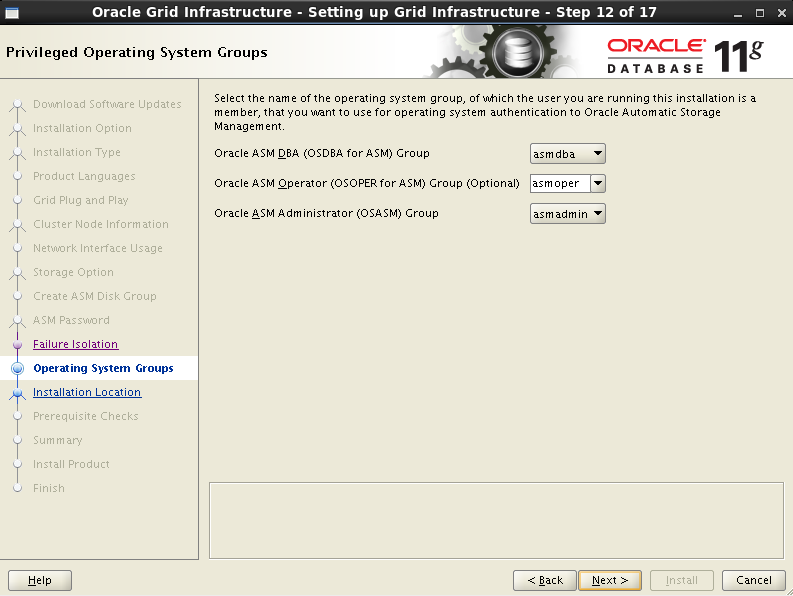
7.13 设置ASM管理用户与用户组
7.14 设置Grid软件安装路径
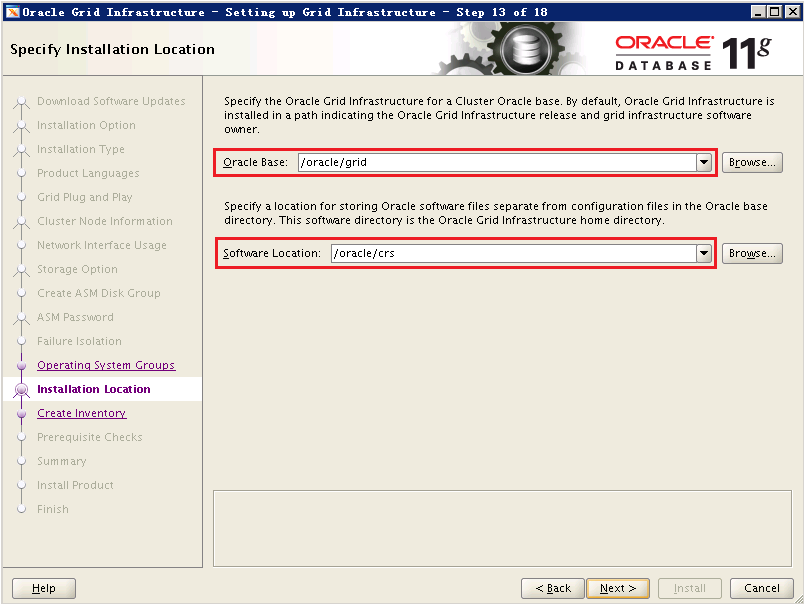
图20 设置Grid软件安装路径
7.15 设置oraInventory路径
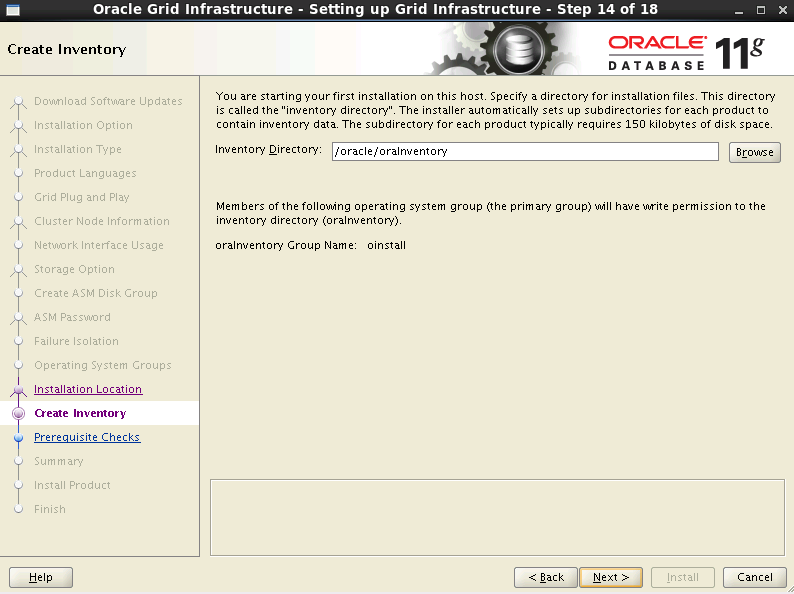
图21 设置oraInventory路径
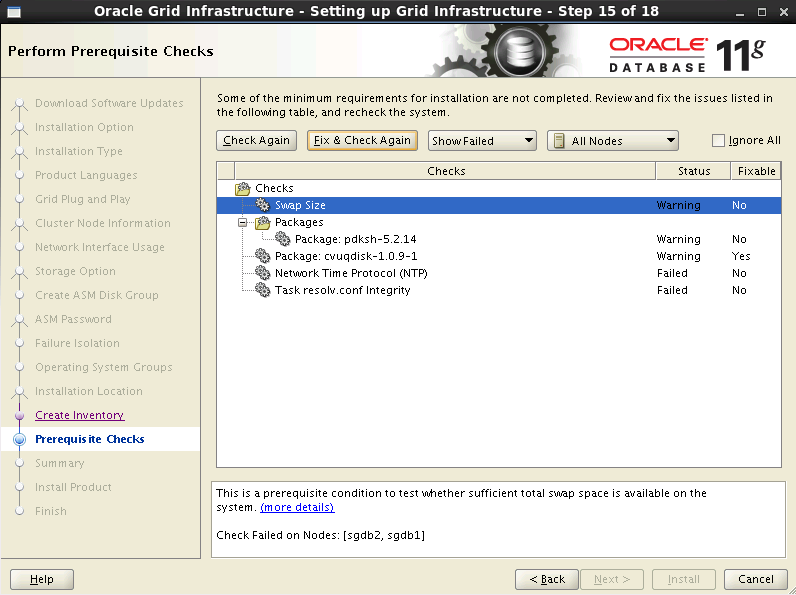
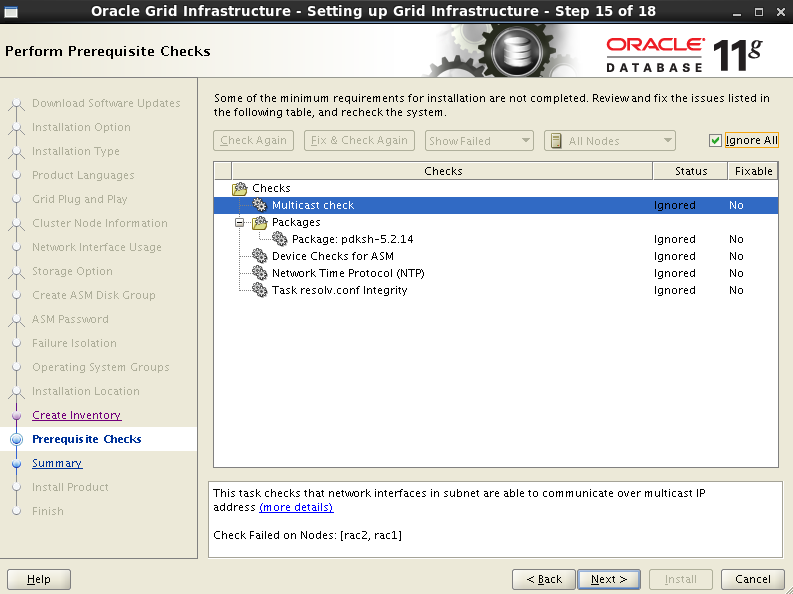
7.16 执行安装前检查
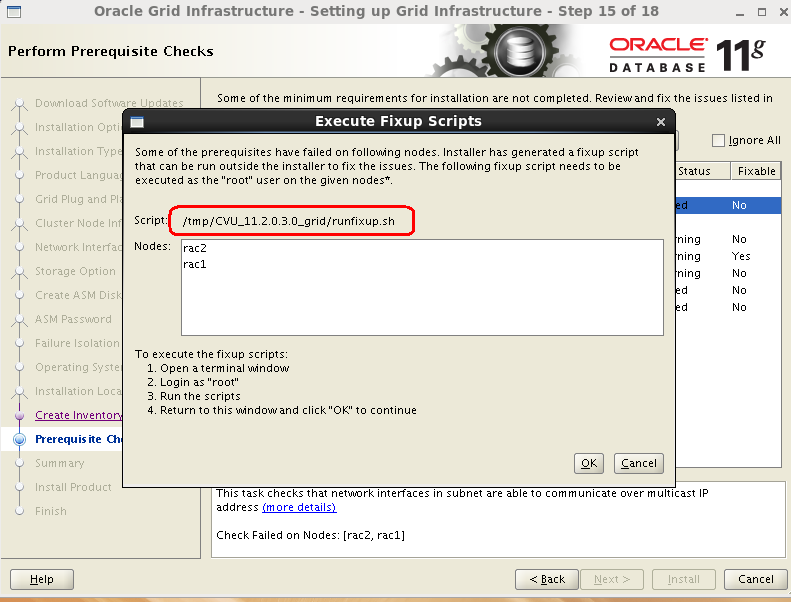
| [root@sgdb1 CVU_11.2.0.4.0_grid]# ./runfixup.sh
Response file being used is :./fixup.response
Enable file being used is :./fixup.enable
Log file location: ./orarun.log
Installing Package /tmp/CVU_11.2.0.4.0_grid//cvuqdisk-1.0.9-1.rpm
Preparing... ########################################### [100%]
1:cvuqdisk ########################################### [100%]
|
| [root@sgdb2 CVU_11.2.0.4.0_grid]# ./runfixup.sh
Response file being used is :./fixup.response
Enable file being used is :./fixup.enable
Log file location: ./orarun.log
Installing Package /tmp/CVU_11.2.0.4.0_grid//cvuqdisk-1.0.9-1.rpm
Preparing... ########################################### [100%]
1:cvuqdisk ########################################### [100%]
|
7.17 安装信息统计
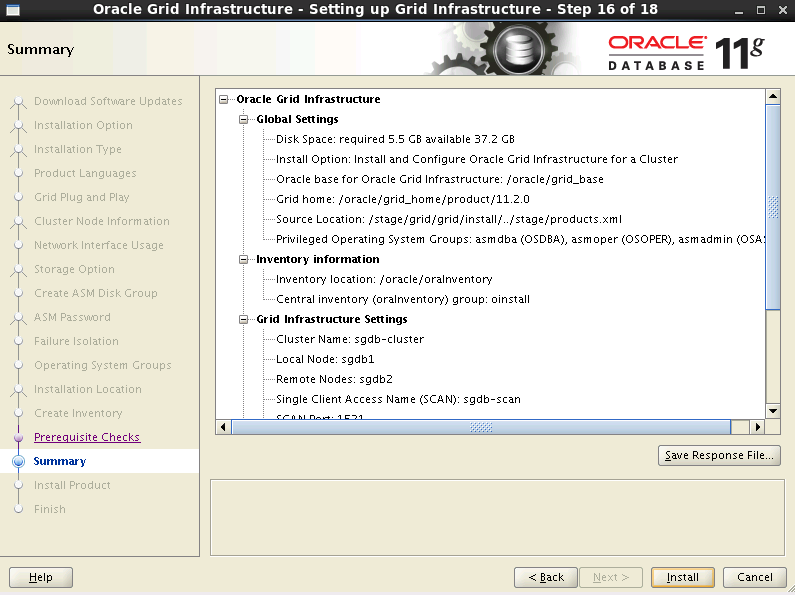
图26 安装前信息汇总
7.18 安装过程
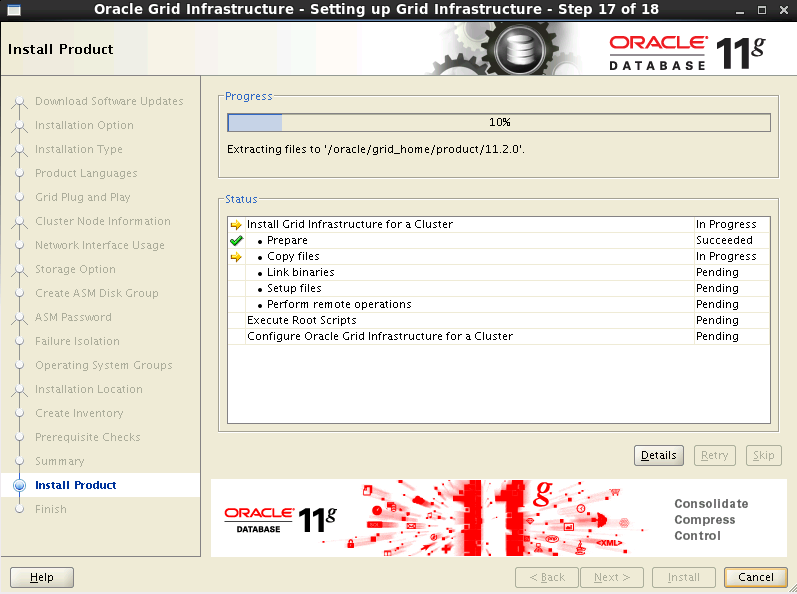
图27 安装过程
7.19 安装结束前,需要执行脚本
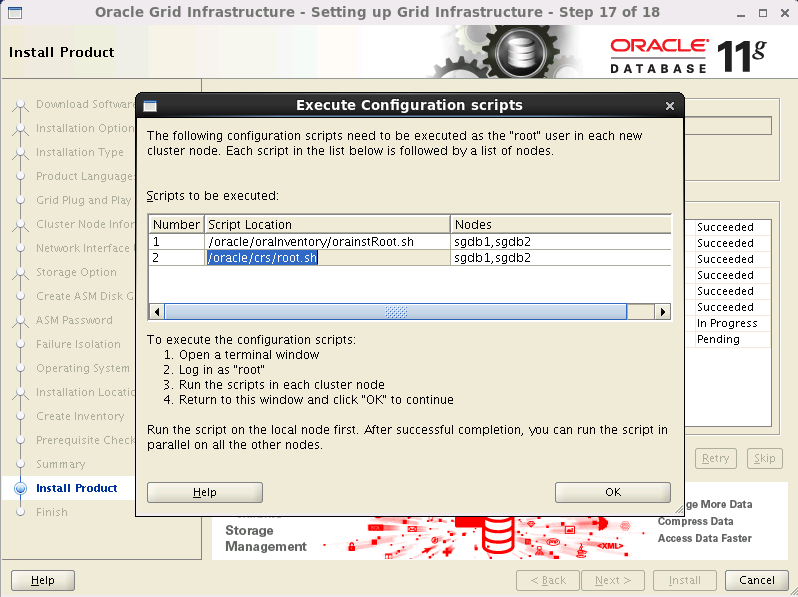
| [root@sgdb1 ~]# /oracle/oraInventory/orainstRoot.sh
Changing permissions of /oracle/oraInventory.
Adding read,write permissions for group.
Removing read,write,execute permissions for world.
Changing groupname of /oracle/oraInventory to oinstall.
The execution of the script is complete.
|
| [root@sgdb2 ~]# /oracle/oraInventory/orainstRoot.sh
Changing permissions of /oracle/oraInventory.
Adding read,write permissions for group.
Removing read,write,execute permissions for world.
Changing groupname of /oracle/oraInventory to oinstall.
The execution of the script is complete.
|
| [root@sgdb1 ~]# /oracle/crs/root.sh
Performing root user operation for Oracle 11g
The following environment variables are set as:
ORACLE_OWNER= grid
ORACLE_HOME= /oracle/crs
Enter the full pathname of the local bin directory: [/usr/local/bin]:
Copying dbhome to /usr/local/bin ...
Copying oraenv to /usr/local/bin ...
Copying coraenv to /usr/local/bin ...
Creating /etc/oratab file...
Entries will be added to the /etc/oratab file as needed by
Database Configuration Assistant when a database is created
Finished running generic part of root script.
Now product-specific root actions will be performed.
Using configuration parameter file: /oracle/crs/crs/install/crsconfig_params
Creating trace directory
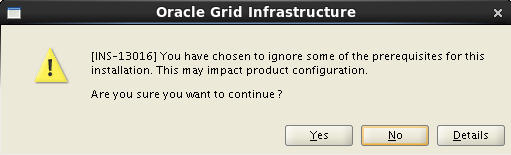
User ignored Prerequisites during installation
Installing Trace File Analyzer
OLR initialization - successful
root wallet
root wallet cert
root cert export
peer wallet
profile reader wallet
pa wallet
peer wallet keys
pa wallet keys
peer cert request
pa cert request
peer cert
pa cert
peer root cert TP
profile reader root cert TP
pa root cert TP
peer pa cert TP
pa peer cert TP
profile reader pa cert TP
profile reader peer cert TP
peer user cert
pa user cert
Adding Clusterware entries to upstart
CRS-2672: Attempting to start 'ora.mdnsd' on 'sgdb1'
CRS-2676: Start of 'ora.mdnsd' on 'sgdb1' succeeded
CRS-2672: Attempting to start 'ora.gpnpd' on 'sgdb1'
CRS-2676: Start of 'ora.gpnpd' on 'sgdb1' succeeded
CRS-2672: Attempting to start 'ora.cssdmonitor' on 'sgdb1'
CRS-2672: Attempting to start 'ora.gipcd' on 'sgdb1'
CRS-2676: Start of 'ora.cssdmonitor' on 'sgdb1' succeeded
CRS-2676: Start of 'ora.gipcd' on 'sgdb1' succeeded
CRS-2672: Attempting to start 'ora.cssd' on 'sgdb1'
CRS-2672: Attempting to start 'ora.diskmon' on 'sgdb1'
CRS-2676: Start of 'ora.diskmon' on 'sgdb1' succeeded
CRS-2676: Start of 'ora.cssd' on 'sgdb1' succeeded
ASM created and started successfully.
Disk Group BJ_SGDB_DATA created successfully.
clscfg: -install mode specified
Successfully accumulated necessary OCR keys.
Creating OCR keys for user 'root', privgrp 'root'..
Operation successful.
CRS-4256: Updating the profile
Successful addition of voting disk 3766451fc40a4fb4bf5638920562eefe.
Successfully replaced voting disk group with +BJ_SGDB_DATA.
CRS-4256: Updating the profile
CRS-4266: Voting file(s) successfully replaced
## STATE File Universal Id File Name Disk group
-- ----- ----------------- --------- ---------
1. ONLINE 3766451fc40a4fb4bf5638920562eefe (/dev/asm-data1) [BJ_SGDB_DATA]
Located 1 voting disk(s).
CRS-2672: Attempting to start 'ora.BJ_SGDB_DATA.dg' on 'sgdb1'
CRS-2676: Start of 'ora.BJ_SGDB_DATA.dg' on 'sgdb1' succeeded
Configure Oracle Grid Infrastructure for a Cluster ... succeeded
|
| [root@sgdb2 ~]# /oracle/crs/root.sh
Performing root user operation for Oracle 11g
The following environment variables are set as:
ORACLE_OWNER= grid
ORACLE_HOME= /oracle/crs
Enter the full pathname of the local bin directory: [/usr/local/bin]:
Copying dbhome to /usr/local/bin ...
Copying oraenv to /usr/local/bin ...
Copying coraenv to /usr/local/bin ...
Creating /etc/oratab file...
Entries will be added to the /etc/oratab file as needed by
Database Configuration Assistant when a database is created
Finished running generic part of root script.
Now product-specific root actions will be performed.
Using configuration parameter file: /oracle/crs/crs/install/crsconfig_params
Creating trace directory
User ignored Prerequisites during installation
Installing Trace File Analyzer OLR initialization - successful
Adding Clusterware entries to upstart
CRS-4402: The CSS daemon was started in exclusive mode but found an active CSS daemon on node sgdb1, number 1, and is terminating
An active cluster was found during exclusive startup, restarting to join the cluster
Configure Oracle Grid Infrastructure for a Cluster ... succeeded
|
| 执行/oracle/crs/root.sh报出:
Failed to create keys in the olr错误
问题原因是缺少包导致的,在节点上安装compat-libcap包
[root@sgdb2 # yum -y install compat-libcap*
执行以下命令,清空当前CRS的配置
[root@sgdb2 #perl /oracle/crs/crs/install/rootcrs.pl -verbose -deconfig -force
再次执行/oracle/crs/root.sh
|
7.20 Grid继续安装
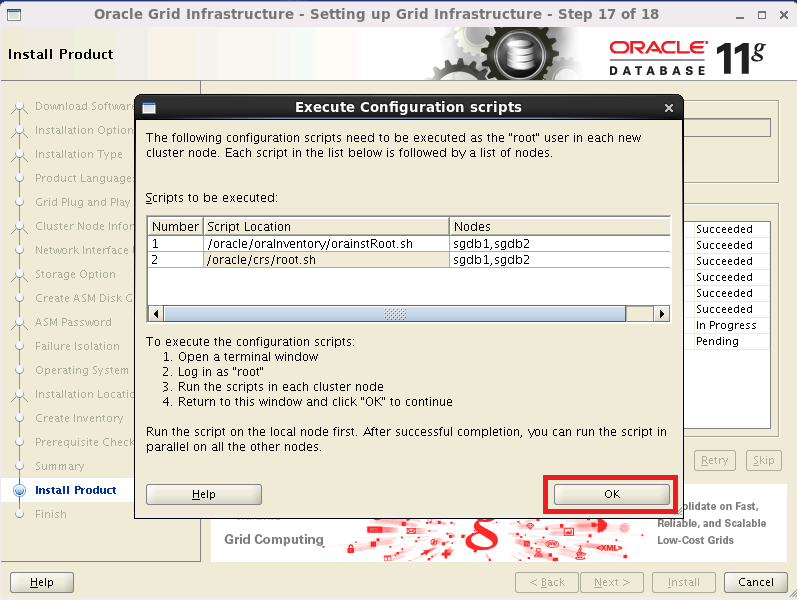
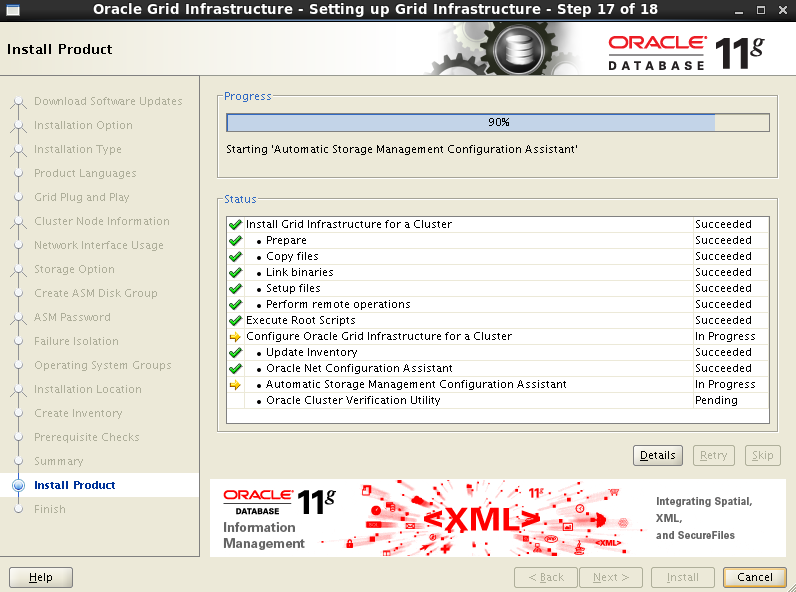
图30 继续安装
7.21 Grid完成安装
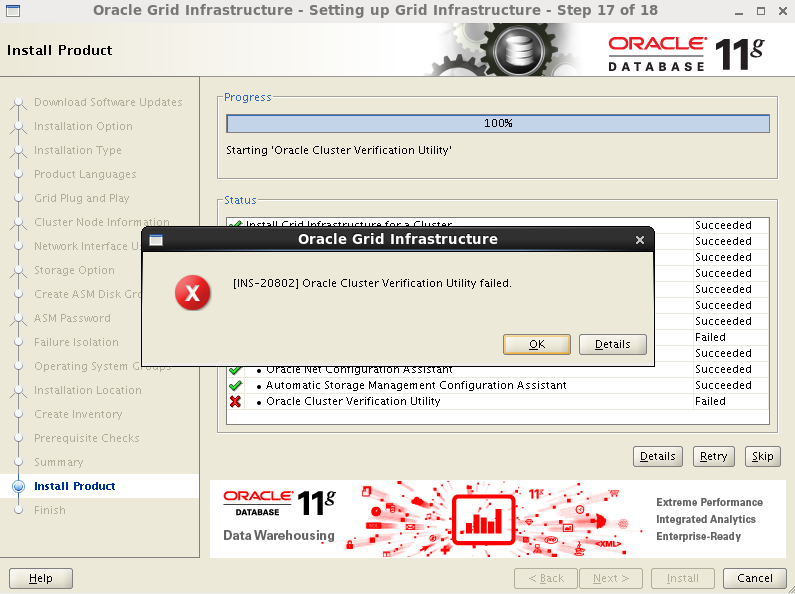
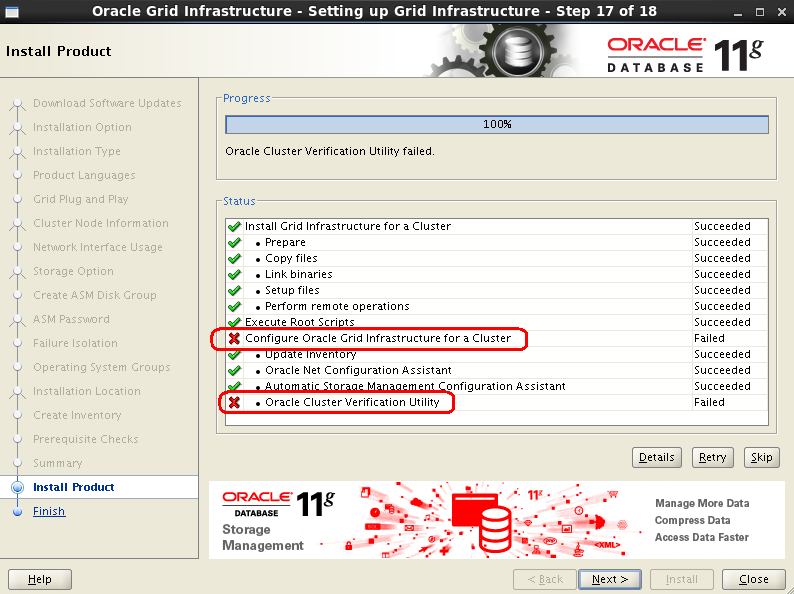
7.22 Grid安装完毕,有一项错误
第7步:安装Grid的更多相关文章
- 【RAC】 RAC For W2K8R2 安装--grid的安装(四)
[RAC] RAC For W2K8R2 安装--grid的安装(四) 一.1 BLOG文档结构图 一.2 前言部分 一.2.1 导读 各位技术爱好者,看完本文后,你可以掌握如下的技能,也可以学 ...
- linux下一步一步安装禅道项目管理工具
linux下一步一步安装禅道项目管理工具 因为禅道官网的安装教程实在是太简陋了,所以记录在此. 1.安装apache服务 archlinux下直接 sudo pacman -S apache ubun ...
- Mac系统下使用VirtualBox虚拟机安装win7--第一步 安装vbox虚拟机
Mac系统下使用VirtualBox虚拟机安装win7操作步骤: 第一步 安装vbox虚拟机 1.先下载vbox,下载地址:: https://www.virtualbox.org/wiki/Down ...
- 安装GRID时跑root.sh脚本报错(ORA-27091: unable to queue I/O)
在安装GRID过程中,运行root.sh脚本时报如下信息: Adding Clusterware entries to upstart CRS-2672: Attempting to start 'o ...
- 基于CentOS与VmwareStation10搭建Oracle11G RAC 64集群环境:4.安装Oracle RAC FAQ-4.5.安装Grid,创建ASM磁盘组空间不足
因之前分区时,分区的Last cylinder的值选了“1”,导致创建磁盘组空间不足.解决办法是先删除分区,重新创建分区并删除ASM磁盘,然后重建ASM磁盘 1. 先删除分区,重新创建分区: 1)查询 ...
- 基于CentOS与VmwareStation10搭建Oracle11G RAC 64集群环境:4.安装Oracle RAC FAQ-4.4.无法图形化安装Grid Infrastructure
无法图形化安装: [grid@linuxrac1 grid]$ ./runInstaller Starting Oracle Universal Installer... Checking Temp ...
- 安装grid之前检查配置 ,报错如下
centos 5 _x86_64 oracle 11.2 安装grid之前检查配置 ,报错如下 : ./runcluvfy.sh stage -pre crsinst -n rac1,rac2 -fi ...
- Linux下搭建Oracle11g RAC(6)----安装Grid Infrastructure
从此步骤开始,我们正式安装Grid软件: ① 以grid用户登录图形界面,执行/home/grid/grid/runInstaller,进入OUI的图形安装界面: ② 进入OUI安装界面后,选择第3项 ...
- rac安装grid报INS-41112错误
原创作品,出自 "深蓝的blog" 博客,欢迎转载,转载时请务必注明下面出处,否则追究版权法律责任. 深蓝的blog:http://blog.csdn.net/huangyanlo ...
随机推荐
- python——关于Python Profilers性能分析器
1. 介绍性能分析器 profiler是一个程序,用来描述运行时的程序性能,并且从不同方面提供统计数据加以表述.Python中含有3个模块提供这样的功能,分别是cProfile, profile和ps ...
- React.Fragment 包裹标签
在 vue 里,我们会用 <template></template> 标签来包裹一些不能有父容器的复数同级标签. 例如在 <tbody></tbody> ...
- Android实现换肤功能(二)
前两天写的上章关于换肤的功能获得了很好的反响,今天为大家介绍另一种方式.今天实现的策略也是网友建议的,然后我自己去写了个demo,大家自己评估下相比第一种方式的优势和劣势在哪里. 简单介绍下关于第一种 ...
- ML:交叉验证Cross-Validation
PRML中首章绪论的模型选择,提到两个方法: 1.交叉验证(Cross-Validation) 2.赤池信息准则(Akaike Information Criterion),简称:AIC. 交叉验证是 ...
- 哈希key个数
$length = keys %hashname; 则$length中得到的直接是该hash的key的个数.
- django inspectdb
使用inspectdb --通过已有数据库表生成 model.pyinspectdb辅助工具检查你的settings文件指向的数据库,决定你表示你的表的Django模型并打印Python模型代码到标 ...
- JS关于scrollTop和可视区域clientWidth
一.scrollTop,scrollLeft 要获得页面的scrollTop及scrollLeft,在不同的浏览器中是不一样的: 谷歌浏览器和没声明DTD的文档,通过document.body.scr ...
- HTTP协议,详解
整合网上各种资料,原创,不懂可以加 QQ:3111901846 一般学习一样新的知识,你首先要问问自己这三个问题,如果学完以后,你能回答出来这几个问题,证明你还是不错的 1.什么是HTTP协议?2.H ...
- html调用摄像头的方法汇总
1.在PC端打开摄像头的方法:(移动端不能使用) 能够实现打开摄像头并截图 <!doctype html> <html lang="en"> <hea ...
- Tcp/Ip--正常情况下的三次握手,四次挥手
三次握手 四次挥手