centos7.2 利用yum安装配置apache2.4多虚拟主机
分类:
Linux题目(8)
版权声明:本文为博主原创文章,未经博主允许不得转载。
一、安装apache
安装
# yum install httpd -y

# rpm -qa httpd
- 1
- 2
- 1
- 2
操作步骤:
[root@centos7-1 httpd]# cat /etc/centos-release

CentOS Linux release 7.2.1511 (Core)

[root@centos7-1 ~]# yum install httpd -y

Loaded plugins: fastestmirror

…………………………………………………………………………

Dependency Installed:

  httpd-tools.x86_64 0:2.4.6-45.el7.centos                         mailcap.noarch 0:2.1.41-2.el7

Complete!

[root@centos7-1 ~]# rpm -qa httpd

httpd-2.4.6-45.el7.centos.x86_64
- 1
- 2
- 3
- 4
- 5
- 6
- 7
- 8
- 9
- 10
- 11
- 1
- 2
- 3
- 4
- 5
- 6
- 7
- 8
- 9
- 10
- 11
二、启动测试apache
1、启动apache
[root@centos7-1 ~]# systemctl start httpd.service
- 1
- 1
2、查看是否启动成功
[root@centos7-1 ~]# ps -ef|grep httpd

root      1739     1  0 18:34 ?        00:00:00 /usr/sbin/httpd -DFOREGROUND

apache    1740  1739  0 18:34 ?        00:00:00 /usr/sbin/httpd -DFOREGROUND

apache    1741  1739  0 18:34 ?        00:00:00 /usr/sbin/httpd -DFOREGROUND

apache    1742  1739  0 18:34 ?        00:00:00 /usr/sbin/httpd -DFOREGROUND

apache    1743  1739  0 18:34 ?        00:00:00 /usr/sbin/httpd -DFOREGROUND

apache    1744  1739  0 18:34 ?        00:00:00 /usr/sbin/httpd -DFOREGROUND

root      1749  1112  0 18:37 pts/0    00:00:00 grep --color=auto httpd

[root@centos7-1 ~]# netstat -lntup|grep httpd

tcp6       0      0 :::80                   :::*                    LISTEN      1739/httpd
- 1
- 2
- 3
- 4
- 5
- 6
- 7
- 8
- 9
- 10
- 1
- 2
- 3
- 4
- 5
- 6
- 7
- 8
- 9
- 10
[root@centos7-1 ~]# echo "192.168.56.101 centos7-1.com www.centos7-1.com bbs.centos7-1.com blog.centos7-1.com">>/etc/hosts

[root@centos7-1 ~]# tail -1 /etc/hosts

192.168.56.101 centos7-1.com www.centos7-1.com bbs.centos7-1.com blog.centos7-1.com
- 1
- 2
- 3
- 1
- 2
- 3
使用curl命令测试
[root@centos7-1 ~]# echo "http://www.$HOSTNAME">/var/www/html/index.html

[root@centos7-1 ~]# cat /var/www/html/index.html

http://www.centos7-1.com

[root@centos7-1 ~]# curl www.centos7-1.com

http://www.centos7-1.com
- 1
- 2
- 3
- 4
- 5
- 1
- 2
- 3
- 4
- 5
三、配置apache
1、修改前备份文件
[root@centos7-1 ~]# cp /etc/httpd/conf/httpd.conf /etc/httpd/conf/httpd.conf.$(date +%F)

[root@centos7-1 ~]# ll /etc/httpd/conf/httpd.conf /etc/httpd/conf/httpd.conf.$(date +%F)

-rw-r--r-- 1 root root 11753 Nov 15 00:53 /etc/httpd/conf/httpd.conf

-rw-r--r-- 1 root root 11753 Jan 10 18:42 /etc/httpd/conf/httpd.conf.2017-01-10

[root@centos7-1 ~]#
- 1
- 2
- 3
- 4
- 5
- 1
- 2
- 3
- 4
- 5
2、配置httpd文件
因为在apache2.4中变化挺大,和nginx一样,可以自定义.conf文件。
在主配置文件中启用虚拟主机
[root@centos7-1 httpd]# mkdir /etc/httpd/vhost.d/

[root@centos7-1 httpd]# echo "include vhost.d/*.conf"

[root@centos7-1 httpd]# tail -1 /etc/httpd/conf/httpd.conf

include vhost.d/*.conf
- 1
- 2
- 3
- 4
- 1
- 2
- 3
- 4
虚拟主机配置文件
[root@centos7-1 httpd]# cat ./vhost.d/name.conf

<VirtualHost *:80>

    ServerAdmin admin@amsilence.com

    DocumentRoot "/var/html/www"

    ServerName www.centos7-1.com

    ErrorLog "/var/httpd/logs/www-error_log"

    CustomLog "/var/httpd/logs/www-access_log" common

</VirtualHost>

<Directory /var/html/www/>

Require all granted

</Directory>

<VirtualHost *:80>

    ServerAdmin admin@amsilence.com

    DocumentRoot "/var/html/bbs"

    ServerName bbs.centos7-1.com

    ErrorLog "/var/httpd/logs/bbs-error_log"

    CustomLog "/var/httpd/logs/bbs-access_log" common

</VirtualHost>

<Directory /var/html/bbs/>

Require all granted

</Directory>

<VirtualHost *:80>

    ServerAdmin admin@amsilence.com

    DocumentRoot "/var/html/blog"

    ServerName blog.centos7-1.com

    ErrorLog "/var/httpd/logs/blog-error_log"

    CustomLog "/var/httpd/logs/blog-access_log" common

</VirtualHost>

<Directory /var/html/blog/>

Require all granted

</Directory>
- 1
- 2
- 3
- 4
- 5
- 6
- 7
- 8
- 9
- 10
- 11
- 12
- 13
- 14
- 15
- 16
- 17
- 18
- 19
- 20
- 21
- 22
- 23
- 24
- 25
- 26
- 27
- 28
- 29
- 30
- 31
- 32
- 33
- 34
- 35
- 36
- 1
- 2
- 3
- 4
- 5
- 6
- 7
- 8
- 9
- 10
- 11
- 12
- 13
- 14
- 15
- 16
- 17
- 18
- 19
- 20
- 21
- 22
- 23
- 24
- 25
- 26
- 27
- 28
- 29
- 30
- 31
- 32
- 33
- 34
- 35
- 36
测试配置文件是否正确
[root@centos7-1 httpd]# /sbin/service httpd configtest

Syntax OK
- 1
- 2
- 1
- 2
重新启动apache服务
[root@centos7-1 httpd]# systemctl restart httpd.service

[root@centos7-1 httpd]# ps -ef|grep httpd

root      1129     1  2 20:40 ?        00:00:00 /usr/sbin/httpd -DFOREGROUND

apache    1131  1129  0 20:40 ?        00:00:00 /usr/sbin/httpd -DFOREGROUND

apache    1132  1129  0 20:40 ?        00:00:00 /usr/sbin/httpd -DFOREGROUND

apache    1133  1129  0 20:40 ?        00:00:00 /usr/sbin/httpd -DFOREGROUND

apache    1134  1129  0 20:40 ?        00:00:00 /usr/sbin/httpd -DFOREGROUND

apache    1135  1129  0 20:40 ?        00:00:00 /usr/sbin/httpd -DFOREGROUND

root      1138  1112  0 20:40 pts/0    00:00:00 grep --color=auto httpd
- 1
- 2
- 3
- 4
- 5
- 6
- 7
- 8
- 9
- 1
- 2
- 3
- 4
- 5
- 6
- 7
- 8
- 9
四、测试web服务
curl测试
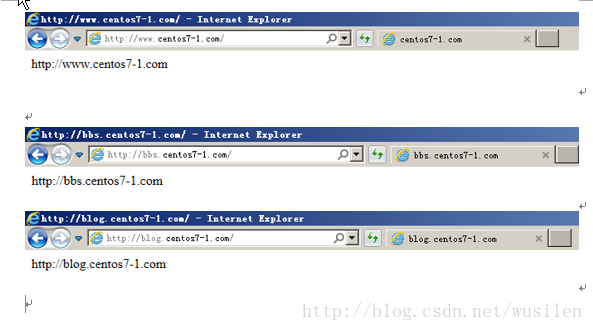
[root@centos7-1 httpd]# for name in www bbs blog;do curl $name.centos7-1.com;done;

http://www.centos7-1.com

http://bbs.centos7-1.com

http://blog.centos7-1.com
- 1
- 2
- 3
- 4
- 1
- 2
- 3
- 4
ie浏览器测试
centos7.2 利用yum安装配置apache2.4多虚拟主机的更多相关文章
- ubuntu下安装配置apache2(含虚拟主机配置)
在Ubuntu14.14中安装apache 安装指令: sudo apt-get install apache2 安装结束后: 产生的启动和停止文件是: /etc/init.d/apache2 启动: ...
- 在CentOS7中利用yum命令安装mysql
在CentOS7中利用yum命令安装mysql 原创 2016年08月31日 10:42:33 标签: mysql / centos 4832 一.说明 我们是在VMware虚拟机上安装的mysql, ...
- centos7 yum安装配置redis 并设置密码
原文:https://www.cnblogs.com/fanlinglong/p/6635828.html centos7 yum安装配置redis 并设置密码 1.设置Redis的仓库地址 yum ...
- Linux 下安装Nginx两种方法- yum安装 and Centos7下yum安装配置nginx与php
转载csdn: Linux 下安装Nginx两种方法- yum安装_在电脑前深思的博客-CSDN博客 Linux安装Nginx(两种方式)_HHRunning的博客-CSDN博客_linux 是否安装 ...
- CentOS7下使用YUM安装mariadb10
1:由于centos7 默认使用yum安装MySQL的话就会安装mariadb,只是安装的版本停留在mariadb5.x,版本比较低.如果我们需要安装mariadb10这里就需要删除mariadb-l ...
- centos7中使用yum安装tomcat以及它的启动、停止、重启
centos7中使用yum安装tomcat 介绍 Apache Tomcat是用于提供Java应用程序的Web服务器和servlet容器. Tomcat是Apache Software Foundat ...
- centos7: svbversion版本的安装配置+tortoisesvn登录验证
centos7: svbversion版本的安装配置+tortoisesvn登录验证 命令工具:svnadmin create #创建版本库 hotcopy #版本库热备份 Islocks #打印所有 ...
- Centos7.6使用yum安装PHP7.2
Centos7.6使用yum安装PHP7.2 1.安装源 安装php72w,是需要配置额外的yum源地址的,否则会报错不能找到相关软件包. php高版本的yum源地址,有两部分,其中一部分是epel- ...
- centos7下使用yum安装mysql
CentOS7的yum源中默认好像是没有mysql的.为了解决这个问题,我们要先下载mysql的repo源. 1. 下载mysql的repo源 wget http://repo.mysql.com/m ...
- centOS下yum安装配置samba
centOS下yum安装配置samba 2010-03-29 15:46:00 标签:samba yum centOS 安装 休闲 注意:本文的原则是只将文件共享应用于内网服务器,并让将要被共享的目 ...
随机推荐
- opencv库图像基础1-python
opencv库图像基础-python 基本操作 图片颜色通道 非灰度图的颜色通道是红绿蓝,在opencv中默认是BGR的顺序 argparse模块 argparse 库是 Python 标准库中用于命 ...
- Netty笔记(7) - 使用Netty 模仿 Dubbo 实现简单的 远程调用
使用Netty 模仿 Dubbo 实现简单的 远程调用 使用 java的反射 动态代理 加 Netty的远程访问 实现根据接口的RPC 远程调用 定义两个公共接口: public interface ...
- Java开发者的Python快速进修指南:掌握T检验
前言 T检验是一种用于比较两个独立样本均值差异的统计方法.它通过计算T值和P值来判断样本之间是否存在显著性差异.通常情况下,我们会有两组数据,例如一组实验组和一组对照组. T检验的原假设是两组样本的均 ...
- 移远4G数传模块EC800M开发总结之基本备忘
一 前记 1 EC800M模块是移远推出的小尺寸低功耗针对可穿戴市场的数传产品.笔者在几个产品上使用过程中,遇到了一些问题. 这里做个备忘吧. 二 梳理 1 工具,这个串口的默认波特率为115200. ...
- 基于BES2500芯片的低功耗蓝牙BLE游戏手柄解决方案源码解析
一 往事 寒冬腊月,在一个寂静的天空飘着碎银雪花的夜晚.我接到这么一个电话:"朋友,能否帮忙开发一个游戏手柄的案子?我们遇到了一些问题,迟迟无法解决.",喔,这边我陷入了沉思 ...
- 洞元智维产品上线:江浙沪PV访问量飙升背后的深层逻辑与未来发展趋势
洞元智维产品自上线以来,凭借其卓越的智能化产品性能和出色的用户体验,迅速在市场上崭露头角,特别是在上海.江苏.浙江等经济发达地区,其PV访问量持续飙升.这不仅反映了用户对智能化产品的强烈需求,更揭示了 ...
- Garnet: 力压Redis的C#高性能分布式存储数据库
今天看到微软研究院开源了一个新的C#项目,叫Garnet,它实现了Redis协议,可以直接将Redis替换为Garnet,客户端不需要任何修改.根据其官网的信息,简单的介绍一下它. 开源仓库地址:ht ...
- 记录--谁还没个靠bug才能正常运行的程序
这里给大家分享我在网上总结出来的一些知识,希望对大家有所帮助 最近遇到一个问题,计算滚动距离,滚动比例达到某界定值时,显示mask,很常见吧^ _ ^ 这里讲的不是这个需求的实现,是其中遇到了一个比较 ...
- 记录--Vue 右键菜单的秘密:自适应位置的实现方法
这里给大家分享我在网上总结出来的一些知识,希望对大家有所帮助 下图这个情景,你是否也遇到过? 当你右键点击网页上的某个元素时,弹出的菜单被屏幕边缘遮挡了,导致你无法看清或选择菜单项? 上图中右键菜单的 ...
- WPF 组件间通信 MVVM 进行解耦
假设有这样一个需求,有这样一个聊天界面,主界面是选项卡,其一选项卡内部是真正的聊天列表和聊天界面,我们需要实时的在主界面显示未读消息的数量 假设我们已经有方法可以拿到未读消息的数量,那么如何在主界面的 ...