Vue3 动态子页面和菜单栏同步
动态子页面
<router-view></router-view>显示子页面的内容
main.vue
<template>

  <a-layout id="components-layout-demo-top-side">

    <the-header-view></the-header-view>

    <a-layout style="padding: 24px 0; background: #fff">

      <the-sider-view></the-sider-view>

      <a-layout-content :style="{ padding: '0 24px', minHeight: '280px' }">

<!--        <p>会员总数: {{ count }}</p>-->

<!--        <button @click="handleCount">Refresh Count</button>-->

        <router-view></router-view>

      </a-layout-content>

    </a-layout>

<!--    <a-layout-content style="padding: 0 50px">-->

<!--      <a-breadcrumb style="margin: 16px 0">-->

<!--        <a-breadcrumb-item>Home</a-breadcrumb-item>-->

<!--        <a-breadcrumb-item>List</a-breadcrumb-item>-->

<!--        <a-breadcrumb-item>App</a-breadcrumb-item>-->

<!--      </a-breadcrumb>-->

<!--      -->

<!--    </a-layout-content>-->

<!--    <a-layout-footer style="text-align: center">-->

<!--      Ant Design 2018 Created by Ant UED-->

<!--    </a-layout-footer>-->

  </a-layout>

</template>

<script>

import { defineComponent } from 'vue';

import TheHeaderView from "@/components/the-header";

import TheSiderView from "@/components/the-sider";

export default defineComponent({

  components: {

    TheSiderView,

    TheHeaderView,

  },

  setup() {

    return {

    };

  },

});

</script>

<style>

#components-layout-demo-top-side .logo {

  float: left;

  width: 120px;

  height: 31px;

  margin: 16px 24px 16px 0;

  background: rgba(255, 255, 255, 0.3);

}

.ant-row-rtl #components-layout-demo-top-side .logo {

  float: right;

  margin: 16px 0 16px 24px;

}

.site-layout-background {

  background: #fff;

}

</style>
实现效果:
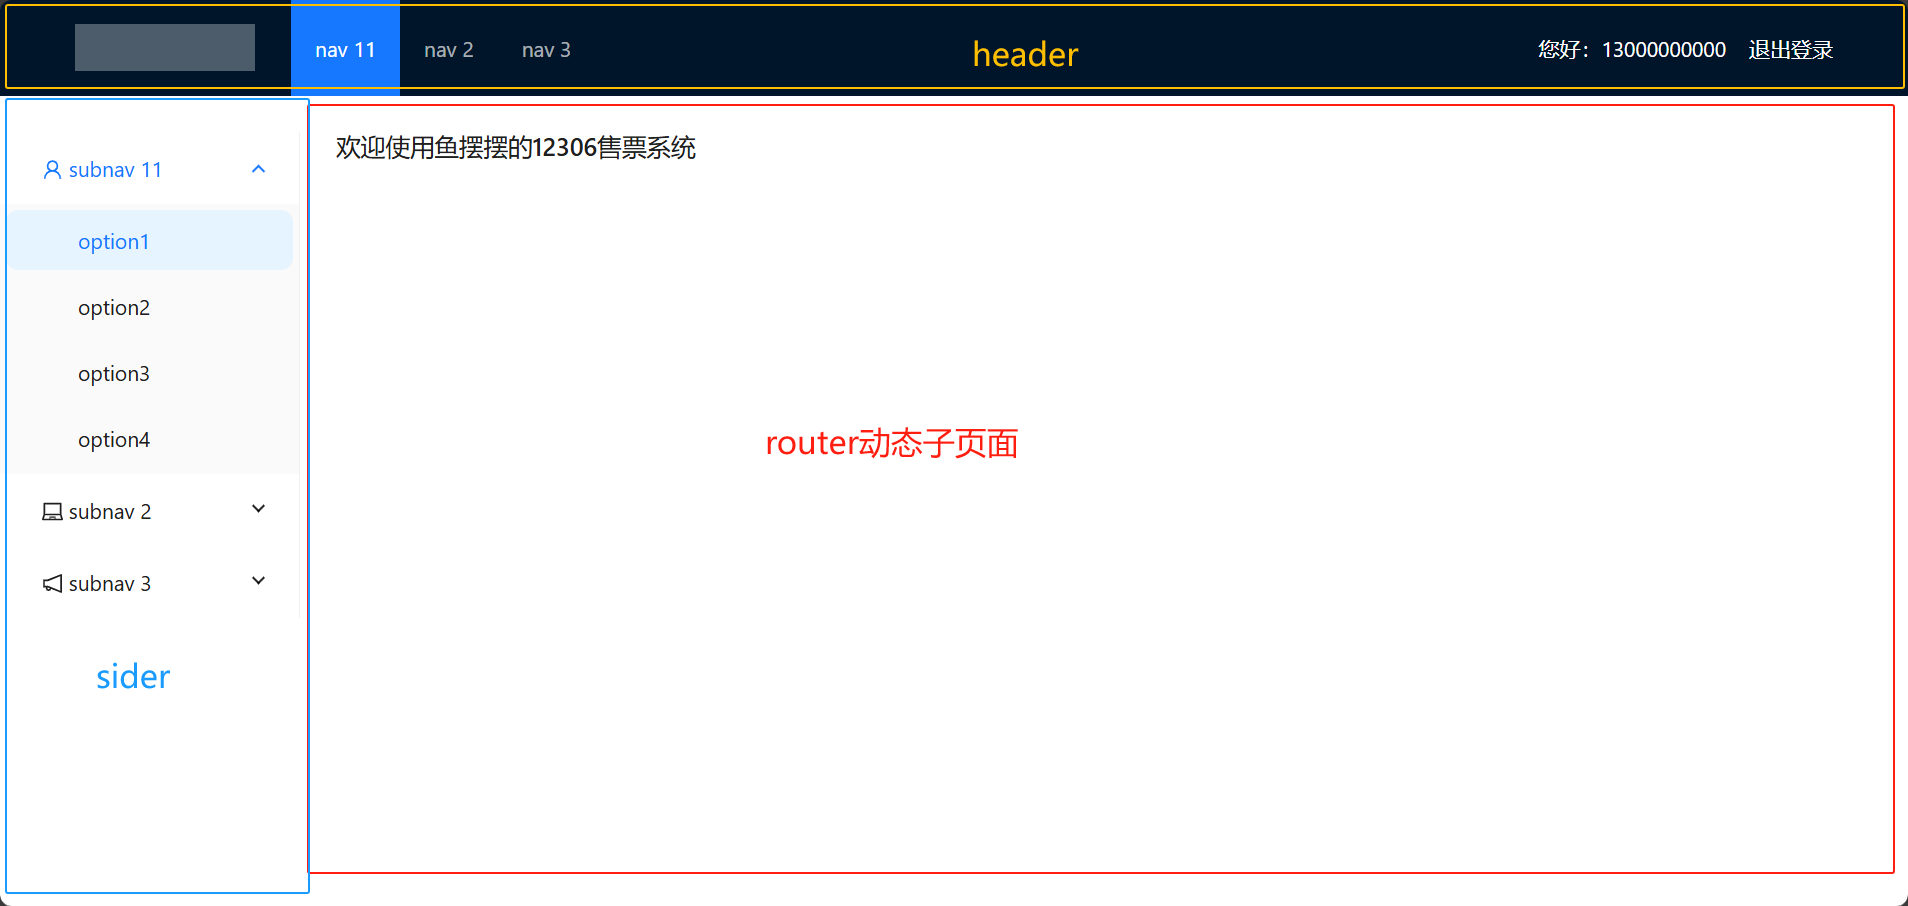
其中header和sider是先前封装的组件
router中显示的就是子页面http://localhost:9001/welcome的内容
给header和sider组件添加menu
menu
<a-menu-item key="/welcome">
<router-link to="/welcome">
<coffee-outlined /> 欢迎
</router-link>
</a-menu-item>
<a-menu-item key="/passenger">
<router-link to="/passenger">
<user-outlined /> 乘车人管理
</router-link>
</a-menu-item>
header
<template>
<a-layout-header class="header">
<div class="logo" />
<div style="float: right; color: white;">
您好:{{member.mobile}}
<router-link to="/login" style="color: white;">
退出登录
</router-link>
</div>
<a-menu
v-model:selectedKeys="selectedKeys1"
theme="dark"
mode="horizontal"
:style="{ lineHeight: '64px' }"
>
<a-menu-item key="/welcome">
<router-link to="/welcome">
<coffee-outlined /> 欢迎
</router-link>
</a-menu-item>
<a-menu-item key="/passenger">
<router-link to="/passenger">
<user-outlined /> 乘车人管理
</router-link>
</a-menu-item>
</a-menu>
<!-- <div>{{member.mobile}}</div>-->
</a-layout-header>
</template>
<script>
import {defineComponent, ref} from 'vue';
import store from "@/store";
export default defineComponent({
name: "the-header-view",
setup() {
let member = store.state.member;
return {
selectedKeys1: ref(['2']),
member
};
},
});
</script>
<!-- Add "scoped" attribute to limit CSS to this component only -->
<style scoped>
</style>
sider
<template>
<a-layout-sider width="200" style="background: #fff">
<a-menu
v-model:selectedKeys="selectedKeys2"
v-model:openKeys="openKeys"
mode="inline"
style="height: 100%"
>
<a-menu-item key="/welcome">
<router-link to="/welcome">
<coffee-outlined /> 欢迎
</router-link>
</a-menu-item>
<a-menu-item key="/passenger">
<router-link to="/passenger">
<user-outlined /> 乘车人管理
</router-link>
</a-menu-item>
<a-sub-menu key="sub1">
<template #title>
<span>
<user-outlined />
subnav 11
</span>
</template>
</a-sub-menu>
<a-sub-menu key="sub2">
<template #title>
<span>
<laptop-outlined />
subnav 2
</span>
</template>
<a-menu-item key="5">option5</a-menu-item>
<a-menu-item key="6">option6</a-menu-item>
<a-menu-item key="7">option7</a-menu-item>
<a-menu-item key="8">option8</a-menu-item>
</a-sub-menu>
<a-sub-menu key="sub3">
<template #title>
<span>
<notification-outlined />
subnav 3
</span>
</template>
<a-menu-item key="9">option9</a-menu-item>
<a-menu-item key="10">option10</a-menu-item>
<a-menu-item key="11">option11</a-menu-item>
<a-menu-item key="12">option12</a-menu-item>
</a-sub-menu>
</a-menu>
</a-layout-sider>
</template>
<script>
import {defineComponent, ref} from 'vue';
export default defineComponent({
name: "the-sider-view",
setup() {
return {
selectedKeys2: ref(['1']),
openKeys:ref(['sub1'])
};
},
});
</script>
<!-- Add "scoped" attribute to limit CSS to this component only -->
<style scoped>
</style>
实现效果:
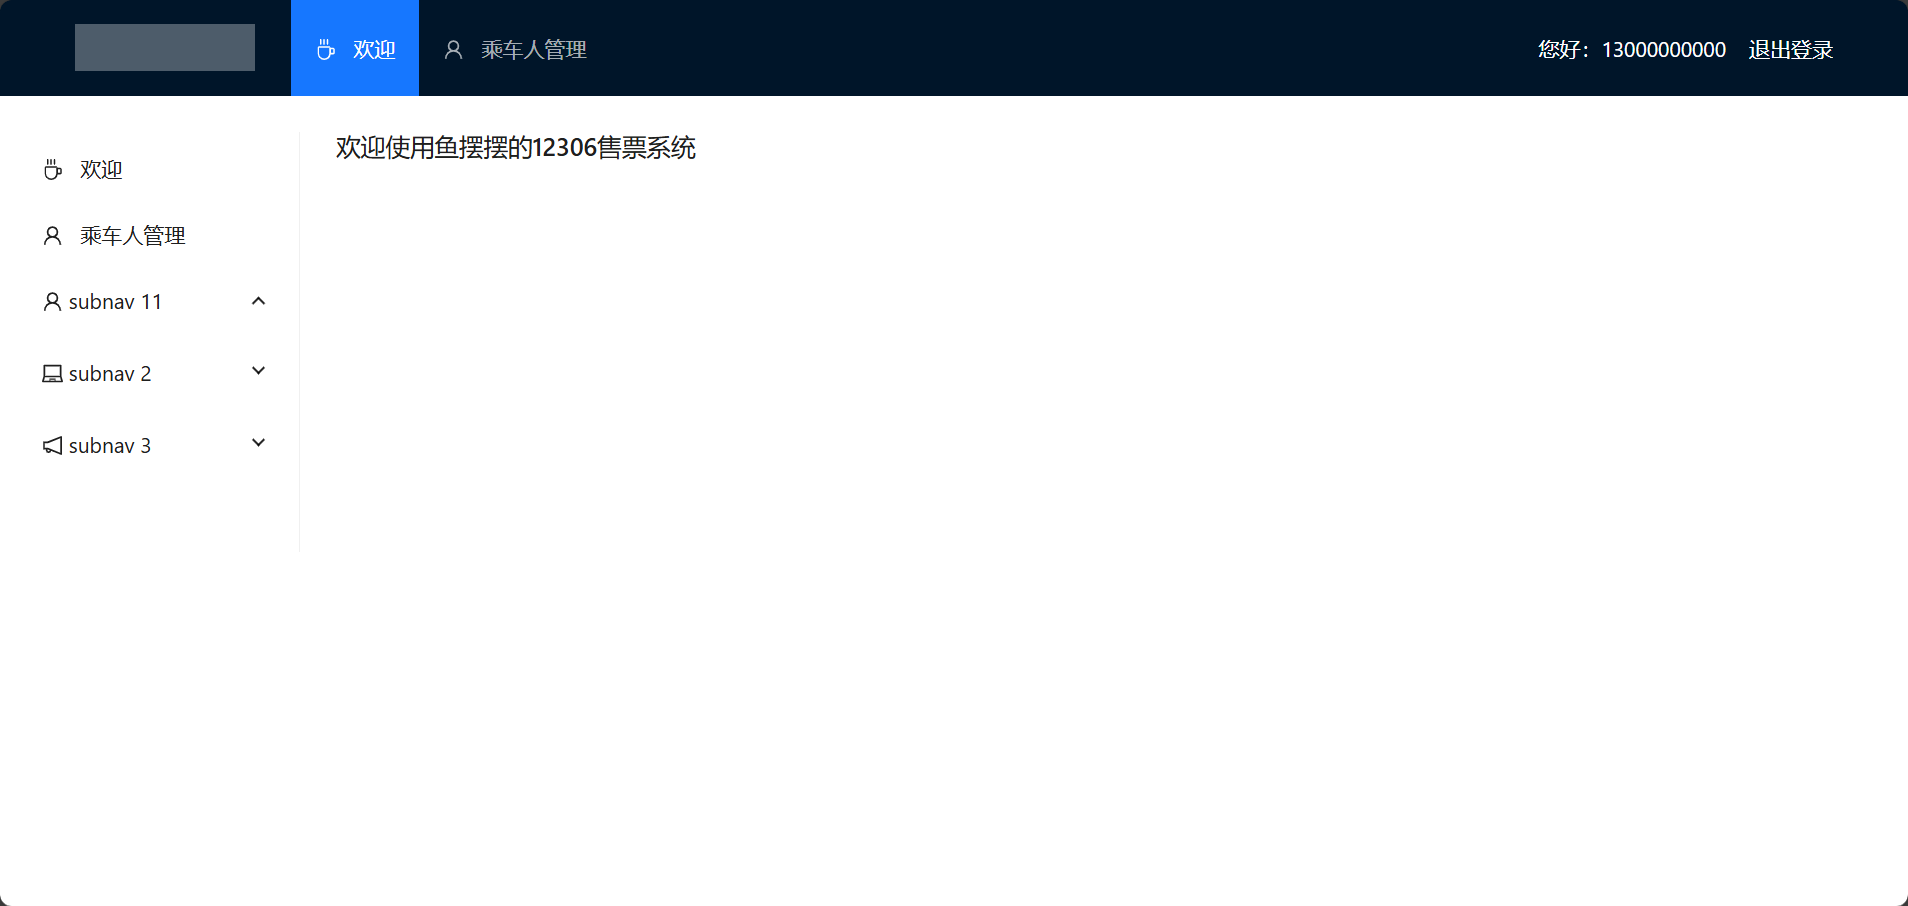
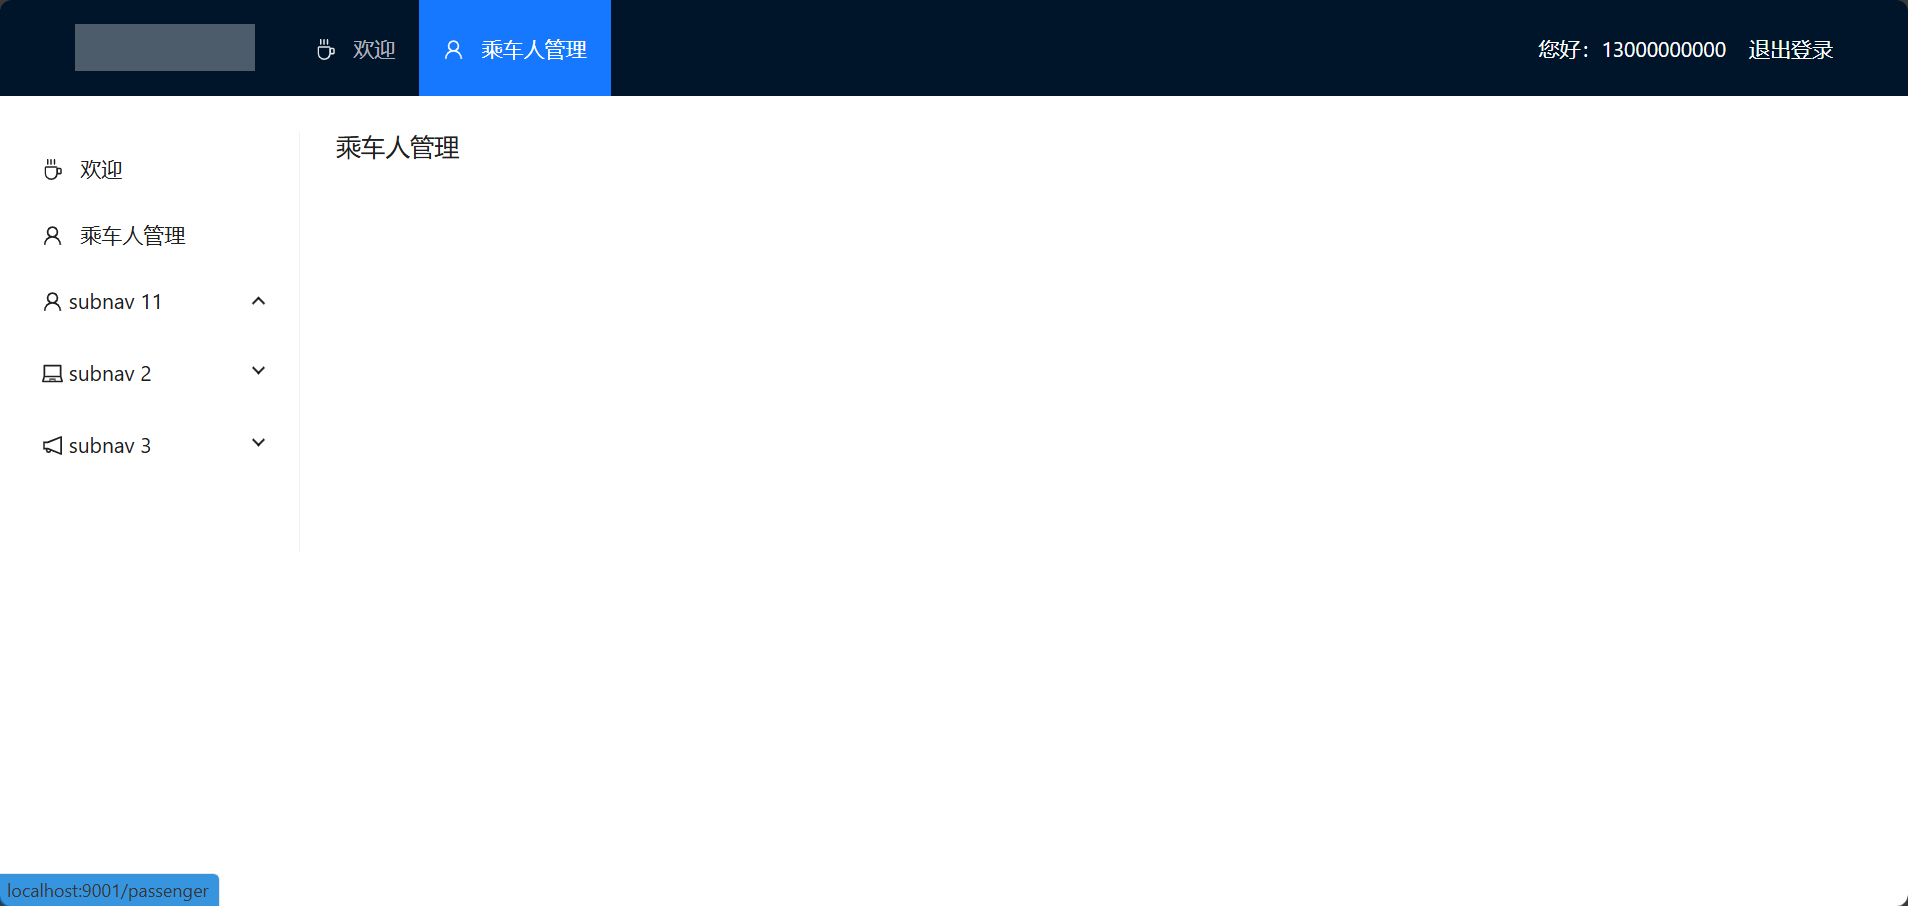
但是,这时的header和sider的菜单显示并不同步,还会出现菜单与内容不符的问题
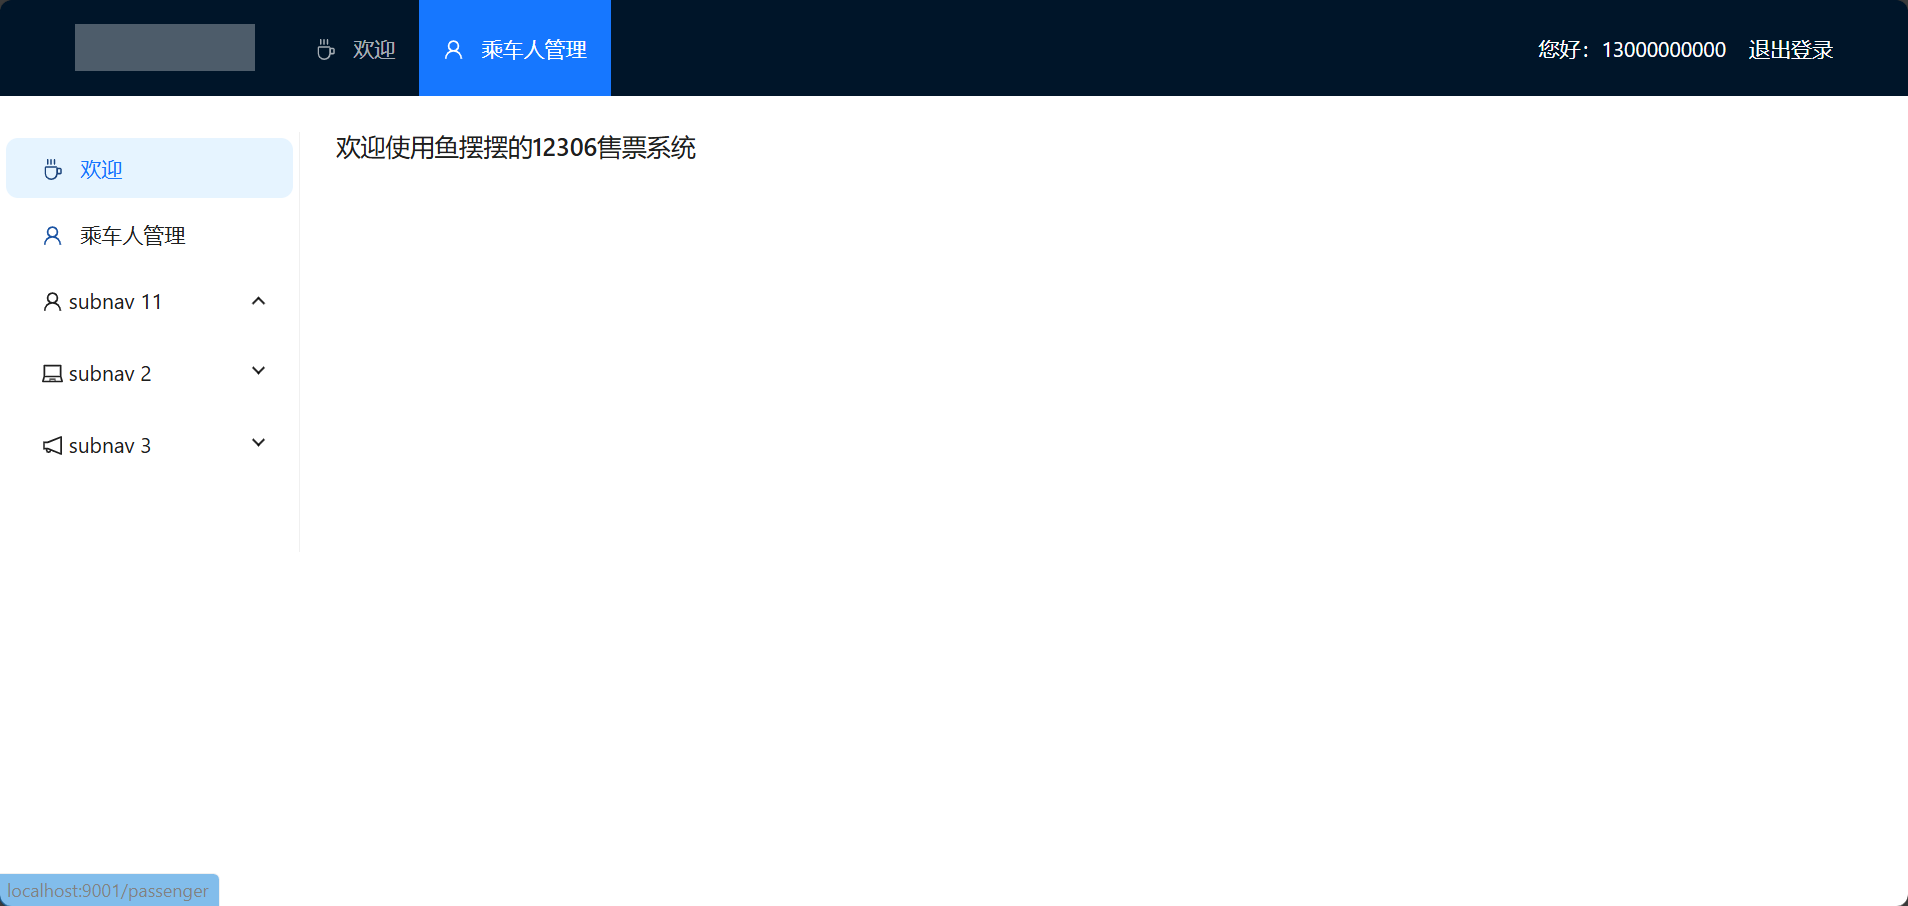
为解决这个问题,在header和sider中分别编写watch,监视地址的router地址的变化
watch
const selectedKeys = ref([]);

    watch(() => router.currentRoute.value.path, (newValue) => {

      console.log('watch', newValue);

      selectedKeys.value = [];

      selectedKeys.value.push(newValue);

    }, {immediate: true});
header
<template>
<a-layout-header class="header">
<div class="logo" />
<div style="float: right; color: white;">
您好:{{member.mobile}}
<router-link to="/login" style="color: white;">
退出登录
</router-link>
</div>
<a-menu
v-model:selectedKeys="selectedKeys"
theme="dark"
mode="horizontal"
:style="{ lineHeight: '64px' }"
>
<a-menu-item key="/welcome">
<router-link to="/welcome">
<coffee-outlined /> 欢迎
</router-link>
</a-menu-item>
<a-menu-item key="/passenger">
<router-link to="/passenger">
<user-outlined /> 乘车人管理
</router-link>
</a-menu-item>
</a-menu>
<!-- <div>{{member.mobile}}</div>-->
</a-layout-header>
</template>
<script>
import {defineComponent, ref, watch} from 'vue';
import store from "@/store";
import router from "@/router";
export default defineComponent({
name: "the-header-view",
setup() {
let member = store.state.member;
const selectedKeys = ref([]);
watch(() => router.currentRoute.value.path, (newValue) => {
console.log('watch', newValue);
selectedKeys.value = [];
selectedKeys.value.push(newValue);
}, {immediate: true});
return {
selectedKeys,
member
};
},
});
</script>
<!-- Add "scoped" attribute to limit CSS to this component only -->
<style scoped>
</style>
sider
<template>
<a-layout-sider width="200" style="background: #fff">
<a-menu
v-model:selectedKeys="selectedKeys"
v-model:openKeys="openKeys"
mode="inline"
style="height: 100%"
>
<a-menu-item key="/welcome">
<router-link to="/welcome">
<coffee-outlined /> 欢迎
</router-link>
</a-menu-item>
<a-menu-item key="/passenger">
<router-link to="/passenger">
<user-outlined /> 乘车人管理
</router-link>
</a-menu-item>
<a-sub-menu key="sub1">
<template #title>
<span>
<user-outlined />
subnav 11
</span>
</template>
</a-sub-menu>
<a-sub-menu key="sub2">
<template #title>
<span>
<laptop-outlined />
subnav 2
</span>
</template>
<a-menu-item key="5">option5</a-menu-item>
<a-menu-item key="6">option6</a-menu-item>
<a-menu-item key="7">option7</a-menu-item>
<a-menu-item key="8">option8</a-menu-item>
</a-sub-menu>
<a-sub-menu key="sub3">
<template #title>
<span>
<notification-outlined />
subnav 3
</span>
</template>
<a-menu-item key="9">option9</a-menu-item>
<a-menu-item key="10">option10</a-menu-item>
<a-menu-item key="11">option11</a-menu-item>
<a-menu-item key="12">option12</a-menu-item>
</a-sub-menu>
</a-menu>
</a-layout-sider>
</template>
<script>
import {defineComponent, ref, watch} from 'vue';
import router from "@/router";
export default defineComponent({
name: "the-sider-view",
setup() {
const selectedKeys = ref([]);
watch(() => router.currentRoute.value.path, (newValue) => {
console.log('watch', newValue);
selectedKeys.value = [];
selectedKeys.value.push(newValue);
}, {immediate: true});
return {
selectedKeys,
openKeys:ref(['welcome'])
};
},
});
</script>
<!-- Add "scoped" attribute to limit CSS to this component only -->
<style scoped>
</style>
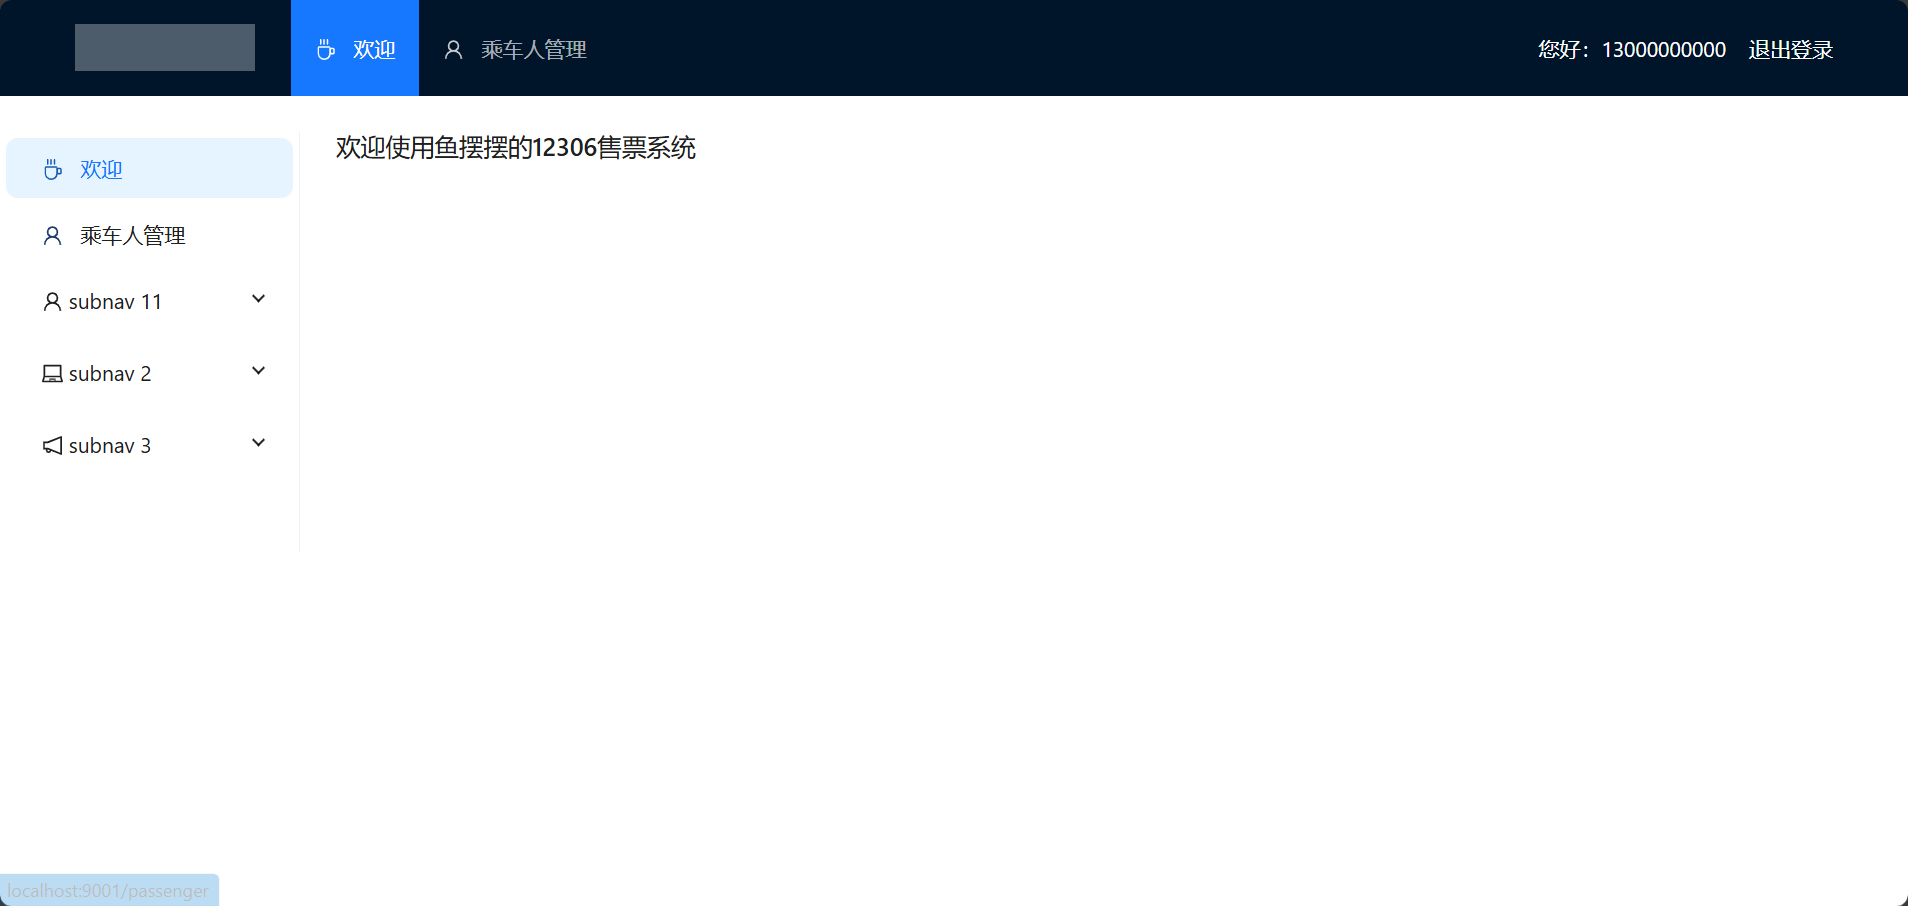
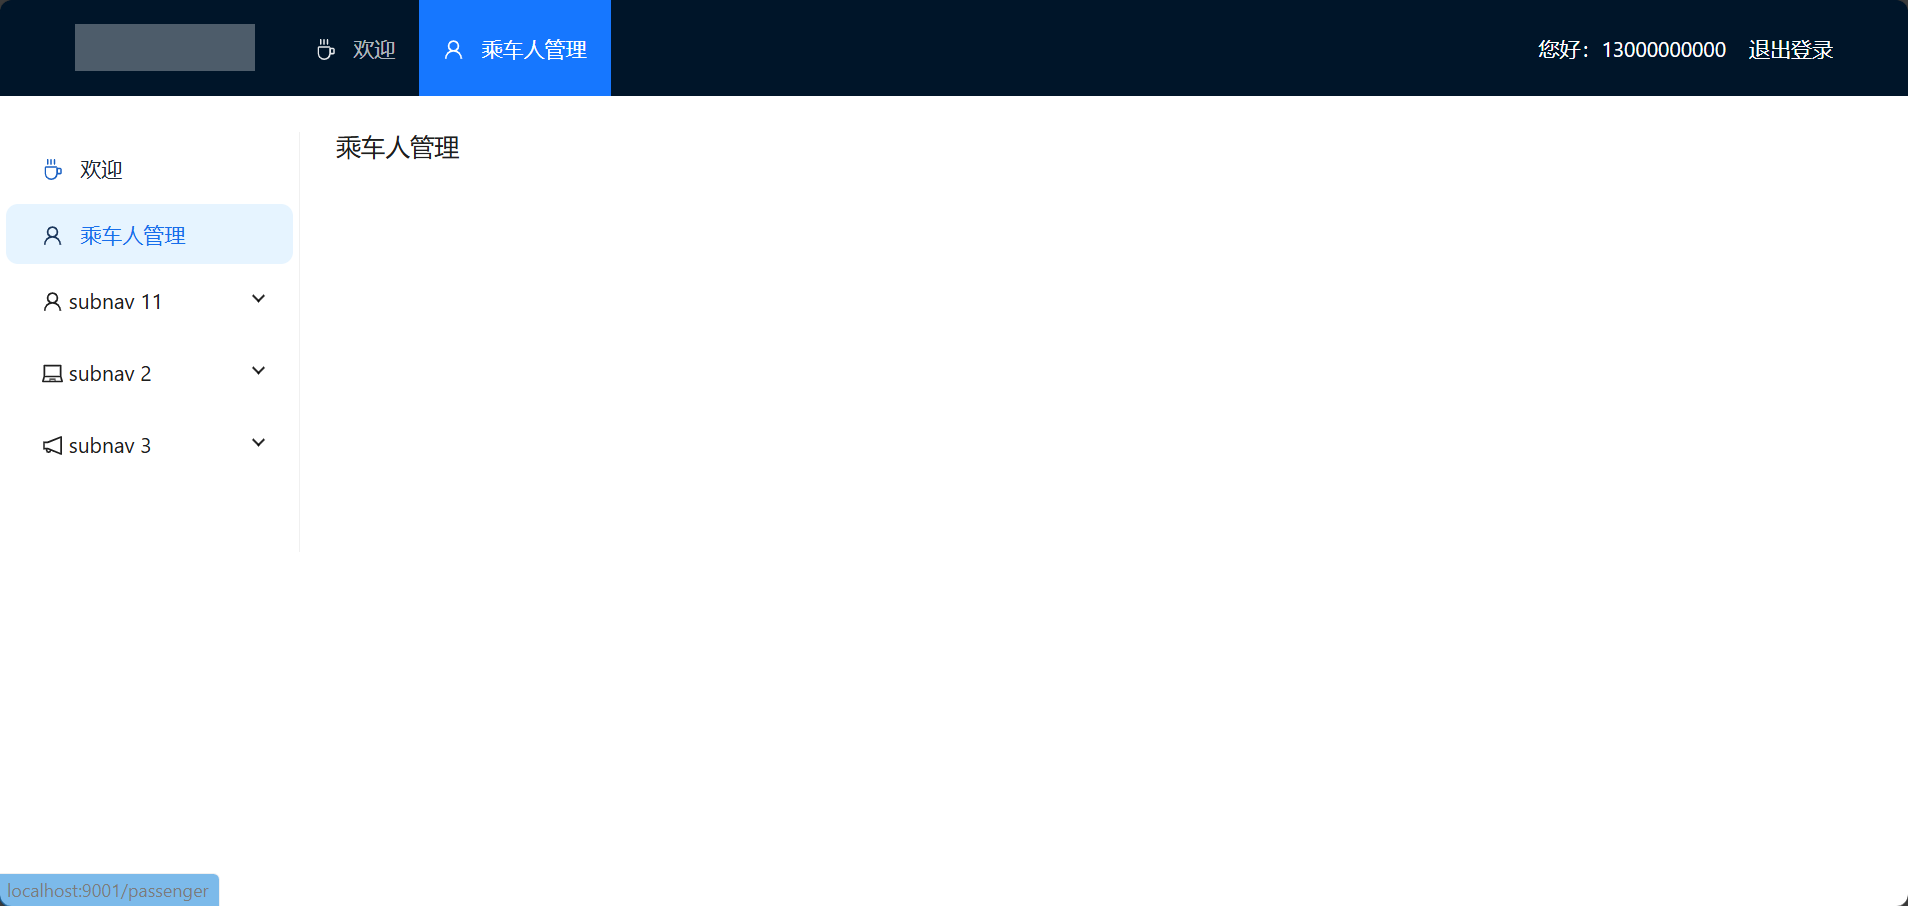
效果:
Vue3 动态子页面和菜单栏同步的更多相关文章
- Js动态获取iframe子页面的高度////////////////////////zzzz
Js动态获取iframe子页面的高度 Js动态获取iframe子页面的高度总结 问题的缘由 产品有个评论列表引用的是个iframe,高度不固定于是引发这个总结. 方法1:父级页面获取子级页面的高度 ...
- 如何实现跨域获取iframe子页面动态的url
有的时候iframe的子页面会动态的切换页面,我们在父页面通过iframe1.contentWindow.window.location只能获取同源的子页面的信息.获取跨域的子页面信息会报错. 这时可 ...
- 获取iframe子页面内容高度给iframe动态设置高度
<!DOCTYPE html><html> <head> <meta charset="UTF-8" /> <meta nam ...
- Js动态获取iframe子页面的高度总结
问题的缘由 产品有个评论列表引用的是个iframe,高度不固定于是引发这个总结. 方法1:父级页面获取子级页面的高度 给元素设置高度 这方法是用在父级页面里的,通过获取子级页面的高度给iframe设置 ...
- 关于easyUI 的tabs 在子页面增加显示tabs的一个问题
在父页面点个链接能动态看到子页面的情况太简单,请看easyUI官网:http://www.jeasyui.com/tutorial/layout/tabs2.php现在说的是在子页面点个按钮也能触发增 ...
- 关于easyUI在子页面增加显示tabs的一个问题
在父页面点个链接能动态看到子页面的情况太简单,请看easyUI官网:http://www.jeasyui.com/tutorial/layout/tabs2.php 现在说的是在子页面点个按钮也能触发 ...
- js里父页面与子页面的相互调用
一.在页面里用 open 打开的子页面: 1.子页面调用父页面的方法,包括子页面给父页面传值: window.opener.methodName(); window.opener.methodName ...
- iframe子页面与父页面元素的访问以及js变量的访问
1.子页面访问父页面元素 parent.document.getElementById('id')和document相关的方法都可以这样用 2.父页面访问子页面元素 document.getEle ...
- 动态渲染页面爬取(Python 网络爬虫) ---Selenium的使用
Selenium 的使用 Selenium 是一个自动化测试工具,利用它可以驱动浏览器执行特定的动作,如点击.下拉等操作,同时还可以获取浏览器当前呈现的页面的源代码,做到可见即可爬.对于一些JavaS ...
- Thymeleaf模版--子页面单独引入CSS、JS文件
https://blog.csdn.net/u010392801/article/details/80465800 ****************************************** ...
随机推荐
- springboot实现异步调用demo
springboot实现异步调用 异步调用特点 异步调用在开发程序中被广泛应用,在异步任务中,主线程不需要阻塞等待异步任务的完成,而是可以继续处理其他请求. 异步调用的特点如下: 非阻塞:主线程在调用 ...
- tp5框架No input file specified
最近从网上下载了一个项目,本地搭建好环境.访问页面出现No input file specified. 这个问题之前就遇到过,是因为权限的问题,导致nginx无法解析php文件,这次有点不一样所以记录 ...
- 在ubuntu16.04下,源码编译安装特定版本的MongoDB PHP扩展
背景:我的php项目在连接其他mongo库时报:Server at xxx:27017 reports wire version 5, but this version of libmongoc re ...
- Git 清除缓存账密
[已解决] git push 报错:git: 'credential-manager' is not a git command. See 'git --help'. 解决方案1)运行 git con ...
- 阅读翻译Mathematics for Machine Learning之2.5 Linear Independence
阅读翻译Mathematics for Machine Learning之2.5 Linear Independence 关于: 首次发表日期:2024-07-18 Mathematics for M ...
- 如何在.NET Framework,或NET8以前的项目中使用C# 12的新特性
前两天发了一篇关于模式匹配的文章,链接地址,有小伙伴提到使用.NET6没法体验 C#新特性的疑问, 其实呢只要本地的SDK源代码编译器能支持到的情况下(直接下载VS2022或者VS的最新preview ...
- 初学者使用1Panel面板快速搭建WordPress网站
之前介绍了宝塔面板以及如何搭建wordpress网站,这篇文章我们来学习如何使用1Panel面板搭建wordpress网站. 一.1Panel面板介绍 1. 介绍 1Panel 是一个现代化.开源的基 ...
- 【Docker】06 部署挂载本地目录的Nginx
1.拉取Nginx镜像: docker pull nginx:1.19 2.生成一个测试的Nginx容器: docker run --rm --name nginx-test -p 8080:80 - ...
- 【Hibernate】Re04 JPA规范使用
都忘了前面一些小前提,就是数据库需要是存在的,不过写链接参数都会写上的 JPA实现就是和Hibernate类似,也需要对应的配置文件等等... 1.配置文件必须命名[persistence.xml]且 ...
- conda环境下安装nvidia-nvcc
参考: https://www.cnblogs.com/littletreee/p/17234053.html conda安装Pytorch或TensorFlow的时候是默认不安装nvcc,但是有时候 ...
