2.9 学习总结 之 【Android】体温统计APP
一、说在前面
| 昨天 | 学习了JQ的相关知识 |
| 今天 | 编写体温统计APP |
我的工程源码:https://github.com/xiaotian12-call/Take-body-temperature
二、所有知识
1、使用Room管理数据库。
2、使用ViewModel管理UI数据。
3、使用hellochart图表展示数据。
4、使用liveData管理数据库数据(观察者),时时更新界面数据。
三、设计思路
1、构建底层数据库。
2、UI设计(卡片视图界面,单个卡片界面,折线图表界面,录入体温界面,菜单界面)。
3、编写Navigation,将卡片视图界面,折线图表界面,录入体温界面加入其中,并确定界面跳转关系。
4、编写适配器,体温数据工厂。
5、编写ViewModel,通过‘工厂’操控数据。
6、完善各个界面的逻辑代码。
1)卡片视图界面,组件绑定,菜单绑定及菜单功能实现,界面跳转。
2)折线图表界面,根据数据库数据,封装好点,线,轴的相关数据。
3)录入体温界面,绑定组件,根据输入数据及当前系统时间更新数据库。
四、体温统计APP编写
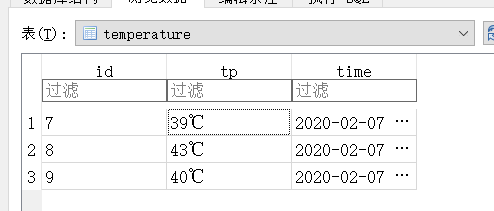
1、构建底层数据库。
1)表结构
2)代码实体 :Entity
package com.me.temperature;

import androidx.room.ColumnInfo;

import androidx.room.Entity;

import androidx.room.PrimaryKey;

@Entity(tableName = "temperature")

public class temperature {

    @PrimaryKey(autoGenerate = true)

    private int id;

    @ColumnInfo(name = "tp")

    private String tp;

    @ColumnInfo(name = "time")

    private String time;

    public temperature(String tp, String time) {

        this.tp = tp;

        this.time = time;

    }

    public int getId() {

        return id;

    }

    public void setId(int id) {

        this.id = id;

    }

    public String getTp() {

        return tp;

    }

    public void setTp(String tp) {

        this.tp = tp;

    }

    public String getTime() {

        return time;

    }

    public void setTime(String time) {

        this.time = time;

    }

}
3)Dao
package com.me.temperature;

import androidx.lifecycle.LiveData;

import androidx.room.Dao;

import androidx.room.Delete;

import androidx.room.Insert;

import androidx.room.Query;

import androidx.room.Update;

import java.util.List;

@Dao

public interface TempDao {

    @Insert

    void insertTp (temperature ... temperatures);

    @Update

    void updateTp (temperature ... temperatures);

    @Delete

    void deleteTp (temperature ... temperatures);

    @Query("DELETE From TEMPERATURE")

    void deleteAllTp ();

    @Query("SELECT * From TEMPERATURE ORDER BY ID DESC")

    LiveData<List<temperature>> getAllTp ();

}
4)Database
package com.me.temperature;

import android.content.Context;

import androidx.room.Database;

import androidx.room.Room;

import androidx.room.RoomDatabase;

@Database(entities = {temperature.class },version = 1,exportSchema = false)

public abstract class TempDatabase extends RoomDatabase {

    private static TempDatabase INSTANCE;

    public abstract TempDao getTempDao();

    static synchronized TempDatabase getTempDatabase(Context context){

        if (INSTANCE == null){

            INSTANCE = Room.databaseBuilder(context.getApplicationContext(),TempDatabase.class,"tp_database")

                    .build();

        }

        return INSTANCE;

    }

}
2、UI设计(卡片视图界面,单个卡片界面,折线图表界面,录入体温界面,菜单界面)
1)卡片视图界面
<?xml version="1.0" encoding="utf-8"?>

<FrameLayout xmlns:android="http://schemas.android.com/apk/res/android"

    xmlns:app="http://schemas.android.com/apk/res-auto"

    xmlns:tools="http://schemas.android.com/tools"

    android:layout_width="match_parent"

    android:layout_height="match_parent"

    tools:context=".AccountRecordFragment"

    android:id="@+id/frameLayout">

    <com.google.android.material.floatingactionbutton.FloatingActionButton

        android:id="@+id/buttonTpAdd"

        android:layout_width="wrap_content"

        android:layout_height="wrap_content"

        android:layout_gravity="bottom|center_horizontal"

        android:layout_margin="16dp"

        android:clickable="true"

        android:focusable="true"

        android:src="@drawable/ic_add_witer_24dp"

        tools:layout_conversion_absoluteHeight="56dp"

        tools:layout_conversion_absoluteWidth="56dp"

        tools:layout_editor_absoluteX="178dp"

        tools:layout_editor_absoluteY="659dp" />

    <androidx.recyclerview.widget.RecyclerView

        android:id="@+id/recyclerView"

        android:layout_width="match_parent"

        android:layout_height="wrap_content"

        tools:layout_conversion_absoluteHeight="731dp"

        tools:layout_conversion_absoluteWidth="411dp"

        tools:layout_editor_absoluteX="0dp"

        tools:layout_editor_absoluteY="0dp" />

</FrameLayout>
2)单个卡片界面
<?xml version="1.0" encoding="utf-8"?>

<LinearLayout xmlns:android="http://schemas.android.com/apk/res/android"

    xmlns:app="http://schemas.android.com/apk/res-auto"

    xmlns:tools="http://schemas.android.com/tools"

    android:layout_width="match_parent"

    android:layout_height="wrap_content"

    android:orientation="vertical">

    <androidx.cardview.widget.CardView

        android:layout_width="match_parent"

        android:layout_height="match_parent">

        <androidx.constraintlayout.widget.ConstraintLayout

            android:layout_width="match_parent"

            android:layout_height="match_parent"

            android:layout_marginLeft="8dp"

            android:layout_marginTop="8dp"

            android:layout_marginRight="8dp"

            android:layout_marginBottom="4dp"

            android:foreground="?selectableItemBackground">

            <androidx.constraintlayout.widget.Guideline

                android:id="@+id/guideline"

                android:layout_width="wrap_content"

                android:layout_height="wrap_content"

                android:orientation="vertical"

                app:layout_constraintGuide_percent="0.1" />

            <TextView

                android:id="@+id/textViewId"

                android:layout_width="wrap_content"

                android:layout_height="wrap_content"

                android:textSize="36sp"

                app:layout_constraintBottom_toBottomOf="parent"

                app:layout_constraintEnd_toStartOf="@+id/guideline"

                app:layout_constraintStart_toStartOf="parent"

                app:layout_constraintTop_toTopOf="parent"

                tools:text="1" />

            <TextView

                android:id="@+id/textViewTp"

                android:layout_width="wrap_content"

                android:layout_height="wrap_content"

                android:layout_marginTop="8dp"

                android:layout_marginBottom="8dp"

                android:textSize="36sp"

                app:layout_constraintBottom_toBottomOf="parent"

                app:layout_constraintEnd_toStartOf="@+id/textViewTime"

                app:layout_constraintHorizontal_bias="0.5"

                app:layout_constraintStart_toStartOf="@+id/guideline"

                app:layout_constraintTop_toTopOf="parent" />

            <TextView

                android:id="@+id/textViewTime"

                android:layout_width="wrap_content"

                android:layout_height="wrap_content"

                android:layout_marginEnd="32dp"

                android:layout_marginRight="32dp"

                android:textSize="24sp"

                app:layout_constraintBottom_toBottomOf="@+id/textViewTp"

                app:layout_constraintEnd_toEndOf="parent"

                app:layout_constraintHorizontal_bias="0.5"

                app:layout_constraintStart_toEndOf="@+id/textViewTp"

                app:layout_constraintTop_toTopOf="@+id/textViewTp" />

        </androidx.constraintlayout.widget.ConstraintLayout>

    </androidx.cardview.widget.CardView>

</LinearLayout>
3)折线图表界面
<?xml version="1.0" encoding="utf-8"?>

<LinearLayout xmlns:android="http://schemas.android.com/apk/res/android"

    android:orientation="vertical" android:layout_width="match_parent"

    android:layout_height="match_parent"

    android:padding="10dp">

    <lecho.lib.hellocharts.view.LineChartView

        android:id="@+id/chart"

        android:padding="20dp"

        android:layout_width="match_parent"

        android:layout_height="match_parent" />

</LinearLayout>
4)录入体温界面
<?xml version="1.0" encoding="utf-8"?>

<androidx.constraintlayout.widget.ConstraintLayout xmlns:android="http://schemas.android.com/apk/res/android"

    xmlns:app="http://schemas.android.com/apk/res-auto"

    xmlns:tools="http://schemas.android.com/tools"

    android:id="@+id/frameLayout2"

    android:layout_width="match_parent"

    android:layout_height="match_parent"

    tools:context=".AddFragment" >

    <TextView

        android:id="@+id/textView"

        android:layout_width="wrap_content"

        android:layout_height="wrap_content"

        android:text="@string/add_title_tp"

        android:textSize="36sp"

        app:layout_constraintBottom_toBottomOf="parent"

        app:layout_constraintEnd_toEndOf="parent"

        app:layout_constraintStart_toStartOf="parent"

        app:layout_constraintTop_toTopOf="parent"

        app:layout_constraintVertical_bias="0.05" />

    <ImageView

        android:id="@+id/imageView2"

        android:layout_width="326dp"

        android:layout_height="262dp"

        android:layout_marginTop="8dp"

        android:contentDescription="@string/add_image"

        android:src="@drawable/temp"

        app:layout_constraintBottom_toBottomOf="parent"

        app:layout_constraintDimensionRatio="1:1"

        app:layout_constraintEnd_toEndOf="parent"

        app:layout_constraintStart_toStartOf="parent"

        app:layout_constraintTop_toBottomOf="@+id/textView"

        app:layout_constraintVertical_bias="0.05" />

    <Button

        android:id="@+id/buttonAdd"

        android:layout_width="0dp"

        android:layout_height="wrap_content"

        android:layout_marginStart="32dp"

        android:layout_marginLeft="32dp"

        android:layout_marginEnd="32dp"

        android:layout_marginRight="32dp"

        android:text="@string/add_but"

        app:layout_constraintBottom_toBottomOf="parent"

        app:layout_constraintEnd_toEndOf="parent"

        app:layout_constraintStart_toStartOf="parent"

        app:layout_constraintTop_toTopOf="parent"

        app:layout_constraintVertical_bias="0.7" />

    <EditText

        android:id="@+id/editTextTp"

        android:layout_width="0dp"

        android:layout_height="wrap_content"

        android:layout_marginStart="32dp"

        android:layout_marginLeft="32dp"

        android:layout_marginEnd="32dp"

        android:layout_marginRight="32dp"

        android:ems="10"

        android:hint="@string/add_tp_in"

        android:importantForAutofill="no"

        android:inputType="number"

        app:layout_constraintBottom_toBottomOf="parent"

        app:layout_constraintEnd_toEndOf="parent"

        app:layout_constraintStart_toStartOf="parent"

        app:layout_constraintTop_toTopOf="parent"

        app:layout_constraintVertical_bias="0.6" />

</androidx.constraintlayout.widget.ConstraintLayout>
5)菜单界面
<?xml version="1.0" encoding="utf-8"?>

<menu xmlns:android="http://schemas.android.com/apk/res/android">

    <item

        android:id="@+id/clearAll"

        android:title="@string/menu_claer" />

    <item

        android:id="@+id/chart"

        android:title="@string/menu_chart" />

</menu>
3、编写Navigation,将卡片视图界面,折线图表界面,录入体温界面加入其中,并确定界面跳转关系。
<?xml version="1.0" encoding="utf-8"?>

<navigation xmlns:android="http://schemas.android.com/apk/res/android"

    xmlns:app="http://schemas.android.com/apk/res-auto"

    xmlns:tools="http://schemas.android.com/tools"

    android:id="@+id/navigation"

    app:startDestination="@id/investigationFragment">

    <fragment

        android:id="@+id/investigationFragment"

        android:name="com.me.temperature.InvestigationFragment"

        android:label="fragment_investigation"

        tools:layout="@layout/fragment_investigation" >

        <action

            android:id="@+id/action_investigationFragment_to_chartFragment"

            app:destination="@id/chartFragment" />

        <action

            android:id="@+id/action_investigationFragment_to_addFragment"

            app:destination="@id/addFragment" />

    </fragment>

    <fragment

        android:id="@+id/chartFragment"

        android:name="com.me.temperature.ChartFragment"

        android:label="fragment_chart"

        tools:layout="@layout/fragment_chart" />

    <fragment

        android:id="@+id/addFragment"

        android:name="com.me.temperature.AddFragment"

        android:label="fragment_add"

        tools:layout="@layout/fragment_add" >

        <action

            android:id="@+id/action_addFragment_to_investigationFragment"

            app:destination="@id/investigationFragment" />

    </fragment>

</navigation>
4、编写适配器,体温数据工厂。
1)适配器
package com.me.temperature;

import android.view.LayoutInflater;

import android.view.View;

import android.view.ViewGroup;

import android.widget.TextView;

import androidx.annotation.NonNull;

import androidx.recyclerview.widget.RecyclerView;

import java.util.ArrayList;

import java.util.List;

public class MyAdpter extends RecyclerView.Adapter <MyAdpter.MyViewHolder>{

    List<temperature> allTemperature = new ArrayList<>();

    public void setAllTemperature(List<temperature> allTemperature) {

        this.allTemperature = allTemperature;

    }

    @NonNull

    @Override

    public MyViewHolder onCreateViewHolder(@NonNull ViewGroup parent, int viewType) {

        LayoutInflater layoutInflater = LayoutInflater.from(parent.getContext());

        View itemView = layoutInflater.inflate(R.layout.tp_cell,parent,false);

        MyViewHolder holder = new MyViewHolder(itemView);

        holder.itemView.setOnClickListener(new View.OnClickListener() {

            @Override

            public void onClick(View v) {

            }

        });

        return holder;

    }

    @Override

    public void onBindViewHolder(@NonNull MyViewHolder holder, int position) {

        temperature temperature = allTemperature.get(position);

        holder.textViewId.setText(String.valueOf(position+1));

        holder.textViewTime.setText(temperature.getTime());

        holder.textViewType.setText(temperature.getTp());

    }

    @Override

    public int getItemCount() {

        return allTemperature.size() ;

    }

    static class  MyViewHolder extends RecyclerView.ViewHolder{

        TextView textViewId,textViewType,textViewMoney,textViewTime;

        public MyViewHolder(@NonNull View itemView) {

            super(itemView);

            textViewId = itemView.findViewById(R.id.textViewId);

            textViewType = itemView.findViewById(R.id.textViewTp);

            textViewTime = itemView.findViewById(R.id.textViewTime);

        }

    }

}
2)工厂
package com.me.temperature;

import android.content.Context;

import android.os.AsyncTask;

import androidx.lifecycle.LiveData;

import java.util.List;

public class TpRepository {

    private LiveData<List<temperature>> allTemperature;

    private static List<temperature> allTemperatures;

    private TempDao tempDao;

    public TpRepository(Context context) {

        TempDatabase accountRecordDatabase = TempDatabase.getTempDatabase(context.getApplicationContext());

        tempDao = accountRecordDatabase.getTempDao();

        allTemperature = tempDao.getAllTp();

    }

    public LiveData<List<temperature>> getAllTemperature() {

        return allTemperature;

    }

    void insertTemperature(temperature ... temperatures){

        new InsertAsyncTask(tempDao).execute(temperatures);

    }

    void deleteAllTemperature(){

        new DeleteAsyncTask(tempDao).execute();

    }

    void deleteTemperature(temperature ... temperatures){

        new DeleteAsyncTask_2(tempDao).execute(temperatures);

    }

    static class InsertAsyncTask extends AsyncTask<temperature ,Void,Void> {

        private TempDao tempDao;

        public InsertAsyncTask(TempDao tempDao) {

            this.tempDao = tempDao;

        }

        @Override

        protected Void doInBackground(temperature... temperatures) {

            tempDao.insertTp(temperatures);

            return null;

        }

    }

    static class DeleteAsyncTask extends AsyncTask<Void ,Void,Void>{

        private TempDao tempDao;

        public DeleteAsyncTask(TempDao tempDao) {

            this.tempDao = tempDao;

        }

        @Override

        protected Void doInBackground(Void... Voids) {

            tempDao.deleteAllTp();

            return null;

        }

    }

    static class DeleteAsyncTask_2 extends AsyncTask<temperature ,Void,Void>{

        private TempDao tempDao;

        public DeleteAsyncTask_2(TempDao tempDao) {

            this.tempDao = tempDao;

        }

        @Override

        protected Void doInBackground(temperature... temperatures ) {

            tempDao.deleteTp(temperatures);

            return null;

        }

    }

}
5、编写ViewModel,通过‘工厂’操控数据。
package com.me.temperature;

import android.app.Application;

import androidx.annotation.NonNull;

import androidx.lifecycle.AndroidViewModel;

import androidx.lifecycle.LiveData;

import java.util.List;

public class TpViewModel extends AndroidViewModel {

    private TpRepository tpRepository;

    public TpViewModel(@NonNull Application application) {

        super(application);

        tpRepository = new TpRepository((application));

    }

    public LiveData<List<temperature>> getAllTemperature() {

        return tpRepository.getAllTemperature();

    }

    void insertTemperature(temperature ... temperatures){

        tpRepository.insertTemperature(temperatures);

    }

    void deleteAllTemperature(){

        tpRepository.deleteAllTemperature();

    }

    void deleteTemperature(temperature ... temperatures){

        tpRepository.deleteTemperature(temperatures);

    }

}
6、完善各个界面的逻辑代码。
1)卡片视图界面,组件绑定,菜单绑定及菜单功能实现,界面跳转。
package com.me.temperature;

import android.app.AlertDialog;

import android.content.DialogInterface;

import android.os.Bundle;

import android.view.ContextMenu;

import android.view.LayoutInflater;

import android.view.Menu;

import android.view.MenuInflater;

import android.view.MenuItem;

import android.view.View;

import android.view.ViewGroup;

import androidx.annotation.NonNull;

import androidx.annotation.Nullable;

import androidx.fragment.app.Fragment;

import androidx.lifecycle.LiveData;

import androidx.lifecycle.Observer;

import androidx.lifecycle.ViewModelProviders;

import androidx.navigation.NavController;

import androidx.navigation.Navigation;

import androidx.recyclerview.widget.ItemTouchHelper;

import androidx.recyclerview.widget.LinearLayoutManager;

import androidx.recyclerview.widget.RecyclerView;

import com.google.android.material.floatingactionbutton.FloatingActionButton;

import java.util.List;

/**

 * A simple {@link Fragment} subclass.

 */

public class InvestigationFragment extends Fragment {

    private TpViewModel tpViewModel;

    private RecyclerView recyclerView;

    private MyAdpter myAdpter;

    private FloatingActionButton floatingActionButton;

    private LiveData<List<temperature>> findTemperature;

    private List<temperature> allTemperatures;

    public InvestigationFragment() {

        setHasOptionsMenu(true);

        // Required empty public constructor

    }

    @Override

    public View onCreateView(LayoutInflater inflater, ViewGroup container,

                             Bundle savedInstanceState) {

        return inflater.inflate(R.layout.fragment_investigation, container, false);

    }

    @Override

    public boolean onOptionsItemSelected(@NonNull MenuItem item) {

        switch (item.getItemId()){

            case R.id.clearAll:

                AlertDialog.Builder builder = new AlertDialog.Builder(requireActivity());

                builder.setTitle("清空账单");

                builder.setPositiveButton("确定", new DialogInterface.OnClickListener() {

                    @Override

                    public void onClick(DialogInterface dialog, int which) {

                        tpViewModel.deleteAllTemperature();

                    }

                });

                builder.setNegativeButton("取消", new DialogInterface.OnClickListener() {

                    @Override

                    public void onClick(DialogInterface dialog, int which) {

                    }

                });

                builder.create();

                builder.show();

                break;

            case R.id.chart:

                NavController navController = Navigation.findNavController(requireActivity(),R.id.fragment);

                navController.navigate(R.id.action_investigationFragment_to_chartFragment);

        }

        return super.onOptionsItemSelected(item);

    }

    @Override

    public void onCreateOptionsMenu(@NonNull Menu menu, @NonNull MenuInflater inflater) {

        super.onCreateOptionsMenu(menu, inflater);

        inflater.inflate(R.menu.menu,menu);

    }

    @Override

    public void onActivityCreated(@Nullable Bundle savedInstanceState) {

        super.onActivityCreated(savedInstanceState);

        tpViewModel = ViewModelProviders.of(requireActivity()).get(TpViewModel.class);

        recyclerView = requireActivity().findViewById(R.id.recyclerView);

        recyclerView.setLayoutManager(new LinearLayoutManager(requireActivity()));

        myAdpter = new MyAdpter();

        recyclerView.setAdapter(myAdpter);

        findTemperature =  tpViewModel.getAllTemperature();

        findTemperature.observe(requireActivity(), new Observer<List<temperature>>() {

            @Override

            public void onChanged(List<temperature> temperatures) {

                allTemperatures = temperatures;

                myAdpter.setAllTemperature(temperatures);

                myAdpter.notifyDataSetChanged();

            }

        });

        new ItemTouchHelper(new ItemTouchHelper.SimpleCallback(0,ItemTouchHelper.START | ItemTouchHelper.END) {

            @Override

            public boolean onMove(@NonNull RecyclerView recyclerView, @NonNull RecyclerView.ViewHolder viewHolder, @NonNull RecyclerView.ViewHolder target) {

                return false;

            }

            @Override

            public void onSwiped(@NonNull RecyclerView.ViewHolder viewHolder, int direction) {

                temperature temperature = allTemperatures.get(viewHolder.getLayoutPosition());

                tpViewModel.deleteTemperature(temperature);

            }

        }).attachToRecyclerView(recyclerView);

        floatingActionButton = requireActivity().findViewById(R.id.buttonTpAdd);

        floatingActionButton.setOnClickListener(new View.OnClickListener() {

            @Override

            public void onClick(View v) {

                NavController navController = Navigation.findNavController(v);

                navController.navigate(R.id.action_investigationFragment_to_addFragment);

            }

        });

    }

}
2)折线图表界面,根据数据库数据,封装好点,线,轴的相关数据。
package com.me.temperature;

import android.graphics.Color;

import android.os.Bundle;

import androidx.annotation.NonNull;

import androidx.annotation.Nullable;

import androidx.fragment.app.Fragment;

import androidx.lifecycle.ViewModelProviders;

import android.view.LayoutInflater;

import android.view.View;

import android.view.ViewGroup;

import java.util.ArrayList;

import java.util.List;

import java.util.Map;

import java.util.TreeMap;

import lecho.lib.hellocharts.model.Axis;

import lecho.lib.hellocharts.model.AxisValue;

import lecho.lib.hellocharts.model.Line;

import lecho.lib.hellocharts.model.LineChartData;

import lecho.lib.hellocharts.model.PointValue;

import lecho.lib.hellocharts.model.ValueShape;

import lecho.lib.hellocharts.util.ChartUtils;

import lecho.lib.hellocharts.view.LineChartView;

/**

 * A simple {@link Fragment} subclass.

 */

public class ChartFragment extends Fragment {

    private LineChartView mChart;

    private Map<String,String> table = new TreeMap<>();

    private LineChartData mData;

    private TpViewModel tpViewModel;

    private List<AxisValue> mAxisXValues = new ArrayList<AxisValue>();

    private List<AxisValue> values = new ArrayList<>();

    public ChartFragment() {

        // Required empty public constructor

    }

    @Override

    public View onCreateView(LayoutInflater inflater, ViewGroup container,

                             Bundle savedInstanceState) {

        // Inflate the layout for this fragment

        return inflater.inflate(R.layout.fragment_chart, container, false);

    }

    @Override

    public void onViewCreated(@NonNull View view, @Nullable Bundle savedInstanceState) {

        super.onViewCreated(view, savedInstanceState);

        mChart = view.findViewById(R.id.chart);

    }

    @Override

    public void onActivityCreated(@Nullable Bundle savedInstanceState) {

        super.onActivityCreated(savedInstanceState);

        tpViewModel = ViewModelProviders.of(requireActivity()).get(TpViewModel.class);

        mData = new LineChartData();

        List<temperature> allDate = tpViewModel.getAllTemperature().getValue();

        generateValues(allDate);

        generateData();

    }

    private void generateData() {

        List<Line> lines = new ArrayList<>();

        List<PointValue> values = new ArrayList<>();

        int indexX = 0;

        for(String value : table.values()){

            char [] chars = value.toCharArray();

            String string = "";

            if(chars.length>0){

                string += chars[0];

            }

            if(chars.length>1){

                string += chars[1];

            }

            values.add(new PointValue(indexX, Integer.valueOf(string)));

            indexX++;

        }

        Line line = new Line(values);

        line.setColor(ChartUtils.COLORS[0]);

        line.setShape(ValueShape.CIRCLE);

        line.setPointColor(ChartUtils.COLORS[1]);

        lines.add(line);

        mData.setLines(lines);

        setAxis();

        mChart.setLineChartData(mData);

    }

    private void generateValues(List<temperature> allDate) {

        if(allDate != null){

            for (int i = 0; i < allDate.size(); i++) {

                temperature costBean = allDate.get(i);

                String costDate = costBean.getTime();

                String costTp = costBean.getTp();

                //mAxisXValues.add(new AxisValue(allDate.size() - i - 1).setLabel(costDate));

                mAxisXValues.add(new AxisValue(i).setLabel(costDate));

                if(!table.containsKey(costDate)){

                    table.put(costDate,costTp);

                    //mAxisXValues.add(new AxisValue(i).setLabel(costDate));

                }else {

                    table.put(costDate,costTp);

                }

            }

        }

    }

    private void setAxis() {

        //坐标轴

        Axis axisX = new Axis(); //X轴

        axisX.setHasTiltedLabels(true);  //X坐标轴字体是斜的显示还是直的,true是斜的显示

        axisX.setTextColor(Color.GRAY);  //设置字体颜色

        axisX.setName("日期");  //表格名称

        axisX.setTextSize(10);//设置字体大小

        axisX.setMaxLabelChars(7); //最多几个X轴坐标,意思就是你的缩放让X轴上数据的个数7<=x<=mAxisXValues.length

        axisX.setValues(mAxisXValues);  //填充X轴的坐标名称

        mData.setAxisXBottom(axisX); //x 轴在底部

        //data.setAxisXTop(axisX);  //x 轴在顶部

        axisX.setHasLines(true); //x 轴分割线

        Axis axisY = new Axis().setHasLines(true);

        axisY.setMaxLabelChars(6);//max label length, for example 60

        for(int i = 35; i < 45; i+= 1){

            AxisValue value = new AxisValue(i);

            String label = i + "℃";

            value.setLabel(label);

            values.add(value);

        }

        axisY.setValues(values);

        axisY.setName("体温");//y轴标注

        axisY.setTextSize(10);//设置字体大小

        mData.setAxisYLeft(axisY);  //Y轴设置在左边

        //data.setAxisYRight(axisY);  //y轴设置在右边

    }

}
3)录入体温界面,绑定组件,根据输入数据及当前系统时间更新数据库。
package com.me.temperature;

import android.os.Bundle;

import android.text.Editable;

import android.text.TextWatcher;

import android.view.LayoutInflater;

import android.view.View;

import android.view.ViewGroup;

import android.widget.Button;

import android.widget.EditText;

import androidx.annotation.Nullable;

import androidx.fragment.app.Fragment;

import androidx.fragment.app.FragmentActivity;

import androidx.lifecycle.ViewModelProviders;

import androidx.navigation.NavController;

import androidx.navigation.Navigation;

import java.text.SimpleDateFormat;

import java.util.Date;

/**

 * A simple {@link Fragment} subclass.

 */

public class AddFragment extends Fragment {

    private Button buttonSubmit;

    private EditText editTextTp;

    private TpViewModel tpViewModel;

    public AddFragment() {

        // Required empty public constructor

    }

    @Override

    public View onCreateView(LayoutInflater inflater, ViewGroup container,

                             Bundle savedInstanceState) {

        // Inflate the layout for this fragment

        return inflater.inflate(R.layout.fragment_add, container, false);

    }

    @Override

    public void onActivityCreated(@Nullable Bundle savedInstanceState) {

        super.onActivityCreated(savedInstanceState);

        FragmentActivity activity = requireActivity();

        tpViewModel = ViewModelProviders.of(activity).get(TpViewModel.class);

        buttonSubmit = activity.findViewById(R.id.buttonAdd);

        editTextTp = activity.findViewById(R.id.editTextTp);

        buttonSubmit.setEnabled(false);

        TextWatcher textWatcher = new TextWatcher() {

            @Override

            public void beforeTextChanged(CharSequence s, int start, int count, int after) {

                String type = editTextTp.getText().toString().trim();

                buttonSubmit.setEnabled(!type.isEmpty());

            }

            @Override

            public void onTextChanged(CharSequence s, int start, int before, int count) {

            }

            @Override

            public void afterTextChanged(Editable s) {

            }

        };

        editTextTp.addTextChangedListener(textWatcher);

        buttonSubmit.setOnClickListener(new View.OnClickListener() {

            @Override

            public void onClick(View v) {

                String tp = editTextTp.getText().toString().trim();

                SimpleDateFormat simpleDateFormat = new SimpleDateFormat("yyyy-MM-dd HH:mm");// HH:mm:ss

                //获取当前时间

                Date date = new Date(System.currentTimeMillis());

                temperature temperature = new temperature(tp+"℃",simpleDateFormat.format(date));

                tpViewModel.insertTemperature(temperature);

                NavController navController = Navigation.findNavController(v);

                navController.navigate(R.id.action_addFragment_to_investigationFragment);

            }

        });

    }

}
2.9 学习总结 之 【Android】体温统计APP的更多相关文章
- android体温登记APP开发过程+问题汇总+源码
源码上传至https://github.com/durtime/myproject下的temperature 实际效果: 开发过程 1.首先进行布局文件的编写,布局前台页面 2.布置两个按钮,一个 ...
- 体温填报app作业演示
今日学习 今天把这个体温填写app作业,做完了. 具体开发流程:https://www.cnblogs.com/yuxuan-light-of-Taihu-Lake/p/14362107.html 点 ...
- 【java学习系列】 Android第一本书《第一行代码》
开始Java的学习,从Android,开始吧.<第一代码>开始阅读和调试demo例子. 下面是 <第一行代码>的思维导图:
- Android Stduio统计项目的代码行数
android studio统计项目的代码行数的步骤如下: 1)按住Ctrl+Shift+A,在弹出的框输入‘find’,然后选择Find in Path.(或者使用快捷键Ctrl+Shift+F) ...
- Android学习系列(39)--Android主题和样式之系统篇(上)
[基于最新的Android4.4的源码分析] 每家公司或者每个移动团队无不想开发出一套自己的UI框架,融入自己的设计和特性,这必然会去修改android的ui.所以,学习和理解android的UI设计 ...
- [原]零基础学习视频解码之android篇系列文章
截止今天,<零基础学习视频解码系列文章>.<零基础学习在Android进行SDL开发系列文章>以及<零基础学习视频解码之android篇>系列文章基本算是告一段落了 ...
- Android流量统计TrafficStats类
对于Android流量统计来说在2.2版中新加入了TrafficStats类可以轻松获取,其实本身TrafficStats类也是读取Linux提供的文件对象系统类型的文本进行解析. android.n ...
- 学习新手给Android新手的一些学习建议
时间紧张,先记一笔,后续优化与完善. Shamoo做Android开辟已有一年了,对Android开辟也有一点点了解.上面就给Android新手说说我对Android浅面的意识和一点建议吧,知道的大牛 ...
- Android 事件统计
title: Android 事件统计 1.写在前面的话 最近都在看framework的东西,也几天没有写什么东西,今天有点时间写下上次面试遇到的一个问题.问题大概是这样的,如果我需要统计页面的点击事 ...
随机推荐
- flex布局(非常重要)
首先明确一点是, flex 是 flex-grow.flex-shrink.flex-basis的缩写.故其取值可以考虑以下情况: flex 的默认值是以上三个属性值的组合.假设以上三个属性同样取默认 ...
- 丰田开放混动专利后,真能PK赢纯电动汽车吗?
特斯拉已成为美国汽车市场增速最快的厂商,且在中国建设工厂后又巩固了自身的地位:蔚来.小鹏等互联网造车企业迅速崛起,吸引着风投的强烈关注:全球范围内,纯电动汽车的销量节节攀升--从多个维度看,纯电动汽车 ...
- Linux centosVMware Tomcat介绍、安装jdk、安装Tomcat
一.Tomcat介绍 Tomcat是Apache软件基金会(Apache Software Foundation)的Jakarta项目中的一个核心项目,由Apache.Sun和其他一些公司及个人共同开 ...
- GET和POST面试知识点
导读:大部分APP都依赖于网络通信,对于开发者来说,基于网络通信的开发无疑是必须掌握的.HTTP通信作为目前计算机主要的通信协议,是企业面试当中必问的.对于HTTP通信的概念,本文不作说明,我将在后续 ...
- JS中,跨域调用(本地)另一个项目的方法
IP地址,因为是本地的项目,所以我一开始写的是127.0.0.1...,但不对.应该写本机的IP地址才对!
- 五 Mybatis一对一关联查询的两种方式(基于resultType&基于resultMap)
关联查询: 一个用户对应多个订单,一个订单只有一个用户 订单关联用户:两种方式 一:基于resultTYpe,一个与表关系一样的pojo实现 主表订单,从表用户 首先要有一个与关联查询表关系一样的po ...
- mybatis注解基础使用
一.创建Maven项目 代码:pom.xml <?xml version="1.0" encoding="UTF-8"?> <projec ...
- Spring--@configuration 和 @Bean
参考:http://wiki.jikexueyuan.com/project/spring/java-based-configuration.html @Configuration 和 @Bean 注 ...
- ZCGL大数据项目优化组件布置
1.经JMeter并发性能测试,每个HBaseService服务的并发请求上限大概是1K,为了支持5W个并发请求量,需要增加部署节点,相应需要增加部署路由网管Zuul,为了隐藏多个路由网管Zuul的I ...
- 【Python数组及其基础操作】【numpy ndarray】
一.创建数组 在python中创建数组最简单的办法就是使用array函数.它接受一切序列型的对象,然后产生一个含有传入数据的numpy数组.其中,嵌套序列(比如由一组等长列表组成的列表)会被转换为一个 ...