Appium自动化(9) - appium元素定位的快速入门
如果你还想从头学起Appium,可以看看这个系列的文章哦!
https://www.cnblogs.com/poloyy/category/1693896.html
快速入门栗子:boss直聘 app
环境要求:Android
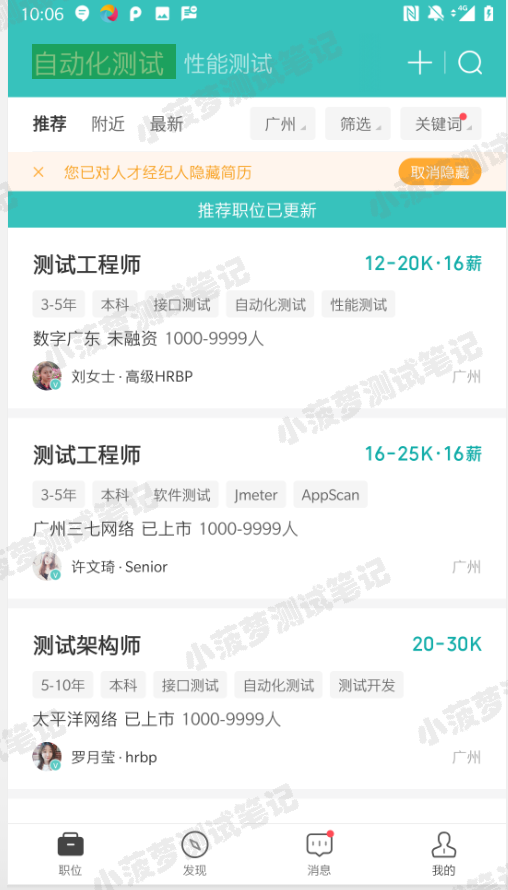
栗子一:定位【自动化测试】
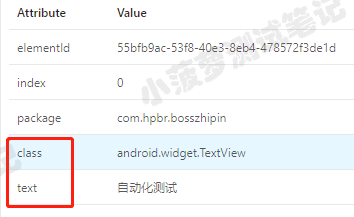
代码
test = driver.find_element_by_class_name("android.widget.TextView")

print(test.text)

test = driver.find_element_by_xpath("//*[@resource-id='com.hpbr.bosszhipin:id/title_container']/android.widget.FrameLayout/android.widget.TextView")

print(test.text)

test = driver.find_element_by_xpath("//*[contains(@text,'自动化测试')]")

print(test.text)
输出结果
自动化测试

自动化测试

自动化测试
栗子二:定位【附近】
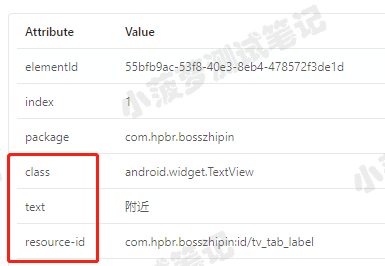
代码
test = driver.find_element_by_id("com.hpbr.bosszhipin:id/tv_tab_label")

print(test.text)

test = driver.find_element_by_xpath("//*[@resource-id='com.hpbr.bosszhipin:id/tv_tab_label']")

print(test.text)

test = driver.find_element_by_xpath("//*[contains(@text,'附近')]")

print(test.text)
输出结果
推荐

推荐

附近
为啥会有两个推荐?
- 很明显因为【推荐、附近】两个 tab 的 resource-id 都是一样的,而 find_element_by 只返回第一个匹配到的元素
- 这个时候可以将代码改成 find_elements_by 匹配多个元素,再根据索引去匹配【附近】
test = driver.find_elements_by_id("com.hpbr.bosszhipin:id/tv_tab_label")[1]

print(test.text)

test = driver.find_elements_by_xpath("//*[@resource-id='com.hpbr.bosszhipin:id/tv_tab_label']")[1]

print(test.text)
输出结果
附近

附近
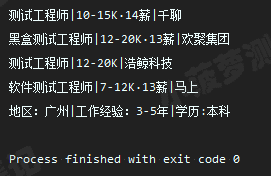
实战栗子:完整的流程
- 进入boss app
- 点击右上角的放大镜icon
- 点击输入框
- 输入“软件测试”
- 点击第一个结果
- 打印第一屏的地区、工作经验、学历
#!/usr/bin/env python

# -*- coding: utf-8 -*-

"""

__title__  =

__Time__   = 2020-04-15 21:59

__Author__ = 小菠萝测试笔记

__Blog__   = https://www.cnblogs.com/poloyy/

"""

# 导包

from appium import webdriver

# 准备自动化配置信息

desired_caps = {

    # 移动设备平台

    'platformName': 'Android',

    # 平台OS版本号,写整数位即可

    'plathformVersion': '',

    # 设备的名称--值可以随便写

    'deviceName': 'test0106',

    # 提供被测app的信息-包名,入口信息

    'appPackage': 'com.hpbr.bosszhipin',

    'appActivity': '.module.launcher.WelcomeActivity',

    # 如果被测应用没有安装到手机上,可以指定apk的在电脑上路径

    # 'app':r'D:\apk\xxx.apk',

    # 确保自动化之后不重置app

    'noReset': True,

    # 设置session的超时时间,单位秒

    'newCommandTimeout': 6000,

    # 如果不想每次都安装UI2驱动,可以这么设置

    'skipServerInstallation': True

}

# 初始化driver对象-用于控制手机

driver = webdriver.Remote('http://localhost:4723/wd/hub', desired_caps)

driver.implicitly_wait(10)  # 稳定元素

# 点击放大镜

driver.find_element_by_xpath('//*[@resource-id="com.hpbr.bosszhipin:id/ly_menu"]/android.widget.RelativeLayout[2]/.').click()

# 搜索框输入职位信息

search_input = driver.find_element_by_id('com.hpbr.bosszhipin:id/et_search')

search_input.send_keys('软件测试')  # 输入参数

# 选择符合条件的第一个搜索结果

driver.find_element_by_id('com.hpbr.bosszhipin:id/tv_filtered_name').click()

# 获取当前页面所有职位信息元素

job_msg = driver.find_elements_by_id('com.hpbr.bosszhipin:id/view_job_card')

for job in job_msg:

    # 输出岗位名称

    name = job.find_element_by_id('com.hpbr.bosszhipin:id/tv_position_name')

    # print(name.text)

    # 输出薪资

    salray = job.find_element_by_id('com.hpbr.bosszhipin:id/tv_salary_statue')

    # print(salray.text)

    # 输出公司名称

    # 找到元素返回包含一个元素的列表,找不到就返回空列表

    company = job.find_elements_by_id('com.hpbr.bosszhipin:id/tv_company_name')

    # 避免屏幕遮挡了公司名,查到不到目标元素,设置一共默认值

    company_text = '空'

    # 当找打company元素的时候,就使用该元素的文本

    if company:

        company_text = company[0].text

    print('%s|%s|%s' % (name.text, salray.text, company_text))

# 点击第一个搜索结果

job_msg[0].click()

# 获取职位名称下面的信息:地区、工作年限、学历、工作性质

location = driver.find_element_by_id('tv_required_location').text

work_exp = driver.find_element_by_id('tv_required_work_exp').text

degree = driver.find_element_by_id('tv_required_degree').text

print(f'地区:{location}|工作经验:{work_exp}|学历:{degree}')

driver.quit()
输出结果
Appium自动化(9) - appium元素定位的快速入门的更多相关文章
- appium自动化测试之UIautomatorviewer元素定位
appium自动化测试之UIautomatorviewer元素定位 标签(空格分隔): uiautomatorviewer元素定位 前面的章节,已经总结了怎么搭建环境,怎样成功启动一个APP了,这里具 ...
- python+Appium自动化:H5元素定位
问题思考 在混合开发的App中,经常会有内嵌的H5页面.那么这些H5页面元素该如何进行定位操作呢? 解决思路 针对这种场景直接使用前面所讲的方法来进行定位是行不通的,因为前面的都是基于Andriod原 ...
- python+Appium自动化:id元素定位
元素定位 与web自动化一样,app自动化元素定位也是非常重要的一环,,appium也是提供了很多元素定位的方法,比如:id.name.class.层级定位等等. 元素定位方式 id name cla ...
- python+Appium自动化:各种元素定位方法
name定位 driver.find_element_by_name('飞利浦净水').click() 测试结果报错:selenium.common.exceptions.InvalidSelecto ...
- 元素定位-----Selenium快速入门(二)
一.eclipse设置 工欲善其事必先利其器,在说元素定位之前,先来设置下eclipse. 首先放大一下字体,点击windows-preferences 其次,eclipse对于java的智能提示默认 ...
- 5、通过Appium Desktop实现页面元素定位
之前我们已经安装了Appium Desktop,下面就让我们使用Appium Desktop实现页面元素定位 1.首先我们打开Appium Desktop,进入如下界面,点击Start Server ...
- 『与善仁』Appium基础 — 17、元素定位工具(一)
目录 1.uiautomatorviewer介绍 2.uiautomatorviewer工具打开方式 3.uiautomatorviewer布局介绍 4.uiautomatorviewer工具的使用 ...
- 『与善仁』Appium基础 — 18、元素定位工具(二)
目录 1.Appium Inspector介绍 2.Appium Inspector打开方式 3.Appium Inspector布局介绍 4.Appium Inspector工具的配置 5.Appi ...
- Appium学习笔记4_元素定位方法
Appium之元素定位,如果对Android上如何使用工具获取页面元素有问题的,请转战到这:http://www.cnblogs.com/taoSir/p/4816382.html. 下面主要是针对自 ...
随机推荐
- nav破解
https://blog.csdn.net/qq_40529395/article/details/78839357
- RedHat 的 crontab
Chapter 39. Automated Tasks In Linux, tasks can be configured to run automatically within a specifie ...
- 防cc攻击利器之Httpgrard
一.httpgrard介绍 HttpGuard是基于openresty,以lua脚本语言开发的防cc攻击软件.而openresty是集成了高性能web服务器Nginx,以及一系列的Nginx模块,这其 ...
- MinIO 的分布式部署
目录 1 前言 2 分布式存储可靠性常用方法 2.1 冗余 2.2 校验 3 MinIO存储机制 3.1 概念理解 3.2 纠删码EC(Erasure Code) 3.3 存储形式 4 部署实践 4. ...
- java并发中CountDownLatch的使用
文章目录 主线程等待子线程全都结束之后再开始运行 等待所有线程都准备好再一起执行 停止CountdownLatch的await java并发中CountDownLatch的使用 在java并发中,控制 ...
- NFS共享设置
一.安装所需要的软件环境[root@fengling ~]# yum -y install rpcbind nfs-utils二.创建共享目录mkdir /web三.启动服务[root@fenglin ...
- js 之 for循环
js之 for循环 普通for 循环 语法 for ([initialization]; [condition]; [final-expression]) statement initializati ...
- 【集群实战】fatab开机挂载失败案例
1. nfs挂载加入fstab案例 NFS客户端实现fstab开机自启动挂载 现象:nfs开机挂载卸载了/etc/fstab中,结果无法开机自动挂载nfs 解答:1. nfs客户端命令放在/etc/r ...
- apache、nginx配置openssl自签名证书
1.生成私钥 生成rsa私钥,des3算法,2048位强度.server.key是秘钥文件名,需要提供一个至少4位的密码. [root@localhost ~]# openssl genrsa -de ...
- Highcharts的自适应DOM或者DIV,JS方法实现
那我们就按照官网的一分钟极速入门代码来说 // 图表配置 var options = { chart: { type: 'bar' //指定图表的类型,默认是折线图(line) }, title: { ...