20175316 盛茂淞 2018-2019-2 《Java程序设计》实验四 《Android程序设计》 实验报告
实验四 Android程序设计
实验要求
- 参考Android开发简易教程
- 完成云班课中的检查点,也可以先完成实验报告,直接提交。注意不能只有截图,要有知识点,原理,遇到的问题和解决过程等说明。实验报告中一个检查点要有多张截图。
- 发表实验报告博客,标题“学期(如2018-2019-2) 学号(如20175300) 实验四《Android开发基础》实验报告”
实验内容
下载安装Android Studio
- 配置Proxy,第一次启动会要求安装Proxy,按步骤走

Android SDK location部分填的是新项目的存放地JDK location须填JDK的绝对路径
新建项目
- 项目模板选
Empty Activity - 项目名填自己命名
Package name直接保持自动生成的名字就好Language选择JavaMinimum API level按老师的博客来就好
配置和启动模拟器
项目的编译和运行
Android程序设计-1
实验内容与要求
Android Stuidio的安装测试: 参考《Java和Android开发学习指南(第二版)(EPUBIT,Java for Android 2nd)》第二十四章:
- 参考http://www.cnblogs.com/rocedu/p/6371315.html#SECANDROID,安装 Android Stuidio
- 完成Hello World, 要求修改res目录中的内容,Hello World后要显示自己的学号,自己学号前后一名同学的学号,提交代码运行截图和码云Git链接,截图没有学号要扣分
- 学习Android Stuidio调试应用程序
实验代码
- activity_main-xml
<?xml version="1.0" encoding="utf-8"?><android.support.constraint.ConstraintLayout xmlns:android="http://schemas.android.com/apk/res/android"xmlns:app="http://schemas.android.com/apk/res-auto"xmlns:tools="http://schemas.android.com/tools"android:layout_width="match_parent"android:layout_height="match_parent"tools:context=".MainActivity"><TextViewandroid:layout_width="wrap_content"android:layout_height="wrap_content"android:layout_marginEnd="80dp"android:layout_marginRight="80dp"android:text="Hello World!\n20175315\n20175316\n20175317\n"app:layout_constraintBottom_toBottomOf="parent"app:layout_constraintLeft_toLeftOf="parent"app:layout_constraintRight_toRightOf="parent"app:layout_constraintTop_toTopOf="parent"tools:text="Hello World!\n20175315\n20175316\n20175317\n" /></android.support.constraint.ConstraintLayout>

运行截图

Android程序设计-2
Activity测试
- 要求:创建 ThirdActivity, 在ThirdActivity中显示自己的学号,修改代码让MainActivity启动ThirdActivity
代码
- activity_main-xml
<?xml version="1.0" encoding="utf-8"?><android.support.constraint.ConstraintLayoutxmlns:android="http://schemas.android.com/apk/res/android"xmlns:app="http://schemas.android.com/apk/res-auto"xmlns:tools="http://schemas.android.com/tools"android:layout_width="match_parent"android:layout_height="match_parent"tools:context=".MainActivity"><Buttonandroid:id="@+id/button1"android:layout_width="fill_parent"android:layout_height="wrap_content"android:text="启动另一个activity"tools:ignore="MissingConstraints" /><TextViewandroid:layout_width="wrap_content"android:layout_height="wrap_content"android:layout_marginEnd="80dp"android:layout_marginRight="80dp"android:text="Hello!\n20175315\n20175316\n20175317\n"app:layout_constraintBottom_toBottomOf="parent"app:layout_constraintEnd_toEndOf="parent"app:layout_constraintLeft_toLeftOf="parent"app:layout_constraintRight_toRightOf="parent"app:layout_constraintTop_toTopOf="parent"tools:text="Hello World!20175105 20175120" /></android.support.constraint.ConstraintLayout>
- MainActivity.java
import android.app.Activity;import android.content.Intent;import android.os.Bundle;import android.view.View;import android.view.View.OnClickListener;import android.widget.Button;public class MainActivity extends Activity {private Button button1;@Overrideprotected void onCreate(Bundle savedInstanceState) {super.onCreate(savedInstanceState);setContentView(R.layout.activity_main);button1 = (Button) findViewById(R.id.button1);button1.setOnClickListener(new OnClickListener() {@Overridepublic void onClick(View v) {Intent intent = new Intent(MainActivity.this, SecondActivityDemo.class); // 创建一个Intent对象startActivity(intent);}});}}
- 新建活动
SecondActivityDemo - 创建成功后你会发现你的文档下多了两个文件,SecondActivityDemo.class与activity_second_Demo,相应代码如下
SecondActivityDemo.java SecondActivityDemo.java
package sms.example.smsapplication3;import android.support.v7.app.AppCompatActivity;import android.os.Bundle;public class SecondActivityDemo extends AppCompatActivity {@Overrideprotected void onCreate(Bundle savedInstanceState) {super.onCreate(savedInstanceState);setContentView(R.layout.activity_second_demo);}}

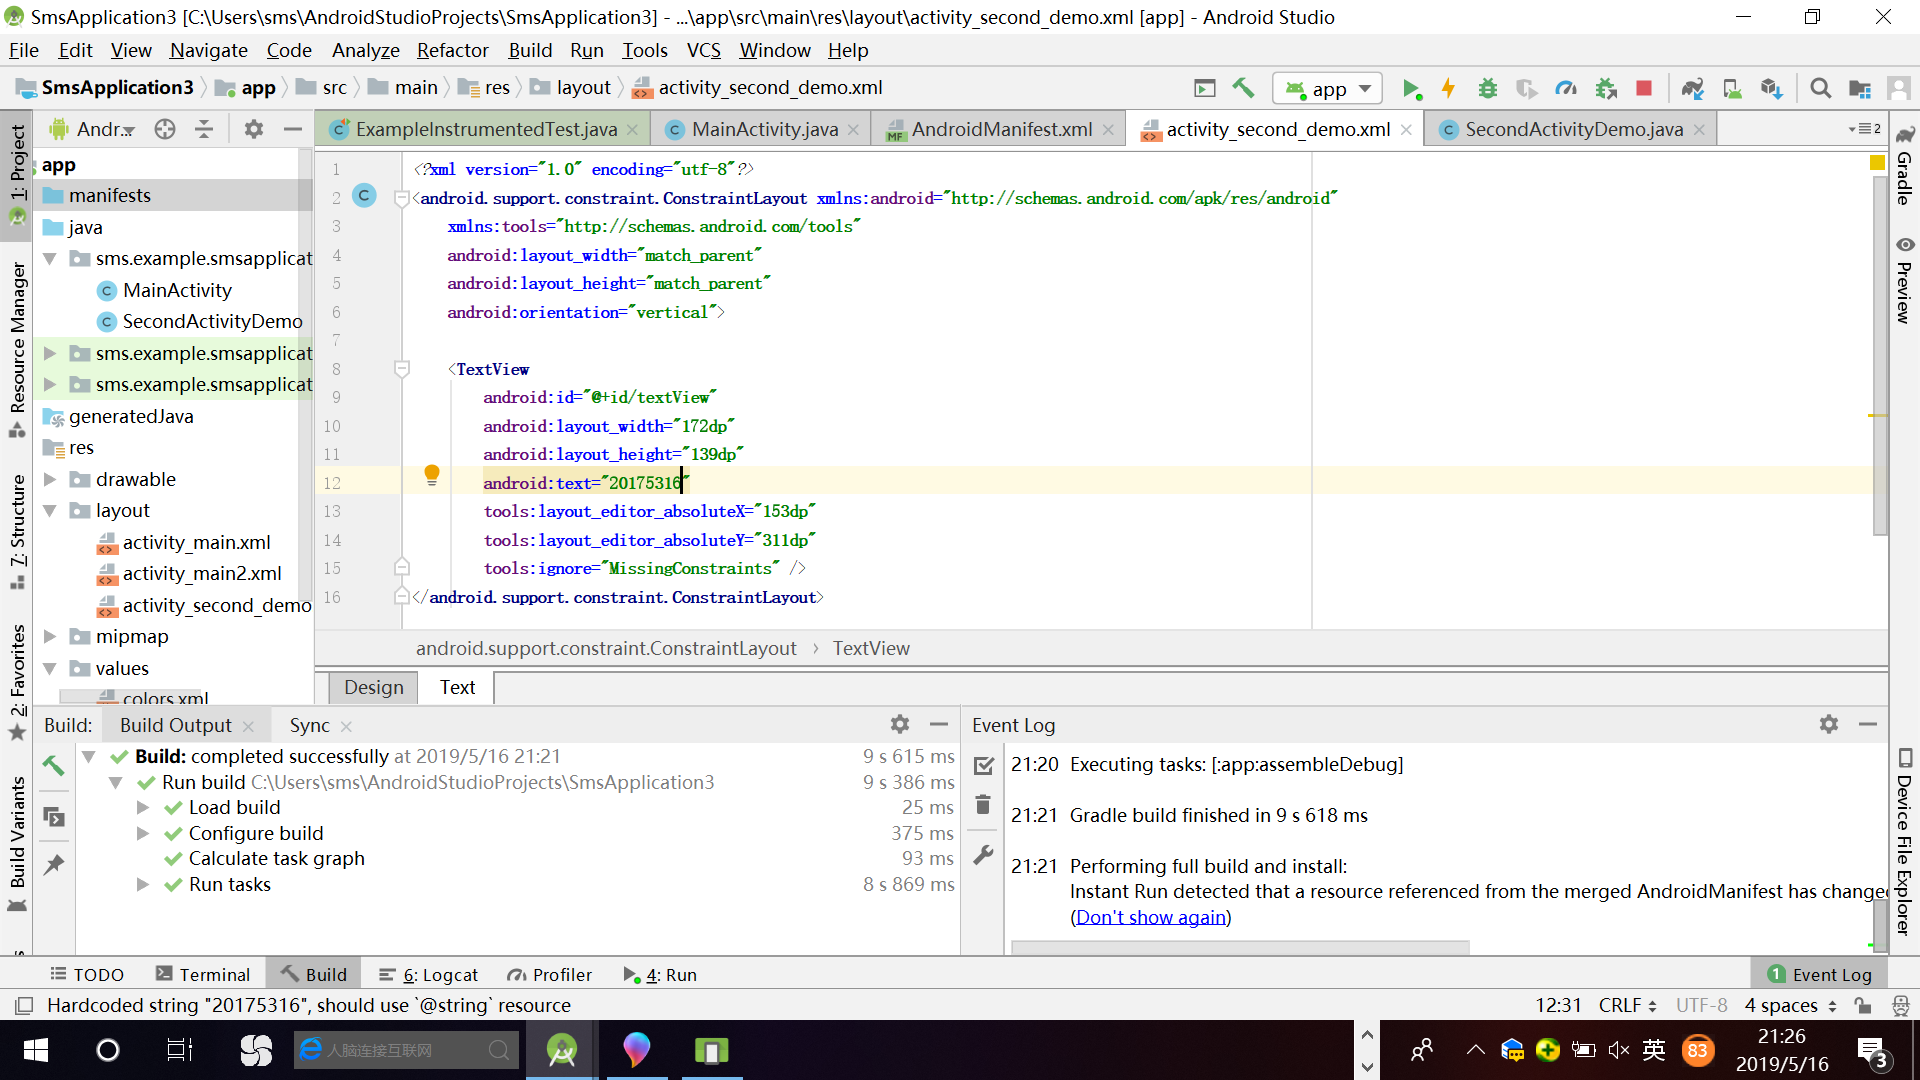
activity_second_Demo
<?xml version="1.0" encoding="utf-8"?><android.support.constraint.ConstraintLayout xmlns:android="http://schemas.android.com/apk/res/android"xmlns:tools="http://schemas.android.com/tools"android:layout_width="match_parent"android:layout_height="match_parent"android:orientation="vertical"><TextViewandroid:id="@+id/textView"android:layout_width="172dp"android:layout_height="139dp"android:text="20175316"tools:layout_editor_absoluteX="153dp"tools:layout_editor_absoluteY="311dp"tools:ignore="MissingConstraints" /></android.support.constraint.ConstraintLayout>
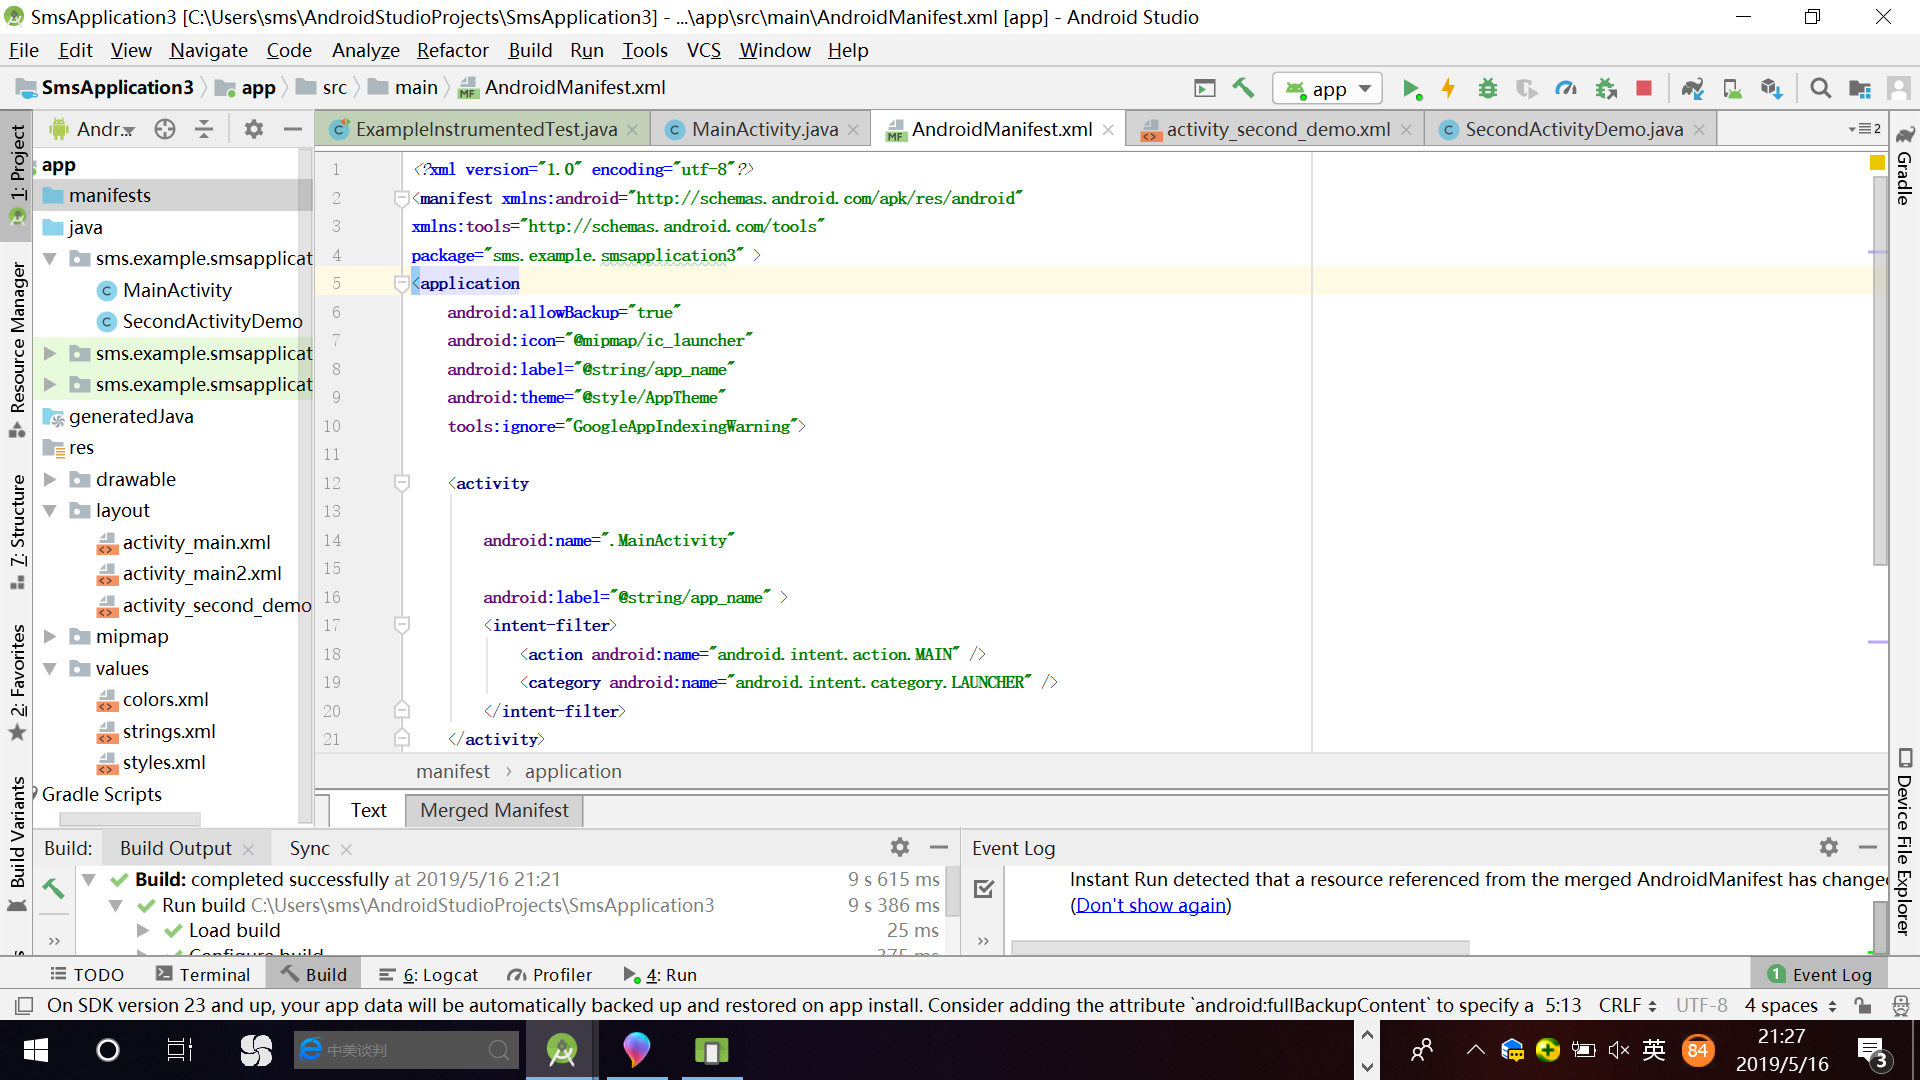
在AndroidMainfest.xml注册
运行效果截图


Android程序设计-3
Toast弹窗设计
- 在MainActivity.java中操作
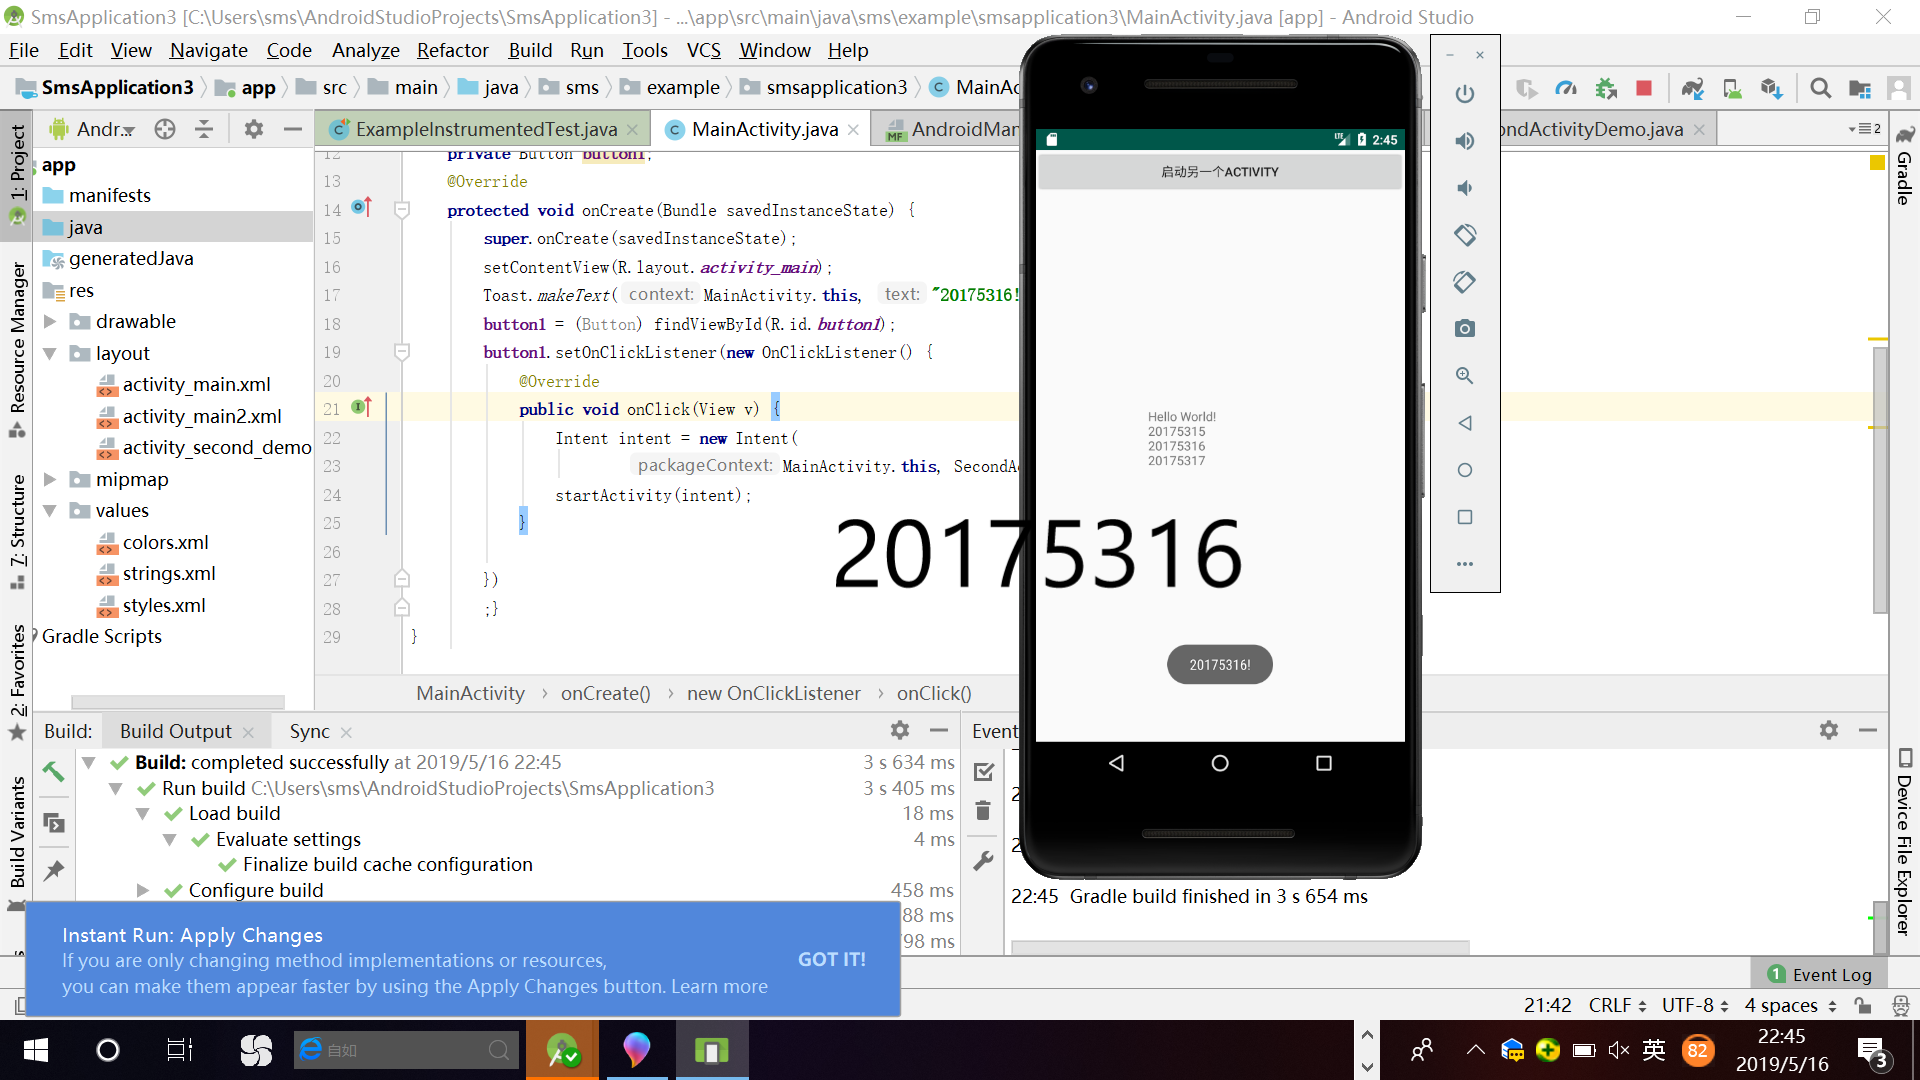
1.import android.widget.Toast;引入方法
2.Toast.makeText(MainActivity.this, "20175316!", Toast.LENGTH_SHORT).show();快速调用
代码
package sms.example.smsapplication3;import android.app.Activity;import android.content.Intent;import android.os.Bundle;import android.view.View;import android.view.View.OnClickListener;import android.widget.Button;import android.widget.Toast;public class MainActivity extends Activity {private Button button1;@Overrideprotected void onCreate(Bundle savedInstanceState) {super.onCreate(savedInstanceState);setContentView(R.layout.activity_main);Toast.makeText(MainActivity.this, "20175316!", Toast.LENGTH_SHORT).show();button1 = (Button) findViewById(R.id.button1);button1.setOnClickListener(new OnClickListener() {@Overridepublic void onClick(View v) {Intent intent = new Intent(MainActivity.this, SecondActivityDemo.class); // 创建一个Intent对象startActivity(intent);}});}}
运行截图
Android程序设计-4
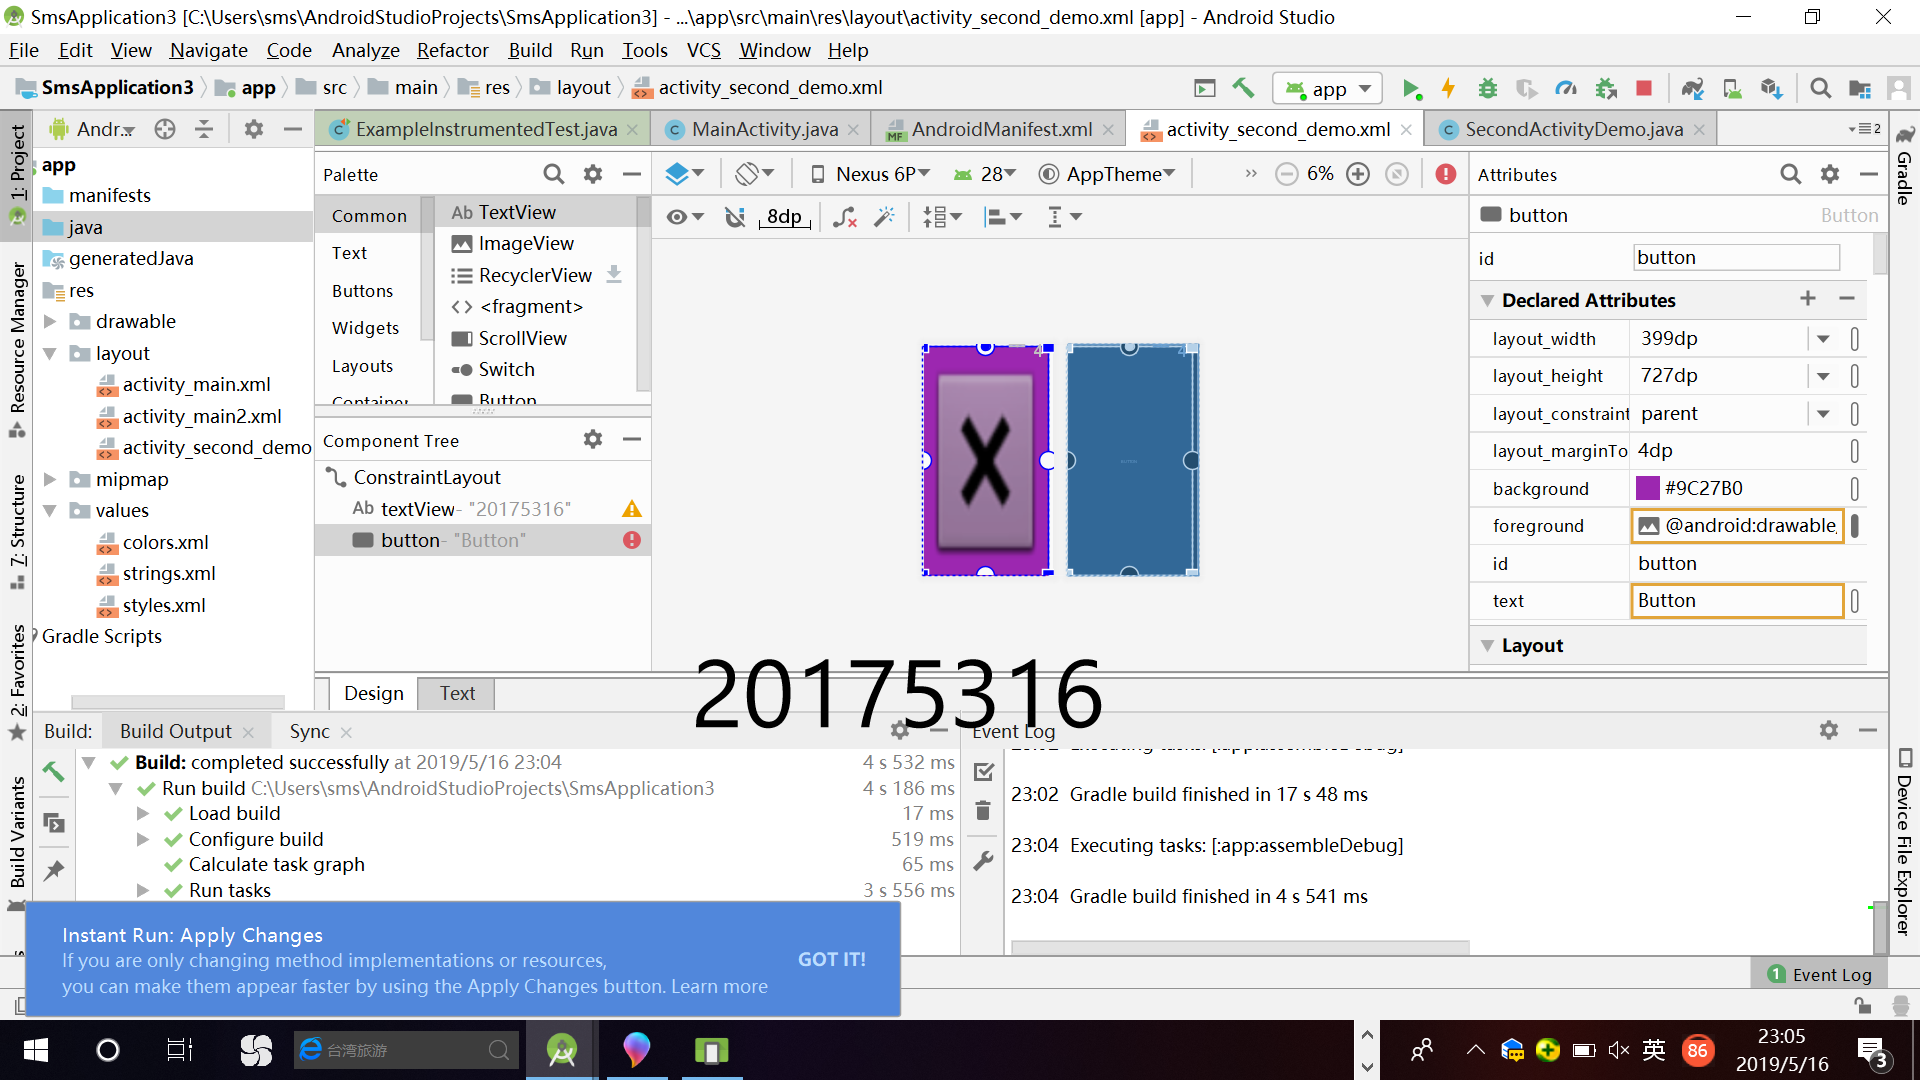
布局测试
- 构建项目,运行教材相关代码
- 修改布局让P290页的界面与教材不同
方法:直接修改
运行效果

Android程序设计-4
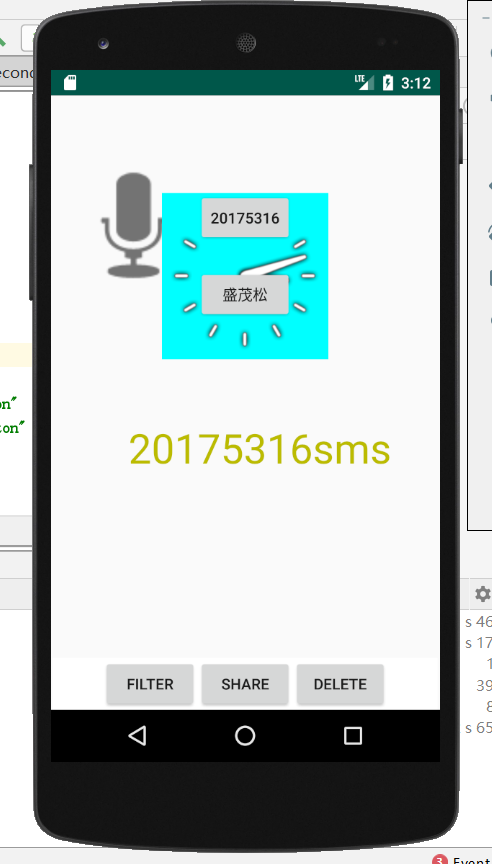
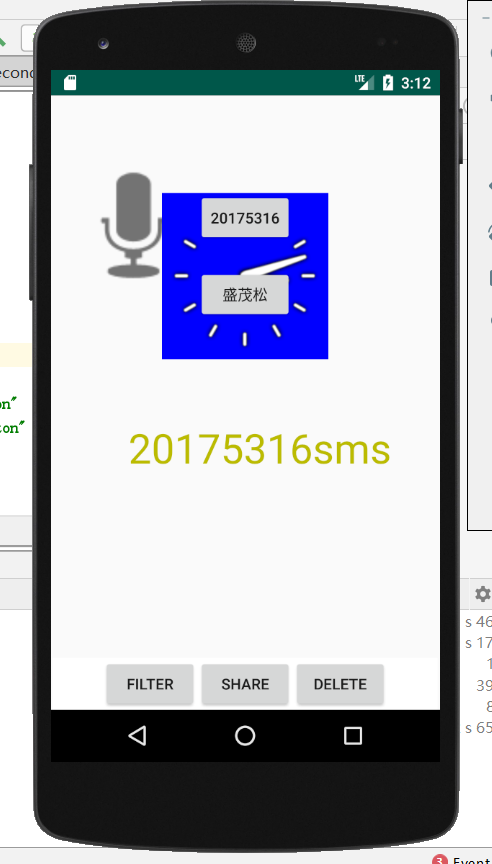
事件处理测试
(虚拟机突然打不开 本次实验在同学电脑上进行)
- 事件处理测试: 参考《Java和Android开发学习指南(第二版)(EPUBIT,Java for Android 2nd)》第二十八章:
- 构建项目,运行教材相关代码
代码
- MainActivity
package sms.example.smsapplication3;import android.support.v7.app.AppCompatActivity;import android.os.Bundle;import android.app.Activity;import android.graphics.Color;import android.os.Bundle;import android.view.Menu;import android.view.View;import android.widget.AnalogClock;import android.app.Activity;import android.graphics.Color;import android.os.Bundle;import android.view.Menu;import android.view.View;import android.widget.AnalogClock;public class MainActivity extends Activity {int counter = 0;int[] colors = { Color.BLACK, Color.BLUE, Color.CYAN,Color.DKGRAY, Color.GRAY, Color.GREEN, Color.LTGRAY,Color.MAGENTA, Color.RED, Color.WHITE, Color.YELLOW };@Overrideprotected void onCreate(Bundle savedInstanceState) {super.onCreate(savedInstanceState);setContentView(R.layout.activity_main);}@Overridepublic boolean onCreateOptionsMenu(Menu menu) {// Inflate the menu; this adds items to the action bar if it// is present.getMenuInflater().inflate(R.menu.menu_main, menu);return true;}public void changeColor(View view) {if (counter == colors.length) {counter = 0;}view.setBackgroundColor(colors[counter++]);}}
- activity_main_xml
<?xml version="1.0" encoding="utf-8"?><android.support.constraint.ConstraintLayout xmlns:android="http://schemas.android.com/apk/res/android"xmlns:app="http://schemas.android.com/apk/res-auto"xmlns:tools="http://schemas.android.com/tools"android:layout_width="match_parent"android:layout_height="match_parent"tools:context=".MainActivity"><TextViewandroid:layout_width="wrap_content"android:layout_height="wrap_content"android:layout_marginEnd="80dp"android:layout_marginRight="80dp"android:text="Hello World!\n20175315\n20175316\n20175317\n"app:layout_constraintBottom_toBottomOf="parent"app:layout_constraintLeft_toLeftOf="parent"app:layout_constraintRight_toRightOf="parent"app:layout_constraintTop_toTopOf="parent"tools:text="Hello World!\n20175315\n20175316\n20175317\n" /><Buttonandroid:id="@+id/button1"android:layout_width="fill_parent"android:layout_height="wrap_content"android:text="启动另一个activity"tools:ignore="MissingConstraints" /><RelativeLayoutxmlns:android="http://schemas.android.com/apk/res/android"xmlns:tools="http://schemas.android.com/tools"android:layout_width="match_parent"android:layout_height="match_parent"android:paddingBottom="10dp"android:paddingLeft="10dp"android:paddingRight="10dp"android:paddingTop="10dp"tools:context=".MainActivity"><AnalogClockandroid:id="@+id/analogClock1"android:layout_width="wrap_content"android:layout_height="wrap_content"android:layout_alignParentTop="true"android:layout_centerHorizontal="true"android:layout_marginTop="90dp"android:onClick="changeColor"/></RelativeLayout></android.support.constraint.ConstraintLayout>
运行结果

- 点击一下改变颜色
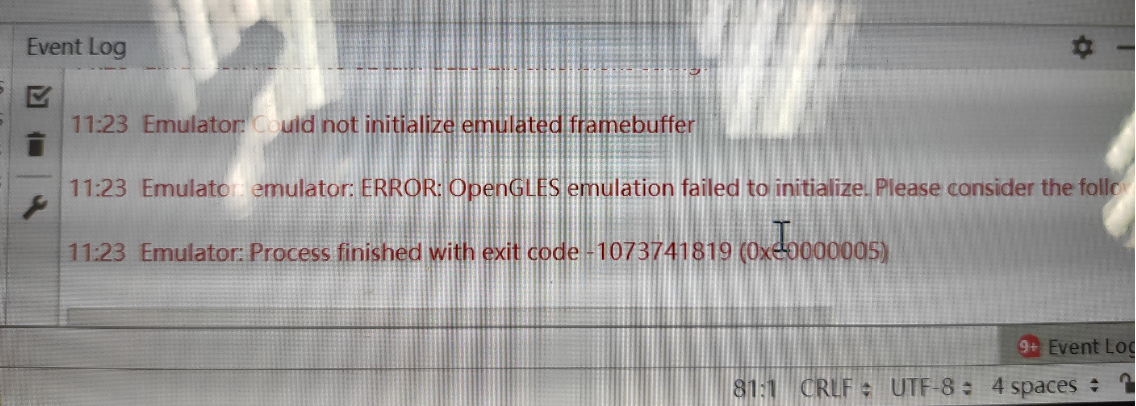
实验过程遇到的问题
问题一
- 虚拟机打不开,之前好好的,不知道为什么,至今无法解决

问题2
- 实验5时找不到menu方法
- 解决方案是鼠标放在划红线的menu上,出现灯泡,安装resource即可
实验心得体会
- 本次实验实用性较强,也较难,我遇到了很多问题,也希望老师能帮我解答,Android在以后学习中实用性较强,应多加练习
码云链接
https://gitee.com/shengmaosong/java-ceshi/commit/5116d386ed7f2783686e00e2ec6ed89007d30990
20175316 盛茂淞 2018-2019-2 《Java程序设计》实验四 《Android程序设计》 实验报告的更多相关文章
- 20175316盛茂淞-Java第1周学习总结
20175316盛茂淞 2018-2019-2 <Java程序设计>第1周学习总结 教材学习内容总结 Java入门 1.Java简介(地位,特点) 2.安装JDK,设置系统环境 3.编译J ...
- 20175316 盛茂淞 2018-2019-2 《Java程序设计》实验五 《网络安全与编程》 实验报告
20175316 盛茂淞 2018-2019-2 <Java程序设计>实验五 <网络安全与编程> 实验报告 一.实验报告封面 课程:Java程序设计 班级:1753班 姓名:盛 ...
- 20175316盛茂淞 2018-2019-2 《Java程序设计》第9周学习总结
20175316盛茂淞 2018-2019-2 <Java程序设计>第9周学习总结 教材学习内容总结 下载安装MySQL数据库管理系统. 学习<Java程序设计>第十一章MyS ...
- 20175316盛茂淞 2018-2019-2 《Java程序设计》第8周学习总结
20175316盛茂淞 2018-2019-2 <Java程序设计>第8周学习总结 教材学习内容总结 第十五章 泛型 -- 主要目的是可以建立具有类型安全的集合框架,如链表.散列映射等数据 ...
- 20175316 盛茂淞 2018-2019-2 《Java程序设计》实验二 面向对象程序设计 实验报告
20175316 盛茂淞 2018-2019-2 <Java程序设计>实验二 面向对象程序设计 实验报告 (一)单元测试 在 IDEA中我们把产品代码放在src目录中,把测试代码放在tes ...
- 20175316盛茂淞 2018-2019-2 《Java程序设计》第7周学习总结
20175316盛茂淞 2018-2019-2 <Java程序设计>第7周学习总结 教材学习内容总结 第八章 常用实用类 一.String类 String类在java.lang包中,jav ...
- 20175316盛茂淞 2018-2019-2 《Java程序设计》第6周学习总结
20175316盛茂淞 2018-2019-2 <Java程序设计>第6周学习总结 教材学习内容总结 第7章 内部类与异常类 1.使用 try.catch Java中所有信息都会被打包为对 ...
- 20175316 盛茂淞 2018-2019-2 《Java程序设计》实验一 Java开发环境的熟悉 实验报告
20175316 盛茂淞 2018-2019-2 <Java程序设计>实验一 Java开发环境的熟悉 实验报告 一.实验要求 1.使用JDK编译.运行简单的Java程序: 2.使用IDEA ...
- 20175316盛茂淞 2018-2019-2 《Java程序设计》第5周学习总结
20175316盛茂淞 2018-2019-2 <Java程序设计>第5周学习总结 教材学习内容总结 第六章 接口与实现. 何谓接口 接口:书上没有明确地给出接口的定义,我理解的接口就是一 ...
- 20175316盛茂淞 2018-2019-2《Java程序设计》第4周学习总结
20175316盛茂淞 2018-2019-2<Java程序设计>第4周学习总结 教材学习内容总结 第五章 子类与继承 一.继承 1.继承定义:避免多个类间重复定义共同行为 2.子类与父类 ...
随机推荐
- 数据库学习之六--事务(Transaction)
一.定义 事务是指访问并可能更新数据库中各种数据项的一个程序执行单元(unit). 规则: 1. 用形如begin transaction和end transaction语句来界定 2. 由事务开始和 ...
- TensorFlow(九):卷积神经网络
一:传统神经网络存在的问题 权值太多,计算量太大 权值太多,需要大量样本进行训练 二:卷积神经网络(CNN) CNN通过感受野和权值共享减少了神经网络需要训练的参数个数. 三:池化 四:卷积操作 五: ...
- linux系列(三):pwd命令
1.命令格式: pwd [选项] 2.命令功能 查看”当前工作目录“的完整路径 3.常用参数 -L:显示当前路径,有连接文件时,直接显示连接文件的路径(不加参数时默认此方式) -P:显示当前的路径,有 ...
- linux系列(十三):less命令
1.命令格式: less [参数] 文件 2.命令功能: less 与 more 类似,但使用 less 可以随意浏览文件,而 more 的功能不如less,而且 less 在查看之前不会加载整个文 ...
- 贾扬清牛人(zz)
贾扬清加入阿里巴巴后,能否诞生出他的第三个世界级杰作? 文 / 华商韬略 张凌云 本文转载,著作权归原作者所有 贾扬清加入阿里巴巴后,能否诞生出他的第三个世界级杰作? 2017年1月11日,美国 ...
- wepy代码知识点
index-page <style lang="less"> .index-nood-modal { width: 100vw; height: 100vh; posi ...
- 初步学习MySQL
我们之前学习如何安装MySQL数据库 以及 navicat 管理数据库可视化工具 那么现在主要来学习一下如何使用,(操作数据库有很多方式,终端操作.可视化工具操作.编程语句操作) 我们首先学习在终端操 ...
- 接口测试必学之curl命令
curl命令使用 curl命令 curl命令是服务器端调试接口最常用的命令,没有之一 curl测试GET接口 curl http://www.baidu.com url参数可以直接写到url中,此时u ...
- ssh刚连接到其他服务器就闪退的问题。Connection to slave1 closed
问题现象: 由于最近在docker上部署hadoop,最开始搭建完以后,ssh是正常的,当我重启系统以后就出现了上面的这个问题 解决: 修改配置文件:/etc/ssh/sshd_config 把Per ...
- win10下子系统的倒腾记录
本文是对于win10下安装ubuntu 18.04的安装.配置c语言开发环境的记录: 一.win10下面的设置,从win10的1709开始,可以完整的搞定linux子系统,如果win10版本不够的同学 ...