Vue公共结果页面实现
需求
我希望写一个公共结果页面,满足所有模块的结果展示,页面设计要素如下:
- 结果图标
type(成功图标,失败图标) - 标题
title(如:提交成功) - 描述
descripton(如:您的工单已提交,请等待管理员审核) - 内容
content(内容不固定,样式不固定,可自定义) - 操作
action(提供默认按钮,可定制返回步数,具备自定义的能力)
我希望的结果页面应该是这样的
- 只有一个路由页面,所有人模块跳转到当前页面展示结果。
- 除了
type、title和description只传入字符串即可,content和action可扩展。
方案
框架采用
vue,以下方案都是基于vue的实现思路
方案一
- 提供一个
Result.vue组件 type、title和description使用props传参content和action使用slot插槽进行扩展
弊端:每个人都要自己配一个路由页面进行跳转,违背设计的初衷,只有一个路由页面满足所有结果展示的设计思路。
方案二
- 提供一个
ResultPage.vue路由页面,所有模块都跳转到该页面 type、title和description通过路由参数传递,结果页面接收参数进行展示content和action传递全局组件的标识,结果页面通过动态组件加载对应的标识
ResultPage.vue
// 伪代码只是表达思路用

<template>

  <div>

    <img

      v-if="$route.query.type === 'success'"

      src='success.png'

    />

    <img v-else src='fail.png'/>

  </div>

  <h1>{{ $route.query.title $}}</h1>

  <h2>{{ $route.query.description $}}</h2>

  <component

    v-if="$route.query.content"

    is="$route.query.content"

  />

  <componet

    v-if="$route.query.action"

    is="$route.query.action"

  >

  <button v-else>返回</button>

</template>

<script>

export default {

  name: 'ResultPage'

}

</script>
跳转示例
<script>

import Vue from 'vue'

export default {

  methods: {

    // 创建全局组件,传递组件标识id字符串

    Vue.component('content', {

      template: `

        <table>

          <tr>

            <th>提交人:</th>

            <td>张三</td>

          </tr>

          <tr>

            <th>提交时间:</th>

            <td>2019-07-09</td>

          </tr>

        </table>

      `

    })

    this.$router.replace({

      name: 'ResultPage',

      query: {

        type: 'success'

        title: '提交成功',

        description: '提交等待审核',

        content: 'content'

      }

    })

  }

}

</script>
弊端:无法模块化创建组件,无法传递组件,只能传递组件标识字符串
优化:如果要传递组件构造器,可以用vuex传递参数
方案三
方案三是对方案二的优化升级,最大的难点是,怎么在路由页面间传递组件
- 兼容方案二,路由传参+vuex传参
- 组件支持模块化
- 可传递局部组件
- 组件可传参扩展
需要了解的API
- component 内置组件component
- Props:
- is - string | ComponentDefinition | ComponentConstructor
- 用法:
渲染一个“元组件”为动态组件。依 is 的值,来决定哪个组件被渲染。
- Props:
  <!-- 动态组件由 vm 实例的属性值 `componentId` 控制 -->

  <component :is="componentId"></component>

  <!-- 也能够渲染注册过的组件或 prop 传入的组件 -->

  <component :is="$options.components.child"></component>
动态组件接收三个参数
- string 组件标识
- ComponentDefinition 组件定义
- ComponentConstructor 组件构造器
以下是对组件几个概念的示例
// 返回组件定义

import ComponentDefinition from './ComponentDefinition.vue'

// 组件标识id

const componentId = 'component-1'

// 返回组件构造器

 const ComponentConstructor = Vue.component(componentId, {

      data() {

        return {

          msg: '你好'

        }

      },

      template: `<h1>{{msg}}</h1>`

    })

// 组件扩展返回组件构造器

const ComponentConstructor2 = Vue.extend(ComponentDefinition)

// 创建组件实例,并给组件传递参数

const componentInstance = new ComponentConstructor({

  propsData: {

    detail: {

      username: '张三'

    }

  }

})
如果要实现组件模块化,并可扩展就要用到以下方法
1、导入本地组件
2、对组件进行扩展
3、创建组件实例,并传递propsData
但是细心的朋友会发现,动态组件并不支持加载组件实例,组件实例需要手动挂载到页面才行
// 创建实例

const componentInstance = new ComponentConstructor({

  propsData: {

    detail: {

      username: '张三'

    }

  }

})

// 挂载实例

componentInstance.$mount('#content');
方案三要对结果页面进行扩展,支持组件模块化,在结果页面要对组件实例区分开,组件实例使用挂载的方式显示,其他用动态组件显示,好在Vue实例有_isVue属性能区分开。
以上说明了原理,下面放出最终版本实现
- ResultPage.vue
<template>

  <q-content>

    <a-card

      :bordered="false"

    >

      <q-result

        :type="type"

        :title="title"

        :description="description"

      >

        <template

          v-if="!!content"

        >

          <template

            v-if="content._isVue"

          >

            <div id="content" />

          </template>

          <template

            v-else

          >

            <component

              :is="content"

            />

          </template>

        </template>

        <template

          v-if="action"

          slot="action"

        >

          <div

            v-if="action._isVue"

            id="action"

          />

          <component

            :is="action"

            v-else

          />

        </template>

        <template

          v-else

          slot="action"

        >

          <a-button

            @click="backHandler"

          >

            {{ goTitle }}

          </a-button>

        </template>

      </q-result>

    </a-card>

  </q-content>

</template>

<script>

  import QContent from '../../components/page/QContent'

  import QResult from '../../components/result/QResult'

  export default {

    name: 'PageResult',

    components: { QResult, QContent },

    mixins: [],

    computed: {

      type () {

        return this.$route.query.type || this.result.type

      },

      title () {

        return decodeURIComponent(this.$route.query.title || this.result.title || '')

      },

      description () {

        return decodeURIComponent(this.$route.query.description || this.result.description || '')

      },

      content () {

        return this.$route.query.content || this.result.content

      },

      action () {

        return this.$route.query.action || this.result.action

      },

      go () {

        return this.$route.query.go || this.result.go

      },

      goTitle () {

        return this.go ? '返回' : '返回首页'

      },

    },

    beforeDestroy () {

      this.cacheResult({})

    },

    mounted () {

      // 挂载组件实例

      if (this.content && this.content._isVue) {

        this.content.$mount('#content')

      }

      if (this.action && this.action._isVue) {

        this.action.$mount('#action')

      }

    },

    methods: {

      backHandler: function () {

        if (this.go) {

          this.$router.go(this.go)

        } else {

          this.$router.replace('/')

        }

      },

    },

  }

</script>

<style scoped>

</style>
result.jsvuex传递参数
import { RESULT_UPDATE } from '../mutation-types/result'

export default {

  namespaced: true,

  state: {

    result: {},

  },

  mutations: {

    [RESULT_UPDATE] (state, obj) {

      state.result = obj

    },

  },

  getters: {

    getResult (state) {

      return state.result

    },

  },

  actions: {

    cacheResult ({ commit }, obj) {

      commit(RESULT_UPDATE, obj)

    },

  },

}
result.js全局混入
import Vue from 'vue'

import { mapActions, mapState } from 'vuex'

export default {

  computed: {

    ...mapState('result', [

      'result',

    ]),

  },

  methods: {

    ...mapActions('result', [

      'cacheResult',

    ]),

    changeResultPage: function (options = {}) {

      this.cacheResult(options)

      this.$router.replace({ name: 'pageResult' })

    },

    renderComponent: function (component, options) {

      if (options) { // 有参数

        if (typeof component !== 'string') {

          const componentConstructor = Vue.extend(component)

          return new componentConstructor(options)

        } else {

          return component

        }

      } else {

        return component

      }

    },

  },

}
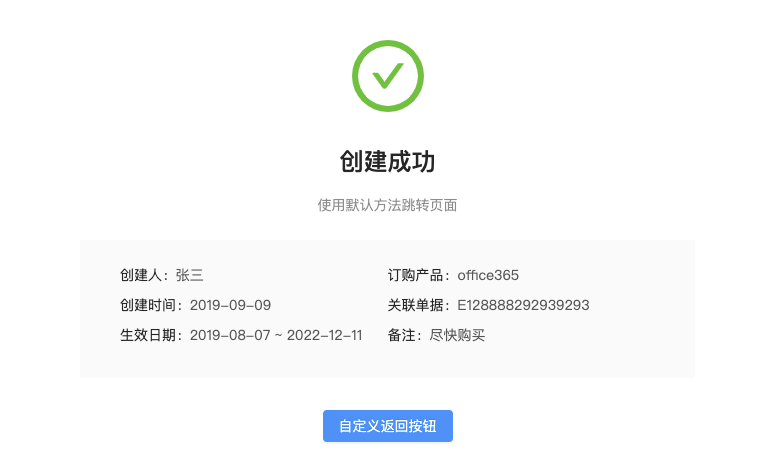
- 模块调用
<script>

import TestResultContent from './components/TestResultContent'

export default {

  methods: {

    toHandler: function() {

      this.changeResultPage({

          type: 'success',

          title: '创建成功',

          description: '使用默认方法跳转页面',

          content: this.renderComponent(TestResultContent, {

            propsData: {

              detail: {

                username: '张三',

                production: 'office365',

                datetime: '2019-09-09',

                order: 'E128888292939293',

                between: '2019-08-07 ~ 2022-12-11',

                remark: '尽快购买',

              },

            },

          })

        })

    }

  }

}

</script>
Vue公共结果页面实现的更多相关文章
- vue实现部分页面导入底部 vue配置公用头部、底部,可控制显示隐藏
vue实现部分页面导入底部 vue配置公用头部.底部,可控制显示隐藏 在app.vue文件里引入公共的header 和 footer header 和 footer 默认显示,例如某个页面不需要显示h ...
- vue获得当前页面URL动态拼接URL复制邀请链接方法
vue获得当前页面URL动态拼接URL复制邀请链接方法 当前页面完整url可以用 location.href路由路径可以用 this.$route.path路由路径参数 this.$route.par ...
- 【vue】使用vue构建多页面应用
先了解一些单页面和多页面的区别 mm 多页应用模式MPA 单页应用模式SPA 应用构成 由多个完整页面构成 一个外壳页面和多个页面片段构成 跳转方式 页面之间的跳转是从一个页面跳转到另一个页面 页面片 ...
- vue 监听页面宽度变化 和 键盘事件
vue 监听页面窗口大小 export default { name: 'Full', components: { Header, Siderbar }, data () { return { scr ...
- 高性能流媒体服务器EasyDSS前端重构(一)-从零开始搭建 webpack + vue + AdminLTE 多页面脚手架
本文围绕着实现EasyDSS高性能流媒体服务器的前端框架来展开的,具体EasyDSS的相关信息可在:www.easydss.com 找到! EasyDSS 高性能流媒体服务器前端架构概述 EasyDS ...
- vue使用nprogress页面加载进度条
vue使用nprogress页面加载进度条 NProgress是页面跳转是出现在浏览器顶部的进度条 官网:http://ricostacruz.com/nprogress/ github:https: ...
- 用vue实现登录页面
vue和mui一起完成登录页面(在hbuilder编辑器) <!DOCTYPE html> <html> <head> <meta charset=" ...
- 高性能流媒体服务器EasyDSS前端重构(三)- webpack + vue + AdminLTE 多页面引入 element-ui
接上篇 接上篇<高性能流媒体服务器EasyDSS前端重构(二) webpack + vue + AdminLTE 多页面提取共用文件, 优化编译时间> 本文围绕着实现EasyDSS高性能流 ...
- 高性能流媒体服务器EasyDSS前端重构(二) webpack + vue + AdminLTE 多页面提取共用文件, 优化编译时间
本文围绕着实现EasyDSS高性能流媒体服务器的前端框架来展开的,具体EasyDSS的相关信息可在:www.easydss.com 找到! 接上回 <高性能流媒体服务器EasyDSS前端重构(一 ...
随机推荐
- 正式发布! .NET开发控件集ComponentOne 新版本加入Blazor UI
近期,由葡萄城推出的ComponentOne .NET开发控件集正式发布最新版本! ComponentOne 是一套专注于企业 .NET开发.支持 .NET Core 平台,并完美集成于 Visual ...
- C++多线程基础学习笔记(十)
一.Windows临界区的基本用法 CRITICAL_SECTION my_winsc; //定义一个Windows的临界区,相当于一个mutex变量 InitializeC ...
- C++11 bind和function用法
function是一个template,定义于头文件functional中.通过function<int(int, int)> 声明一个function类型,它是“接受两个int参数.返回 ...
- k8s组件通信或者创建pod生命周期
Kubernetes 多组件之间的通信原理: apiserver 负责 etcd 存储的所有操作,且只有 apiserver 才直接操作 etcd 集群 apiserver 对内(集群中的其他组件)和 ...
- 不吹不黑,赞一下应用运维管理的cassacdra
不吹不黑的为菊厂的应用运维管理AOM点个赞.Why? 某菊厂应用运维管理工具AOM每天处理着亿级条数据,这么多数据是怎么存储的呢? 说到数据存储就会想到关系型数据库,比如mysql,oracle,sy ...
- SMTP实现发送邮箱2(封装版)
SMTP.h #ifndef __SMTP_H__ //避免重复包含 #define __SMTP_H__ #include <iostream> #include <list> ...
- 在windows部署service
首先,需要在环境变量的path中加入Install Util的路径: C:\WINDOWS\Microsoft.NET\Framework\v2.0.50727 注意这里的Framework\v2.0 ...
- ELinq学习一
ELinq安装:在Nuget控制台中输入:install-package ELinq一.ELinq与DLinq和EF的功能差异 二.数据库对照表 三.CRUD操作1.插入(Insert)(1)简单形式 ...
- maven 私服 nexus 安装
1.去官方下载他的免费版,人民称为oss版(这一步自行百度去官网解决),官网:https://www.sonatype.com/ 2.下载好后,解压是两个文件夹: 3.配置环境变量: 4.安装生成w ...
- 捕捉Promise reject 错误
var sleep = function (time) { return new Promise(function (resolve, reject) { setTimeout(function () ...