Windows下 Robhess SIFT源码配置
Robhess OpenSIFT 源码下载:传送门
为了进一步学习SIFT,选择论文就着代码看,在VS2013、OpenCV2.4.13下新建项目,跑一跑经典之作。由于将代码和Opencv配置好后还会有些错误提示,所以下面是代码的一些改动之处。(试了下其实还是ubuntu下更方便,因为有许多参数或者命令是linux下的,当然windows下可以进行一些修改后利用)。
大前提:opencv配置好。剩下的都可以通过修改来搞定。
首先看看解压后的文件,我们只需要头文件和源文件:
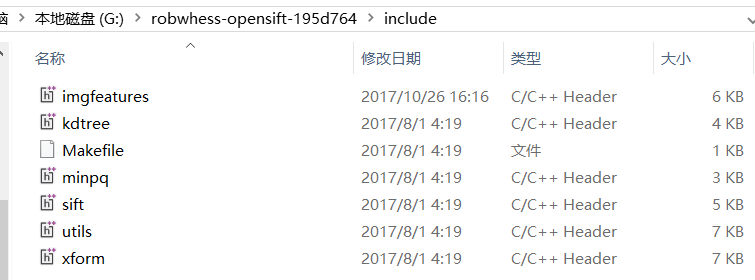

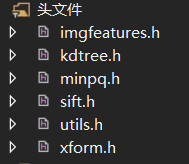
头文件:6个 源文件:10个
注意直接运行肯定不行,因为有几个文件比较特殊,下面对所有头、源文件进行解释:
1)imgfeatures.c 和 imgfeatures.h:
有SIFT特征点结构struct feature的定义,除此之外还有一些特征点的导入导出以及特征点绘制函数的声明,对应的imgfeatures.c文件中是特征点的导入导出以及特征点绘制函数的实现。
2)utils.c 和 utils.h:
这两个文件中是一些图像基本操作的函数,包括:获取某位置的像素点,设置某位置的像素点(8位,32位和64位),计算两点之间的距离的平方,在图片某一点画一个“X”,将两张图片合成为一个(在特征匹配中用到),高是二者之和,宽是二者的较大者。
3)minpq.c 和 minpq.h:
这两个文件中实现了最小优先级队列(Minimizing Priority Queue),也就是小顶堆,在k-d树的建立和搜索过程中要用到。
4)kdtree.c 和 kdtree.h:
这两个文件中实现了k-d树的建立以及用BBF(Best Bin First)算法搜索匹配点的函数。如果需要对两个图片中的特征点进行匹配,就要用到这两个文件。
5)xform.c 和 xform.h:
这两个文件中实现了RANSAC算法(RANdom SAmple Consensus 随机抽样一致)。RANSAC算法可用来筛选两个图像间的SIFT特征匹配并计算变换矩阵。可以单利用RANSAC算法筛选两个图像间的SIFT特征匹配,以得到更好的匹配结果,很经典的算法,值得学习。
6)sift.c 和 sift.h:
论文里最主要的内容在此,里面的内容就是两个特征点检测函数sift_features()和 _sift_features(),sift_features()是用默认参数进行特征点检测, _sift_features()允许用户输入各种检测参数,其实sift_features()中也是再次调用_sift_features()函数。所以只需提供原图像和存储特征点的数组以及其他一些检测参数,然后调用sift_features()或 _sift_features()就可完成SIFT特征点检测。
7)siftfeat.c :含有main函数,用来实现特征点的检测,返回特征点数目和标记特征点的图像。(主要用到)
8)match.c : 含有main函数, 检测两张图中的sift特征点,然后找到特征点的匹配对。(主要用到)
9)match_num.c : 含有main函数,检测sift特征点,但是用到了linux下的多线程编程,所以这里暂时不做讨论。
10)dspfeat.c : 含有main函数,可以从预先保存的特征点文件中读取特征点并显示在图片上。
一. 修改代码
第一步:将代码中所有头文件和源文件中的声明改一下:
修改前:
- #include <cv.h>
- #include <cxcore.h>
- #include <highgui.h>
修改后:
- #include <opencv/cv.h>
- #include <opencv/cxcore.h>
- #include <opencv/highgui.h>
修改原因:因为直接利用找不到opencv路径,所以调整路径。
第二步:修改源文件代码:
1. sift.c:
将函数 static IplImage*** build_gauss_pyr( IplImage* base, int octvs, int intvls, double sigma ) 中的代码进行改动:
修改前:
- const int _intvls = intvls;
- double sig[_intvls+], sig_total, sig_prev, k;
修改后:
- const int _intvls = intvls;
- double *sig = (double*)malloc(sizeof(double)*(_intvls+));
- double sig_total, sig_prev, k;
...
free(sig); //子函数返回前释放内存
修改原因:
源代码中用变量_intvls+3作为数组的长度,但是VC的编译器不是GCC,它不允许这样做。DEV-C++使用的编译器是GCC,它允许使用变量作为数组的长度定义数组。
2. utils.c
首先删除这两行:
- #include <gdk/gdk.h>
- #include <gtk/gtk.h>
为啥删掉?
gtk是一个功能强大、设计灵活的一个通用图形库,是GNU/Linux下开发图形界面的应用程序的主流开发工具之一,GTK+也有Windows版本和Mac OS X版。在作者的源码中gtk用来调整窗口来显示图像,因为我懒于装gtk,所以直接利用opencv进行显示,所以这里需要修改一些opencv的东西。
将函数进行改动:
修改前:
- void display_big_img( IplImage* img, char* title )
- {
- IplImage* small;
- GdkScreen* scr;
- int scr_width, scr_height;
- double img_aspect, scr_aspect, scale;
- /* determine screen size to see if image fits on screen */
- gdk_init( NULL, NULL );
- scr = gdk_screen_get_default();
- scr_width = gdk_screen_get_width( scr );
- scr_height = gdk_screen_get_height( scr );
- if( img->width >= 0.90 * scr_width || img->height >= 0.90 * scr_height )
- {
- img_aspect = (double)(img->width) / img->height;
- scr_aspect = (double)(scr_width) / scr_height;
- if( img_aspect > scr_aspect )
- scale = 0.90 * scr_width / img->width;
- else
- scale = 0.90 * scr_height / img->height;
- small = cvCreateImage( cvSize( img->width * scale, img->height * scale ),
- img->depth, img->nChannels );
- cvResize( img, small, CV_INTER_AREA );
- }
- else
- small = cvCloneImage( img );
- cvNamedWindow( title, );
- cvShowImage( title, small );
- cvReleaseImage( &small );
- }
修改后:
- void display_big_img(IplImage* img, char* title)
- {
- cvNamedWindow(title, ); //参数0表示生成的窗口大小可调整,参数1表示窗口自适应图像而用户不可调整,所以我选择参数0
- cvShowImage(title, img);
- cvReleaseImage(&img);
- }
3. siftfeat.c
注释掉下面一行:
- #include <unistd.h>
原因:顾名思义,unistd.h是unix std的意思,是POSIX标准定义的unix类系统定义符号常量的头文件,所以在windows下先注释掉。
然后注释掉下面这两个函数:static void arg_parse( int argc, char** argv ) 和 static void usage( char* name )
- static void arg_parse( int argc, char** argv )
- {
- //extract program name from command line (remove path, if present)
- pname = basename( argv[] );
- //parse commandline options
- while( )
- {
- char* arg_check;
- int arg = getopt( argc, argv, OPTIONS );
- if( arg == - )
- break;
- switch( arg )
- {
- // catch unsupplied required arguments and exit
- case ':':
- fatal_error( "-%c option requires an argument\n" \
- "Try '%s -h' for help.", optopt, pname );
- break;
- // read out_file_name
- case 'o':
- if( ! optarg )
- fatal_error( "error parsing arguments at -%c\n" \
- "Try '%s -h' for help.", arg, pname );
- out_file_name = optarg;
- break;
- // read out_img_name
- case 'm':
- if( ! optarg )
- fatal_error( "error parsing arguments at -%c\n" \
- "Try '%s -h' for help.", arg, pname );
- out_img_name = optarg;
- break;
- // read intervals
- case 'i':
- // ensure argument provided
- if( ! optarg )
- fatal_error( "error parsing arguments at -%c\n" \
- "Try '%s -h' for help.", arg, pname );
- // parse argument and ensure it is an integer
- intvls = strtol( optarg, &arg_check, );
- if( arg_check == optarg || *arg_check != '\0' )
- fatal_error( "-%c option requires an integer argument\n" \
- "Try '%s -h' for help.", arg, pname );
- break;
- // read sigma
- case 's' :
- // ensure argument provided
- if( ! optarg )
- fatal_error( "error parsing arguments at -%c\n" \
- "Try '%s -h' for help.", arg, pname );
- // parse argument and ensure it is a floating point number
- sigma = strtod( optarg, &arg_check );
- if( arg_check == optarg || *arg_check != '\0' )
- fatal_error( "-%c option requires a floating point argument\n" \
- "Try '%s -h' for help.", arg, pname );
- break;
- // read contrast_thresh
- case 'c' :
- // ensure argument provided
- if( ! optarg )
- fatal_error( "error parsing arguments at -%c\n" \
- "Try '%s -h' for help.", arg, pname );
- // parse argument and ensure it is a floating point number
- contr_thr = strtod( optarg, &arg_check );
- if( arg_check == optarg || *arg_check != '\0' )
- fatal_error( "-%c option requires a floating point argument\n" \
- "Try '%s -h' for help.", arg, pname );
- break;
- // read curvature_thresh
- case 'r' :
- // ensure argument provided
- if( ! optarg )
- fatal_error( "error parsing arguments at -%c\n" \
- "Try '%s -h' for help.", arg, pname );
- // parse argument and ensure it is a floating point number
- curv_thr = strtol( optarg, &arg_check, );
- if( arg_check == optarg || *arg_check != '\0' )
- fatal_error( "-%c option requires an integer argument\n" \
- "Try '%s -h' for help.", arg, pname );
- break;
- // read descr_width
- case 'n' :
- // ensure argument provided
- if( ! optarg )
- fatal_error( "error parsing arguments at -%c\n" \
- "Try '%s -h' for help.", arg, pname );
- // parse argument and ensure it is a floating point number
- descr_width = strtol( optarg, &arg_check, );
- if( arg_check == optarg || *arg_check != '\0' )
- fatal_error( "-%c option requires an integer argument\n" \
- "Try '%s -h' for help.", arg, pname );
- break;
- // read descr_histo_bins
- case 'b' :
- // ensure argument provided
- if( ! optarg )
- fatal_error( "error parsing arguments at -%c\n" \
- "Try '%s -h' for help.", arg, pname );
- // parse argument and ensure it is a floating point number
- descr_hist_bins = strtol( optarg, &arg_check, );
- if( arg_check == optarg || *arg_check != '\0' )
- fatal_error( "-%c option requires an integer argument\n" \
- "Try '%s -h' for help.", arg, pname );
- break;
- // read double_image
- case 'd' :
- img_dbl = ( img_dbl == )? : ;
- break;
- // read display
- case 'x' :
- display = ;
- break;
- // user asked for help
- case 'h':
- usage( pname );
- exit();
- break;
- // catch invalid arguments
- default:
- fatal_error( "-%c: invalid option.\nTry '%s -h' for help.",
- optopt, pname );
- }
- }
- // make sure an input file is specified
- if( argc - optind < )
- fatal_error( "no input file specified.\nTry '%s -h' for help.", pname );
- // make sure there aren't too many arguments
- if( argc - optind > )
- fatal_error( "too many arguments.\nTry '%s -h' for help.", pname );
- // copy image file name from command line argument
- img_file_name = argv[optind];
- }
- static void usage( char* name )
- {
- fprintf(stderr, "%s: detect SIFT keypoints in an image\n\n", name);
- fprintf(stderr, "Usage: %s [options] <img_file>\n", name);
- fprintf(stderr, "Options:\n");
- fprintf(stderr, " -h Display this message and exit\n");
- fprintf(stderr, " -o <out_file> Output keypoints to text file\n");
- fprintf(stderr, " -m <out_img> Output keypoint image file (format" \
- " determined by extension)\n");
- fprintf(stderr, " -i <intervals> Set number of sampled intervals per" \
- " octave in scale space\n");
- fprintf(stderr, " pyramid (default %d)\n",
- SIFT_INTVLS);
- fprintf(stderr, " -s <sigma> Set sigma for initial gaussian" \
- " smoothing at each octave\n");
- fprintf(stderr, " (default %06.4f)\n", SIFT_SIGMA);
- fprintf(stderr, " -c <thresh> Set threshold on keypoint contrast" \
- " |D(x)| based on [0,1]\n");
- fprintf(stderr, " pixel values (default %06.4f)\n",
- SIFT_CONTR_THR);
- fprintf(stderr, " -r <thresh> Set threshold on keypoint ratio of" \
- " principle curvatures\n");
- fprintf(stderr, " (default %d)\n", SIFT_CURV_THR);
- fprintf(stderr, " -n <width> Set width of descriptor histogram" \
- " array (default %d)\n", SIFT_DESCR_WIDTH);
- fprintf(stderr, " -b <bins> Set number of bins per histogram" \
- " in descriptor array\n");
- fprintf(stderr, " (default %d)\n", SIFT_DESCR_HIST_BINS);
- fprintf(stderr, " -d Toggle image doubling (default %s)\n",
- SIFT_IMG_DBL == ? "off" : "on");
- fprintf(stderr, " -x Turn off keypoint display\n");
- }
注释原因:此函数是一些控制台操作,其中有许多Unix标准库提供的函数,而我们不需要。
注释掉main函数中的:
- arg_parse( argc, argv );
注释原因:调用了上面那个arg_parse函数。
4. imgfeatures.c
在首行加入宏定义:
- #define M_PI 3.14159265358979323846
原因:报错“M_PI”未声明。
暂时这么多,可能还有些细节问题,但是很容易解决。
二. 运行程序
好了到目前为止可以进行试验了,因为上文提到有4个main函数,所以可以分别运行来看看他们到底实现了什么功能。
1. siftfeat.c
利用siftfeat.c进行特征点的检测,返回检测到的特征点数目并在图中标记出。
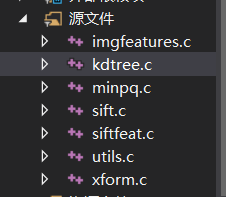

配置好的siftfeat.c文件:
- /*
- This program detects image features using SIFT keypoints. For more info,
- refer to:
- Lowe, D. Distinctive image features from scale-invariant keypoints.
- International Journal of Computer Vision, 60, 2 (2004), pp.91--110.
- Copyright (C) 2006-2012 Rob Hess <rob@iqengines.com>
- Note: The SIFT algorithm is patented in the United States and cannot be
- used in commercial products without a license from the University of
- British Columbia. For more information, refer to the file LICENSE.ubc
- that accompanied this distribution.
- Version: 1.1.2-20100521
- */
- #include "sift.h"
- #include "imgfeatures.h"
- #include "utils.h"
- #include <opencv/highgui.h>
- //#include <unistd.h> //unix 标准头文件
- #define OPTIONS ":o:m:i:s:c:r:n:b:dxh"
- /*************************** Function Prototypes *****************************/
- static void usage( char* );
- static void arg_parse( int, char** );
- /******************************** Globals ************************************/
- char* pname;
- char* img_file_name = "G:\\360downloads\\pc.jpg"; //待检测图片的绝对路径
- char* out_file_name = NULL; //导出特征点到此文件中
- char* out_img_name = NULL; //导出图片的文件名
- int intvls = SIFT_INTVLS;
- double sigma = SIFT_SIGMA;
- double contr_thr = SIFT_CONTR_THR;
- int curv_thr = SIFT_CURV_THR;
- int img_dbl = SIFT_IMG_DBL;
- int descr_width = SIFT_DESCR_WIDTH;
- int descr_hist_bins = SIFT_DESCR_HIST_BINS;
- int display = ;
- /********************************** Main *************************************/
- int main( int argc, char** argv )
- {
- IplImage* img;
- struct feature* features;
- int n = ;
- //arg_parse( argc, argv );
- fprintf( stderr, "Finding SIFT features...\n" );
- img = cvLoadImage( img_file_name, );
- if( ! img )
- fatal_error( "unable to load image from %s", img_file_name );
- n = _sift_features( img, &features, intvls, sigma, contr_thr, curv_thr,
- img_dbl, descr_width, descr_hist_bins );
- fprintf( stderr, "Found %d features.\n", n );
- if( display )
- {
- draw_features( img, features, n );
- display_big_img( img, img_file_name );
- cvWaitKey( );
- }
- if( out_file_name != NULL )
- export_features( out_file_name, features, n );
- if( out_img_name != NULL )
- cvSaveImage( out_img_name, img, NULL );
- return ;
- }
直接运行得到结果:


输入图像 输出图像

可以看到找到了3001个特征点。
2. match.c
注意这次调用match中的main函数,所以暂时将siftfeat.c移除。

配置好的match.c文件:
- /*
- Detects SIFT features in two images and finds matches between them.
- Copyright (C) 2006-2012 Rob Hess <rob@iqengines.com>
- @version 1.1.2-20100521
- */
- #include "sift.h"
- #include "imgfeatures.h"
- #include "kdtree.h"
- #include "utils.h"
- #include "xform.h"
- #include <opencv/cv.h>
- #include <opencv/cxcore.h>
- #include <opencv/highgui.h>
- #include <stdio.h>
- /* the maximum number of keypoint NN candidates to check during BBF search */
- #define KDTREE_BBF_MAX_NN_CHKS 200
- /* threshold on squared ratio of distances between NN and 2nd NN */
- #define NN_SQ_DIST_RATIO_THR 0.49
- int main( int argc, char** argv )
- {
- IplImage* img1, * img2, * stacked;
- struct feature* feat1, * feat2, * feat;
- struct feature** nbrs;
- struct kd_node* kd_root;
- CvPoint pt1, pt2;
- double d0, d1;
- int n1, n2, k, i, m = ;
- if( argc != )
- fatal_error( "usage: %s <img1> <img2>", argv[] );
- img1 = cvLoadImage( argv[], );
- if( ! img1 )
- fatal_error( "unable to load image from %s", argv[] );
- img2 = cvLoadImage( argv[], );
- if( ! img2 )
- fatal_error( "unable to load image from %s", argv[] );
- stacked = stack_imgs( img1, img2 );
- fprintf( stderr, "Finding features in %s...\n", argv[] );
- n1 = sift_features( img1, &feat1 );
- fprintf( stderr, "Finding features in %s...\n", argv[] );
- n2 = sift_features( img2, &feat2 );
- fprintf( stderr, "Building kd tree...\n" );
- kd_root = kdtree_build( feat2, n2 );
- for( i = ; i < n1; i++ )
- {
- feat = feat1 + i;
- k = kdtree_bbf_knn( kd_root, feat, , &nbrs, KDTREE_BBF_MAX_NN_CHKS );
- if( k == )
- {
- d0 = descr_dist_sq( feat, nbrs[] );
- d1 = descr_dist_sq( feat, nbrs[] );
- if( d0 < d1 * NN_SQ_DIST_RATIO_THR )
- {
- pt1 = cvPoint( cvRound( feat->x ), cvRound( feat->y ) );
- pt2 = cvPoint( cvRound( nbrs[]->x ), cvRound( nbrs[]->y ) );
- pt2.y += img1->height;
- cvLine( stacked, pt1, pt2, CV_RGB(,,), , , );
- m++;
- feat1[i].fwd_match = nbrs[];
- }
- }
- free( nbrs );
- }
- fprintf( stderr, "Found %d total matches\n", m );
- display_big_img( stacked, "Matches" );
- cvWaitKey( );
- /*
- UNCOMMENT BELOW TO SEE HOW RANSAC FUNCTION WORKS
- Note that this line above:
- feat1[i].fwd_match = nbrs[0];
- is important for the RANSAC function to work.
- */
- /*
- {
- CvMat* H;
- IplImage* xformed;
- H = ransac_xform( feat1, n1, FEATURE_FWD_MATCH, lsq_homog, 4, 0.01,
- homog_xfer_err, 3.0, NULL, NULL );
- if( H )
- {
- xformed = cvCreateImage( cvGetSize( img2 ), IPL_DEPTH_8U, 3 );
- cvWarpPerspective( img1, xformed, H,
- CV_INTER_LINEAR + CV_WARP_FILL_OUTLIERS,
- cvScalarAll( 0 ) );
- cvNamedWindow( "Xformed", 1 );
- cvShowImage( "Xformed", xformed );
- cvWaitKey( 0 );
- cvReleaseImage( &xformed );
- cvReleaseMat( &H );
- }
- }
- */
- cvReleaseImage( &stacked );
- cvReleaseImage( &img1 );
- cvReleaseImage( &img2 );
- kdtree_release( kd_root );
- free( feat1 );
- free( feat2 );
- return ;
- }
match.c
注意运行此程序的方法,以及图片的存放路径,具体步骤见博客。
例如我的两张图片为:pc1.jpg 和 pc2.jpg,此外我都是在debug形式下调试,所以不要搞错为release。


pc1.jpg pc2.jpg
直接运行结果:
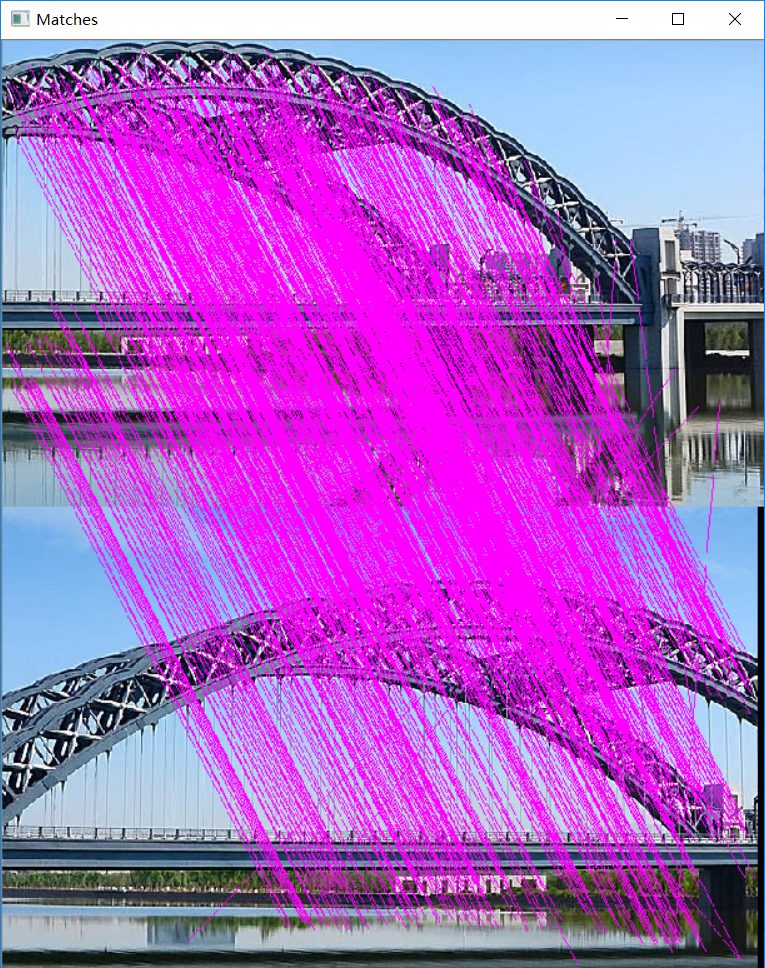
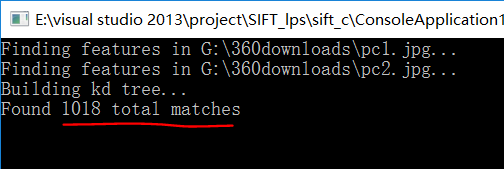
可以看到总共找出1018对匹配点对。
此外其实注意到在match.c中的main函数有一部分代码被注释掉了,而这段代码调用了xform.c,即(RANSAC算法(RANdom SAmple Consensus 随机抽样一致))的结果,所以将这部分代码取消注释后,直接执行:
- /*
- Detects SIFT features in two images and finds matches between them.
- Copyright (C) 2006-2012 Rob Hess <rob@iqengines.com>
- @version 1.1.2-20100521
- */
- #include "sift.h"
- #include "imgfeatures.h"
- #include "kdtree.h"
- #include "utils.h"
- #include "xform.h"
- #include <opencv/cv.h>
- #include <opencv/cxcore.h>
- #include <opencv/highgui.h>
- #include <stdio.h>
- /* the maximum number of keypoint NN candidates to check during BBF search */
- #define KDTREE_BBF_MAX_NN_CHKS 200
- /* threshold on squared ratio of distances between NN and 2nd NN */
- #define NN_SQ_DIST_RATIO_THR 0.49
- int main( int argc, char** argv )
- {
- IplImage* img1, * img2, * stacked;
- struct feature* feat1, * feat2, * feat;
- struct feature** nbrs;
- struct kd_node* kd_root;
- CvPoint pt1, pt2;
- double d0, d1;
- int n1, n2, k, i, m = ;
- if( argc != )
- fatal_error( "usage: %s <img1> <img2>", argv[] );
- img1 = cvLoadImage( argv[], );
- if( ! img1 )
- fatal_error( "unable to load image from %s", argv[] );
- img2 = cvLoadImage( argv[], );
- if( ! img2 )
- fatal_error( "unable to load image from %s", argv[] );
- stacked = stack_imgs( img1, img2 );
- fprintf( stderr, "Finding features in %s...\n", argv[] );
- n1 = sift_features( img1, &feat1 );
- fprintf( stderr, "Finding features in %s...\n", argv[] );
- n2 = sift_features( img2, &feat2 );
- fprintf( stderr, "Building kd tree...\n" );
- kd_root = kdtree_build( feat2, n2 );
- for( i = ; i < n1; i++ )
- {
- feat = feat1 + i;
- k = kdtree_bbf_knn( kd_root, feat, , &nbrs, KDTREE_BBF_MAX_NN_CHKS );
- if( k == )
- {
- d0 = descr_dist_sq( feat, nbrs[] );
- d1 = descr_dist_sq( feat, nbrs[] );
- if( d0 < d1 * NN_SQ_DIST_RATIO_THR )
- {
- pt1 = cvPoint( cvRound( feat->x ), cvRound( feat->y ) );
- pt2 = cvPoint( cvRound( nbrs[]->x ), cvRound( nbrs[]->y ) );
- pt2.y += img1->height;
- cvLine( stacked, pt1, pt2, CV_RGB(,,), , , );
- m++;
- feat1[i].fwd_match = nbrs[];
- }
- }
- free( nbrs );
- }
- fprintf( stderr, "Found %d total matches\n", m );
- display_big_img( stacked, "Matches" );
- cvWaitKey( );
- /*
- UNCOMMENT BELOW TO SEE HOW RANSAC FUNCTION WORKS
- Note that this line above:
- feat1[i].fwd_match = nbrs[0];
- is important for the RANSAC function to work.
- */
- {
- CvMat* H;
- IplImage* xformed;
- H = ransac_xform( feat1, n1, FEATURE_FWD_MATCH, lsq_homog, , 0.01,
- homog_xfer_err, 3.0, NULL, NULL );
- if( H )
- {
- xformed = cvCreateImage( cvGetSize( img2 ), IPL_DEPTH_8U, );
- cvWarpPerspective( img1, xformed, H,
- CV_INTER_LINEAR + CV_WARP_FILL_OUTLIERS,
- cvScalarAll( ) );
- cvNamedWindow( "Xformed", );
- cvShowImage( "Xformed", xformed );
- cvWaitKey( );
- cvReleaseImage( &xformed );
- cvReleaseMat( &H );
- }
- }
- cvReleaseImage( &stacked );
- cvReleaseImage( &img1 );
- cvReleaseImage( &img2 );
- kdtree_release( kd_root );
- free( feat1 );
- free( feat2 );
- return ;
- }
match.c

匹配结果
3. match_num.c
以下头文件用到了linux下的多线程编程:
- #include <pthread.h>
Linux系统下的多线程遵循POSIX线程接口,称为pthread。编写Linux下的多线程程序,需要使用头文件pthread.h,连接时需要使用库libpthread.a。暂时不讨论。
4.dspfeat.c
以下头文件用到了linux标准库:
- #include <unistd.h>
这个文件主要作用是可以从预先保存的特征点文件中读取特征点并显示在图片上。暂时用不到不做讨论。
源码中除了论文中步骤的实现以外,还有kdtree以及ransac等经典算法值得一看,先挖个坑,待填。
综上,可以利用sift源码来实现图像匹配,其实还可以用来作目标识别、全景图像拼接、视频跟踪等等。
附上我改好的源码链接,可以参考此文,直接运行: sift_c
参考:
RobHess的SIFT源码分析:综述
结合OPENSIFT源码详解SIFT算法
Windows下 Robhess SIFT源码配置的更多相关文章
- 比特币学习笔记(二)---在windows下调试比特币源码
根据我一贯的学习经验,学习开源代码的话,单单看是不够的,必须一边看一边调试才能尽快理解,所以我们要想法搭建windows下bitcoin源码的调试环境. 紧接着昨天的进度,想要调试linux下的比特币 ...
- Windows下编译live555源码
Windos下编译live555源码 环境 Win7 64位 + VS2012 步骤 1)源码下载并解压 在官网上下载最新live555源码,并对其进行解压. 2)VS下建立工程项目 新建Win32项 ...
- <转>windows下编译lua源码
因为之前一直使用 lua for windows 来搭建lua的使用环境,但是最新的 lua for windows 还没有lua5.2,我又想用这个版本的lua,所以被逼无奈只能自己编一下lua源码 ...
- windows下编译lua源码
所有的lua源码都放在了 src 文件夹下,当然,不同的lua版本目录结构有可能不一样,但是都会有 src 这个文件夹,只有这个才是我们编译必须的.而且lua越做越精简了,5.1的版本里面还有一些te ...
- Nginx (一)Windows下编译Nginx源码以及安装 nginx for windows方法步骤
转载自: http://apps.hi.baidu.com/share/detail/11192699#content Nginx介绍: Nginx ("engine x")是一个 ...
- 《Lucene in Action第二版》学习总结---如何在Windows下编译luceneinAction2Edition源码包
1. 下载此源码包,位置是: www.manning.com/hatcher3,得到:lia2e.tar.gz,然后解压缩得到目录:lia2e,为了以后能辨识,我将此目录改名为:luceneinAct ...
- Windows,linux下编译qt源码(比较简单)
一.linux下静态编译qt源码 1.取到qt源码并解压到文件夹 2.cd到qt目录下 3.使用configure生成makefile ./configure–prefix /opt/qtstatic ...
- 阅读《RobHess的SIFT源码分析:综述》笔记
今天总算是机缘巧合的找到了照样一篇纲要性质的文章. 如是能早一些找到就好了.不过“在你认为为时已晚的时候,其实还为时未晚”倒是也能聊以自慰,不过不能经常这样迷惑自己,毕竟我需要开始跑了! 就照着这个大 ...
- Windows 10 x64 下编译 Hadoop 源码
Windows 10 x64 下编译 Hadoop 源码 环境准备 Hadoop并没有提供官方的 Windows 10 下的安装包,所以需要自己手动来编译,官方文档中 BUILDING.txt 文件中 ...
随机推荐
- MT【60】几个不常见的函数图像
此讲部分内容属于课外阅读拓展,学有余力的可以看看. [We need to know, and we will know.]----大卫·希尔伯特(1862-1943) $y=sin\frac{1}{ ...
- Leetcode 414.Fizz Buzz By Python
写一个程序,输出从 1 到 n 数字的字符串表示. 如果 n 是3的倍数,输出"Fizz": 如果 n 是5的倍数,输出"Buzz": 3.如果 n 同时是3和 ...
- Office web apps 打补丁后(安装PDF在线浏览) 错误解决
最近为了能让PDF在线review,所以安装了460287_intl_x64_zip.exe 这个OWA的hotfix, 安装后,发现OWA挂了,一段搜索之后,发现要重新配置OWA: 1. 在 ...
- UVALive - 6442 (思维题)
题目链接:https://vjudge.net/contest/241341#problem/I 题目大意:给你一个有N个点等距的环,编号[0,N-1],然后有些点上有一个或多个硬币,通过移动这些硬币 ...
- Elasticsearch利用cat api快速查看集群状态、内存、磁盘使用情况
使用场景 当Elasticsearch集群中有节点挂掉,我们可以去查看集群的日志信息查找错误,不过在查找错误日志之前,我们可以通过elasticsearch的cat api简单判断下各个节点的状态,包 ...
- JavaScript表格插件库
DataTables https://datatables.net/ Handsontable https://handsontable.com/ JsGrid http://js-grid.com/ ...
- Raspbian开启root账户
启用root账户 使用默认用户pi,密码raspberry登录树莓派 sudo passwd root #给root账户设置密码 sudo passws --unlock root #解除root账户 ...
- 内存分布图,errno
输出错误,errno是默认的全局变量 错误处理函数: 错误号:errno perror函数: void perror(const char *s); strerror函数: ...
- 跟我一起学习vue2(学习工程目录)[三]
查看生成的my-project的工程目录 首先看 build是最终发布的代码存放位置. 我查看了一下目录,里面都是Js文件 config目录里面主要是配置目录,包括端口号.如果开的项目多,可以进入in ...
- Spring + Mybatis 读写分离
项目背景:项目开发中数据库使用了读写分离,所有查询语句走从库,除此之外走主库. 实现思路是: 第一步,实现动态切换数据源:配置两个DataSource,配置两个SqlSessionFactory指向两 ...
