SpringBoot文件上传(MVC情况和webFlux情况)
MVC情况
引入依赖
<?xml version="1.0" encoding="UTF-8"?>

<project xmlns="http://maven.apache.org/POM/4.0.0" xmlns:xsi="http://www.w3.org/2001/XMLSchema-instance"

    xsi:schemaLocation="http://maven.apache.org/POM/4.0.0 http://maven.apache.org/xsd/maven-4.0.0.xsd">

    <modelVersion>4.0.0</modelVersion>

    <parent>

        <groupId>org.springframework.boot</groupId>

        <artifactId>spring-boot-starter-parent</artifactId>

        <version>2.1.3.RELEASE</version>

        <relativePath/> <!-- lookup parent from repository -->

    </parent>

    <groupId>com.example</groupId>

    <artifactId>demo</artifactId>

    <version>0.0.1-SNAPSHOT</version>

    <name>demo</name>

    <description>Demo project for Spring Boot</description>

    <properties>

        <java.version>1.8</java.version>

    </properties>

    <dependencies>

        <dependency>

            <groupId>org.springframework.boot</groupId>

            <artifactId>spring-boot-starter-thymeleaf</artifactId>

        </dependency>

        <dependency>

            <groupId>org.springframework.boot</groupId>

            <artifactId>spring-boot-starter-web</artifactId>

        </dependency>

        <dependency>

            <groupId>commons-io</groupId>

            <artifactId>commons-io</artifactId>

            <version>2.6</version>

        </dependency>

        <dependency>

            <groupId>org.projectlombok</groupId>

            <artifactId>lombok</artifactId>

            <optional>true</optional>

        </dependency>

        <dependency>

            <groupId>org.springframework.boot</groupId>

            <artifactId>spring-boot-starter-test</artifactId>

            <scope>test</scope>

        </dependency>

    </dependencies>

    <build>

        <plugins>

            <plugin>

                <groupId>org.springframework.boot</groupId>

                <artifactId>spring-boot-maven-plugin</artifactId>

            </plugin>

        </plugins>

    </build>

</project>
前台(两个js框架自行下载)
<!DOCTYPE html>
<html lang="en" xmlns:th="http://www.thymeleaf.org">
<head>
<meta charset="UTF-8">
<title>Index</title>
<style>
html, body {
margin: 0;
padding: 0;
height: 100%;
min-height: 100%;
} .header {
padding: 1px;
position: relative;
left: 0;
top: 0;
width: 100%;
height: 70px;
background-color: #4E3384;
color: #c7acff;
} .header h2 {
text-align: center;
} .header a {
display: block;
position: absolute;
top: 18px;
right: 15px;
padding: 8px 15px;
background-color: #a27bf1;
color: #fff;
border-radius: 3px;
text-decoration: none;
} .container {
min-height: 100%;
} .main {
max-width: 1200px;
margin: 30px auto;
text-align: center;
} .file-wrap {
position: relative;
padding: 8px 10px;
background-color: #ad0660;
color: #fff;
text-decoration: none;
font-size: 14px;
border-radius: 3px;
margin: 60px 25px;
display: inline-block;
} .file-wrap:hover {
background-color: #d80b7a;
} .file-input {
font-size: 0;
position: absolute;
left: 0;
top: 0;
width: 100%;
height: 100%;
cursor: pointer;
opacity: 0;
}
</style>
</head>
<body>
<div class="container">
<div class="header">
<h2>文件上传</h2>
</div>
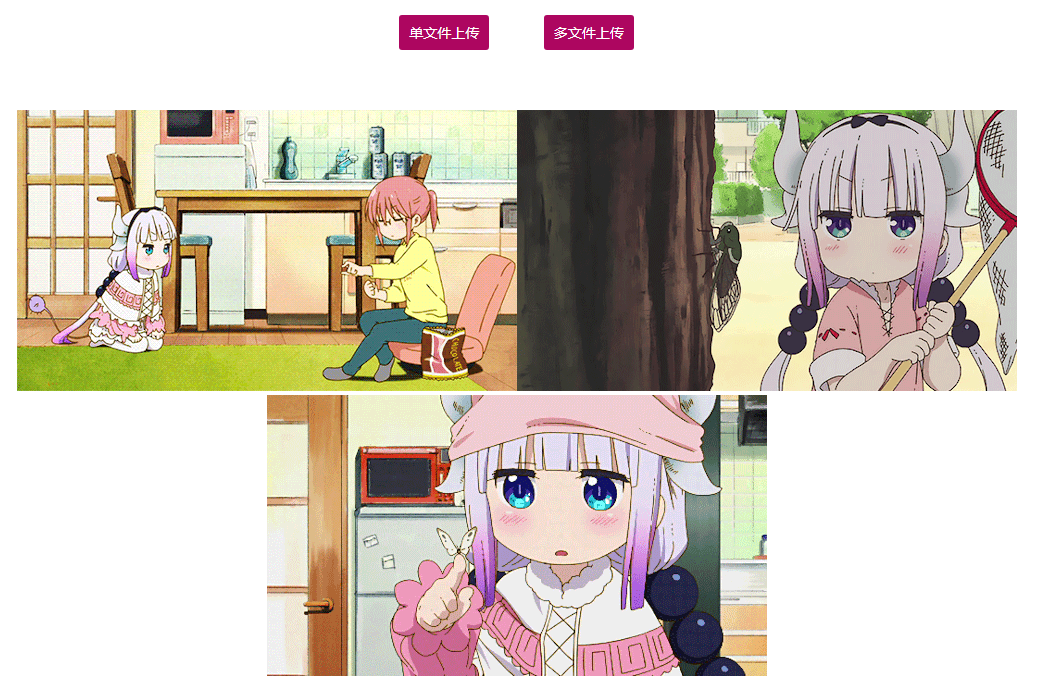
<div class="main">
<a href="javascript:;" class="file-wrap">单文件上传
<input type="file" id="singleFile" name="singleFile" class="file-input">
</a>
<a href="javascript:;" class="file-wrap">多文件上传
<input type="file" id="multiFile" name="multiFile" class="file-input" multiple>
</a>
<div id="imgDiv"></div>
</div>
</div>
<script th:src="@{js/jquery-3.3.1.min.js}"></script>
<script th:src="@{js/ajaxfileupload.js}"></script>
<script> $(document).on('change', '#singleFile', function () {
$.ajaxFileUpload({
url: '/upload/single', // 用于文件上传的服务器端请求地址
secureuri: false, // 是否需要安全协议,一般设置为false
fileElementId: 'singleFile', // 文件上传域的ID
dataType: 'json', // 返回值类型 一般设置为json
// 服务器成功响应处理函数
success: function (data, status) {
alert(data.msg);
if (data.code == 1){
$('#imgDiv').append($('<img src="'+ data.data +'">'));
}
},
// 服务器响应失败处理函数
error: function (data, status, e) {
alert(e);
}
});
$('#singleFile').val('');
}) $(document).on('change', '#multiFile', function () {
$.ajaxFileUpload({
url: '/upload/multi', // 用于文件上传的服务器端请求地址
secureuri: false, // 是否需要安全协议,一般设置为false
fileElementId: 'multiFile', // 文件上传域的ID
dataType: 'json', // 返回值类型 一般设置为json
// 服务器成功响应处理函数
success: function (data, status) {
alert(data.msg);
if (data.code == 1){
for (var i = 0; i < data.data.length; i++){
$('#imgDiv').append($('<img src="'+ data.data[i] +'">'));
}
}
},
// 服务器响应失败处理函数
error: function (data, status, e) {
alert(e);
}
});
$('#multiFile').val('');
}) </script>
</body>
</html>
最后是Java代码
这个是通用的返回结果
package com.example.demo;

import lombok.Data;

@Data

public class BaseResponse<T> {

    private T data;

    private int code = 1;   // 0-false;1-true;默认1

    private String msg = "success";

}
下面是核心上传代码(一个单文件上传,一个多文件上传)
package com.example.demo; import org.apache.commons.io.FileUtils;
import org.springframework.web.bind.annotation.PostMapping;
import org.springframework.web.bind.annotation.RequestMapping;
import org.springframework.web.bind.annotation.RequestParam;
import org.springframework.web.bind.annotation.RestController;
import org.springframework.web.multipart.MultipartFile; import javax.servlet.http.HttpServletRequest;
import java.io.File;
import java.io.IOException;
import java.util.ArrayList;
import java.util.Date;
import java.util.List; @RestController
@RequestMapping("/upload")
public class FileController { @PostMapping("/single")
public BaseResponse<String> single(@RequestParam("singleFile") MultipartFile file, HttpServletRequest req) throws IOException {
String fileName = file.getOriginalFilename();
String fileType = fileName.substring(fileName.lastIndexOf("."));
String newFileName = new Date().getTime() + "";
String fileSize = FileUtils.byteCountToDisplaySize(file.getSize());
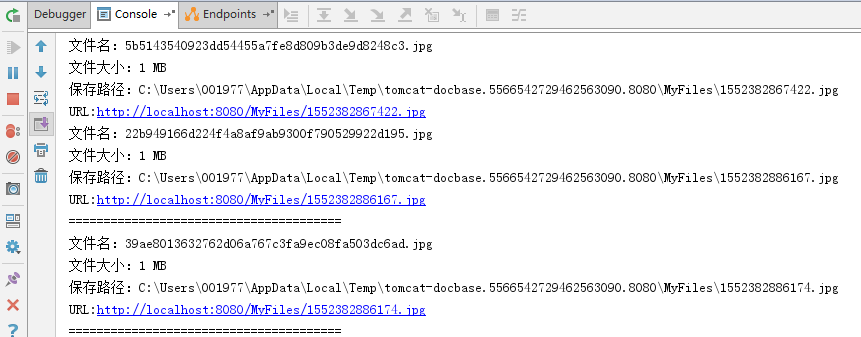
System.out.println("文件名:" + fileName);
System.out.println("文件大小:" + fileSize);
String path = req.getServletContext().getRealPath("/MyFiles/"); // 保存在项目运行目录下的MyFiles文件夹
File targetFile = new File(path + newFileName + fileType);
FileUtils.copyInputStreamToFile(file.getInputStream(), targetFile);
String imgPath = targetFile.getPath();
System.out.println("保存路径:" + imgPath);
// String url = req.getScheme() + "://" + req.getServerName() + req.getContextPath() +
// "/MyFiles/" + newFileName + fileType;
String url = req.getScheme() + "://" + req.getServerName() + ":" + req.getServerPort() + req.getContextPath() +
"/MyFiles/" + newFileName + fileType;
System.out.println("URL:" + url);
BaseResponse<String> response = new BaseResponse<>();
response.setData(url);
return response;
} @PostMapping("/multi")
public BaseResponse<List<String>> multi(@RequestParam("multiFile") MultipartFile[] files, HttpServletRequest req) throws IOException {
List<String> urls = new ArrayList<>();
for (MultipartFile file : files){
String fileName = file.getOriginalFilename();
String fileType = fileName.substring(fileName.lastIndexOf("."));
String newFileName = new Date().getTime() + "";
String fileSize = FileUtils.byteCountToDisplaySize(file.getSize());
System.out.println("文件名:" + fileName);
System.out.println("文件大小:" + fileSize);
String path = req.getServletContext().getRealPath("/MyFiles/");
File targetFile = new File(path + newFileName + fileType);
FileUtils.copyInputStreamToFile(file.getInputStream(), targetFile);
String imgPath = targetFile.getPath();
System.out.println("保存路径:" + imgPath);
String url = req.getScheme() + "://" + req.getServerName() + ":" + req.getServerPort() + req.getContextPath() +
"/MyFiles/" + newFileName + fileType;
System.out.println("URL:" + url);
urls.add(url);
System.out.println("=======================================");
} BaseResponse<List<String>> response = new BaseResponse<>();
response.setData(urls);
return response;
}
}
最后你可以配置上传文件大小,在application.properties
spring.servlet.multipart.max-file-size=5MB

spring.servlet.multipart.max-request-size=10MB
后台打印:
WebFlux情况(Spring5的新产品)
这种情况不同于SpringMVC,我只能以我目前开发的情况来说明。我们是前后端分离的项目,前端用vue+vuetify+VueX+Axios,大概思路就是搞一个按钮,当change事件发生就执行上传操作。
<v-btn dark small color="blue darken-1">上传文件

    <input type="file" id="pbFileInput" class="file-input" @change="uploadFile('pbFileInput')"/>

</v-btn>
..
// id 为文件域的id

uploadFile: function(id){

    let me = this;

    let formData = new window.FormData();

    formData.append('file',document.querySelector('#'+id).files[0])

    let options = {  // 设置axios的参数

        headers: {

            'Content-Type': 'multipart/form-data'

        }

    }

    me.$store.state.axios.post('/upload',formData, options)

        .then(function (response) {

            let data = response.data;

            if (data.code == 0){

                console.log(data);

                document.querySelector('#'+id).value = '';  // 解决上传第二次不能选择同一文件

            } else{

                console.log(data.msg)

            }

        })

        .catch(function (error) {

            console.log(error);

        });

}
后端(这个是借鉴网友的代码,还可以用)
    private static final String BASE_PATH = "/MyFiles/";

    @PostMapping(value = "/upload", consumes = MediaType.MULTIPART_FORM_DATA_VALUE)

    public Mono<BaseResponse<String>> requestBodyFlux(@RequestPart("file") FilePart filePart) throws IOException {

        String base = BASE_PATH;  // 存放在当前磁盘的根目录

        System.out.println(filePart.filename());

        Path path = Paths.get(base);

        if (!Files.exists(path)){

            Files.createDirectories(path);

        }

        Path file = Files.createFile(Paths.get(base + filePart.filename()));

        // 方法一

        AsynchronousFileChannel channel =

                AsynchronousFileChannel.open(file, StandardOpenOption.WRITE);

        DataBufferUtils.write(filePart.content(), channel, 0)

                .doOnComplete(() -> {

                    System.out.println("finish");

                })

                .subscribe();

        // 方法二

//        filePart.transferTo(file.toFile());

        System.out.println(file.toString());

        BaseResponse<String> response = new BaseResponse<>();

        response.setData(filePart.filename()); // 把文件名传回给前端

        return Mono.just(response);

    }
填坑:网友的代码也不是万能的哦
    @PostMapping(value = "/upload", consumes = MediaType.MULTIPART_FORM_DATA_VALUE)

    public Mono<BaseResponse<String>> requestBodyFlux(@RequestPart("file") FilePart filePart, @RequestHeader("uniqueId") String uniqueId) throws IOException {

        String base = baseConfiguration.getPbUploadPath();  // 存放在当前磁盘的根目录

        if (StringUtils.isEmpty(uniqueId)){

            uniqueId = randomNumber();   // 每个pb协议有个独立的文件夹名称

        }

        String filename = filePart.filename();

        log.info("=======================上传文件=======================");

        log.info(filename);

        log.info(uniqueId);

        Path path = Paths.get(org.apache.commons.lang3.StringUtils.appendIfMissing(base, "/") + uniqueId + "/");

        if (!Files.exists(path)){

            Files.createDirectories(path);

        }

        // 如果存在同名文件,先删除

        Path targetPath = Paths.get(org.apache.commons.lang3.StringUtils.appendIfMissing(base, "/") + uniqueId + "/" + filename);

        if (Files.exists(targetPath)){

            boolean b = Files.deleteIfExists(targetPath);

            log.info("已存在同名文件:" + filename + ",先删除:" + b);

        }

        // 再建立新的

        Path tempFile = Files.createFile(targetPath);

        // 方法一

        AsynchronousFileChannel channel =

                AsynchronousFileChannel.open(tempFile, StandardOpenOption.WRITE);

        DataBufferUtils.write(filePart.content(), channel, 0)

                .doOnComplete(() -> {

                    log.info("文件写入完毕...");

                    // 不关闭的话如果再上传同一个文件,会报错:java.nio.file.AccessDeniedException,因为资源被占用,无法删除

                    log.info("文件流关闭...");

                    try {

                        channel.close();

                    } catch (IOException e) {

                        e.printStackTrace();

                        log.info("文件流关闭失败...");

                    }

                })

                .subscribe();

        // 方法二

//        filePart.transferTo(tempFile.toFile());

        log.info(tempFile.toString());

        log.info("=======================--------=======================");

        BaseResponse<String> response = new BaseResponse<>();

        response.setData(filename + "," + uniqueId); // 把唯一id和文件名传回给前端

        return Mono.just(response);

    }
生成随机文件夹名字
    private String randomNumber(){

        long time = new Date().getTime();

        String s = time + "";

        Random random = new Random();

        for (int i = 0; i < 4; i++){

            s += random.nextInt(10);

        }

        return s;

    }
我已经测试这种方式可以行得通
SpringBoot文件上传(MVC情况和webFlux情况)的更多相关文章
- 补习系列(11)-springboot 文件上传原理
目录 一.文件上传原理 二.springboot 文件机制 临时文件 定制配置 三.示例代码 A. 单文件上传 B. 多文件上传 C. 文件上传异常 D. Bean 配置 四.文件下载 小结 一.文件 ...
- 【SpringBoot】07.SpringBoot文件上传
SpringBoot文件上传 1.编写html文件在classpath下的static中 <!DOCTYPE html> <html> <head> <met ...
- springboot文件上传下载简单使用
springboot的文件上传比较简单 一.使用默认的Resolver:StandardServletMultipartResolver controller package com.mydemo.w ...
- SpringBoot从入门到精通十一(SpringBoot文件上传的两种方法)
前言 在企业级项目开发过程中,上传文件是最常用到的功能.SpringBoot集成了SpringMVC,当然上传文件的方式跟SpringMVC没有什么出入. 本章目标 使用SpringBoot项目完成单 ...
- springboot文件上传报错
异常信息: org.springframework.web.multipart.MultipartException: Could not parse multipart servlet reques ...
- SpringBoot 文件上传临时文件路径问题
年后放假回来,一向运行OK的项目突然图片上传不了了,后台报错日志如下: java.io.IOException: The temporary upload location [/tmp/tomcat. ...
- springboot 文件上传大小配置
转自:https://blog.csdn.net/shi0299/article/details/69525848 springboot上传文件大小的配置有两种,一种是设置在配置文件里只有两行代码,一 ...
- SpringBoot文件上传下载
项目中经常会有上传和下载的需求,这篇文章简述一下springboot项目中实现简单的上传和下载. 新建springboot项目,前台页面使用的thymeleaf模板,其余的没有特别的配置,pom代码如 ...
- Springboot 文件上传(带进度条)
1. 相关依赖 pom.xml <project xmlns="http://maven.apache.org/POM/4.0.0" xmlns:xsi="http ...
随机推荐
- 用app.net Core搞掂多国语言网站
Asp.net Core 中文文档很少,你可以看英文的,不过英文的也是说的有点乱.这篇文章是干货. 1. 配置好你的WebApplication,使他可以支持国际化语言,修改文档Startup.cs ...
- 如何快速清理 docker 资源
如果经常使用 docker,你会发现 docker 占用的资源膨胀很快,其中最明显也最容易被察觉的应该是对磁盘空间的占用.本文将介绍如何快速的清理 docker 占用的系统资源,具体点说就是删除那些无 ...
- HTML5移动端触摸事件
一.移动端事件问题 1.click事件300ms延迟问题 2007年第一代iphone发布,移动端Safari首创双击缩放功能,原理是click一次后,经过300ms之后检测是否再有一次click,如 ...
- 华为笔记HOSTS,便于访问云端存储
# Copyright (c) - Microsoft Corp. # # This is a sample HOSTS file used by Microsoft TCP/IP for Windo ...
- Cookies, Claims and Authentication in ASP.NET Core(转载)
Most of the literature concerning the theme of authentication in ASP.NET Core focuses on the use of ...
- JS 转换HTML转义符
JS转换HTML转义符 //去掉html标签 1 2 3 function removeHtmlTab(tab) { return tab.replace(/<[^<>]+?& ...
- 关于取li中的value
HTML的li标签的属性value是有规定的:规定列表项目的数字,所以它的value只能是数字.像字符和第一数字为0的都不取非要用li的话可以 var uid = $('#userid').attr( ...
- Neutron Vlan Network 学习
vlan network 是带 tag 的网络,是实际应用最广泛的网络类型. 下图是 vlan100 网络的示例. 1. 三个 instance 通过 TAP 设备连接到名为 brqXXXX ...
- C#创建安装、卸载部署程序
分享3: 需求:对已经开发的应用程序进行安装封装操作,即创建安装.卸载部署程序: 分析:程序的开发是为了在不同的人在不同的机器上使用,为了使不同机器使用该软件就需要见程序安装包,并且保证安装包中必须包 ...
- 微信小程序-表单笔记2
本地添加4张图片并显示至页面——组件位置.设置样式.列表渲染 Q.button是一张图片,需要实现点击这张图片后选择本地图片后显示至页面,不知道怎么让本地图片将button挤到右边 S.在wxml中 ...