GTest的安装与使用
安装GTest
1、安装源代码
下载gtest,release-1.8.0
git clone https://github.com/google/googletest
gtest编译
cd googletest
生成Makefile文件(先安装cmake,brew install cmake),继续输入命令编译:
cmake CMakeLists.txt
执行make,生成两个静态库:libgtest.a libgtest_main.a
make
拷贝到系统目录,注意,如果下诉目录位置在不同版本位置有变动,用find . -name "libgtest*.a" 找到位置
sudo cp libgtest*.a /usr/lib
sudo cp –a include/gtest /usr/include
检查是否安装成功
可以写一个简单的测试代码如下:
#include<gtest/gtest.h>

int add(int a,int b){

    return a+b;

}

TEST(testCase,test0){

    EXPECT_EQ(add(2,3),5);

}

int main(int argc,char **argv){

  testing::InitGoogleTest(&argc,argv);

  return RUN_ALL_TESTS();

}
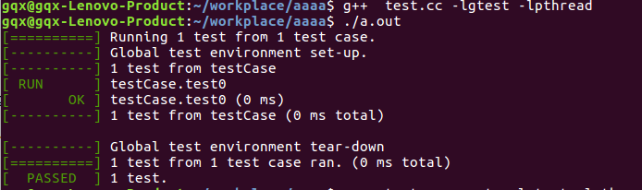
在该文件的终端输入编译指令:
gqx@gqx-Lenovo-Product:~/workplace/aaaa$ g++ test.cc -lgtest -lpthread
gqx@gqx-Lenovo-Product:~/workplace/aaaa$ ./a.out
即得到如下显示结果:
GTest的一些基本概念
要测试一个类或函数,我们需要对其行为做出断言。当一个断言失败时,Google Test会在屏幕上输出该代码所在的源文件及其所在的位置行号,以及错误信息。也可以在编写断言时,提供一个自定义的错误信息,这个信息在失败时会被附加在Google Test的错误信息之后。
断言常常成对出现,它们都测试同一个类或者函数,但对当前功能有着不同的效果。ASSERT_*版本的断言失败时会产生致命失败,并结束当前函数。EXPECT_*版本的断言产生非致命失败,而不会中止当前函数。通常更推荐使用EXPECT_*断言,因为它们运行一个测试中可以有不止一个的错误被报告出来。但如果在编写断言如果失败,就没有必要继续往下执行的测试时,你应该使用ASSERT_*断言。 因为失败的ASSERT_*断言会立刻从当前的函数返回,可能会跳过其后的一些的清洁代码,这样也许会导致空间泄漏。
GTest的断言
1、布尔值检查
|
Fatal assertion |
Nonfatal assertion |
Verifies |
|
ASSERT_TRUE(condition); |
EXPECT_TRUE(condition); |
condition is true |
|
ASSERT_FALSE(condition); |
EXPECT_FALSE(condition); |
condition is false |
2、数值型数据检查
|
Fatal assertion |
Nonfatal assertion |
Verifies |
|
ASSERT_EQ(expected, actual); |
EXPECT_EQ(expected, actual); |
expected == actual |
|
ASSERT_NE(val1, val2); |
EXPECT_NE(val1, val2); |
val1 != val2 |
|
ASSERT_LT(val1, val2); |
EXPECT_LT(val1, val2); |
val1 < val2 |
|
ASSERT_LE(val1, val2); |
EXPECT_LE(val1, val2); |
val1 <= val2 |
|
ASSERT_GT(val1, val2); |
EXPECT_GT(val1, val2); |
val1 > val2 |
|
ASSERT_GE(val1, val2); |
EXPECT_GE(val1, val2); |
val1 >= val2 |
3、字符串比较
|
Fatal assertion |
Nonfatal assertion |
Verifies |
|
ASSERT_STREQ(expected_str, actual_str); |
EXPECT_STREQ(expected_str, actual_str); |
两个C字符串有相同的内容 |
|
ASSERT_STRNE(str1, str2); |
EXPECT_STRNE(str1, str2); |
两个C字符串有不同的内容 |
|
ASSERT_STRCASEEQ(expected_str, actual_str); |
EXPECT_STRCASEEQ(expected_str, actual_str); |
两个C字符串有相同的内容,忽略大小写 |
|
ASSERT_STRCASENE(str1, str2); |
EXPECT_STRCASENE(str1, str2); |
两个C字符串有不同的内容,忽略大小写 |
4、异常检查
|
Fatal assertion |
Nonfatal assertion |
Verifies |
|
ASSERT_THROW(statement, exception_type); |
EXPECT_THROW(statement, exception_type); |
statement throws an exception of the given type |
|
ASSERT_ANY_THROW(statement); |
EXPECT_ANY_THROW(statement); |
statement throws an exception of any type |
|
ASSERT_NO_THROW(statement); |
EXPECT_NO_THROW(statement); |
statement doesn't throw any exception |
5、浮点型检查
|
Fatal assertion |
Nonfatal assertion |
Verifies |
|
ASSERT_FLOAT_EQ(expected, actual); |
EXPECT_FLOAT_EQ(expected, actual); |
the two float values are almost equal |
|
ASSERT_DOUBLE_EQ(expected, actual); |
EXPECT_DOUBLE_EQ(expected, actual); |
the two double values are almost equal |
对相近的两个数比较:
|
Fatal assertion |
Nonfatal assertion |
Verifies |
|
ASSERT_NEAR(val1, val2, abs_error); |
EXPECT_NEAR(val1, val2, abs_error); |
the difference between val1 and val2 doesn't exceed the given absolute error |
6、此外还有类型检查、谓词检查等
事件机制
全局事件
要实现全局事件,必须写一个类,继承testing::Environment类,实现里面的SetUp和TearDown方法。
1. SetUp()方法在所有案例执行前执行
2. TearDown()方法在所有案例执行后执行
还需要告诉gtest添加这个全局事件,我们需要在main函数中通过testing::AddGlobalTestEnvironment方法将事件挂进来,也就是说,我们可以写很多个这样的类,然后将他们的事件都挂上去。
TestSuite事件
我们需要写一个类,继承testing::Test,然后实现两个静态方法
1. SetUpTestCase() 方法在第一个TestCase之前执行
2. TearDownTestCase() 方法在最后一个TestCase之后执行
在编写测试案例时,我们需要使用TEST_F这个宏,第一个参数必须是我们上面类的名字,代表一个TestSuite。
TestCase事件
TestCase事件是挂在每个案例执行前后的,实现方式和上面的几乎一样,不过需要实现的是SetUp方法和TearDown方法:
1. SetUp()方法在每个TestCase之前执行
2. TearDown()方法在每个TestCase之后执行
以下案例解决说明上述三个事件的使用
#include<gtest/gtest.h>

#include<map>

#include<iostream>

using namespace std;

class Student{

public:

	Student(){

	    age=0;

	}

	Student(int a){

	    age=a;

	}

	void print(){

	cout<<"*********** "<<age<<" **********"<<endl;;

    	}

private:

	int age;

};

class FooEnvironment : public testing::Environment{

public:

    virtual void SetUp()

    {

        std::cout << "Foo FooEnvironment SetUP" << std::endl;

    }

    virtual void TearDown()

    {

        std::cout << "Foo FooEnvironment TearDown" << std::endl;

    }

};

static Student *s;

//在第一个test之前,最后一个test之后调用SetUpTestCase()和TearDownTestCase()

class TestMap:public testing::Test

{

public:

    static void SetUpTestCase()

    {

        cout<<"SetUpTestCase()"<<endl;

	s=new Student(23);

    }

    static void TearDownTestCase()

    {

	delete s;

        cout<<"TearDownTestCase()"<<endl;

    }

    void SetUp()

    {

        cout<<"SetUp() is running"<<endl;

    }

    void TearDown()

    {

        cout<<"TearDown()"<<endl;

    }

};

TEST_F(TestMap, Test1)

 {

    // you can refer to s here

    s->print();

}

int main(int argc, char** argv)

{

    testing::AddGlobalTestEnvironment(new FooEnvironment);

    testing::InitGoogleTest(&argc, argv);

    return RUN_ALL_TESTS();

}
相关结果和说明如下:

参数化
当考虑多次要为被测函数传入不同的值的情况时,可以按下面的方式去测试。必须添加一个类,继承testing::TestWithParam<T>。其中T就是你需要参数化的参数类型,如下面的案例是int型参数。(官方文档上的案例)
#include<gtest/gtest.h>

// Returns true iff n is a prime number.

bool IsPrime(int n)

{

    // Trivial case 1: small numbers

    if (n <= 1) return false;

    // Trivial case 2: even numbers

    if (n % 2 == 0) return n == 2;

    // Now, we have that n is odd and n >= 3.

    // Try to divide n by every odd number i, starting from 3

    for (int i = 3; ; i += 2) {

        // We only have to try i up to the squre root of n

        if (i > n/i) break;

        // Now, we have i <= n/i < n.

        // If n is divisible by i, n is not prime.

        if (n % i == 0) return false;

    }

    // n has no integer factor in the range (1, n), and thus is prime.

    return true;

}

class IsPrimeParamTest : public::testing::TestWithParam<int>{};

TEST_P(IsPrimeParamTest, HandleTrueReturn)

{

 int n =  GetParam();

 EXPECT_TRUE(IsPrime(n));

}

//被测函数须传入多个相关的值

INSTANTIATE_TEST_CASE_P(TrueReturn, IsPrimeParamTest, testing::Values(3, 5, 11, 23, 17));

int main(int argc, char **argv)

{

    testing::InitGoogleTest(&argc, argv);

    return RUN_ALL_TESTS();

}
注:部分内容摘自网络(http://www.cnblogs.com/coderzh/archive/2009/04/06/1426755.html)
GTest的安装与使用的更多相关文章
- gtest的安装和测试[good]
一.前言 本篇将介绍一些gtest的基本使用,包括下载,安装,编译,建立我们第一个测试Demo工程,以及编写一个最简单的测试案例. 二.下载 如果不记得网址, 直接在google里搜gtest,第一个 ...
- gtest环境安装
gtest全称Google Test,是Google的C++测试框架,有很多优秀的软件都会依赖这个环境编译或者在开发中也会用到,gtest的编译非常简单,下面简单说明一下安装过程. gtest git ...
- C++雾中风景番外篇2:Gtest 与 Gmock,聊聊C++的单元测试
正式工作之后,公司对于单元测试要求比较严格.(笔者之前比较懒,一般很少写完整的单测~~).作为一个合格的开发工程师,需要为所编写代码编写适量的单元测试是十分必要的,在实际进行的开发工作之中,TDD(T ...
- libjingler-0.6.2在windows和ubuntu 10.04下的编译(Google Talk)
Libjingle版本:0.6.2 所需的资源: gtest-1.6.0.zip http://download.csdn.net/detail/cl_gamer/48 ...
- gtest 安装
1.下载,https://code.google.com/p/googletest/.解压,进入该目录,按REAME说明 安装:1.5之前 make install可以安装,1.6之后不可以...安装 ...
- ubuntu 安装 google Gtest [转]有效性待验证
最近在做一些东西,用过gtest,废话少说,现讲其再ubuntu上安装的 方法贴出来,以供朋友们参考: 安装gtest分三步: 1.安装源代码 在ubuntu的桌面上,右键选择打开终端,在终端中输入如 ...
- gtest 安装与使用
打开资源管理器: nautilus . gtest 获取 从:https://www.bogotobogo.com/cplusplus/google_unit_test_gtest.php 获取gte ...
- mac安装protobuf2.4.1时报错./include/gtest/internal/gtest-port.h:428:10: fatal error: 'tr1/tuple' file not found和google/protobuf/message.cc:175:16: error: implicit instantiation of undefined template
通过网上下载的protobuf2.4.1的压缩文件,然后进行安装,./configure和make时遇到了两个问题. 正常的安装步骤如下: ./configure make make check m ...
- ubuntu 安装 google Gtest
1.安装源代码 在ubuntu的桌面上,右键选择打开终端,在终端中输入如下命令: $ sudo apt-get install libgtest-dev 下载源码后,apt将会在目录/usr/src/ ...
随机推荐
- node.js中express的Router路由的使用
express中的Router作用就是为了方便我们更好的根据路由去分模块.避免将所有路由都写在入口文件中. 一.简单的使用Router const express = require('express ...
- 关于requests库中文编码问题
转自:代码分析Python requests库中文编码问题 Python reqeusts在作为代理爬虫节点抓取不同字符集网站时遇到的一些问题总结. 简单说就是中文乱码的问题. 如果单纯的抓取微博 ...
- thymeleaf学习笔记:总结
Thymeleaf定义:Thymeleaf is a modern server-side Java template engine for both web and standalone envir ...
- IPv6下网络编程socket, TCP和UDP例子,以及兼容IPV4和IPV6的类
一.TCP socket ipv6与ipv4的区别 服务器端源代码如下: #include <stdio.h> #include <stdlib.h> #include < ...
- Docker构建文件
构建文件 创建Dockerfile touch Dockerfile 编辑Dockerfile vim Dockerfile #基于java8版本构建 FROM java:8 #挂载日志目录 VOLU ...
- 前端vue框架 父组件与子组件之间的相互调用
子组件调用父组件东西: 1.在父组件与子组件契合的标签的的template模板中绑定 v-bind:自定义一个名字=“要调用的名字” 2.在子组件的script中props:["自定义的名字 ...
- veri HDL modeisim仿真:test bench文件编写
预编译指令: verilog HDL预编译指令是以" ' "字符开头,而且不需要以";"结尾. 作用:指示在编译verilog hdl源代码前,需要执行哪些操作 ...
- (转载)linux 常用命令
出处:http://www.cnblogs.com/vamei $ 命令行提示符 粗体表示命令 斜体表示参数 filename, file1, file2 都是文件名.有时文件名有后缀,比如file. ...
- FastDFS分布式文件系统配置文件详解
一.tracker配置文件详解: # is this config file disabled# false for enabled# true for disableddisabled=false# ...
- MFS故障测试及维护总结
一.测试环境说明: 10.2.2.230 mfsmaster VIP:10.2.2.130 10.2.2.231 mfsbackup 10.2.2.253 mfsdata01 10.2.2.2 ...