在 CentOS7 上安装 Zookeeper服务
1、创建 /usr/local/services/zookeeper 文件夹:
mkdir -p /usr/local/services/zookeeper
2、进入到 /usr/local/services/zookeeper 目录中:
cd /usr/local/services/zookeeper
3、下载 zookeeper-3.4.9.tar.gz:
wget https://archive.apache.org/dist/zookeeper/zookeeper-3.4.9/zookeeper-3.4.9.tar.gz
4、解压缩 zookeeper-3.4.9.tar.gz:
tar -zxvf zookeeper-3.4.9.tar.gz
5、进入到 /usr/local/services/zookeeper/zookeeper-3.4.9/conf 目录中:
cd zookeeper-3.4.9/conf/
6、复制 zoo_sample.cfg 文件的并命名为为 zoo.cfg:
cp zoo_sample.cfg zoo.cfg
7、用 vim 打开 zoo.cfg 文件并修改其内容为如下:
# The number of milliseconds of each tick

# zookeeper 定义的基准时间间隔,单位:毫秒

tickTime=

# The number of ticks that the initial

# synchronization phase can take

initLimit=

# The number of ticks that can pass between

# sending a request and getting an acknowledgement

syncLimit=

# the directory where the snapshot is stored.

# do not use /tmp for storage, /tmp here is just

# example sakes.

# dataDir=/tmp/zookeeper

# 数据文件夹

dataDir=/usr/local/services/zookeeper/zookeeper-3.4./data

# 日志文件夹

dataLogDir=/usr/local/services/zookeeper/zookeeper-3.4./logs

# the port at which the clients will connect

# 客户端访问 zookeeper 的端口号

clientPort=

# the maximum number of client connections.

# increase this if you need to handle more clients

#maxClientCnxns=

#

# Be sure to read the maintenance section of the

# administrator guide before turning on autopurge.

#

# http://zookeeper.apache.org/doc/current/zookeeperAdmin.html#sc_maintenance

#

# The number of snapshots to retain in dataDir

#autopurge.snapRetainCount=

# Purge task interval in hours

# Set to "" to disable auto purge feature

#autopurge.purgeInterval=
8、保存并关闭 zoo.cfg 文件:
9、进入到 /usr/local/services/zookeeper/zookeeper-3.4.9/bin 目录中:
cd ../bin/
10、用 vim 打开 /etc/ 目录下的配置文件 profile:
vim /etc/profile
并在其尾部追加如下内容:
#idea - zookeeper-3.4. config start - --

export ZOOKEEPER_HOME=/usr/local/services/zookeeper/zookeeper-3.4./

export PATH=$ZOOKEEPER_HOME/bin:$PATH

export PATH

#idea - zookeeper-3.4. config end - --
11、使 /etc/ 目录下的 profile 文件即可生效:
source /etc/profile
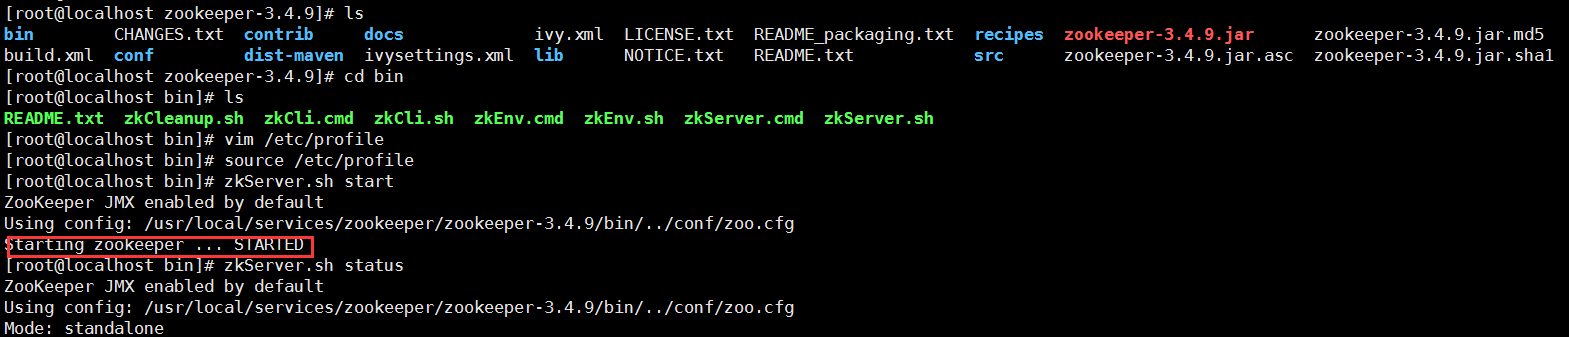
12、启动 zookeeper 服务:
zkServer.sh start
如打印如下信息则表明启动成功:
ZooKeeper JMX enabled by default
Using config: /usr/local/services/zookeeper/zookeeper-3.4.9/bin/../conf/zoo.cfg
Starting zookeeper ... STARTED
13、查询 zookeeper 状态:
zkServer.sh status
14、关闭 zookeeper 服务:
zkServer.sh stop
如打印如下信息则表明成功关闭:
ZooKeeper JMX enabled by default
Using config: /usr/local/services/zookeeper/zookeeper-3.4.9/bin/../conf/zoo.cfg
Stopping zookeeper ... STOPPED
15、重启 zookeeper 服务:
zkServer.sh restart
如打印如下信息则表明重启成功:
ZooKeeper JMX enabled by default
Using config: /usr/local/services/zookeeper/zookeeper-3.4.9/bin/../conf/zoo.cfg
ZooKeeper JMX enabled by default
Using config: /usr/local/services/zookeeper/zookeeper-3.4.9/bin/../conf/zoo.cfg
Stopping zookeeper ... STOPPED
ZooKeeper JMX enabled by default
Using config: /usr/local/services/zookeeper/zookeeper-3.4.9/bin/../conf/zoo.cfg
Starting zookeeper ... STARTED
实际操作如下:
集群配置:

在 CentOS7 上安装 Zookeeper服务的更多相关文章
- 如何在Centos7上安装zookeeper 多实例
一.如何在Centos7上安装zookeeper 多实例 cd /usr/local/src/ wget https://mirrors.tuna.tsinghua.edu.cn/apache/zoo ...
- centos7上安装zookeeper
centos7上安装zookeeper 1 准备工作 1.准备服务器,本次安装采用 centos7系统.内存2G.存储60G的虚拟机服务器一台: 2.服务器安装java环境: 参考文章<cent ...
- 在 CentOS7 上部署 zookeeper 服务
在 CentOS7 上部署 zookeeper 服务 1 用 SecureCRT 或 XShell 等 Linux 客户端工具连接至 CentOS7 服务器: 2 进入到 /usr/local/too ...
- CentOS7上安装FTP服务
---------------------------------------------------------------------------------------------------- ...
- 在CentOS7上安装和使用ZooKeeper最新版本(V3.4.12)
0.ZooKeeper文档 http://zookeeper.apache.org/doc/r3.4.11/zookeeperOver.html 1.准备 在CentOS7上安装zookeeper时, ...
- 在 CentOS7 上安装 zookeeper-3.4.9 服务
在 CentOS7 上安装 zookeeper-3.4.9 服务 1.创建 /usr/local/services/zookeeper 文件夹: mkdir -p /usr/local/service ...
- Linux上安装Zookeeper以及一些注意事项
最近打算出一个系列,介绍Dubbo的使用. 分布式应用现在已经越来越广泛,Spring Could也是一个不错的一站式解决方案,不过据我了解国内目前貌似使用阿里Dubbo的公司比较多,一方面这个框架也 ...
- centos7下安装zookeeper&zookeeper集群的搭建
一.centos7下安装zookeeper 1.zookeeper 下载地址 https://mirrors.tuna.tsinghua.edu.cn/apache/zookeeper/ 2.安装步骤 ...
- 在 CentOS7 上安装 MongoDB
在 CentOS7 上安装 MongoDB 1 通过 SecureCRT 连接至 CentOS7 服务器: 2 进入到 /usr/local/ 目录: cd /usr/local 3 在当前目录下创建 ...
随机推荐
- PHP5.5+ APC 安装
因php 语言特性(短链接), 没法实现共享内存来提升性能. apc的出现给出了一个解决方案 .不过很可惜5.5+以后PHP官方已经废弃掉这个扩展. 幸好出现了 apcu扩展提供后续功能 api 也没 ...
- C++对windows控制面板的操作
经常碰到程序无法卸载, 就老是骂微软搞的什么安装方式,安装好了不能卸载. 后来就打算研究一下windows是如何卸载程序的,一个程序安装完后留下了什么信息用于后面的卸载. 研究对象win7 64位, ...
- 案例源码解读及思路:RabbitMQ在springboot中的配置
程序员的高级之处不是什么都会,而是对自己不会的进行抽象,然后完成自己的工作.比如对于RabbitMQ,按照字面理解,就将其看成Message Queue,也就是用来容纳对象的集合.很多功能都拆分给一个 ...
- cf 1132 F
区间dp.. 每次删一串相邻的一样的,问多少次删光. 感觉想的几乎是一样的怎么比赛时就过不了呢...一定是因为我挂机睡觉了 考虑l和r相等,l和l+1相等,r和r-1相等这三种情况就行了..然后就是裸 ...
- JAVA课程之简易课程登记
实现技术JSP+Servlet+MySQL 思想:首先前台用jsp获取数据,然后用Form表单传值给Servlet,Servlet操作MySQL,获取数据再通过jsp显示 1.jsp功能选择界面 &l ...
- TemplateBuilder Android Studio
TemplateBuilder:是Android Studio的一个开发模板,大大提高开发效率.
- ubuntu下安装php扩展
参考原文地址:http://www.php.cn/php-weizijiaocheng-341528.html 发现在mac上好像不太行,然后按照下面的可以,写下来与大家分享 利用ubuntu的软件包 ...
- div左右居中css
l_btn{ font-size: 1.2rem; width: 190px; height: 50px; border: 1px solid #fff; border-radius: 25px; c ...
- c++ __declspec
dllimport 和dllexport 用__declspec(dllexport),__declspec(dllimport)显式的定义dll接口给调用它的exe或dll文件,用 dllexpor ...
- 文本编辑器vim和gedit
vim和gedit都是文本编辑器 vim用法: vim 文件名 #打开文件 输入 i,进入文本编辑模式,编辑完再按ESC,退出编辑模式,再输:wq,保存退出:如果输:q!则是不保存退出,很简单.. 如 ...