一台虚拟机配置nginx反向代理+3个apache虚拟主机
三个虚拟主机通过一张网卡添加三个IP来实现
一、安装nginx
1.解决依赖
[root@xuegod1 ~]# yum groupinstall "Development Tools" "Development Libraries" -y
[root@xuegod1 ~]# yum install gcc gcc-c++ autoconf automake zlib zlib-devel openssl openssl-devel pcre* pcre-devel -y
Zlib:Nginx提供gzip模块,需要zlib的支持
Openssl:Nginx提供SSL的功能
[root@xuegod1 ~]# tar xf pcre-8.37.tar.bz2 -C /usr/local/src/ //解压此安装包即可,不需要安装,Nginx需要指定pcre的源码不是安装后的路径,此包的功能是支持地址重写rewrite功能 pcre的依赖可以yum安装pcre和pcre-devel解决!
2.解压编译安装
[root@xuegod1 nginx-1.8.0]# tar xvf nginx-1.8.0.tar.gz -C /usr/local/src/ ; cd /usr/local/src/nginx-1.8.0
[root@xuegod1 nginx-1.8.0]# ./configure --prefix=/usr/local/nginx --with-http_dav_module --with-http_stub_status_module --with-http_addition_module --with-http_sub_module --with-http_flv_module --with-http_mp4_module --with-pcre=/usr/local/src/pcre-8.37/
[root@xuegod1 ~]# make -j 4 ; make install ; cd
[root@xuegod1 ~]# useradd -M -u 8001 -s /sbin/nologin nginx //用于运行Nginx的用户
3.配置Nginx支持php文件
[root@xuegod1 ~]# vim /usr/local/nginx/conf/nginx.conf //Nginx主配置文件
#user nobody;
user nginx nginx; //添加此行
并在所支持的主页面格式中添加php格式的主页,类似如下:
location / {
root html;
index index.php index.html index.htm;
}
#location ~ \.php$ {
# root html;
# fastcgi_pass 127.0.0.1:9000;
# fastcgi_index index.php;
# fastcgi_param SCRIPT_FILENAME /scripts$fastcgi_script_name;
# include fastcgi_params;
#} #找到上面这段内容,将这段内容复制,去掉#且修改为如下
location ~ \.php$ {
root html;
fastcgi_pass 127.0.0.1:9000;
fastcgi_index index.php;
fastcgi_param SCRIPT_FILENAME /usr/local/nginx/html$fastcgi_script_name; #将scripts修改为nginx的html,即Nginx页面目录,因为要处理的php文件也在这个目录下
include fastcgi_params;
}
4.启动Nginx
[root@xuegod1 ~]# /usr/local/nginx/sbin/nginx
[root@xuegod1 ~]# netstat -tlnp|grep nginx
tcp 0 0 0.0.0.0:80 0.0.0.0:* LISTEN 11786/nginx
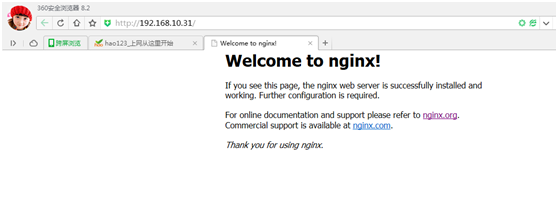
使用浏览器测试 http://192.168.10.31
二、安装apache和php
[root@xuegod44 conf]# yum install php httpd -y
1.配置网卡
[root@xuegod44 network-scripts]# cp ifcfg-eth0 ifcfg-eth0:1
[root@xuegod44 ~]# cd /etc/sysconfig/network-scripts/
[root@xuegod44 network-scripts]#ifcfg-eth0:1
DEVICE=eth0:1
TYPE=Ethernet
ONBOOT=yes
NM_CONTROLLED=yes
BOOTPROTO=none
IPADDR=192.168.10.51
NETMASK=255.255.255.0
[root@xuegod44 network-scripts]# cp ifcfg-eth0:1 ifcfg-eth0:2
[root@xuegod44 network-scripts]# cp ifcfg-eth0:1 ifcfg-eth0:3
[root@xuegod44 network-scripts]# vim ifcfg-eth0:2
DEVICE=eth0:2
TYPE=Ethernet
ONBOOT=yes
NM_CONTROLLED=yes
BOOTPROTO=none
IPADDR=192.168.10.52
NETMASK=255.255.255.0
[root@xuegod44 network-scripts]# vim ifcfg-eth0:3
DEVICE=eth0:3
TYPE=Ethernet
ONBOOT=yes
NM_CONTROLLED=yes
BOOTPROTO=none
IPADDR=192.168.10.53
NETMASK=255.255.255.0
[root@xuegod44 network-scripts]# service network restart
[root@xuegod44 network-scripts]# ifconfig
eth0 Link encap:Ethernet HWaddr 00:0C:29:BA:FD:EF
inet addr:192.168.10.44 Bcast:192.168.10.255 Mask:255.255.255.0
inet6 addr: fe80::20c:29ff:feba:fdef/64 Scope:Link
UP BROADCAST RUNNING MULTICAST MTU:1500 Metric:1
RX packets:59171 errors:0 dropped:0 overruns:0 frame:0
TX packets:36411 errors:0 dropped:0 overruns:0 carrier:0
collisions:0 txqueuelen:1000
RX bytes:68548149 (65.3 MiB) TX bytes:3833239 (3.6 MiB)
eth0:1 Link encap:Ethernet HWaddr 00:0C:29:BA:FD:EF
inet addr:192.168.10.51 Bcast:192.168.10.255 Mask:255.255.255.0
UP BROADCAST RUNNING MULTICAST MTU:1500 Metric:1
eth0:2 Link encap:Ethernet HWaddr 00:0C:29:BA:FD:EF
inet addr:192.168.10.52 Bcast:192.168.10.255 Mask:255.255.255.0
UP BROADCAST RUNNING MULTICAST MTU:1500 Metric:1
eth0:3 Link encap:Ethernet HWaddr 00:0C:29:BA:FD:EF
inet addr:192.168.10.53 Bcast:192.168.10.255 Mask:255.255.255.0
UP BROADCAST RUNNING MULTICAST MTU:1500 Metric:1
lo Link encap:Local Loopback
inet addr:127.0.0.1 Mask:255.0.0.0
inet6 addr: ::1/128 Scope:Host
UP LOOPBACK RUNNING MTU:65536 Metric:1
RX packets:0 errors:0 dropped:0 overruns:0 frame:0
TX packets:0 errors:0 dropped:0 overruns:0 carrier:0
collisions:0 txqueuelen:0
RX bytes:0 (0.0 b) TX bytes:0 (0.0 b)
2.配置apache
[root@xuegod44 ~]# cd /var/www/html/
[root@xuegod44 html]# mkdir a
[root@xuegod44 html]# mkdir b
[root@xuegod44 html]# mkdir c
[root@xuegod44 html]# echo "192.168.10.51" > a/index.html
[root@xuegod44 html]# echo "192.168.10.52" > b/index.html
[root@xuegod44 html]# echo "192.168.10.53" > c/index.html
[root@xuegod44 ~]# vim /etc/httpd/conf/httpd.conf
Listen 81
<VirtualHost 192.168.10.51:81>
ServerAdmin webmaster@dummy-host.example.com
DocumentRoot /var/www/html/a
ServerName xuegod44
ErrorLog logs/dummy-host.example.com-error_log
CustomLog logs/dummy-host.example.com-access_log common
</VirtualHost>
<VirtualHost 192.168.10.52:81>
ServerAdmin webmaster@dummy-host.example.com
DocumentRoot /var/www/html/b
ServerName xuegod44
ErrorLog logs/dummy-host.example.com-error_log
CustomLog logs/dummy-host.example.com-access_log common
</VirtualHost>
<VirtualHost 192.168.10.53:81>
ServerAdmin webmaster@dummy-host.example.com
DocumentRoot /var/www/html/c
ServerName xuegod44
ErrorLog logs/dummy-host.example.com-error_log
CustomLog logs/dummy-host.example.com-access_log common
</VirtualHost>
三、配置nginx
[root@xuegod44 ~]# vim /usr/local/nginx/conf/nginx.conf
第二行添加
user nginx nginx;
server {
listen 80;
server_name localhost;
#charset koi8-r;
#access_log logs/host.access.log main;
location / { #添加
root html;
index index.html index.htm;
if ($request_uri ~* \.html$) {
proxy_pass http://htmlservers;
}
if ($request_uri ~* \.php$) {
proxy_pass http://phpservers;
}
proxy_pass http://pciservers;
}
#error_page 404 /404.html;
# redirect server error pages to the static page /50x.html
#
error_page 500 502 503 504 /50x.html;
location = /50x.html {
root html;
}
# proxy the PHP scripts to Apache listening on 127.0.0.1:80
#
#location ~ \.php$ {
# proxy_pass http://127.0.0.1;
#}
# pass the PHP scripts to FastCGI server listening on 127.0.0.1:9000
#
#location ~ \.php$ {
# root html;
# fastcgi_pass 127.0.0.1:9000;
# fastcgi_index index.php;
# fastcgi_param SCRIPT_FILENAME /scripts$fastcgi_script_name;
# include fastcgi_params;
#}
#location ~ \.php$ {
# # proxy_pass http://127.0.0.1;
# #}
#
# # pass the PHP scripts to FastCGI server listening on 127.0.0.1:9000
# #
location ~ \.php$ {
root html;
fastcgi_pass 127.0.0.1:9000;
fastcgi_index index.php;
fastcgi_param SCRIPT_FILENAME /usr/local/nginx/html$fastcgi_script_name;
include fastcgi_params;
}
}
upstream htmlservers { #server模块外添加
server 192.168.10.51:81;
server 192.168.10.52:81;
server 192.168.10.53:81;
}
upstream phpservers {
server 192.168.10.51:81;
server 192.168.10.52:81;
server 192.168.10.53:81;
}
upstream pciservers {
server 192.168.10.51:81;
server 192.168.10.52:81;
server 192.168.10.53:81;
}
# deny access to .htaccess files, if Apache's document root
# concurs with nginx's one
#
#location ~ /\.ht {
# deny all;
#}
4.测试
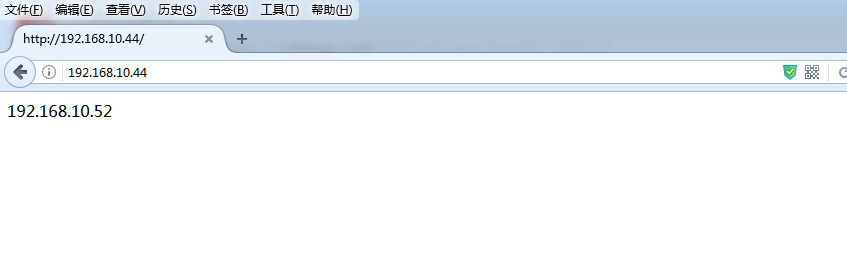
使用浏览器访问http://192.168.10.44

刷新一次
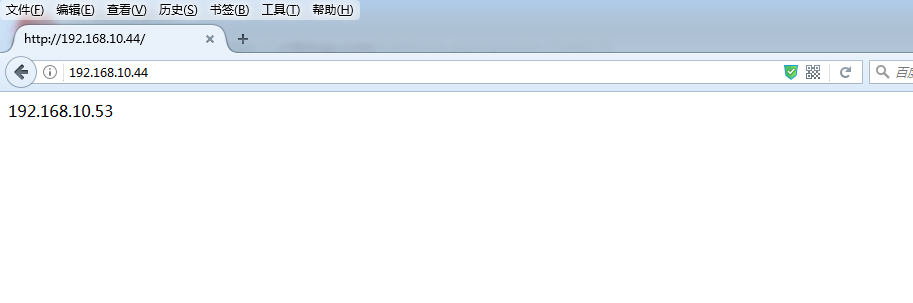
再刷新一次
备注:apache这里不能用80端口,否则会与nginx冲突,因为nginx先占用了80端口。如果apache用80端口会报如下错误

一台虚拟机配置nginx反向代理+3个apache虚拟主机的更多相关文章
- Nginx反向代理1--基本介绍-虚拟主机
1 Nginx 1.1 什么是nginx Nginx是一款高性能的http 服务器/反向代理服务器及电子邮件(IMAP/POP3)代理服务器.由俄罗斯的程序设计师Igor Sysoev所开发, ...
- CentOS 7 学习(二) 配置Nginx反向代理
CentOS 7 学习(二) 配置Nginx反向代理 Nginx可以通过php-fpm来运行PHP程序,也可以转向apache,让apache调用php程序来运行. 不过对于Nginx来说,其反向代理 ...
- 配置LANMP环境(7)-- 配置nginx反向代理,与配置apache虚拟主机
一.配置nginx反向代理 1.修改配置文件 vim /etc/nginx/nginx.conf 在35行http下添加一下内容: include /data/nginx/vhosts/*.conf; ...
- 为docker私有registry配置nginx反向代理
公司的Docker私有registry已经搭建好了,用官方的registry image很容易就搭建好了.现在就是要用nginx的反向代理把它放出来,以便在外网可以访问. 我的上一篇blog 讲了如何 ...
- 使用SSL配置Nginx反向代理的简单指南
反向代理是一个服务器,它接收通过Web发出的请求,即http和https,然后将它们发送到后端服务器(或服务器).后端服务器可以是单个或一组应用服务器,如Tomcat,wildfly或Jenkins等 ...
- Centos 7.6配置nginx反向代理,直接yum安装
一,实验介绍 利用三台centos7虚拟机搭建简单的nginx反向代理负载集群, 三台虚拟机地址及功能介绍 192.168.2.76 nginx负载均衡器 192.168.2.82 web ...
- [亲测]ASP.NET Core 2.0怎么发布/部署到Ubuntu Linux服务器并配置Nginx反向代理实现域名访问
前言 ASP.NET Core 2.0 怎么发布到Ubuntu服务器?又如何在服务器上配置使用ASP.NET Core网站绑定到指定的域名,让外网用户可以访问呢? 步骤 第1步:准备工作 一台Liun ...
- [亲测]七步学会ASP.NET Core 2.0怎么发布/部署到Ubuntu Linux服务器并配置Nginx反向代理实现域名访问
前言 ASP.NET Core 2.0 怎么发布到Ubuntu服务器?又如何在服务器上配置使用ASP.NET Core网站绑定到指定的域名,让外网用户可以访问呢? 步骤 第1步:准备工作 一台Liun ...
- Linux 笔记 - 第二十章 配置 Nginx 反向代理和负载均衡
一.简介 由于 Nginx 的反向代理和负载均衡功能经常被提及,所以将这两个功能单独提出来进行讲解. Nginx 其实仅仅是作为 Nginx Proxy 反向代理使用的,因为这个反向代理功能表现的效果 ...
随机推荐
- 【Nutch2.2.1基础教程之1】nutch相关异常 分类: H3_NUTCH 2014-08-08 21:46 1549人阅读 评论(2) 收藏
1.在任务一开始运行,注入Url时即出现以下错误. InjectorJob: Injecting urlDir: urls InjectorJob: Using class org.apache.go ...
- .Net Core身份认证:IdentityServer4实现OAuth 2.0 客户端模式 - 简书
原文:.Net Core身份认证:IdentityServer4实现OAuth 2.0 客户端模式 - 简书 一.客户端模式介绍 客户端模式(Client Credentials Grant)是指客户 ...
- Java 常用工具类---- 各种字符集编码判断与转换
import java.io.UnsupportedEncodingException; /** * 判断字符编码 * * @author guyinyihun */ public class Cha ...
- [tmux] Share a tmux session for pair programming with ssh
By using ssh, you can share a tmux session, making pair programming much easier. We'll learn how to ...
- 让Apache 和nginx支持跨域訪问
1,怎样让Apache支持跨域訪问呢? 步骤: 改动httpd.conf,windows中相应的文件夹是:C:\wamp\bin\apache\Apache2.4.4\conf\httpd.conf ...
- android studio 2.2 使用cmake编译NDK
Android studio 2.2 已经进入beta版本,新功能添加众多,NDK编程也得到了简化.官方博客介绍.本文介绍如何使用新版android studio调用 c++代码,为了超级通俗易懂,例 ...
- js进阶 10-10 可见伪类选择器和内容伪类选择器的作用
js进阶 10-10 可见伪类选择器和内容伪类选择器的作用 一.总结 一句话总结:分组来描述.内容伪类选择器就是 四个 包含.可见的伪类选择器就是可见和不可见.查找功能,也就是内容伪类选择器非常 ...
- .netcore consul实现服务注册与发现-单节点部署
原文:.netcore consul实现服务注册与发现-单节点部署 一.Consul的基础介绍 Consul是HashiCorp公司推出的开源工具,用于实现分布式系统的服务发现与配置.与其他分 ...
- [Angular] @ContentChildren and QueryList
We have looked at @ContentChild in article(http://www.cnblogs.com/Answer1215/p/6414657.html). Now le ...
- 小强的HTML5移动开发之路(35)——jQuery中的过滤器详解
1.基本过滤选择器 :first :last :not(selector) :selector匹配的节点之外的节点 :even :偶数 :odd :奇数 :eq(index) :gt(index) : ...