Spring 的application.properties项目配置与注解
一、项目结构介绍
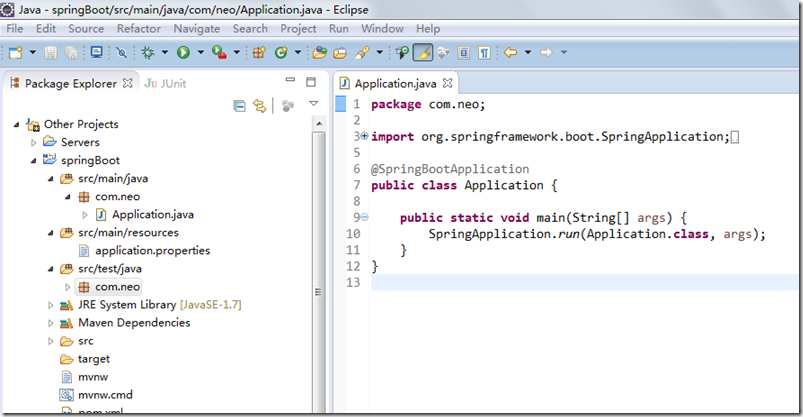
如上图所示,Spring Boot的基础结构共三个文件:
src/main/java 程序开发以及主程序入口
src/main/resources 配置文件
src/test/java 测试程序
二、application.properties 配置文件
默认启动项目的url配置,不需要加项目路径默认为/ 可以自行修改。
端口默认8080 修改端口号为8888
项目名称server.context-path
server.port=8888
server.context-path=/HelloWorld
helloWorld=spring boot
@Value("${helloWorld}")根据key-value直接注入helloWorld
@RestController
public class HelloWorldController {
@Value("${helloWorld}")
private String helloWorld;
@RequestMapping("/helloWorld")
public String say(){
return helloWorld;
}
}
@RestController的意思就是controller里面的方法都以json格式输出,不用再写什么jackjson配置的了!
启动主程序,打开浏览器访问http://localhost:8080/HelloWorld/helloWorld,就可以看到效果了。页面输出spring boot
三、@Value将外部配置文件的值动态注入到Bean
配置文件主要有两类:
application.properties。application.properties在spring boot启动时默认加载此文件
自定义属性文件。自定义属性文件通过@PropertySource加载。@PropertySource可以同时加载多个文件,也可以加载单个文件。如果相同第一个属性文件和第二属性文件存在相同key,则最后一个属性文件里的key启作用。加载文件的路径也可以配置变量,如下文的${anotherfile.configinject},此值定义在第一个属性文件config.properties
第一个属性文件config.properties内容如下:
${anotherfile.configinject}作为第二个属性文件加载路径的变量值
book.name=bookName
anotherfile.configinject=placeholder
第二个属性文件config_placeholder.properties内容如下:
book.name.placeholder=bookNamePlaceholder
下面通过@Value(“${app.name}”)语法将属性文件的值注入bean属性值
@Component
// 引入外部配置文件组:${app.configinject}的值来自config.properties。
// 如果相同
@PropertySource({"classpath:com/hry/spring/configinject/config.properties",
"classpath:com/hry/spring/configinject/config_${anotherfile.configinject}.properties"})
public class ConfigurationFileInject{
@Value("${app.name}")
private String appName; // 这里的值来自application.properties,spring boot启动时默认加载此文件
@Value("${book.name}")
private String bookName; // 注入第一个配置外部文件属性
@Value("${book.name.placeholder}")
private String bookNamePlaceholder; // 注入第二个配置外部文件属性
@Autowired
private Environment env; // 注入环境变量对象,存储注入的属性值
public String toString(){
StringBuilder sb = new StringBuilder();
sb.append("bookName=").append(bookName).append("\r\n")
.append("bookNamePlaceholder=").append(bookNamePlaceholder).append("\r\n")
.append("appName=").append(appName).append("\r\n")
.append("env=").append(env).append("\r\n")
// 从eniroment中获取属性值
.append("env=").append(env.getProperty("book.name.placeholder")).append("\r\n");
return sb.toString();
}
}
Application.java同上文
@RunWith(SpringRunner.class)
@SpringBootTest(classes=Application.class)
public class ConfiginjectApplicationTest {
@Autowired
private ConfigurationFileInject configurationFileInject;
@Test
public void configurationFileInject(){
System.out.println(configurationFileInject.toString());
}
}
测试结果
bookName=bookName
bookNamePlaceholder=bookNamePlaceholder
appName=appName
env=StandardEnvironment {activeProfiles=[], defaultProfiles=[default], propertySources=[Inlined Test Properties,systemProperties,systemEnvironment,random,applicationConfig: [classpath:/application.properties],class path resource [com/hry/spring/configinject/config_placeholder.properties],class path resource [com/hry/spring/configinject/config.properties]]}
env=bookNamePlaceholder
四、application.properties配置数据库连接
有前缀的属性注入
请求url
mysql.jdbcName=com.mysql.jdbc.Driver
mysql.dbUrl=jdbc:mysql://localhost:3306/db_boot
mysql.userName=root
mysql.password=123456
@Component 让spring加载
import org.springframework.boot.context.properties.ConfigurationProperties;
import org.springframework.stereotype.Component;
/**
* Mysql属性配置文件
* @author Administrator
*
*/
@RestController
public class MysqlProperties {
@Value("${mysql.jdbcName}")
private String jdbcName;
@Value("${mysql.dbUrl}")
private String dbUrl;
@Value("${mysql.userName}")
private String userName;
@Value("${mysql.password}")
private String password;
public String getJdbcName() {
return jdbcName;
}
public void setJdbcName(String jdbcName) {
this.jdbcName = jdbcName;
}
public String getDbUrl() {
return dbUrl;
}
public void setDbUrl(String dbUrl) {
this.dbUrl = dbUrl;
}
public String getUserName() {
return userName;
}
public void setUserName(String userName) {
this.userName = userName;
}
public String getPassword() {
return password;
}
public void setPassword(String password) {
this.password = password;
}
}
@ConfigurationProperties(prefix="mysql") 就是application配置文件的前缀mysql
import org.springframework.boot.context.properties.ConfigurationProperties;
import org.springframework.stereotype.Component;
/**
* Mysql属性配置文件
* @author Administrator
*
*/
@Component
@ConfigurationProperties(prefix="mysql")
public class MysqlProperties {
private String jdbcName;
private String dbUrl;
private String userName;
private String password;
public String getJdbcName() {
return jdbcName;
}
public void setJdbcName(String jdbcName) {
this.jdbcName = jdbcName;
}
public String getDbUrl() {
return dbUrl;
}
public void setDbUrl(String dbUrl) {
this.dbUrl = dbUrl;
}
public String getUserName() {
return userName;
}
public void setUserName(String userName) {
this.userName = userName;
}
public String getPassword() {
return password;
}
public void setPassword(String password) {
this.password = password;
}
}
@Component已经变为spring管理的bean了@Resource 直接引入
import javax.annotation.Resource;
import org.springframework.beans.factory.annotation.Value;
import org.springframework.web.bind.annotation.RequestMapping;
import org.springframework.web.bind.annotation.RestController;
@RestController
public class HelloWorldController {
@Resource
private MysqlProperties mysqlProperties;
@RequestMapping("/showJdbc")
public String showJdbc(){
return "mysql.jdbcName:"+mysqlProperties.getJdbcName()+"<br/>"
+"mysql.dbUrl:"+mysqlProperties.getDbUrl()+"<br/>"
+"mysql.userName:"+mysqlProperties.getUserName()+"<br/>"
+"mysql.password:"+mysqlProperties.getPassword()+"<br/>";
}
}
五、spring处理http请求
@Controller 处理http请求的注解,请求后台转发页面
@RequestMapping 映射路径
import org.springframework.stereotype.Controller;
import org.springframework.web.bind.annotation.RequestMapping;
import org.springframework.web.servlet.ModelAndView;
@Controller
@RequestMapping("/freemarker")
public class HelloWorldFreemarkerController {
@RequestMapping("/say")
public ModelAndView say(){
ModelAndView mav=new ModelAndView();
mav.addObject("message", "springboot!");
mav.setViewName("helloWorld");
return mav;
}
}
helloWorld的模板文件
helloWorld.ftl
<!DOCTYPE html>
<html>
<head>
<meta charset="UTF-8">
<title>Insert title here</title>
</head>
<body>
show: ${message}
</body>
</html>
@PathVariable获取url参数
@RequestParam 获取get或post参数或者是form和url参数
rest风格的资源url请求
index.html
<!DOCTYPE html>
<html>
<head>
<meta charset="UTF-8">
<title>Insert title here</title>
<script src="http://www.java1234.com/jquery-easyui-1.3.3/jquery.min.js"></script>
<script type="text/javascript">
function show(){
$.post("ajax/hello",{},function(result){
alert(result);
});
}
</script>
</head>
<body>
<button onclick="show()">你好</button>
<a href="/HelloWorld/blog/21">天天</a>
<a href="/HelloWorld/blog/query?q=123456">搜索</a>
</body>
</html>
import org.springframework.web.bind.annotation.RequestMapping;
import org.springframework.web.bind.annotation.RestController;
@RestController
@RequestMapping("/ajax")
public class HelloWorldAjaxController {
@RequestMapping("/hello")
public String say(){
return "{'message1':'SpringBoot你好','message2','Spring你好2'}";
}
}
@PathVariable获取url参数
<a href="/HelloWorld/blog/21"></a>
<a href="/HelloWorld/blog/query?q=123456">搜索</a>
import org.springframework.stereotype.Controller;
import org.springframework.web.bind.annotation.PathVariable;
import org.springframework.web.bind.annotation.RequestMapping;
import org.springframework.web.bind.annotation.RequestParam;
import org.springframework.web.servlet.ModelAndView;
@Controller
@RequestMapping("/blog")
public class BlogController {
@RequestMapping("/{id}")
public ModelAndView show(@PathVariable("id") Integer id){
ModelAndView mav=new ModelAndView();
mav.addObject("id", id);
mav.setViewName("blog");
return mav;
}
@RequestMapping("/query")
public ModelAndView query(@RequestParam(value="q",required=false)String q){
ModelAndView mav=new ModelAndView();
mav.addObject("q", q);
mav.setViewName("query");
return mav;
}
}
blog.ftl
<!DOCTYPE html>
<html>
<head>
<meta charset="UTF-8">
<title>Insert title here</title>
</head>
<body>
id:${id}
</body>
</html>
---------------------
作者:wespten
来源:CSDN
原文:https://blog.csdn.net/qq_35029061/article/details/81926967
版权声明:本文为博主原创文章,转载请附上博文链接!
Spring 的application.properties项目配置与注解的更多相关文章
- spring boot application.properties基本配置
spring.datasource.driver-class-name=com.mysql.cj.jdbc.Driver spring.datasource.url=jdbc:mysql://loca ...
- 【转】spring boot application.properties 配置参数详情
multipart multipart.enabled 开启上传支持(默认:true) multipart.file-size-threshold: 大于该值的文件会被写到磁盘上 multipart. ...
- Spring boot application.properties 配置
原文链接: http://docs.spring.io/spring-boot/docs/current/reference/html/common-application-properties.ht ...
- Inspection info: Checks Spring Boot application .properties configuration files. Highlights unresolved and deprecated configuration keys and in
Cannot resolve class or package ‘jdbc’ less… (Ctrl+F1) Inspection info: Checks Spring Boot applicati ...
- SpringBoot在logback.xml中读取application.properties中配置的日志路径
1.在springboot项目中使用logback记录日志,在logback.xml中配置日志存储位置时读取application.properties中配置的路径,在 logback.xml中配置引 ...
- 使用 application.properties 中配置的属性,举例:@Value("${server.port}")
使用 application.properties 中配置的属性:@Value 注解. @RestController public class HelloWorldController { @Val ...
- Spring boot 的application.properties 全局配置
端口号.项目名称 application.properties: server.port=8888 server.context-path=/start 日志相关的配置 # 自定义日志配置路径 log ...
- Spring Boot 菜鸟教程 application.properties 常用配置
SPRING CONFIG (ConfigFileApplicationListener) spring.config.name 配置文件名称,默认为application spring.config ...
- spring boot application.properties 配置参数详情
multipart multipart.enabled 开启上传支持(默认:true) multipart.file-size-threshold: 大于该值的文件会被写到磁盘上 multipart. ...
随机推荐
- $_POST和$GLOBALS['HTTP_RAW_POST_DATA'] 的区别
HTTP 协议是建立在 TCP/IP 协议之上的应用层规范,它把 HTTP 请求分为三个部分:请求行.请求头.消息主体.协议规定 POST 提交的数据必须放在消息主体(entity-body)中,但协 ...
- FastJson序列化Json自定义返回字段,普通类从spring容器中获取bean
前言: 数据库的字段比如:price:1 ,返回需要price:1元. 这时两种途径修改: ① 比如sql中修改或者是在实体类转json前遍历修改. ②返回json,序列化时候修改.用到的是fastj ...
- Laravel篇之Laravel的安装及使用
想搭建一个基于Lavarel和vuejs的个人网站,使用git推送到github存储,千里之行,始于足下,首先要做的用composer来下载laravel框架,并成功运行. 一.使用compose ...
- MySQL5.7: sql script demo
-- MyISAM Foreign Keys显示不了外键,MyISAM此为5.0 以下版本使用 InnoDB 为5.0以上版本使用 drop table IF EXISTS city; CREATE ...
- maven将依赖依赖打包到jar中
通过maven-assembly-plugin插件可以实现将依赖jar包打包到自己的jar包中的需求,只需要在pom.xml中配置该插件即可,配置如下: <build> <plugi ...
- Foundry feats. MultiverseStudio
https://www.foundry.com/news-awards/foundry-jcube-announcement 经过这么多年的过程,本周本产品终于发布了PR,这次是由Foundry独家代 ...
- websocket 与 tornado 的结合
对于socket是不陌生的,但是对于websocket我却是陌生的,不同于https,在网页中使用websocket可以同样起到ajax的作用,默默发送数据... 在script中: ws = new ...
- PVS桌面主镜像配置后,实际用户登录,配置未生效
1.打开系统属性——高级——用户配置文件下的[设置] 2.打开用户配置文件,可以看到[复制]项灰化 3.使用windwows enable 工具启动上述灰化项,运行附件的exe文件后,任务栏出现下图标 ...
- <自动化测试方案书>方案书目录排版
自动化测试方案书 一.介绍 QQ交流群:585499566 这篇是一个系列,用来给需要做自动化测试方案的人做个参考,文章的内容是我收集网上和自己工作经验所得,希望能够给你们有所帮助 背景:因为工作需要 ...
- WPF控件库:图片按钮的封装
需求:很多时候界面上的按钮都需要被贴上图片,一般来说: 1.按钮处于正常状态,按钮具有背景图A 2.鼠标移至按钮上方状态,按钮具有背景图B 3.鼠标点击按钮状态,按钮具有背景图C 4.按钮处于不可用状 ...