CentOS7下搭建基本LNMP环境,部署WordPress
系统环境:CentOS Linux release 7.4.1708 (Core) 3.10.0-693.el7.x86_64
软件版本:nginx-1.12.2.tar.gz
php 7.1.11
mysql-community-server-5.7.20-1.el7.x86_64
网络环境中配置了DNS服务器,本次nginx服务器的IP是192.168.1.20,域名是wp1.st.local。过程中全部使用域名配置或访问。
一、安装nginx
1、安装依赖及相关支持库
# yum install pcre-devel pcre openssl openssl-devel
2、编译安装nginx
# cd nginx-1.12.

# ./configure \

  --prefix=/opt/nginx \

  --sbin-path=/usr/sbin/nginx \

  --user=nginx \

  --group=nginx \

 --pid-path=/var/run/nginx.pid \

 --lock-path=/var/run/nginx.lock \

  --with-http_ssl_module \

  --with-http_stub_status_module \

  --with-pcre \

  --error-log-path=/var/log/nginx/error.log \

  --http-log-path=/var/log/nginx/access.log \

  --with-http_gzip_static_module \

  --with-file-aio \

  --with-http_realip_module
3、编译成功
Configuration summary

  + using system PCRE library

  + using system OpenSSL library

  + using system zlib library

  nginx path prefix: "/opt/nginx"

  nginx binary file: "/usr/sbin/nginx"

  nginx modules path: "/opt/nginx/modules"

  nginx configuration prefix: "/opt/nginx/conf"

  nginx configuration file: "/opt/nginx/conf/nginx.conf"

  nginx pid file: "/var/run/nginx.pid"

  nginx error log file: "/var/log/nginx/error.log"

  nginx http access log file: "/var/log/nginx/access.log"

  nginx http client request body temporary files: "client_body_temp"

  nginx http proxy temporary files: "proxy_temp"

  nginx http fastcgi temporary files: "fastcgi_temp"

  nginx http uwsgi temporary files: "uwsgi_temp"

  nginx http scgi temporary files: "scgi_temp"
4、安装
# make && make install
5、检验安装结果
# nginx -V

nginx version: nginx/1.12.

built by gcc 4.8.  (Red Hat 4.8.-) (GCC)

built with OpenSSL 1.0.2k-fips   Jan

TLS SNI support enabled

configure arguments: --prefix=/opt/nginx --sbin-path=/usr/sbin/nginx --user=nginx --group=nginx --with-http_ssl_module --with-http_stub_status_module --with-pcre --error-log-path=/var/log/nginx/error.log --http-log-path=/var/log/nginx/access.log --with-http_gzip_static_module --with-file-aio --with-http_realip_module --pid-path=/var/run/nginx.pid --lock-path=/var/run/nginx.lock
6、创建nginx用户
# useradd -M -s /sbin/nologin nginx
7、创建nginx的unit
注意文件路径
# vi /usr/lib/systemd/system/nginx.service

[Unit]

Description=The nginx HTTP and reverse proxy server

After=network.target remote-fs.target nss-lookup.target

[Service]

Type=forking

PIDFile=/run/nginx.pid

# Nginx will fail to start if /run/nginx.pid already exists but has the wrong

# SELinux context. This might happen when running `nginx -t` from the cmdline.

# https://bugzilla.redhat.com/show_bug.cgi?id=1268621

ExecStartPre=/usr/bin/rm -f /run/nginx.pid

ExecStartPre=/usr/sbin/nginx -t

ExecStart=/usr/sbin/nginx

ExecReload=/bin/kill -s HUP $MAINPID

KillSignal=SIGQUIT

TimeoutStopSec=

KillMode=process

PrivateTmp=true

[Install]

WantedBy=multi-user.target
8、防火墙
# iptables -I INPUT  -m state --state NEW -m tcp -p tcp --dport  -j ACCEPT
# iptables-save >/etc/sysconfig/iptables
9、配置nginx.conf语法高亮
# wget http://www.vim.org/scripts/download_script.php?src_id=14376 -O /usr/share/vim/vim74/syntax/nginx.vim

# vi /usr/share/vim/vim74/filetype.vim

#追加一行,注意nginx的配置文件路径

au BufRead,BufNewFile /opt/nginx/conf/* set ft=nginx
10、修改配置文件
# vi /opt/nginx/conf/nginx.conf

user  nginx;

worker_processes  auto;

    server {

        listen       ;

        server_name  wp1.st.local;        #配置域名

        location / {

            root   html;

            index  index.php index.html index.htm;        #增加index.php

        }

        error_page        /50x.html;

        location = /50x.html {

            root   html;

        }
11、启动服务
# systemctl start nginx.service

# systemctl enable nginx.service
12、访问测试
二、安装PHP
1、添加扩展源
# yum -y install https://mirror.webtatic.com/yum/el7/epel-release.rpm https://mirror.webtatic.com/yum/el7/webtatic-release.rpm
2、安装支持库
# yum install libxml2 libxml2-devel libpng libpng-devel libcurl-devel libcurl libzip-devel libzip gd bzip2-devel bzip2
3、安装PHP7.1及相关支持
# yum -y install mod_php71w php71w-mbstring php71w-pear php71w-fpm php71w-gd php71w-pdo
php71w-mysql放在安装MySQL时一起安装,因为在未添加mysql57源的时候,可能会安装mariadb-libs作为mysql-community-libs的替代。
4、修改配置文件
# vi /etc/php-fpm.d/www.conf

#指定用户为前面创建的nginx

user = nginx

group = nginx
修改nginx.conf,root最好填写绝对路径,document_root就是root选项的指定目录
#添加

location ~ \.php$ {

            root           /opt/nginx/html;

            fastcgi_pass   127.0.0.1:;

            fastcgi_index  index.php;

            fastcgi_param  SCRIPT_FILENAME  $document_root$fastcgi_script_name;

            include        fastcgi_params;

        }
修改所属用户为nginx
# chown -R nginx. /var/lib/php
# chown -R nginx. /opt/nginx/html
5、启动php-fpm,重载nginx
# systemctl start php-fpm.service

# systemctl enable php-fpm.service
# systemctl reload nginx.service
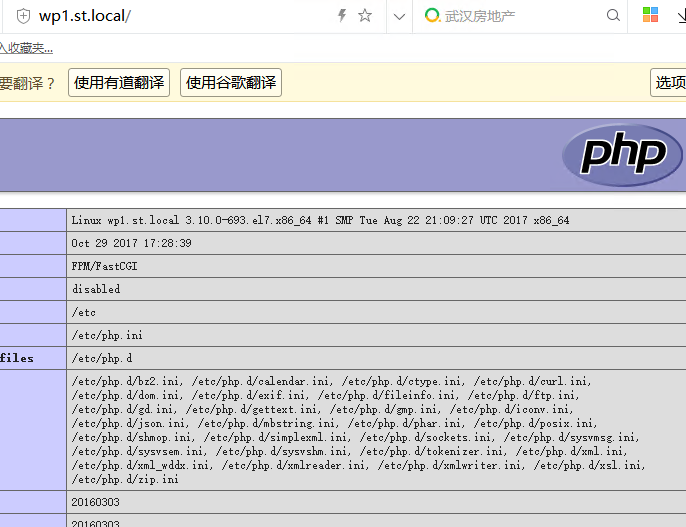
6、访问测试
# /opt/nginx/html/index.php

<?php

    phpinfo();

?>
注意权限
# chown nginx. index.php
三、安装MySQL5.7
1、添加扩展源
# vi /etc/yum.repos.d/mysql-community.repo

[mysql57-community]

name=MySQL 5.7 Community Server

baseurl=http://repo.mysql.com/yum/mysql-5.7-community/el/7/$basearch/

enabled=

gpgcheck=

gpgkey=http://repo.mysql.com/RPM-GPG-KEY-mysql
2、安装MySQL
# yum -y install mysql-community-server php71w-mysql
3、启动并配置
# vi /etc/my.cnf

#添加一行

character-set-server=utf8

# systemctl start mysqld
通过mysql_secure_installation命令按提示设置root密码以及基础的MySQL配置
4、创建数据库和新用户
mysql> create database wordpress;

mysql> create user 'wp_user'@'%' identified by 'xxxxxxxx';    #创建用户

mysql> grant all privileges on wordpress.* to 'wp_user'@'%' identified by 'xxxxxxxx';    #授权
mysql> flush privileges;
5、重置MySQL的用户密码
如果忘记MySQL密码,就使用如下办法重置。需要root权限
#vi /etc/my.cnf

[mysqld]

skip-grant-tables

#mysql -uroot

mysql> use mysql;

mysql> update user set authentication_string=password('xxxxxxxx') where user='root';    #.7版本的密码字段是authentication_string,而不是password

mysql> flush privileges;
修改完后注释掉skip-grant-tables,重启mysqld.service
四、安装WordPress
1、下载并解压
# wget https://cn.wordpress.org/wordpress-4.9.1-zh_CN.zip

# unzip wordpress-4.9.-zh_CN.zip

# cp -rva wordpress/* /opt/nginx/html/
2、修改用户和组
# chown nginx. /opt/nginx/html
3、SELINUX
# cd /opt/nginx

# chcon -R -t httpd_sys_content_t html/

# cd html/

# chcon -R -t httpd_sys_rw_content_t wp-content/
通过编译安装的nginx与yum安装的的安全上下文有所不同,yum安装会自动配置正确的上下文,编译安装默认可能是admin_home_t,访问时会提示File not found,必须改为httpd_sys_content_t
4、按照提示部署WordPress
五、配置nginx虚拟机
1、添加配置
虚拟server都可以配置为80端口,配置不同的域名
# mkdir /opt/nginx/conf.d

# vi /opt/nginx/conf.d/virtual1.conf

server {

    listen       ;

    server_name  bbs.st.local;

    location / {

        root   /opt/nginx/virtual;

        index  index.html index.htm;

    }

}

#在nginx.conf全局区块中包含配置文件

# vi /opt/nginx/conf/nginx.conf

include /opt/nginx/conf.d/*.conf;
2、创建虚拟主机目录并修改权限
# mkdir /opt/nginx/virtual

# vi /opt/nginx/virtual/index.html

Nginx Virtual Host Test Page

# chown -R nginx. /opt/nginx/virtual/

# chcon -R -t httpd_sys_content_t /opt/nginx/virtual/
3、重载服务
# systemctl reload nginx.service
4、结果检测
CentOS7下搭建基本LNMP环境,部署WordPress的更多相关文章
- 用源码搭建LNMP环境+部署WordPress
首先要做的是就是关闭Centos7.4的防火墙及selinux #systemctl stop firewalld #systemctl disable firewalld #sed -ri 's/^ ...
- Centos7下搭建LAMP平台环境 (转载)
1.启用Apache(httpd) Centos7默认已经安装httpd服务,只是没有启动.如果你需要全新安装,可以yum install -y httpd 启动服务:systemctl start ...
- Centos7下搭建LAMP平台环境
1.启用Apache2 Centos7默认已经安装httpd服务,只是没有启动.如果你需要全新安装,可以yum install -y httpd 启动服务:systemctl start httpd. ...
- 搭建LNMP环境部署Wordpress博客
!!!首先要做的就是关闭系统的防火墙以及selinux: #systemctl stop firewalld #systemctl disable firewalld #sed -ri 's/^(SE ...
- Dockerfile分离构建LNMP环境部署wordpress
最近忙着写自己的项目,也把一个站点的bbs论坛打算迁移到Docker中,测试没发现啥大问题.在单台上面的架构如下:(往后我们也是要讲到compose和swarm调度的慢慢来) 1.首先我们先安装一下d ...
- Hyperledger超级账本在Centos7下搭建运行环境
超级账本(hyperledger)是Linux基金会于2015年发起的推进区块链数字技术和交易验证的开源项目,加入成员包括:荷兰银行(ABN AMRO).埃森哲(Accenture)等十几个不同利益体 ...
- linux搭建的LNMP环境下的mysql授权远程连接
用phpstudy搭建的lnmp环境下mysql授权远程连接 简单高效 这是因为mysql 里的优先级不是所有人(提前检查防火墙是关闭状态)1.使用phpstudy安装的mysql没有放置到可以直接调 ...
- centos7下Maven Java selenium3环境搭建
centos7下Maven Java selenium3环境搭建 一.Jdk安装 我这里用的是open-jdk. [adawang@localhost src]$ sudo yum search op ...
- CentOS7下Hadoop伪分布式环境搭建
CentOS7下Hadoop伪分布式环境搭建 前期准备 1.配置hostname(可选,了解) 在CentOS中,有三种定义的主机名:静态的(static),瞬态的(transient),和灵活的(p ...
随机推荐
- 小朋友学C++(1)
Hello World! 在学C++之前,最好先学习一下C语言 让我们先运行一段简单的代码,编译器可以使用 在线C++编译器 或 Xcode(苹果系统) 或Dev C++(Windows系统). #i ...
- 属性,类方法@classmethod
# 属性的初识# class Person:## def __init__(self,name,hight,weight):# self.name = name# self.__hight = hig ...
- python的分支循环
知识内容: 1.if-else分支结构 2.while循环 3.for循环 4.循环结构综述 5.break和continue语句 一.if-else分支结构 1.单分支选择结构 if 表达式: 语句 ...
- Bogart SysPwd.vb
Module syspwd Public Const STR_MASK = "MyFunction" '加密用字串 '預定義密碼長度 Public GintCheckPwd As ...
- windows脚本测试
一. C:\Users\smc892h>systeminfo | findstr 物理内存物理内存总量: 12,167 MB可用的物理内存: 2,103 MB 二.截取字段 参考网站 ...
- Socket Error # 10013 Access denied
--------------------------- Debugger Exception Notification --------------------------- Project xxx. ...
- myeclipse2016-ci破解疑难杂症问题整理
感谢网上的各位大神,在你们的基础,我又整理了下安装成功的心得,破解不成功时一定注意下红色字体内容,避免被坑,都是教训. 试了网上N种破解工具+方法,Myeclipse 2016装了很多遍(本人官网下载 ...
- start 调用外部程序
批处理中调用外部程序的命令(该外部程序在新窗口中运行,批处理程序继续往下执行,不理会外部程序的运行状况),如果直接运行外部程序则必须等外部程序完成后才继续执行剩下的指令 例:start explore ...
- python模块说明
1.模块(变量,函数,类,实现一个功能) 包:用来从逻辑上组织模块,本质是一个目录(必须带有__init__.py) 2.导入方法 import module_alex from module_ale ...
- jQuery:总体掌握
链式编程....方法多,属性无法得到对象进行链式.vs10自动完成.书籍锋利的jQuery vsdoc有智能提示开发时候用,开发完之后,换成min压缩版的. 经验:打开网站文件夹.可以把vs网站上的解 ...