iOS-各种动画特效
概述
详细
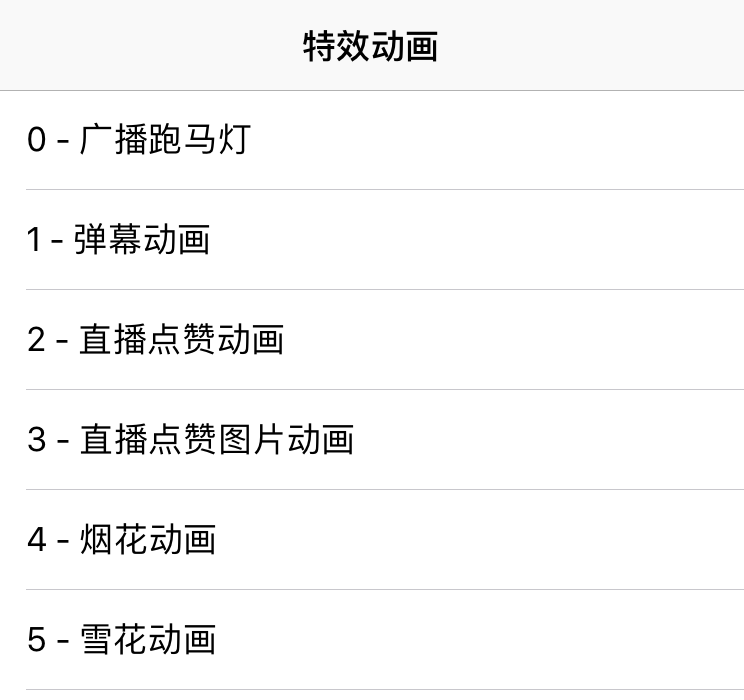
一、实现功能
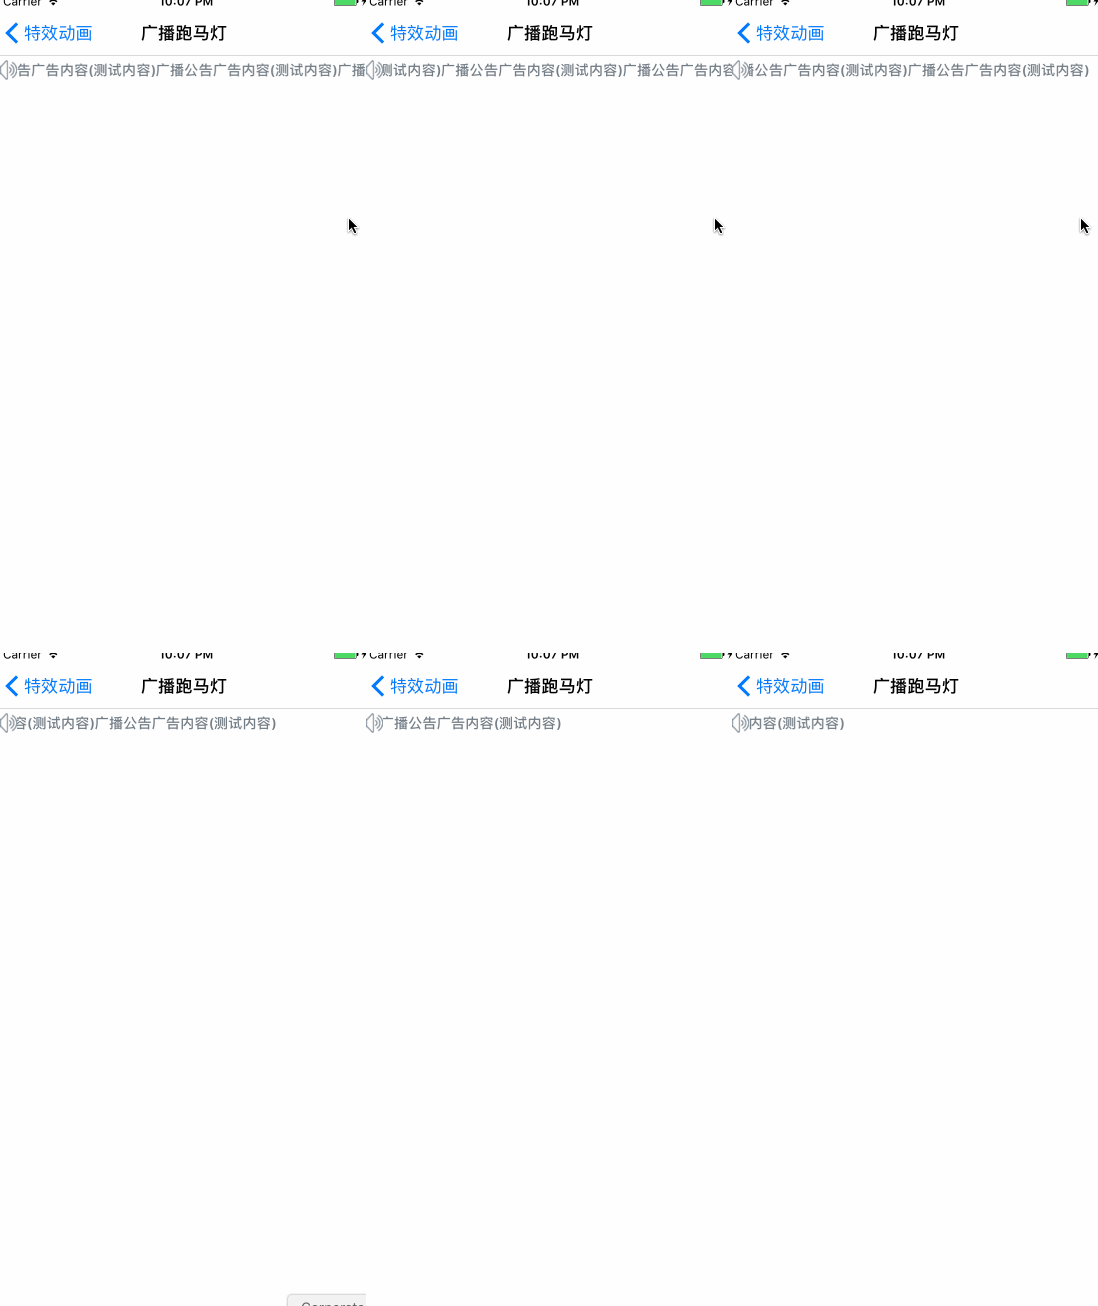
1. 广播跑马灯
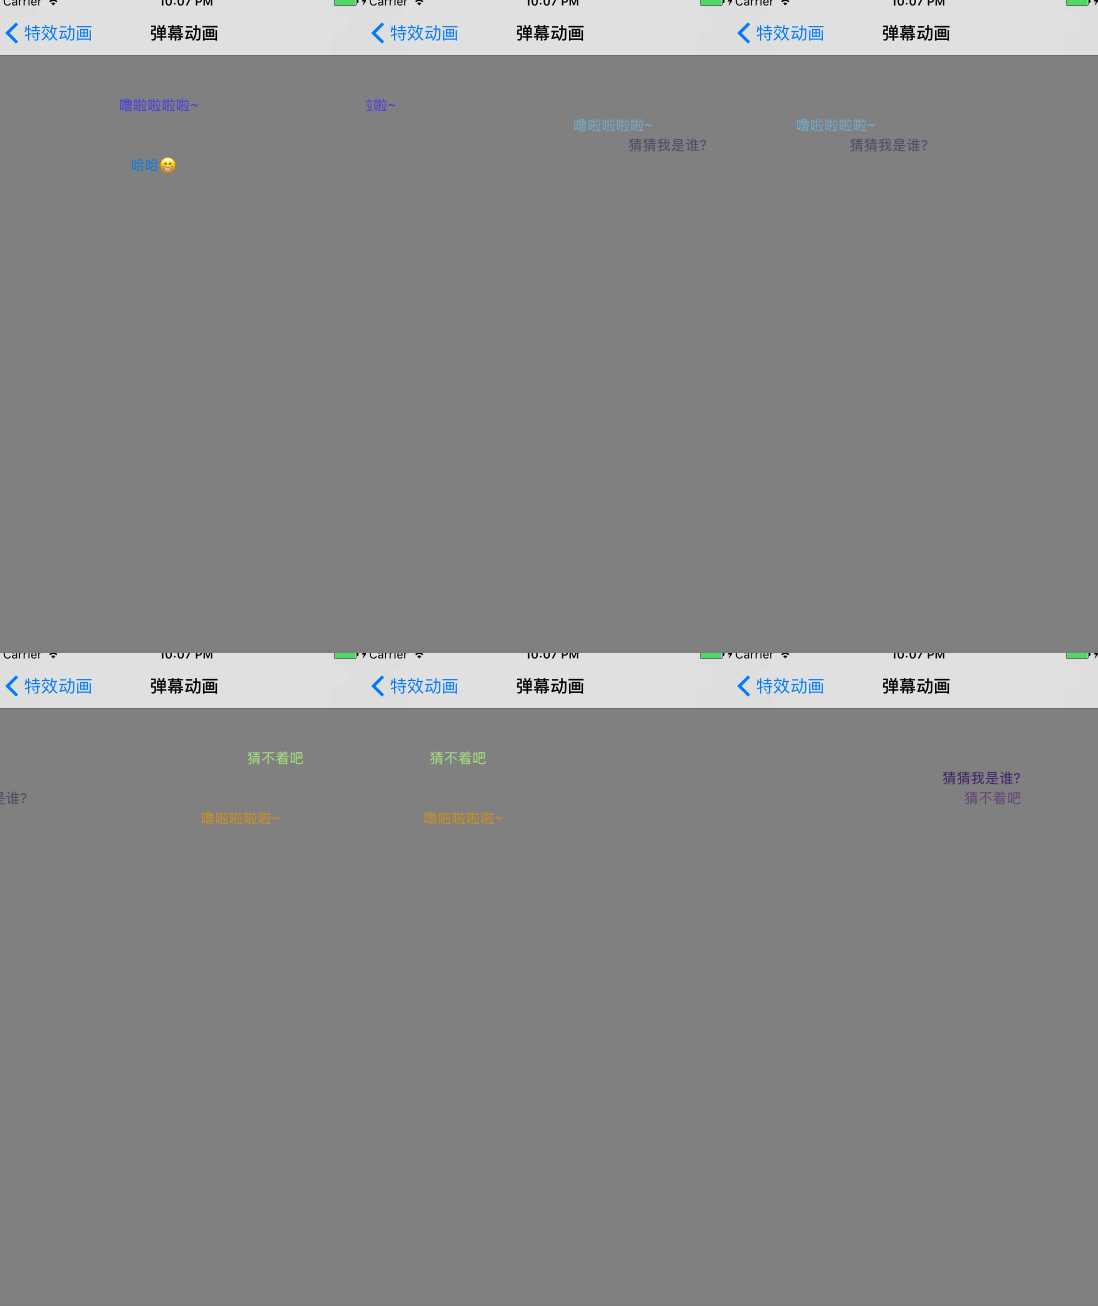
2. 弹幕动画
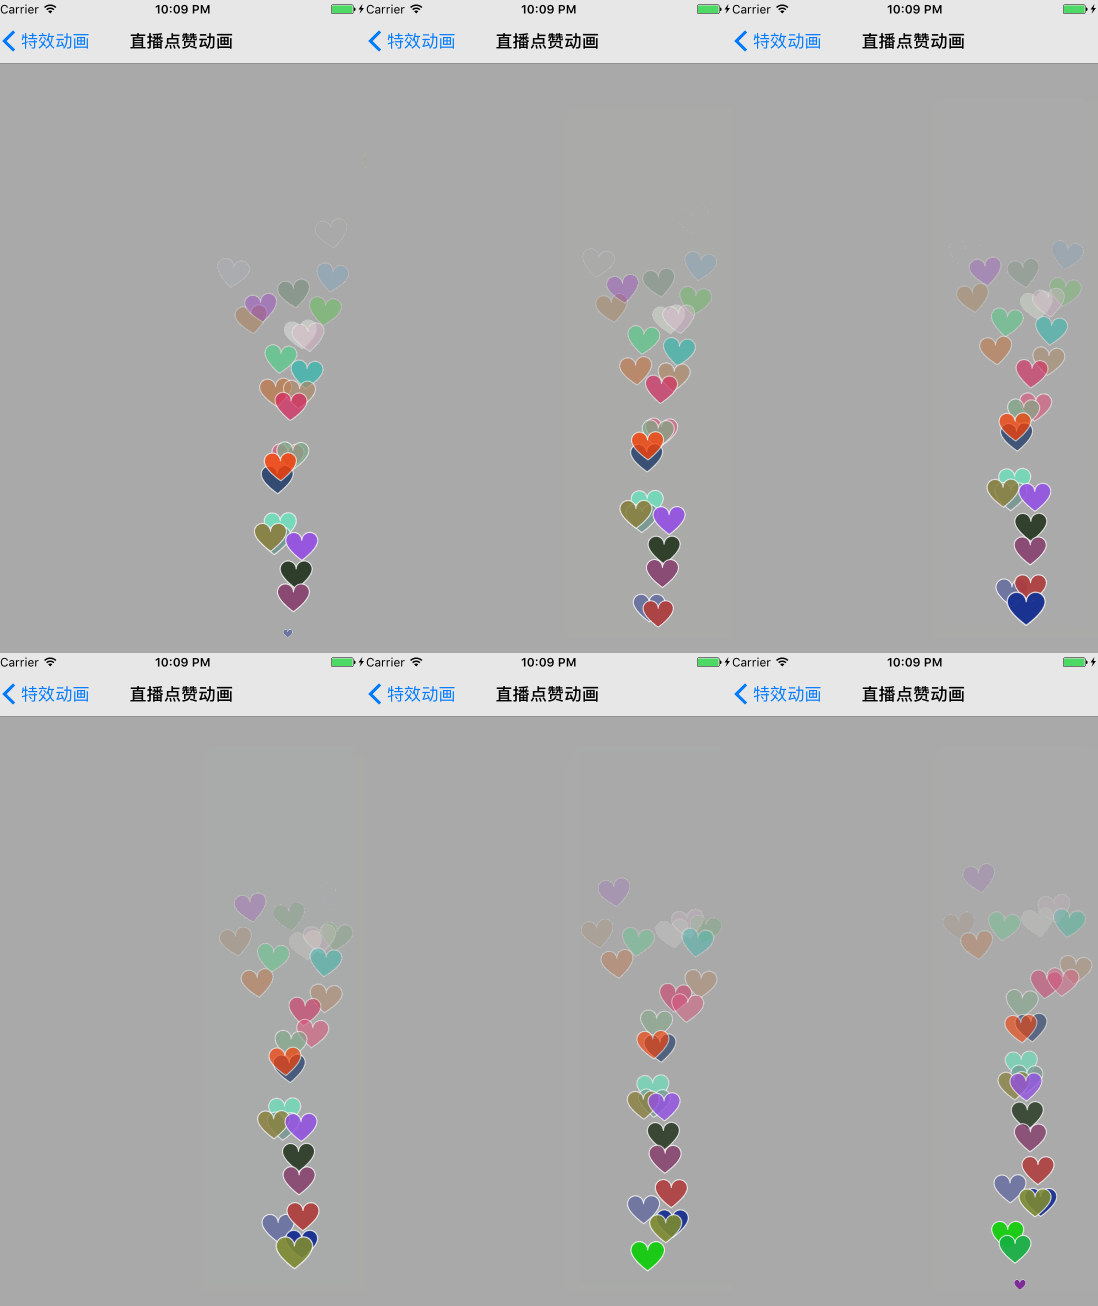
3. 直播点赞动画
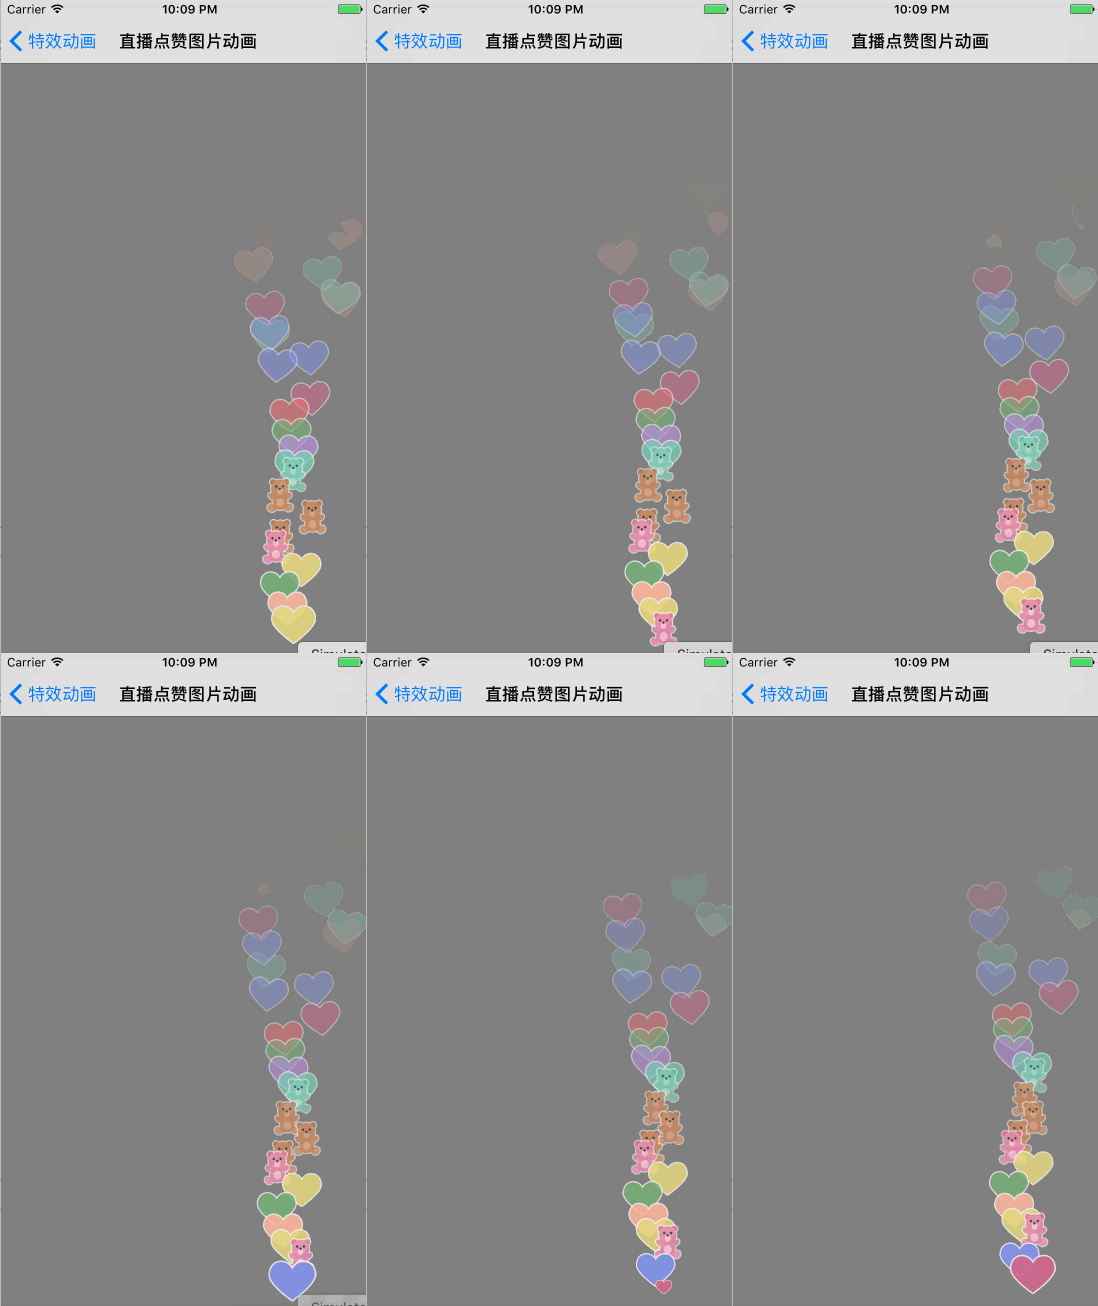
4. 直播点赞图片动画
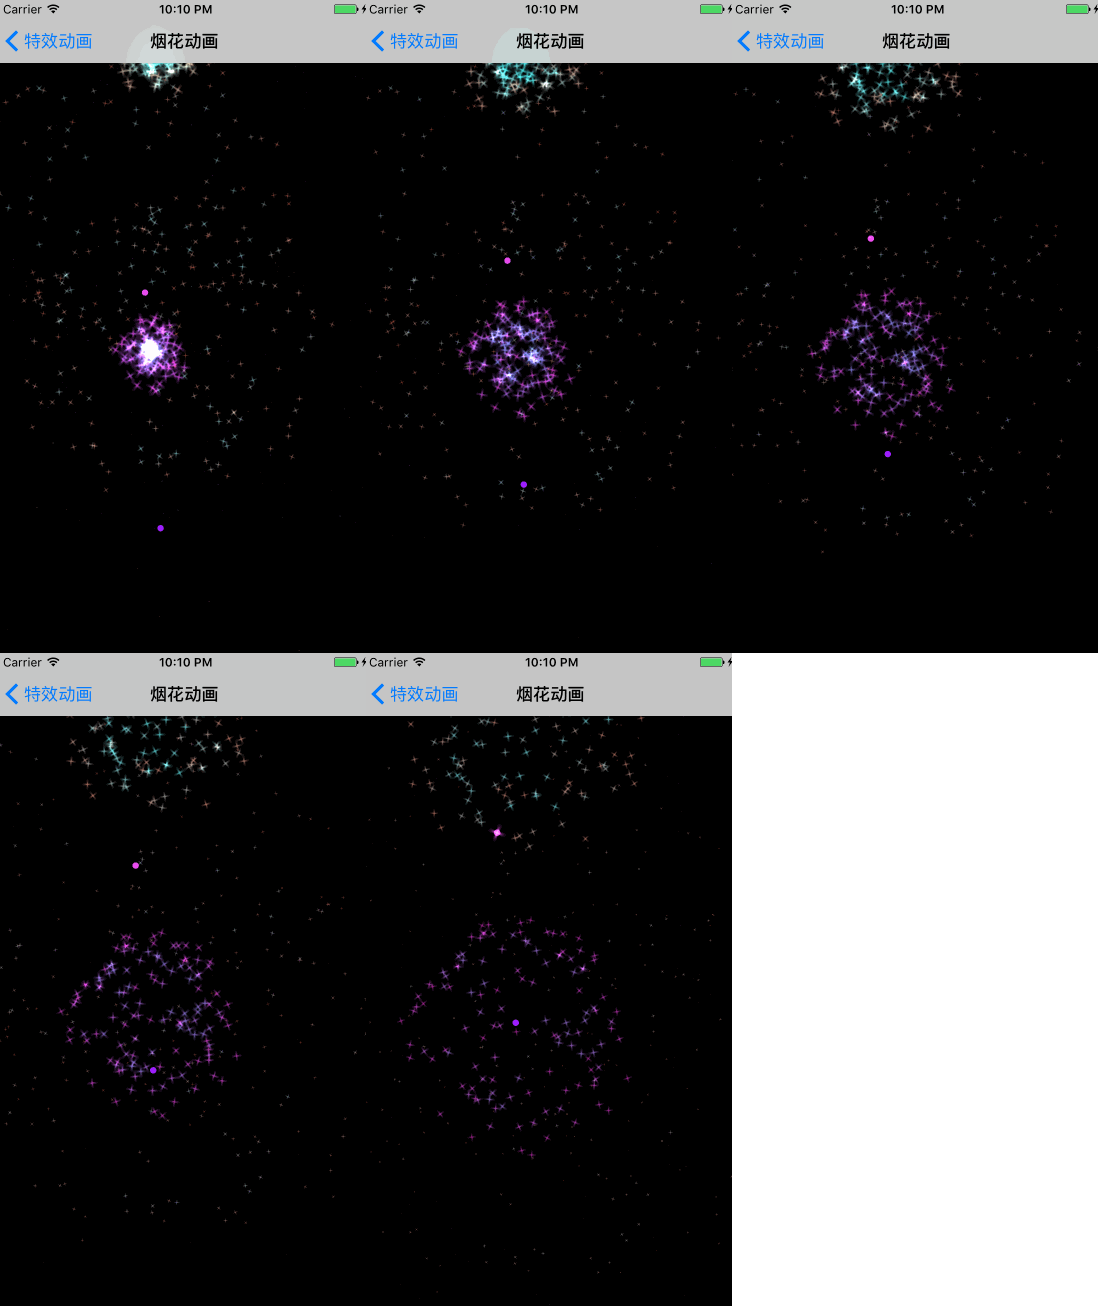
5. 烟花动画
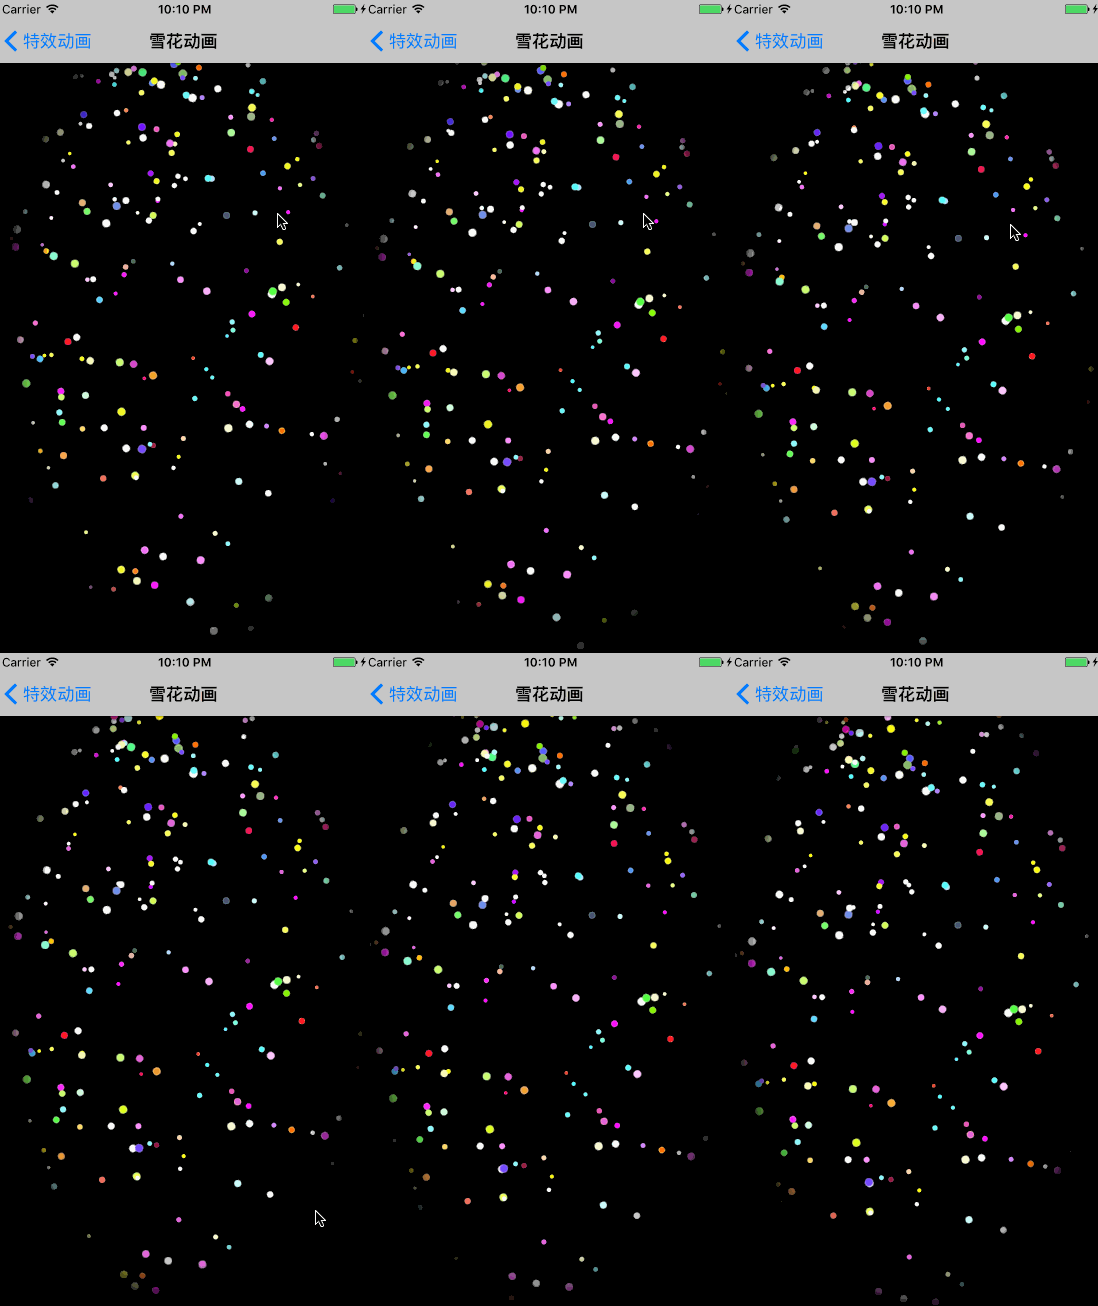
6. 雪花动画
二、程序实现
1. 广播动画特效:
思路:
1. 初始化广播视图
2. 设置广播公告广告内容
3. 添加动画效果
初始化广播视图, 广播活动标题按钮 与 广播活动标题标签 控件大小一样
/**

 * 设置广播视图

 */

- (void)setupBroadcastingView {

    // 设置广播活动标题按钮

    UIButton *activityBtn = [UIButton buttonWithType:UIButtonTypeCustom];

    activityBtn.frame = CGRectMake(0, 64, [UIScreen mainScreen].bounds.size.width, 30);

    activityBtn.backgroundColor = [UIColor clearColor];

    [activityBtn addTarget:self action:@selector(activityDetail) forControlEvents:UIControlEventTouchUpInside];

    [self.view addSubview:activityBtn];

    self.activityBtn = activityBtn;

    // 设置广播活动标题文字

    UILabel *activityLb = [[UILabel alloc] init];

    activityLb.frame = activityBtn.bounds;

    [activityLb setFont:[UIFont boldSystemFontOfSize:14]];

    [activityLb setTextColor:[UIColor colorWithRed:115/255.0 green:125/255.0 blue:134/255.0 alpha:1.0]];

    [activityLb setBackgroundColor:[UIColor clearColor]];

    [activityBtn addSubview:activityLb];

    self.activityLb = activityLb;

    // 设置广播logo

    UIImageView *speaker = [[UIImageView alloc] initWithImage:[UIImage imageNamed:[NSString stringWithFormat:@"broadcasting"]]];

    speaker.frame = CGRectMake(0, 5, 20, 20);

    speaker.backgroundColor = self.view.backgroundColor;

    [activityBtn addSubview:speaker];

    // 设置广播公告广告内容

    [self setActivityButtonTitle];

}
设置广播公告广告内容, 这里是以假数据填充,一般需求会是后台请求得来的活动内容.
添加动画效果: 当文字内容超过显示区域就滚动展示,未超过则居中展示.
/**

 * 设置广播公告广告内容

 */

- (void)setActivityButtonTitle {

    // 广播公告广告内容(假数据)

    NSString *title = @"广播公告广告内容(ZL测试内容)广播公告广告内容(测试内容)\r\n广播公告广告内容(测试内容)广播公告广告内容(测试内容)广播公告广告内容(测试内容)";

    title = [title stringByReplacingOccurrencesOfString:@"\r\n" withString:@" "];

    [self.activityLb setText:title];

    [self.activityLb sizeToFit];

    if (self.activityLb.frame.size.width <= self.activityBtn.frame.size.width) {

        [self.activityLb setCenter:CGPointMake(self.activityBtn.frame.size.width/2, self.activityBtn.frame.size.height/2)];

    } else { // 当文字内容超过显示区域就滚动展示

        CGRect frame = self.activityLb.frame;

        frame.origin.x = self.activityBtn.frame.size.width;

        frame.origin.y = self.activityBtn.frame.size.height * 0.5 - self.activityLb.bounds.size.height * 0.5;

        self.activityLb.frame = frame;

        [UIView beginAnimations:@"testAnimation" context:NULL];

        [UIView setAnimationDuration:frame.size.width/55.f];

        [UIView setAnimationCurve:UIViewAnimationCurveLinear];

        [UIView setAnimationRepeatAutoreverses:NO];

        [UIView setAnimationRepeatCount:INT_MAX];

        frame = self.activityLb.frame;

        frame.origin.x = - frame.size.width;

        self.activityLb.frame = frame;

        [UIView commitAnimations];

    }

}
当有活动链接时,需要添加点击效果; 如果没则不需要创建按钮及点击效果.
// 展示活动详情

- (void)activityDetail {

    NSLog(@"点击了广播活动公告详情");

}
2. 弹幕动画特效:
先自定义弹幕标签ZLScrollLabelView:
.h 文件露出开始/停止/暂停/恢复弹幕动画
@interface ZLScrollLabelView : UIView

// 代理协议

@property (nonatomic, weak) id <ZLScrollLabelViewDelegate> delegate;

// 速度

@property (nonatomic) CGFloat speed;

// 方向

@property (nonatomic) ScrollDirectionType barrageDirection;

// 容器

- (void)addContentView:(UIView *)view;

// 开始

- (void)startAnimation;

// 停止

- (void)stopAnimation;

// 暂停

- (void)pauseAnimation;

// 恢复

- (void)resumeAnimation;

@end
.m 文件初始化:
- (instancetype)initWithFrame:(CGRect)frame {

    if (self = [super initWithFrame:frame]) {

        _width = frame.size.width;

        _height = frame.size.height;

        self.speed = 1.f;

        self.barrageDirection = FromLeftType;

        self.layer.masksToBounds = YES;

        self.animationView = [[UIView alloc] initWithFrame:CGRectMake(_width, 0, _width, _height)];

        [self addSubview:self.animationView];

    }

    return self;

}

- (void)addContentView:(UIView *)view {

    [_contentView removeFromSuperview];

    view.frame = view.bounds;

    _contentView = view;

    self.animationView.frame = view.bounds;

    [self.animationView addSubview:_contentView];

    _animationViewWidth = self.animationView.frame.size.width;

    _animationViewHeight = self.animationView.frame.size.height;

}
开始弹幕动画:
- (void)startAnimation {

    [self.animationView.layer removeAnimationForKey:@"animationViewPosition"];

    _stoped = NO;

    CGPoint pointRightCenter = CGPointMake(_width + _animationViewWidth / 2.f, _animationViewHeight / 2.f);

    CGPoint pointLeftCenter  = CGPointMake(-_animationViewWidth / 2, _animationViewHeight / 2.f);

    CGPoint fromPoint = self.barrageDirection == FromLeftType ? pointRightCenter : pointLeftCenter;

    CGPoint toPoint = self.barrageDirection == FromLeftType ? pointLeftCenter  : pointRightCenter;

    self.animationView.center = fromPoint;

    UIBezierPath *movePath = [UIBezierPath bezierPath];

    [movePath moveToPoint:fromPoint];

    [movePath addLineToPoint:toPoint];

    CAKeyframeAnimation *moveAnimation = [CAKeyframeAnimation animationWithKeyPath:@"position"];

    moveAnimation.path = movePath.CGPath;

    moveAnimation.removedOnCompletion = YES;

    moveAnimation.duration = _animationViewWidth / 30.f * (1 / self.speed);

    moveAnimation.delegate = self;

    [self.animationView.layer addAnimation:moveAnimation forKey:@"animationViewPosition"];

}
停止弹幕动画:
- (void)stopAnimation {

    _stoped = YES;

    [self.animationView.layer removeAnimationForKey:@"animationViewPosition"];

}

- (void)animationDidStop:(CAAnimation *)anim finished:(BOOL)flag {

    if (self.delegate && [self.delegate respondsToSelector:@selector(barrageView:animationDidStopFinished:)]) {

        [self.delegate barrageView:self animationDidStopFinished:flag];

    }

    if (flag && !_stoped) {

        [self startAnimation];

    }

}
暂停弹幕动画:
- (void)pauseAnimation {

    [self pauseLayer:self.animationView.layer];

}

- (void)pauseLayer:(CALayer*)layer {

    CFTimeInterval pausedTime = [layer convertTime:CACurrentMediaTime() fromLayer:nil];

    layer.speed = 0.0;

    layer.timeOffset = pausedTime;

}
恢复弹幕动画:
- (void)resumeAnimation {

    [self resumeLayer:self.animationView.layer];

}

- (void)resumeLayer:(CALayer*)layer {

    CFTimeInterval pausedTime = layer.timeOffset;

    layer.speed = 1.0;

    layer.timeOffset = 0.0;

    layer.beginTime = 0.0;

    CFTimeInterval timeSincePause = [layer convertTime:CACurrentMediaTime() fromLayer:nil] - pausedTime;

    layer.beginTime = timeSincePause;

}
在所需控制器里, 添加代理ZLScrollLabelViewDelegate实现开始动画方法
- (void)viewDidLoad {

    [super viewDidLoad];

    self.navigationItem.title = @"弹幕动画";

    self.view.backgroundColor = [UIColor grayColor];

    ZLScrollLabelView *barrageView0 = [[ZLScrollLabelView alloc] initWithFrame:CGRectMake(0, 104, self.view.frame.size.width, 20)];

    barrageView0.delegate = self;

    // add

    [self.view addSubview:barrageView0];

    // text

    [barrageView0 addContentView:[self createLabelWithText:@"超喜欢赵丽颖,只因她的踏实!"

                                                     textColor:[self randomColor]]];

    // start

    [barrageView0 startAnimation];

}
代理ZLScrollLabelViewDelegate:
- (UILabel *)createLabelWithText:(NSString *)text textColor:(UIColor *)textColor {

    NSString *string = [NSString stringWithFormat:@" %@ ", text];

    CGFloat width = [string widthWithStringAttribute:@{NSFontAttributeName : [UIFont systemFontOfSize:14.f]}];

    UILabel *label = [[UILabel alloc] initWithFrame:CGRectMake(0, 0, width, 20)];

    label.font = [UIFont systemFontOfSize:14.f];

    label.text = string;

    label.textColor = textColor;

    return label;

}

#pragma mark - ZLScrollLabelViewDelegate

- (void)barrageView:(ZLScrollLabelView *)barrageView animationDidStopFinished:(BOOL)finished {

    [barrageView stopAnimation];

    dispatch_after(dispatch_time(DISPATCH_TIME_NOW, (int64_t)(1.0 * NSEC_PER_SEC)), dispatch_get_main_queue(), ^{

        [barrageView addContentView:[self createLabelWithText:[self randomString]

                                                        textColor:[self randomColor]]];

        [barrageView startAnimation];

    });

}

- (NSString *)randomString {

    NSArray *array = @[@"猜猜我是谁?",

                       @"哈哈",

                       @"猜不着吧",

                       @"我是程序媛",

                       @"噜啦啦啦啦~"];

    return array[arc4random() % array.count];

}
3. 直播点赞效果
先自定义ZLLiveHeartView,露出liveHeartAnimateInView方法:
- (void)liveHeartAnimateInView:(UIView *)view {

    NSTimeInterval totalAnimationDuration = 8;

    CGFloat heartSize = CGRectGetWidth(self.bounds);

    CGFloat heartCenterX = self.center.x;

    CGFloat viewHeight = CGRectGetHeight(view.bounds);

    // Pre-Animation setup

    self.transform = CGAffineTransformMakeScale(0, 0);

    self.alpha = 0;

    // Bloom

    [UIView animateWithDuration:0.5 delay:0.0 usingSpringWithDamping:0.6 initialSpringVelocity:0.8 options:UIViewAnimationOptionCurveEaseOut animations:^{

        self.transform = CGAffineTransformIdentity;

        self.alpha = 0.9;

    } completion:NULL];

    NSInteger i = arc4random_uniform(2);

    // -1 OR 1

    NSInteger rotationDirection = 1 - (2 * i);

    NSInteger rotationFraction = arc4random_uniform(10);

    [UIView animateWithDuration:totalAnimationDuration animations:^{

        self.transform = CGAffineTransformMakeRotation(rotationDirection * M_PI / (16 + rotationFraction * 0.2));

    } completion:NULL];

    UIBezierPath *heartTravelPath = [UIBezierPath bezierPath];

    [heartTravelPath moveToPoint:self.center];

    // random end point

    CGPoint endPoint = CGPointMake(heartCenterX + (rotationDirection) * arc4random_uniform(2 * heartSize), viewHeight/6.0 + arc4random_uniform(viewHeight / 4.0));

    // random Control Points

    NSInteger j = arc4random_uniform(2);

    NSInteger travelDirection = 1- (2*j);

    // randomize x and y for control points

    CGFloat xDelta = (heartSize/2.0 + arc4random_uniform(2*heartSize)) * travelDirection;

    CGFloat yDelta = MAX(endPoint.y ,MAX(arc4random_uniform(8*heartSize), heartSize));

    CGPoint controlPoint1 = CGPointMake(heartCenterX + xDelta, viewHeight - yDelta);

    CGPoint controlPoint2 = CGPointMake(heartCenterX - 2*xDelta, yDelta);

    [heartTravelPath addCurveToPoint:endPoint controlPoint1:controlPoint1 controlPoint2:controlPoint2];

    CAKeyframeAnimation *keyFrameAnimation = [CAKeyframeAnimation animationWithKeyPath:@"position"];

    keyFrameAnimation.path = heartTravelPath.CGPath;

    keyFrameAnimation.timingFunction = [CAMediaTimingFunction functionWithName:kCAMediaTimingFunctionLinear];

    keyFrameAnimation.duration = totalAnimationDuration + endPoint.y/viewHeight;

    [self.layer addAnimation:keyFrameAnimation forKey:@"positionOnPath"];

    // Alpha & remove from superview

    [UIView animateWithDuration:totalAnimationDuration animations:^{

        self.alpha = 0.0;

    } completion:^(BOOL finished) {

        [self removeFromSuperview];

    }];

}
- (void)drawRect:(CGRect)rect {

    [_strokeColor setStroke];

    [_fillColor setFill];

    CGFloat drawingPadding = 4.0;

    CGFloat curveRadius = floor((CGRectGetWidth(rect) - 2*drawingPadding) / 4.0);

    // Creat path

    UIBezierPath *heartPath = [UIBezierPath bezierPath];

    // Start at bottom heart tip

    CGPoint tipLocation = CGPointMake(floor(CGRectGetWidth(rect) / 2.0), CGRectGetHeight(rect) - drawingPadding);

    [heartPath moveToPoint:tipLocation];

    // Move to top left start of curve

    CGPoint topLeftCurveStart = CGPointMake(drawingPadding, floor(CGRectGetHeight(rect) / 2.4));

    [heartPath addQuadCurveToPoint:topLeftCurveStart controlPoint:CGPointMake(topLeftCurveStart.x, topLeftCurveStart.y + curveRadius)];

    // Create top left curve

    [heartPath addArcWithCenter:CGPointMake(topLeftCurveStart.x + curveRadius, topLeftCurveStart.y) radius:curveRadius startAngle:M_PI endAngle:0 clockwise:YES];

    // Create top right curve

    CGPoint topRightCurveStart = CGPointMake(topLeftCurveStart.x + 2*curveRadius, topLeftCurveStart.y);

    [heartPath addArcWithCenter:CGPointMake(topRightCurveStart.x + curveRadius, topRightCurveStart.y) radius:curveRadius startAngle:M_PI endAngle:0 clockwise:YES];

    // Final curve to bottom heart tip

    CGPoint topRightCurveEnd = CGPointMake(topLeftCurveStart.x + 4*curveRadius, topRightCurveStart.y);

    [heartPath addQuadCurveToPoint:tipLocation controlPoint:CGPointMake(topRightCurveEnd.x, topRightCurveEnd.y + curveRadius)];

    [heartPath fill];

    heartPath.lineWidth = 1;

    heartPath.lineCapStyle = kCGLineCapRound;

    heartPath.lineJoinStyle = kCGLineCapRound;

    [heartPath stroke];

}
再在所需控制器里添加ZLLiveHeartView.
- (void)showLiveHeartView {

    ZLLiveHeartView *heart = [[ZLLiveHeartView alloc]initWithFrame:CGRectMake(0, 0, 40, 40)];

    [self.view addSubview:heart];

    CGPoint fountainSource = CGPointMake(self.view.frame.size.width - 80, self.view.bounds.size.height - 30 / 2.0 - 10);

    heart.center = fountainSource;

    [heart liveHeartAnimateInView:self.view];

}
4. 直播图片点赞动画
先自定义ZLLikeAnimation,animatePictureInView方法:
- (void)animatePictureInView:(UIView *)view Image:(UIImage *)image {

    self.imageView.image = image;

    NSTimeInterval totalAnimationDuration = 8;

    CGFloat heartSize = CGRectGetWidth(self.bounds);

    CGFloat heartCenterX = self.center.x;

    CGFloat viewHeight = CGRectGetHeight(view.bounds);

    // Pre-Animation setup

    self.transform = CGAffineTransformMakeScale(0, 0);

    self.alpha = 0;

    // Bloom

    [UIView animateWithDuration:0.5 delay:0.0 usingSpringWithDamping:0.6 initialSpringVelocity:0.8 options:UIViewAnimationOptionCurveEaseOut animations:^{

        self.transform = CGAffineTransformIdentity;

        self.alpha = 0.9;

    } completion:NULL];

    NSInteger i = arc4random_uniform(2);

    // -1 OR 1

    NSInteger rotationDirection = 1 - (2 * i);

    NSInteger rotationFraction = arc4random_uniform(10);

    [UIView animateWithDuration:totalAnimationDuration animations:^{

        self.transform = CGAffineTransformMakeRotation(rotationDirection * M_PI / (16 + rotationFraction * 0.2));

    } completion:NULL];

    UIBezierPath *heartTravelPath = [UIBezierPath bezierPath];

    [heartTravelPath moveToPoint:self.center];

    // random end point

    CGPoint endPoint = CGPointMake(heartCenterX + (rotationDirection) * arc4random_uniform(2 * heartSize), viewHeight/6.0 + arc4random_uniform(viewHeight / 4.0));

    // random Control Points

    NSInteger j = arc4random_uniform(2);

    NSInteger travelDirection = 1 - (2 * j);

    // randomize x and y for control points

    CGFloat xDelta = (heartSize / 2.0 + arc4random_uniform(2 * heartSize)) * travelDirection;

    CGFloat yDelta = MAX(endPoint.y ,MAX(arc4random_uniform(8 * heartSize), heartSize));

    CGPoint controlPoint1 = CGPointMake(heartCenterX + xDelta, viewHeight - yDelta);

    CGPoint controlPoint2 = CGPointMake(heartCenterX - 2 * xDelta, yDelta);

    [heartTravelPath addCurveToPoint:endPoint controlPoint1:controlPoint1 controlPoint2:controlPoint2];

    CAKeyframeAnimation *keyFrameAnimation = [CAKeyframeAnimation animationWithKeyPath:@"position"];

    keyFrameAnimation.path = heartTravelPath.CGPath;

    keyFrameAnimation.timingFunction = [CAMediaTimingFunction functionWithName:kCAMediaTimingFunctionLinear];

    keyFrameAnimation.duration = totalAnimationDuration + endPoint.y / viewHeight;

    [self.layer addAnimation:keyFrameAnimation forKey:@"positionOnPath"];

    // Alpha & remove from superview

    [UIView animateWithDuration:totalAnimationDuration animations:^{

        self.alpha = 0.0;

    } completion:^(BOOL finished) {

        [self removeFromSuperview];

    }];

}
再在所需控制器里添加ZLLikeAnimation.
- (void)showLikePictureView {

    ZLLikeAnimation *heart = [[ZLLikeAnimation alloc]initWithFrame:CGRectMake(0, 0, 40, 40)];

    [self.view addSubview:heart];

    CGPoint fountainSource = CGPointMake(self.view.frame.size.width - 80, self.view.bounds.size.height - 30 / 2.0 - 10);

    heart.center = fountainSource;

    int count = round(random() % 12);

    [heart animatePictureInView:self.view Image:[UIImage imageNamed:[NSString stringWithFormat:@"resource.bundle/heart%d.png",count]]];

}
5. 烟花特效:
设置烟花
- (void)setupFireworks {

    self.caELayer = [CAEmitterLayer layer];

    // 发射源

    self.caELayer.emitterPosition = CGPointMake(self.view.frame.size.width / 2, self.view.frame.size.height - 50);

    // 发射源尺寸大小

    self.caELayer.emitterSize = CGSizeMake(50, 0);

    // 发射源模式

    self.caELayer.emitterMode = kCAEmitterLayerOutline;

    // 发射源的形状

    self.caELayer.emitterShape = kCAEmitterLayerLine;

    // 渲染模式

    self.caELayer.renderMode = kCAEmitterLayerAdditive;

    // 发射方向

    self.caELayer.velocity = 1;

    // 随机产生粒子

    self.caELayer.seed = (arc4random() % 100) + 1;

    // cell

    CAEmitterCell *cell = [CAEmitterCell emitterCell];

    // 速率

    cell.birthRate = 1.0;

    // 发射的角度

    cell.emissionRange = 0.11 * M_PI;

    // 速度

    cell.velocity = 300;

    // 范围

    cell.velocityRange = 150;

    // Y轴 加速度分量

    cell.yAcceleration = 75;

    // 声明周期

    cell.lifetime  = 2.04;

    // 是个CGImageRef的对象,既粒子要展现的图片

    cell.contents = (id)[[UIImage imageNamed:@"ring"] CGImage];

    // 缩放比例

    cell.scale = 0.2;

    // 粒子的颜色

    cell.color = [[UIColor colorWithRed:0.6 green:0.6 blue:0.6 alpha:1.0] CGColor];

    // 一个粒子的颜色green 能改变的范围

    cell.greenRange = 1.0;

    // 一个粒子的颜色red 能改变的范围

    cell.redRange = 1.0;

    // 一个粒子的颜色blue 能改变的范围

    cell.blueRange = 1.0;

    // 子旋转角度范围

    cell.spinRange = M_PI;

    // 爆炸

    CAEmitterCell *burst = [CAEmitterCell emitterCell];

    // 粒子产生系数

    burst.birthRate = 1.0;

    // 速度

    burst.velocity = 0;

    // 缩放比例

    burst.scale = 2.5;

    // shifting粒子red在生命周期内的改变速度

    burst.redSpeed = -1.5;

    // shifting粒子blue在生命周期内的改变速度

    burst.blueSpeed= +1.5;

    // shifting粒子green在生命周期内的改变速度

    burst.greenSpeed = +1.0;

    // 生命周期

    burst.lifetime = 0.35;

    // 火花 and finally, the sparks

    CAEmitterCell *spark = [CAEmitterCell emitterCell];

    // 粒子产生系数,默认为1.0

    spark.birthRate = 400;

    // 速度

    spark.velocity = 125;

    // 360 deg //周围发射角度

    spark.emissionRange = 2 * M_PI;

    // gravity //y方向上的加速度分量

    spark.yAcceleration = 75;

    // 粒子生命周期

    spark.lifetime = 3;

    // 是个CGImageRef的对象,既粒子要展现的图片

    spark.contents = (id)

    [[UIImage imageNamed:@"fireworks"] CGImage];

    // 缩放比例速度

    spark.scaleSpeed = -0.2;

    // 粒子green在生命周期内的改变速度

    spark.greenSpeed = -0.1;

    // 粒子red在生命周期内的改变速度

    spark.redSpeed = 0.4;

    // 粒子blue在生命周期内的改变速度

    spark.blueSpeed = -0.1;

    // 粒子透明度在生命周期内的改变速度

    spark.alphaSpeed = -0.25;

    // 子旋转角度

    spark.spin = 2 * M_PI;

    // 子旋转角度范围

    spark.spinRange = 2 * M_PI;

    self.caELayer.emitterCells = [NSArray arrayWithObject:cell];

    cell.emitterCells = [NSArray arrayWithObjects:burst, nil];

    burst.emitterCells = [NSArray arrayWithObject:spark];

    [self.view.layer addSublayer:self.caELayer];

}
6. 雪花特效:
设置雪花
- (void)setupSnowflake {

    // 创建粒子Layer

    CAEmitterLayer *snowEmitter = [CAEmitterLayer layer];

    // 粒子发射位置

    snowEmitter.emitterPosition = CGPointMake(120,0);

    // 发射源的尺寸大小

    snowEmitter.emitterSize = self.view.bounds.size;

    // 发射模式

    snowEmitter.emitterMode = kCAEmitterLayerSurface;

    // 发射源的形状

    snowEmitter.emitterShape = kCAEmitterLayerLine;

    // 创建雪花类型的粒子

    CAEmitterCell *snowflake = [CAEmitterCell emitterCell];

    // 粒子的名字

    snowflake.name = @"snow";

    // 粒子参数的速度乘数因子

    snowflake.birthRate = 20.0;

    snowflake.lifetime = 120.0;

    // 粒子速度

    snowflake.velocity = 10.0;

    // 粒子的速度范围

    snowflake.velocityRange = 10;

    // 粒子y方向的加速度分量

    snowflake.yAcceleration = 2;

    // 周围发射角度

    snowflake.emissionRange = 0.5 * M_PI;

    // 子旋转角度范围

    snowflake.spinRange = 0.25 * M_PI;

    snowflake.contents  = (id)[[UIImage imageNamed:@"snow"] CGImage];

    // 设置雪花形状的粒子的颜色

    snowflake.color = [[UIColor whiteColor] CGColor];

    snowflake.redRange = 1.5f;

    snowflake.greenRange = 2.2f;

    snowflake.blueRange = 2.2f;

    snowflake.scaleRange = 0.6f;

    snowflake.scale = 0.7f;

    snowEmitter.shadowOpacity = 1.0;

    snowEmitter.shadowRadius = 0.0;

    snowEmitter.shadowOffset = CGSizeMake(0.0, 0.0);

    // 粒子边缘的颜色

    snowEmitter.shadowColor = [[UIColor whiteColor] CGColor];

    // 添加粒子

    snowEmitter.emitterCells = @[snowflake];

    // 将粒子Layer添加进图层中

    [self.view.layer addSublayer:snowEmitter];

    // 形成遮罩

    UIImage *image = [UIImage imageNamed:@"alpha"];

    _layer = [CALayer layer];

    _layer.frame = (CGRect){CGPointZero, self.view.bounds.size};

    _layer.contents = (__bridge id)(image.CGImage);

    _layer.position = self.view.center;

    snowEmitter.mask = _layer;

}
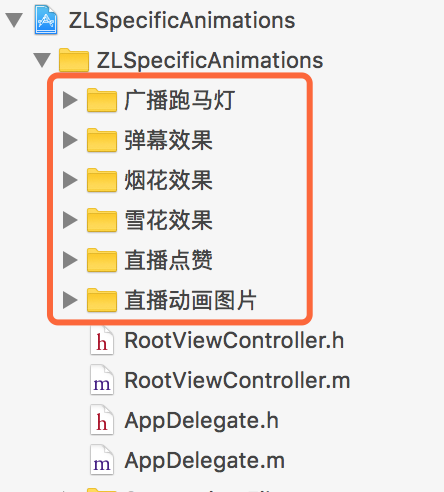
三、压缩文件截图
1、压缩文件截图
2.项目截图:
四、其他补充
持续更新添加动画特效~
界面性问题可以根据自己项目需求调整即可, 具体可参考代码, 项目能够直接运行!
注:本文著作权归作者,由demo大师发表,拒绝转载,转载需要作者授权
iOS-各种动画特效的更多相关文章
- iOS界面动画特效
1.TableView的headView背景图片拉伸 - (void)viewDidLoad { [super viewDidLoad]; // Do any additional setup aft ...
- Android的Activity切换动画特效库SwitchLayout,视图切换动画库,媲美IOS
由于看了IOS上面很多开发者开发的APP的视图界面切换动画体验非常好,这些都是IOS自带的,但是Android的Activity等视图切换动画并没有提供原生的,所以特此写了一个可以媲美IOS视图切换动 ...
- Bodymovin:Bodymovin和Lottie:把AE动画转换成HTML5/Android/iOS原生动画
转自:https://www.cnblogs.com/zamhown/p/6688369.html 大杀器Bodymovin和Lottie:把AE动画转换成HTML5/Android/iOS原生动画 ...
- 大杀器Bodymovin和Lottie:把AE动画转换成HTML5/Android/iOS原生动画
前段时间听部门老大说,Airbnb出了个移动端的动画库Lottie,可以和一个名叫Bodymovin的AE插件结合起来,把在AE上做好的动画导出为json文件,然后以Android/iOS原生动画的形 ...
- html5跟随鼠标炫酷网站引导页动画特效
html5跟随鼠标炫酷网站引导页动画特效一款非常不错的引导页,文字效果渐变,鼠标跟随出绚丽的条纹.html5炫酷网站引导页,鼠标跟随出特效. 体验效果:http://hovertree.com/tex ...
- jQuery css3鼠标悬停图片显示遮罩层动画特效
jQuery css3鼠标悬停图片显示遮罩层动画特效 效果体验:http://hovertree.com/texiao/jquery/39/ 效果图: 源码下载:http://hovertree.co ...
- jQuery动画特效实例教程
本文以实例形式详细讲述了jQuery动画特效的实现方法. 1.自制折叠内容块 内容块如下: <div class="module"> <div cla ...
- css3动画特效:上下晃动的div
css3动画特效:上下晃动的div <div id="square" class="container animated">上下晃动</div ...
- css3 animation动画特效插件的巧用
这一个是css3 animation动画特效在线演示的网站 https://daneden.github.io/animate.css/ 下载 animate.css文件,文件的代码很多,不过要明白 ...
- jQuery+CSS3实现404背景动画特效
效果:http://hovertree.com/texiao/jquery/74/ 源码下载:http://hovertree.com/h/bjaf/ko0gcgw5.htm 效果图如下: 代码如下: ...
随机推荐
- 【spring cloud】spring cloud zuul 路由网关
GitHub源码地址:https://github.com/AngelSXD/springcloud 版本介绍: <properties> <project.build.source ...
- 如何搭建 LNMP环境
和LAMP不同的是LNMP中的N指的是是Nginx(类似于Apache的一种web服务软件)其他都一样.目前这种环境应用的也是非常之多. Nginx设计的初衷是提供一种快速高效多并发的web服务软件. ...
- 最值得你所关注的10个C语言开源项目
. Webbench Webbench是一个在linux下使用的非常简单的网站压测工具.它使用fork()模拟多个客户端同时访问我们设定的URL,测试网站在压力下工作的性能,最多可以模拟3万个并发连接 ...
- 第七章 Xmemcached客户端介绍
提示:有关于XMemcached在实际开发中的具体使用,查看"Java企业项目开发实践"系列博客的<第八章 企业项目开发--分布式缓存memcached> 注意:本文主 ...
- Sublime Text2格式化HMTL/CSS/JS插件HTML-CSS-JS Prettify
之前格式化用过JSFormat,今天在GitHub发现了一个比较好的插件HTML-CSS-JS Prettify,具体的地址https://github.com/victorporof/Sublime ...
- 独特的deadlock(仅update语句也能造成死锁)
最近遇到了一个看上去很奇怪,分析起来很有意思的死锁问题.这个死锁看上去难以理解.而分析过程中,又使用了很多分析SQL Server死锁的典型方法.记录下来整个分析过程还是很有意义的. 问题重现步骤: ...
- python3 使用openpyxl库读写excel(续)
官网:https://openpyxl.readthedocs.io/en/stable/
- Linq-System.Data.Linq.DataContext不包含采用“0”个参数的构造函数
解决方法: 打开linq to sql 的db文件***.designer.cs,加上下面的代码: 加上这些构造函数之后重新生成就可以了.
- windows CMD命令查看局域网内所有主机名及IP
COLOR 0A CLS @ECHOOff Title查询局域网内在线电脑IP :send @ECHO off&setlocal enabledelayedexpansion ECHO 正在获 ...
- NGUI诡异的drawCall
看了很多关于NGUI drawCall的文章,见得比较多的一个观点是:一个 Atlas 对应一个Drawcall. 好奇心下做了个demo,两个panel中只用到一个Atlas,却产生了10个draw ...
