1-----Docker实例-安装Nginx
Docker 安装 Nginx
方法一、docker pull nginx(推荐)
查找 Docker Hub 上的 nginx 镜像
runoob@runoob:~/nginx$ docker search nginx
NAME                      DESCRIPTION                                     STARS     OFFICIAL   AUTOMATED
nginx                     Official build of Nginx.                        3260      [OK]
jwilder/nginx-proxy       Automated Nginx reverse proxy for docker c...   674                  [OK]
richarvey/nginx-php-fpm   Container running Nginx + PHP-FPM capable ...   207                  [OK]
million12/nginx-php       Nginx + PHP-FPM 5.5, 5.6, 7.0 (NG), CentOS...   67                   [OK]
maxexcloo/nginx-php       Docker framework container with Nginx and ...   57                   [OK]
webdevops/php-nginx       Nginx with PHP-FPM                              39                   [OK]
h3nrik/nginx-ldap         NGINX web server with LDAP/AD, SSL and pro...   27                   [OK]
bitnami/nginx             Bitnami nginx Docker Image                      19                   [OK]
maxexcloo/nginx           Docker framework container with Nginx inst...   7                    [OK]
...
这里我们拉取官方的镜像
runoob@runoob:~/nginx$ docker pull nginx
等待下载完成后,我们就可以在本地镜像列表里查到 REPOSITORY 为 nginx 的镜像。
runoob@runoob:~/nginx$ docker images nginx
REPOSITORY          TAG                 IMAGE ID            CREATED             SIZE
nginx               latest              555bbd91e13c        3 days ago          182.8 MB
方法二、通过 Dockerfile 构建(不推荐)
创建 Dockerfile
首先,创建目录 nginx, 用于存放后面的相关东西。
runoob@runoob:~$ mkdir -p ~/nginx/www ~/nginx/logs ~/nginx/conf
www: 目录将映射为 nginx 容器配置的虚拟目录。
logs: 目录将映射为 nginx 容器的日志目录。
conf: 目录里的配置文件将映射为 nginx 容器的配置文件。
进入创建的 nginx 目录,创建 Dockerfile 文件,内容如下:
FROM debian:stretch-slim

LABEL maintainer="NGINX Docker Maintainers <docker-maint@nginx.com>"

ENV NGINX_VERSION 1.14.0-1~stretch
ENV NJS_VERSION   1.14.0.0.2.0-1~stretch

RUN set -x \
    && apt-get update \
    && apt-get install --no-install-recommends --no-install-suggests -y gnupg1 apt-transport-https ca-certificates \
    && \
    NGINX_GPGKEY=573BFD6B3D8FBC641079A6ABABF5BD827BD9BF62; \
    found=''; \
    for server in \
        ha.pool.sks-keyservers.net \
        hkp://keyserver.ubuntu.com:80 \
        hkp://p80.pool.sks-keyservers.net:80 \
        pgp.mit.edu \
    ; do \
        echo "Fetching GPG key $NGINX_GPGKEY from $server"; \
        apt-key adv --keyserver "$server" --keyserver-options timeout=10 --recv-keys "$NGINX_GPGKEY" && found=yes && break; \
    done; \
    test -z "$found" && echo >&2 "error: failed to fetch GPG key $NGINX_GPGKEY" && exit 1; \
    apt-get remove --purge --auto-remove -y gnupg1 && rm -rf /var/lib/apt/lists/* \
    && dpkgArch="$(dpkg --print-architecture)" \
    && nginxPackages=" \
        nginx=${NGINX_VERSION} \
        nginx-module-xslt=${NGINX_VERSION} \
        nginx-module-geoip=${NGINX_VERSION} \
        nginx-module-image-filter=${NGINX_VERSION} \
        nginx-module-njs=${NJS_VERSION} \
    " \
    && case "$dpkgArch" in \
        amd64|i386) \
# arches officialy built by upstream
            echo "deb https://nginx.org/packages/debian/ stretch nginx" >> /etc/apt/sources.list.d/nginx.list \
            && apt-get update \
            ;; \
        *) \
# we're on an architecture upstream doesn't officially build for
# let's build binaries from the published source packages
            echo "deb-src https://nginx.org/packages/debian/ stretch nginx" >> /etc/apt/sources.list.d/nginx.list \
            \
# new directory for storing sources and .deb files
            && tempDir="$(mktemp -d)" \
            && chmod 777 "$tempDir" \
# (777 to ensure APT's "_apt" user can access it too)
            \
# save list of currently-installed packages so build dependencies can be cleanly removed later
            && savedAptMark="$(apt-mark showmanual)" \
            \
# build .deb files from upstream's source packages (which are verified by apt-get)
            && apt-get update \
            && apt-get build-dep -y $nginxPackages \
            && ( \
                cd "$tempDir" \
                && DEB_BUILD_OPTIONS="nocheck parallel=$(nproc)" \
                    apt-get source --compile $nginxPackages \
            ) \
# we don't remove APT lists here because they get re-downloaded and removed later
            \
# reset apt-mark's "manual" list so that "purge --auto-remove" will remove all build dependencies
# (which is done after we install the built packages so we don't have to redownload any overlapping dependencies)
            && apt-mark showmanual | xargs apt-mark auto > /dev/null \
            && { [ -z "$savedAptMark" ] || apt-mark manual $savedAptMark; } \
            \
# create a temporary local APT repo to install from (so that dependency resolution can be handled by APT, as it should be)
            && ls -lAFh "$tempDir" \
            && ( cd "$tempDir" && dpkg-scanpackages . > Packages ) \
            && grep '^Package: ' "$tempDir/Packages" \
            && echo "deb [ trusted=yes ] file://$tempDir ./" > /etc/apt/sources.list.d/temp.list \
# work around the following APT issue by using "Acquire::GzipIndexes=false" (overriding "/etc/apt/apt.conf.d/docker-gzip-indexes")
#   Could not open file /var/lib/apt/lists/partial/_tmp_tmp.ODWljpQfkE_._Packages - open (13: Permission denied)
#   ...
#   E: Failed to fetch store:/var/lib/apt/lists/partial/_tmp_tmp.ODWljpQfkE_._Packages  Could not open file /var/lib/apt/lists/partial/_tmp_tmp.ODWljpQfkE_._Packages - open (13: Permission denied)
            && apt-get -o Acquire::GzipIndexes=false update \
            ;; \
    esac \
    \
    && apt-get install --no-install-recommends --no-install-suggests -y \
                        $nginxPackages \
                        gettext-base \
    && apt-get remove --purge --auto-remove -y apt-transport-https ca-certificates && rm -rf /var/lib/apt/lists/* /etc/apt/sources.list.d/nginx.list \
    \
# if we have leftovers from building, let's purge them (including extra, unnecessary build deps)
    && if [ -n "$tempDir" ]; then \
        apt-get purge -y --auto-remove \
        && rm -rf "$tempDir" /etc/apt/sources.list.d/temp.list; \
    fi

# forward request and error logs to docker log collector
RUN ln -sf /dev/stdout /var/log/nginx/access.log \
    && ln -sf /dev/stderr /var/log/nginx/error.log

EXPOSE 80

STOPSIGNAL SIGTERM

CMD ["nginx", "-g", "daemon off;"]
通过 Dockerfile 创建一个镜像,替换成你自己的名字。
docker build -t nginx .
创建完成后,我们可以在本地的镜像列表里查找到刚刚创建的镜像
runoob@runoob:~/nginx$ docker images nginx
REPOSITORY          TAG                 IMAGE ID            CREATED             SIZE
nginx               latest              555bbd91e13c        3 days ago          182.8 MB
使用 nginx 镜像
运行容器
runoob@runoob:~/nginx$ docker run -p 80:80 --name mynginx -v $PWD/www:/www -v $PWD/conf/nginx.conf:/etc/nginx/nginx.conf -v $PWD/logs:/wwwlogs  -d nginx
45c89fab0bf9ad643bc7ab571f3ccd65379b844498f54a7c8a4e7ca1dc3a2c1e
runoob@runoob:~/nginx$
命令说明:
-p 80:80:将容器的80端口映射到主机的80端口
--name mynginx:将容器命名为mynginx
-v $PWD/www:/www:将主机中当前目录下的www挂载到容器的/www
-v $PWD/conf/nginx.conf:/etc/nginx/nginx.conf:将主机中当前目录下的nginx.conf挂载到容器的/etc/nginx/nginx.conf
-v $PWD/logs:/wwwlogs:将主机中当前目录下的logs挂载到容器的/wwwlogs
查看容器启动情况
runoob@runoob:~/nginx$ docker ps
CONTAINER ID        IMAGE        COMMAND                      PORTS                         NAMES
45c89fab0bf9        nginx        "nginx -g 'daemon off"  ...  0.0.0.0:80->80/tcp, 443/tcp   mynginx
f2fa96138d71        tomcat       "catalina.sh run"       ...  0.0.0.0:81->8080/tcp          tomcat
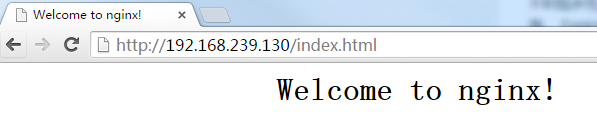
通过浏览器访问
1-----Docker实例-安装Nginx的更多相关文章
- docker上安装nginx服务
环境 1.开启一个容器,安装nginx,略过 2.假如第一步新启动没映射端口的话,重新把容器保存为镜像然后再重新运行一个新容器,不建议在一个正在运行的容器上做端口映射 docker run ...
- Docker容器安装nginx基本步骤Yum版
首先我们来科普一下nginx: Nginx (engine x) 是一个高性能的HTTP和反向代理web服务器,同时也提供了IMAP/POP3/SMTP服务.Nginx是由伊戈尔·赛索耶夫为俄罗斯访问 ...
- docker下安装nginx,启动ngixn,修改nginx配置等--超详细
1.获取nginx版本 docker中nginx版本信息:https://hub.docker.com/_/nginx?tab=tags&page=1&ordering=last_up ...
- 在docker下面安装Nginx PHP mysql let's encrypt
最近自己在弄了个Nginx PHP Mysql Let's encrypt的docker,下面记录一下 1)先装 Let's encrypt docker run --rm -p 80:80 -p 4 ...
- dockerfile实例--安装nginx
[root@localhost ~]# vi Dockerfile //ADD FROM centos_with_net MAINTAINER frankie onez0714@.com RUN yu ...
- docker下安装nginx并实现https访问
一.启动容器 docker run --detach --name wx-nginx -p 443:443 -p 80:80 -v /home/nginx/data:/usr/share/nginx/ ...
- docker中安装nginx,部署前端代码
最近在学习docker,初次接触,难免遇到磕磕碰碰,遂将其整理成博客,以便日后查看. 1.拉取nginx镜像 直接从官方镜像库拉取简单粗暴: docker pull nginx 2.运行 docker ...
- 【转载】Docker 安装 Nginx 并个性化挂载配置文件 nginx.conf
首先,系统(3.8以上内核的linux)中安装好 Docker 这个运用程序.由于网络原因,我们下载一个Docker官方的镜像需要很长的时间,甚至下载失败.为此,阿里云容器镜像服务提供了官方的镜像站点 ...
- 阿里云CentOS7.3服务器通过Docker安装Nginx
前言 小编环境: 阿里云CentOS7.3服务器 docker 下面分享一次小编在自己的阿里云CentOS7.3服务器上使用Docker来安装Nginx的一次全过程 温馨小提示: 如果只是希望单纯使用 ...
随机推荐
- modifiers标量调节器插件的定义和使用
在插件目录plugins里新建文件 modifier.插件名.php文件(如 modifier.插件名.php)例:function smarty_modifier_test($utime, $for ...
- springmvc框架简单搭建
一.利用xml 配置 1.web.xml <web-app version="2.4" xmlns="http://java.sun.com/xml/n ...
- Codeigniter框架前后台部署(多目录部署)
个网站一般包含前台和后台并且访问的url是不同的,Codeigniter怎么来部署呢? 在网上看到了一篇比较好的文章: 在下载好的ci的根目录建立一个目录 admin 将application目录中的 ...
- app里面嵌套的H5页面上电话号码怎么才能点击拨号?
代码: <p>联系我们:<a href="tel://66666666666">66666666666</a> </p>
- ssm集合的配置
web.xml <!DOCTYPE web-app PUBLIC "-//Sun Microsystems, Inc.//DTD Web Application 2.3//EN&quo ...
- MyEclipse中安装反编译插件
如何查看MyEclipse中Spring等框架的源文件. 首先先下载一个插件:http://pan.baidu.com/share/link?shareid=644034672&uk=3508 ...
- 【微服务架构】SpringCloud之Ribbon(四)
一:Ribbon是什么? Ribbon是Netflix发布的开源项目,主要功能是提供客户端的软件负载均衡算法,将Netflix的中间层服务连接在一起.Ribbon客户端组件提供一系列完善的配置项如连接 ...
- MVC4 Model ControllerDescriptor
1. ControllerDescriptor 的描述 Controller 的Action 方法有以下一些特性: 1.1 ActionNameAttribute特性 他继承自 System.We ...
- 微软编程一小时 题目2: Longest Repeated Sequence
题目2 : Longest Repeated Sequence 时间限制:10000ms 单点时限:1000ms 内存限制:256MB 描述 You are given a sequence of i ...
- c#实现高斯模糊
说说高斯模糊 高斯模糊的理论我这里就不太多费话了,百度下太多,都是抄来抄去. 主要用到二个函数“高斯函数” 一维形式为: 二维形式为: X,Y对应的一维二维坐标,σ表示模糊半径(半径* 2 + 1) ...