Elasticsearch 开发入门 - Python
文章转载自:https://elasticstack.blog.csdn.net/article/details/111573923
前提条件
- 你需要在你的电脑上安装 python3
- 你需要安装 docker 18.03.0-ce 或以上的版本
创建一个 python 项目
我们在自己的电脑里创建一个如下的目录:
mkdir python-elasticsearch

cd python-elasticsearch
接着我们在这个目录里安装 elasticsearch 包:
pip3 install elasticsearch
这样我们就安装好了 elasticsearch 包。我们接下来安装 Elastic Stack。
安装 Elasticsearch 及 Kibana
使用 docker 来安装 Elasticsearch 及 Kibana。我们首先来创建一个叫做 docker-compose.yml 的文件:
docker-compose.yml
---

version: "3"

services:

  elasticsearch:

    image: docker.elastic.co/elasticsearch/elasticsearch:7.10.0

    container_name: es01

    environment:

      - node.name=es01

      - cluster.name=docker-cluster

      - bootstrap.memory_lock=true

      - "ES_JAVA_OPTS=-Xms512m -Xmx512m"

      - discovery.type=single-node

    ulimits:

      memlock:

        soft: -1

        hard: -1

    volumes:

      - esdata:/usr/share/elasticsearch/data

    ports:

      - 9200:9200

  kibana:

    image: docker.elastic.co/kibana/kibana:7.10.0

    ports:

      - 5601:5601

    depends_on:

      - elasticsearch

volumes:

  esdata:

    driver: local
在上面,我们使用了 Elastic Stack 7.10.0 发行版作为实验的版本。在你实际的使用中,你可以根据自己的版本需求而进行修改。
我们必须先启动 docker,然后在命令行中执行:
docker-compose up
上面命令必须执行于 docker-compose.yml 文件所在的目录中。
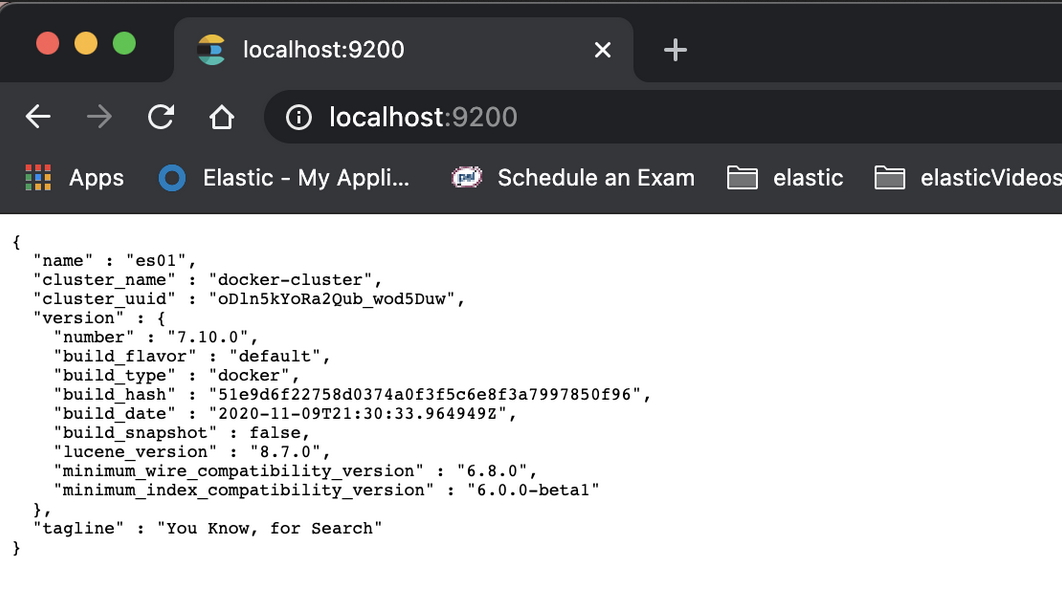
它将启动 http://localhost:9200 中的 Elasticsearch 和 http://localhost:5601 中的 Kibana。 你可以通过在浏览器中打开链接来进行验证。
连接到 Elasticsearch
首先我们创建一个叫做 main.py 的文件:
main.py
# Import Elasticsearch package

from elasticsearch import Elasticsearch

# Connect to the elastic cluster

es = Elasticsearch([{'host':'localhost','port':9200}])

print(es)
在上面我们使用 elasticsearch 包实例化一个 es。我们使用本地的 Elasticsearch 实例。如果你使用其它地址的 Elasticsearch,请修改上面的地址及端口地址。我们使用如下的命令来运行:
python3 main.py
上面的运行结果为:
$ python3 main.py

<Elasticsearch([{'host': 'localhost', 'port': 9200}])>
创建索引并导入文档
Elasticsearch 是面向文档的,这意味着它存储了整个对象或文档。 它不仅存储它们,而且索引每个文档的内容以使其可搜索。 在 Elasticsearch 中,你可以对文档进行索引,搜索,排序和过滤。
Elasticsearch 使用 JSON 作为文档的序列化格式。现在让我们开始索引员工文档。在 Elasticsearch 中存储数据的行为称为索引编制。 Elasticsearch 集群可以包含多个索引,而索引又包含一个类型。 这些类型包含多个文档,并且每个文档都有多个字段。
main.py
# Import Elasticsearch package

from elasticsearch import Elasticsearch

# Connect to the elastic cluster

es = Elasticsearch([{'host':'localhost','port':9200}])

print(es)

e1 = {

    "first_name":"nitin",

    "last_name":"panwar",

    "age": 27,

    "about": "Love to play cricket",

    "interests": ['sports','music'],

}

res = es.index(index = 'megacorp', doc_type ='_doc',id=1,body = e1)

print(res)
运行上面的代码,它显示:
<Elasticsearch([{'host': 'localhost', 'port': 9200}])>

{'_index': 'megacorp', '_type': '_doc', '_id': '1', '_version': 1, 'result': 'created', '_shards': {'total': 2, 'successful': 1, 'failed': 0}, '_seq_no': 0, '_primary_term': 1}
才能够上面的代码的 result 字段的结果 created 中,可以看出来一个新的文档已经被生成。
我们可以通过 Kibana 来进行查看
我们在 Console 中打入如下的命令:
GET megacorp/_search
从上面,我们可以看出来已经被导入的文档。
在上面的例子中,我们指定了一个文档的 id 为 1。在实际的使用中,指定 id 会带来导入效率的降低,因为在写入时,需要检查该 id 的文档是否已经存在,如果不存在就创建新的文档。如果已经存在就更新原有的文档。
我们可以使用如下的例子来创建一个不指定 id 的文档:
main.py
# Import Elasticsearch package

from elasticsearch import Elasticsearch

# Connect to the elastic cluster

es = Elasticsearch([{'host':'localhost','port':9200}])

print(es)

e1 = {

    "first_name":"nitin",

    "last_name":"panwar",

    "age": 27,

    "about": "Love to play cricket",

    "interests": ['sports','music'],

}

res = es.index(index = 'megacorp', doc_type ='_doc', body = e1)

print(res)
运行上面的代码:
<Elasticsearch([{'host': 'localhost', 'port': 9200}])>

{'_index': 'megacorp', '_type': '_doc', '_id': 'Fg-VjXYBP6HMK-G4GNQV', '_version': 1, 'result': 'created', '_shards': {'total': 2, 'successful': 1, 'failed': 0}, '_seq_no': 1, '_primary_term': 1}
上面显示 result 为 created,表明一个新的文档已经生成。同样,我们可以在 Kibana 中使用:
GET megacorp/_search
来查询已经生成文档:
    {

      "took" : 660,

      "timed_out" : false,

      "_shards" : {

        "total" : 1,

        "successful" : 1,

        "skipped" : 0,

        "failed" : 0

      },

      "hits" : {

        "total" : {

          "value" : 2,

          "relation" : "eq"

        },

        "max_score" : 1.0,

        "hits" : [

          {

            "_index" : "megacorp",

            "_type" : "_doc",

            "_id" : "1",

            "_score" : 1.0,

            "_source" : {

              "first_name" : "nitin",

              "last_name" : "panwar",

              "age" : 27,

              "about" : "Love to play cricket",

              "interests" : [

                "sports",

                "music"

              ]

            }

          },

          {

            "_index" : "megacorp",

            "_type" : "_doc",

            "_id" : "Fg-VjXYBP6HMK-G4GNQV",

            "_score" : 1.0,

            "_source" : {

              "first_name" : "nitin",

              "last_name" : "panwar",

              "age" : 27,

              "about" : "Love to play cricket",

              "interests" : [

                "sports",

                "music"

              ]

            }

          }

        ]

      }

    }
在上面所示的第二个文档的 _id 是一个随机分配的文档。
从上面的创建索引的过程来看,它非常之简单! 无需先执行任何管理任务,例如创建索引或指定每个字段包含的数据类型。 我们可以直接为文档建立索引。
接下来,我们插入更多的文档:
main.py
# Import Elasticsearch package

from elasticsearch import Elasticsearch

# Connect to the elastic cluster

es = Elasticsearch([{'host':'localhost','port':9200}])

print(es)

e1 = {

    "first_name":"nitin",

    "last_name":"panwar",

    "age": 27,

    "about": "Love to play cricket",

    "interests": ['sports','music'],

}

res = es.index(index = 'megacorp', doc_type ='_doc', id = 1, body = e1)

print(res['result'])

e2 = {

    "first_name" :  "Jane",

    "last_name" :   "Smith",

    "age" :         32,

    "about" :       "I like to collect rock albums",

    "interests":  [ "music" ]

}

e3 = {

    "first_name" :  "Douglas",

    "last_name" :   "Fir",

    "age" :         35,

    "about":        "I like to build cabinets",

    "interests":  [ "forestry" ]

}

res = es.index(index = 'megacorp', doc_type = '_doc', id = 2,body = e2)

print(res['result'])

res = es.index(index = 'megacorp', doc_type = '_doc', id = 3, body = e3)

print(res['result'])
上面的运行结果为:
<Elasticsearch([{'host': 'localhost', 'port': 9200}])>

updated

created

created
从上面可以看出来:第一个文档插入时,由于 id 为 1 的文档已经是存在,再次进行插入时,返回的结果为 updated,而对于下面的两个文档来说,它们都是第一次被创建所以是 created。
获取一个文档
在 Elasticsearch 中这很容易。 我们只需执行一个 HTTP GET 请求并指定文档的地址-索引,类型和 ID。 使用这三段信息,我们可以返回原始 JSON 文档。
main.py
# Import Elasticsearch package

from elasticsearch import Elasticsearch

# Connect to the elastic cluster

es = Elasticsearch([{'host':'localhost','port':9200}])

print(es)

e1 = {

    "first_name":"nitin",

    "last_name":"panwar",

    "age": 27,

    "about": "Love to play cricket",

    "interests": ['sports','music'],

}

res = es.index(index = 'megacorp', doc_type ='_doc', id = 1, body = e1)

print(res['result'])

e2 = {

    "first_name" :  "Jane",

    "last_name" :   "Smith",

    "age" :         32,

    "about" :       "I like to collect rock albums",

    "interests":  [ "music" ]

}

e3 = {

    "first_name" :  "Douglas",

    "last_name" :   "Fir",

    "age" :         35,

    "about":        "I like to build cabinets",

    "interests":  [ "forestry" ]

}

res = es.index(index = 'megacorp', doc_type = '_doc', id = 2,body = e2)

print(res['result'])

res = es.index(index = 'megacorp', doc_type = '_doc', id = 3, body = e3)

print(res['result'])

res = es.get(index='megacorp', doc_type = '_doc', id = 3)

print(res)
在上面,我们添加了获取 id 为 3 的文档:
    res = es.get(index='megacorp', doc_type = '_doc', id = 3)

    print(res)
运行上面的代码:
<Elasticsearch([{'host': 'localhost', 'port': 9200}])>

updated

updated

updated

{'_index': 'megacorp', '_type': '_doc', '_id': '3', '_version': 5, '_seq_no': 15, '_primary_term': 1, 'found': True, '_source': {'first_name': 'Douglas', 'last_name': 'Fir', 'age': 35, 'about': 'I like to build cabinets', 'interests': ['forestry']}}
你在 _source 字段中可以发现之前输入文档的内容。
删除一个文档
我们可以使用如下的代码来删除一个文档:
res = es.delete(index = 'megacorp',doc_type='_doc', id = 3)

print(res['result'])
在上面,我们删除 id 为 3 的文档。
main.py
# Import Elasticsearch package

from elasticsearch import Elasticsearch

# Connect to the elastic cluster

es = Elasticsearch([{'host':'localhost','port':9200}])

print(es)

e1 = {

    "first_name":"nitin",

    "last_name":"panwar",

    "age": 27,

    "about": "Love to play cricket",

    "interests": ['sports','music'],

}

res = es.index(index = 'megacorp', doc_type ='_doc', id = 1, body = e1)

print(res['result'])

e2 = {

    "first_name" :  "Jane",

    "last_name" :   "Smith",

    "age" :         32,

    "about" :       "I like to collect rock albums",

    "interests":  [ "music" ]

}

e3 = {

    "first_name" :  "Douglas",

    "last_name" :   "Fir",

    "age" :         35,

    "about":        "I like to build cabinets",

    "interests":  [ "forestry" ]

}

res = es.index(index = 'megacorp', doc_type = '_doc', id = 2,body = e2)

print(res['result'])

res = es.index(index = 'megacorp', doc_type = '_doc', id = 3, body = e3)

print(res['result'])

res = es.get(index='megacorp', doc_type = '_doc', id = 3)

print(res)

# Delete a doc with id = 3

res = es.delete(index = 'megacorp',doc_type='_doc', id = 3)

print(res['result'])
运行上面的代码:
<Elasticsearch([{'host': 'localhost', 'port': 9200}])>

updated

updated

updated

{'_index': 'megacorp', '_type': '_doc', '_id': '3', '_version': 6, '_seq_no': 18, '_primary_term': 1, 'found': True, '_source': {'first_name': 'Douglas', 'last_name': 'Fir', 'age': 35, 'about': 'I like to build cabinets', 'interests': ['forestry']}}

deleted
从上面我们可以看出来 id 为 3 的文档已经被删除了。
搜索文档
首先让我们搜索之前所有的文档:
main.py
# Import Elasticsearch package

from elasticsearch import Elasticsearch

# Connect to the elastic cluster

es = Elasticsearch([{'host':'localhost','port':9200}])

print(es)

e1 = {

    "first_name":"nitin",

    "last_name":"panwar",

    "age": 27,

    "about": "Love to play cricket",

    "interests": ['sports','music'],

}

res = es.index(index = 'megacorp', doc_type ='_doc', id = 1, body = e1)

print(res['result'])

e2 = {

    "first_name" :  "Jane",

    "last_name" :   "Smith",

    "age" :         32,

    "about" :       "I like to collect rock albums",

    "interests":  [ "music" ]

}

e3 = {

    "first_name" :  "Douglas",

    "last_name" :   "Fir",

    "age" :         35,

    "about":        "I like to build cabinets",

    "interests":  [ "forestry" ]

}

res = es.index(index = 'megacorp', doc_type = '_doc', id = 2,body = e2)

print(res['result'])

res = es.index(index = 'megacorp', doc_type = '_doc', id = 3, body = e3)

print(res['result'])

res = es.get(index='megacorp', doc_type = '_doc', id = 3)

print(res)

# Delete a doc with id = 3

res = es.delete(index = 'megacorp',doc_type='_doc', id = 3)

print(res['result'])

# Search all of the available documents

res = es.search(index = 'megacorp', body = {'query': {"match_all": {}} } )

print(res['hits'])
在上面最后的部分:
res = es.search(index = 'megacorp', body = {'query': {"match_all": {}} } )

print(res['hits'])
它搜索所有的文档。在这里,我们使用 match_all 搜索。运行上面的代码显示:
<Elasticsearch([{'host': 'localhost', 'port': 9200}])>

updated

updated

created

{'_index': 'megacorp', '_type': '_doc', '_id': '3', '_version': 1, '_seq_no': 26, '_primary_term': 1, 'found': True, '_source': {'first_name': 'Douglas', 'last_name': 'Fir', 'age': 35, 'about': 'I like to build cabinets', 'interests': ['forestry']}}

deleted

{'total': {'value': 4, 'relation': 'eq'}, 'max_score': 1.0, 'hits': [{'_index': 'megacorp', '_type': '_doc', '_id': 'Fg-VjXYBP6HMK-G4GNQV', '_score': 1.0, '_source': {'first_name': 'nitin', 'last_name': 'panwar', 'age': 27, 'about': 'Love to play cricket', 'interests': ['sports', 'music']}}, {'_index': 'megacorp', '_type': '_doc', '_id': 'Fw-bjXYBP6HMK-G4GNTa', '_score': 1.0, '_source': {'first_name': 'nitin', 'last_name': 'panwar', 'age': 27, 'about': 'Love to play cricket', 'interests': ['sports', 'music']}}, {'_index': 'megacorp', '_type': '_doc', '_id': '1', '_score': 1.0, '_source': {'first_name': 'nitin', 'last_name': 'panwar', 'age': 27, 'about': 'Love to play cricket', 'interests': ['sports', 'music']}}, {'_index': 'megacorp', '_type': '_doc', '_id': '2', '_score': 1.0, '_source': {'first_name': 'Jane', 'last_name': 'Smith', 'age': 32, 'about': 'I like to collect rock albums', 'interests': ['music']}}]}
从上面的 value 为 4 来看,总共有4个文档。它们在 hits 字段中被展示。
现在,让我们搜索姓氏为 nitin 的用户名。
match 操作符
main.py
# Import Elasticsearch package

from elasticsearch import Elasticsearch

# Connect to the elastic cluster

es = Elasticsearch([{'host':'localhost','port':9200}])

print(es)

e1 = {

    "first_name":"nitin",

    "last_name":"panwar",

    "age": 27,

    "about": "Love to play cricket",

    "interests": ['sports','music'],

}

res = es.index(index = 'megacorp', doc_type ='_doc', id = 1, body = e1)

print(res['result'])

e2 = {

    "first_name" :  "Jane",

    "last_name" :   "Smith",

    "age" :         32,

    "about" :       "I like to collect rock albums",

    "interests":  [ "music" ]

}

e3 = {

    "first_name" :  "Douglas",

    "last_name" :   "Fir",

    "age" :         35,

    "about":        "I like to build cabinets",

    "interests":  [ "forestry" ]

}

res = es.index(index = 'megacorp', doc_type = '_doc', id = 2,body = e2)

print(res['result'])

res = es.index(index = 'megacorp', doc_type = '_doc', id = 3, body = e3)

print(res['result'])

res = es.get(index='megacorp', doc_type = '_doc', id = 3)

print(res)

# Delete a doc with id = 3

res = es.delete(index = 'megacorp',doc_type='_doc', id = 3)

print(res['result'])

# Search all of the available documents

res = es.search(index = 'megacorp', body = {'query': {"match_all": {}} } )

print(res['hits'])

# Search for a document with first_name = nitin

res= es.search(index = 'megacorp', body = {'query':{'match':{'first_name':'nitin'}}})

print(res['hits']['hits'])
我们使用了如下的代码来进行匹配:
# Search for a document with first_name = nitin

res= es.search(index = 'megacorp', body = {'query':{'match':{'first_name':'nitin'}}})

print(res['hits']['hits'])
运行上面的代码:
<Elasticsearch([{'host': 'localhost', 'port': 9200}])>

updated

updated

created

{'_index': 'megacorp', '_type': '_doc', '_id': '3', '_version': 1, '_seq_no': 30, '_primary_term': 1, 'found': True, '_source': {'first_name': 'Douglas', 'last_name': 'Fir', 'age': 35, 'about': 'I like to build cabinets', 'interests': ['forestry']}}

deleted

{'total': {'value': 4, 'relation': 'eq'}, 'max_score': 1.0, 'hits': [{'_index': 'megacorp', '_type': '_doc', '_id': 'Fg-VjXYBP6HMK-G4GNQV', '_score': 1.0, '_source': {'first_name': 'nitin', 'last_name': 'panwar', 'age': 27, 'about': 'Love to play cricket', 'interests': ['sports', 'music']}}, {'_index': 'megacorp', '_type': '_doc', '_id': 'Fw-bjXYBP6HMK-G4GNTa', '_score': 1.0, '_source': {'first_name': 'nitin', 'last_name': 'panwar', 'age': 27, 'about': 'Love to play cricket', 'interests': ['sports', 'music']}}, {'_index': 'megacorp', '_type': '_doc', '_id': '1', '_score': 1.0, '_source': {'first_name': 'nitin', 'last_name': 'panwar', 'age': 27, 'about': 'Love to play cricket', 'interests': ['sports', 'music']}}, {'_index': 'megacorp', '_type': '_doc', '_id': '2', '_score': 1.0, '_source': {'first_name': 'Jane', 'last_name': 'Smith', 'age': 32, 'about': 'I like to collect rock albums', 'interests': ['music']}}]}

[{'_index': 'megacorp', '_type': '_doc', '_id': 'Fg-VjXYBP6HMK-G4GNQV', '_score': 0.99542797, '_source': {'first_name': 'nitin', 'last_name': 'panwar', 'age': 27, 'about': 'Love to play cricket', 'interests': ['sports', 'music']}}, {'_index': 'megacorp', '_type': '_doc', '_id': 'Fw-bjXYBP6HMK-G4GNTa', '_score': 0.99542797, '_source': {'first_name': 'nitin', 'last_name': 'panwar', 'age': 27, 'about': 'Love to play cricket', 'interests': ['sports', 'music']}}, {'_index': 'megacorp', '_type': '_doc', '_id': '1', '_score': 0.99542797, '_source': {'first_name': 'nitin', 'last_name': 'panwar', 'age': 27, 'about': 'Love to play cricket', 'interests': ['sports', 'music']}}]
在上面输出结果的最后部分显示了搜索的结果。
bool 操作符
bool 使用字典,其中至少包含 must,should 和 must_not 中的一个,每个字典都包含匹配列表或其他进一步的搜索运算符。
res= es.search(index = 'megacorp', body = {

        'query':{

            'bool':{

                'must':[{

                        'match':{

                            'first_name':'nitin'

                        }

                    }]

            }

        }

    })

print(res['hits']['hits'])
main.py
# Import Elasticsearch package

from elasticsearch import Elasticsearch

# Connect to the elastic cluster

es = Elasticsearch([{'host':'localhost','port':9200}])

#print(es)

e1 = {

    "first_name":"nitin",

    "last_name":"panwar",

    "age": 27,

    "about": "Love to play cricket",

    "interests": ['sports','music'],

}

res = es.index(index = 'megacorp', doc_type ='_doc', id = 1, body = e1)

#print(res['result'])

e2 = {

    "first_name" :  "Jane",

    "last_name" :   "Smith",

    "age" :         32,

    "about" :       "I like to collect rock albums",

    "interests":  [ "music" ]

}

e3 = {

    "first_name" :  "Douglas",

    "last_name" :   "Fir",

    "age" :         35,

    "about":        "I like to build cabinets",

    "interests":  [ "forestry" ]

}

res = es.index(index = 'megacorp', doc_type = '_doc', id = 2,body = e2)

#print(res['result'])

res = es.index(index = 'megacorp', doc_type = '_doc', id = 3, body = e3)

#print(res['result'])

res = es.get(index='megacorp', doc_type = '_doc', id = 3)

#print(res)

# Delete a doc with id = 3

res = es.delete(index = 'megacorp',doc_type='_doc', id = 3)

#print(res['result'])

# Search all of the available documents

res = es.search(index = 'megacorp', body = {'query': {"match_all": {}} } )

#print(res['hits'])

# Search for a document with first_name = nitin

res= es.search(index = 'megacorp', body = {'query':{'match':{'first_name':'nitin'}}})

#print(res['hits']['hits'])

res= es.search(index = 'megacorp', body = {

        'query':{

            'bool':{

                'must':[{

                        'match':{

                            'first_name':'nitin'

                        }

                    }]

            }

        }

    })

print(res['hits']['hits'])
运行上面的代码:
[{'_index': 'megacorp', '_type': '_doc', '_id': 'Fg-VjXYBP6HMK-G4GNQV', '_score': 1.0159205, '_source': {'first_name': 'nitin', 'last_name': 'panwar', 'age': 27, 'about': 'Love to play cricket', 'interests': ['sports', 'music']}}, {'_index': 'megacorp', '_type': '_doc', '_id': 'Fw-bjXYBP6HMK-G4GNTa', '_score': 1.0159205, '_source': {'first_name': 'nitin', 'last_name': 'panwar', 'age': 27, 'about': 'Love to play cricket', 'interests': ['sports', 'music']}}, {'_index': 'megacorp', '_type': '_doc', '_id': '1', '_score': 1.0159205, '_source': {'first_name': 'nitin', 'last_name': 'panwar', 'age': 27, 'about': 'Love to play cricket', 'interests': ['sports', 'music']}}]
filter 操作符
让我们的搜索更加复杂。 我们仍然希望找到所有姓氏为 nitin 的员工,但我们只希望年龄在 30 岁以上的员工。我们的查询将略有变化以适应过滤器,这使我们可以高效地执行结构化搜索:
res= es.search(index = 'megacorp', body = {

        'query':{

            'bool':{

                'must':{

                    'match':{

                        'first_name':'nitin'

                    }

                },

                "filter":{

                    "range":{

                        "age":{

                            "gt":25

                        }

                    }

                }

            }

        }

    })

print(res['hits']['hits'])
我们添加上面的代码到 main.py 中,并运行:
[{'_index': 'megacorp', '_type': '_doc', '_id': 'Fg-VjXYBP6HMK-G4GNQV', '_score': 1.0296195, '_source': {'first_name': 'nitin', 'last_name': 'panwar', 'age': 27, 'about': 'Love to play cricket', 'interests': ['sports', 'music']}}, {'_index': 'megacorp', '_type': '_doc', '_id': 'Fw-bjXYBP6HMK-G4GNTa', '_score': 1.0296195, '_source': {'first_name': 'nitin', 'last_name': 'panwar', 'age': 27, 'about': 'Love to play cricket', 'interests': ['sports', 'music']}}, {'_index': 'megacorp', '_type': '_doc', '_id': '1', '_score': 1.0296195, '_source': {'first_name': 'nitin', 'last_name': 'panwar', 'age': 27, 'about': 'Love to play cricket', 'interests': ['sports', 'music']}}]
从上面我们可以看出来只有年龄大于25的,并且 first_name 为 nitin 的文档被搜索到。如果我们把年龄设置为 27岁,那么我们将不会搜索到任何的文档:
res= es.search(index = 'megacorp', body = {

        'query':{

            'bool':{

                'must':{

                    'match':{

                        'first_name':'nitin'

                    }

                },

                "filter":{

                    "range":{

                        "age":{

                            "gt":27

                        }

                    }

                }

            }

        }

    })

print(res['hits']['hits'])
上面的搜索将会生成:
[]
全文搜索
到目前为止,搜索非常简单。让我们尝试更高级的全文本搜索。 在开始下一种搜索之前,让我再插入一个文档。
main.py
# Import Elasticsearch package

from elasticsearch import Elasticsearch

# Connect to the elastic cluster

es = Elasticsearch([{'host':'localhost','port':9200}])

#print(es)

e1 = {

    "first_name":"nitin",

    "last_name":"panwar",

    "age": 27,

    "about": "Love to play cricket",

    "interests": ['sports','music'],

}

res = es.index(index = 'megacorp', doc_type ='_doc', id = 1, body = e1)

#print(res['result'])

e2 = {

    "first_name" :  "Jane",

    "last_name" :   "Smith",

    "age" :         32,

    "about" :       "I like to collect rock albums",

    "interests":  [ "music" ]

}

e3 = {

    "first_name" :  "Douglas",

    "last_name" :   "Fir",

    "age" :         35,

    "about":        "I like to build cabinets",

    "interests":  [ "forestry" ]

}

res = es.index(index = 'megacorp', doc_type = '_doc', id = 2,body = e2)

#print(res['result'])

res = es.index(index = 'megacorp', doc_type = '_doc', id = 3, body = e3)

#print(res['result'])

res = es.get(index='megacorp', doc_type = '_doc', id = 3)

#print(res)

# Delete a doc with id = 3

res = es.delete(index = 'megacorp',doc_type='_doc', id = 3)

#print(res['result'])

# Search all of the available documents

res = es.search(index = 'megacorp', body = {'query': {"match_all": {}} } )

#print(res['hits'])

# Search for a document with first_name = nitin

res= es.search(index = 'megacorp', body = {'query':{'match':{'first_name':'nitin'}}})

#print(res['hits']['hits'])

res= es.search(index = 'megacorp', body = {

        'query':{

            'bool':{

                'must':[{

                        'match':{

                            'first_name':'nitin'

                        }

                    }]

            }

        }

    })

# print(res['hits']['hits'])

res= es.search(index = 'megacorp', body = {

        'query':{

            'bool':{

                'must':{

                    'match':{

                        'first_name':'nitin'

                    }

                },

                "filter":{

                    "range":{

                        "age":{

                            "gt":27

                        }

                    }

                }

            }

        }

    })

# print(res['hits']['hits'])

e4 = {

    "first_name":"asd",

    "last_name":"pafdfd",

    "age": 27,

    "about": "Love to play football",

    "interests": ['sports','music'],

}

res = es.index(index = 'megacorp', doc_type = '_doc', id = 4, body = e4)

print(res['result'])

res = es.search( index = 'megacorp', body = {

        'query':{

            'match':{

                "about":"play cricket"

            }

        }

    })

for hit in res['hits']['hits']:

    print(hit['_source']['about'])

    print(hit['_score'])

    print('**********************')
在上面,我们添加了一个 id 为 4 的文档,进行全文搜索。在上面的示例中,它返回4个文档,但是得分不同。它的运行结果为:
updated

Love to play cricket

1.9652195

**********************

Love to play cricket

1.9652195

**********************

Love to play cricket

1.9652195

**********************

Love to play football

0.74101156

**********************
Phrase search
在一个字段中查找单个单词很好,但是有时你想要匹配短语中单词的确切顺序。
res= es.search(index = 'megacorp', body = {

        'query':{

            'match_phrase':{

                "about":"play cricket"

            }

        }

    })

for hit in res['hits']['hits']:

    print(hit['_source']['about'])

    print(hit['_score'])

    print('**********************')
上面代码的显示结果为:
Love to play cricket

2.0281231

**********************

Love to play cricket

2.0281231

**********************

Love to play cricket

2.0281231

**********************
聚合
Elasticsearch 具有称为聚合的功能,该功能使你可以对数据进行复杂的分析。 它与 SQ L中的 “Group By” 相似,但功能更强大。
res= es.search(index = 'megacorp', body = {

        "aggs": {

            "all_interests": {

            "terms": { "field": "interests.keyword" }

            }

        }

    })

print(res)
上面的代码执行的结果是:
{'took': 1, 'timed_out': False, '_shards': {'total': 1, 'successful': 1, 'skipped': 0, 'failed': 0}, 'hits': {'total': {'value': 5, 'relation': 'eq'}, 'max_score': 1.0, 'hits': [{'_index': 'megacorp', '_type': '_doc', '_id': 'Fg-VjXYBP6HMK-G4GNQV', '_score': 1.0, '_source': {'first_name': 'nitin', 'last_name': 'panwar', 'age': 27, 'about': 'Love to play cricket', 'interests': ['sports', 'music']}}, {'_index': 'megacorp', '_type': '_doc', '_id': 'Fw-bjXYBP6HMK-G4GNTa', '_score': 1.0, '_source': {'first_name': 'nitin', 'last_name': 'panwar', 'age': 27, 'about': 'Love to play cricket', 'interests': ['sports', 'music']}}, {'_index': 'megacorp', '_type': '_doc', '_id': '1', '_score': 1.0, '_source': {'first_name': 'nitin', 'last_name': 'panwar', 'age': 27, 'about': 'Love to play cricket', 'interests': ['sports', 'music']}}, {'_index': 'megacorp', '_type': '_doc', '_id': '2', '_score': 1.0, '_source': {'first_name': 'Jane', 'last_name': 'Smith', 'age': 32, 'about': 'I like to collect rock albums', 'interests': ['music']}}, {'_index': 'megacorp', '_type': '_doc', '_id': '4', '_score': 1.0, '_source': {'first_name': 'asd', 'last_name': 'pafdfd', 'age': 27, 'about': 'Love to play football', 'interests': ['sports', 'music']}}]}, 'aggregations': {'all_interests': {'doc_count_error_upper_bound': 0, 'sum_other_doc_count': 0, 'buckets': [{'key': 'music', 'doc_count': 5}, {'key': 'sports', 'doc_count': 4}]}}}
Elasticsearch 开发入门 - Python的更多相关文章
- 【python】 web开发入门
进入Web开发 现在你完成了Python忍者训练,准备深入Ptyhon的Web开发,但现在的问题是有很多的框架,从中选择最好的框架非常困难,但从初学者的角度出发,Flask基本Web框架将非常适合We ...
- 程序员带你十天快速入门Python,玩转电脑软件开发(四)
本系列文章立志于从一个已经习得一门编程语言的基础之上,全面介绍Python的相关开发过程和相关经验总结.本篇文章主要是基于上一篇的程序员带你十天快速入门Python,玩转电脑软件开发(三)的基础之上, ...
- 程序员带你十天快速入门Python,玩转电脑软件开发(三)
声明:本次教程主要适用于已经习得一门编程语言的程序员.想要学习第二门语言.有梦想,立志做全栈攻城狮的你 . 如果是小白,也可以学习本教程.不过可能有些困难.如有问题在文章下方进行讨论.或者添加QQ群5 ...
- 程序员带你十天快速入门Python,玩转电脑软件开发(二)
关注今日头条-做全栈攻城狮,学代码也要读书,爱全栈,更爱生活.提供程序员技术及生活指导干货. 如果你真想学习,请评论学过的每篇文章,记录学习的痕迹. 请把所有教程文章中所提及的代码,最少敲写三遍,达到 ...
- 程序员带你十天快速入门Python,玩转电脑软件开发(一)
关注今日头条-做全栈攻城狮,学代码也要读书,爱全栈,更爱生活.提供程序员技术及生活指导干货. 如果你真想学习,请评论学过的每篇文章,记录学习的痕迹. 请把所有教程文章中所提及的代码,最少敲写三遍,达到 ...
- Python云端系统开发入门——框架基础
Django框架基础 这是我学习北京理工大学嵩天老师的<Python云端系统开发入门>课程的笔记,在此我特别感谢老师的精彩讲解和对我的引导. 1.Django简介与安装 Django是一个 ...
- 《python开发技术详解》|百度网盘免费下载|Python开发入门篇
<python开发技术详解>|百度网盘免费下载|Python开发入门篇 提取码:2sby 内容简介 Python是目前最流行的动态脚本语言之一.本书共27章,由浅入深.全面系统地介绍了利 ...
- HTML5手机APP开发入门(1)
HTML5手机APP开发入门(1) 开发框架 Ionicframework V2 + Angular 2 具体内容可以参考一下网站 http://ionicframework.net/ http:// ...
- 【转】Nginx模块开发入门
转自: http://kb.cnblogs.com/page/98352/ 结论:对Nginx模块开发入门做了一个helloworld的示例,简单易懂.也有一定的深度.值得一看. Nginx模块开发入 ...
随机推荐
- Mybatis-Generator 自定义注释
继承DefaultCommentGenerator 或者CommentGenerator package com.zhianchen.mysqlremark.toword.config;import ...
- 西文字符与中文GBK编码的区别
一般来讲二者读取的时候西文字符的数值是正,而中文字符的数值是负的,此时读取的是中文字符的前一半,需要再读取一个char类型的数据,在大多数运行环境下这个规则都是用. ps:转自算法竞赛的笔记,要注意在 ...
- 不同云服务器下,ubuntu下开k3s集群
首先先感谢老哥的文章:h构建多云环境下的K3S集群,但是我尝试在centos 8.2上面前面一直执行报错 并且安装glibc 2.17时还会报错make版本太低,所以直接放弃centos,投入ubun ...
- dockerfile操作
简介 Dockerfile 是一个用来构建镜像的文本文件,文本内容包含了一条条构建镜像所需的指令和说明. 上下文路径 如下是一个简单的基于dockerfile创建镜像的命令,我们注意到启动处理镜像名和 ...
- 学python,怎么能不学习scrapy呢!
摘要:本文讲述如何编写scrapy爬虫. 本文分享自华为云社区<学python,怎么能不学习scrapy呢,这篇博客带你学会它>,作者: 梦想橡皮擦 . 在正式编写爬虫案例前,先对 scr ...
- 个人开源项目如何上传maven中央仓库
最近在写一些开源项目,想把自己写的东西放到maven中央仓库,提供给更多的人使用.所以写这一篇文章,记录一下自研开源项目jar包上传同步maven中央仓库成功的整个过程,这其中还是有不少的坑的. 目录 ...
- Unity3D学习笔记11——后处理
目录 1. 概述 2. 详论 2.1. 实现 2.2. 解析 1. 概述 一般来说,图形渲染引擎都会把帧缓冲(Framebuffer)技术封装成两个接口,其中之一就是后处理(Post-process) ...
- Redis 19 整合SpringBoot
参考源 https://www.bilibili.com/video/BV1S54y1R7SB?spm_id_from=333.999.0.0 版本 本文章基于 Redis 6.2.6 概述 Spri ...
- ahooks 是怎么解决用户多次提交问题?
本文是深入浅出 ahooks 源码系列文章的第四篇,该系列已整理成文档-地址.觉得还不错,给个 star 支持一下哈,Thanks. 本文来探索一下 ahooks 的 useLockFn.并由此讨论一 ...
- 清晰梳理最全日志框架关系与日志配置-SpringBoot 2.7.2 实战基础
优雅哥 SpringBoot 2.7.2 实战基础 - 07 - 日志配置 Java 中日志相关的 jar 包非常多,log4j.log4j2.commons-logging.logback.slf4 ...