Glide4.0 centerCrop属性和圆角 冲突
首先致谢:https://blog.csdn.net/flyinbed_/article/details/75506062
咱们不是代码的生产者,只是代码的搬运工。
最近有个工作中有个需求就是展示的图片必须圆角、正方形,当时一想这太尼玛简单了,无非就是设置一个图片参数的大小,然后在设置一个centerCrop的属性,在自定义一个类去继承BitmapTransformation重画一下。
结果写的时候发现,在glide4.0上面 centerCrop和圆角图片有冲突只能显示一个,结果就度娘问了一边,大部分都是下面这行代码,发现这个在glide4.0上面直接报错 无法使用,最后没办法了只能自己撸一遍源码看看了。
transform(new CenterCrop(getActivity()),new GlideRoundImage(getActivity()))
点开centerCrop的源码
/**

 * Applies {@link CenterCrop} to all default types and

 * throws an exception if asked to transform an unknown type.

 *

 * <p>this will override previous calls to {@link #dontTransform()} ()}.

 *

 * @see #transform(Class, Transformation)

 * @see #optionalCenterCrop()

 */

public RequestOptions centerCrop() {

  return transform(DownsampleStrategy.CENTER_OUTSIDE, new CenterCrop());

}
原来这犊子也是调用的 transform的方法,在点开 new Centercrop()这个方法看看里面的实现
/**

 * Scale the image so that either the width of the image matches the given width and the height of

 * the image is greater than the given height or vice versa, and then crop the larger dimension to

 * match the given dimension.

 *

 * Does not maintain the image's aspect ratio

 */

public class CenterCrop extends BitmapTransformation {

  private static final String ID = "com.bumptech.glide.load.resource.bitmap.CenterCrop";

  private static final byte[] ID_BYTES = ID.getBytes(CHARSET);

  public CenterCrop() {

    // Intentionally empty.

  }

  @Deprecated

  public CenterCrop(@SuppressWarnings("unused") Context context) {

    this();

  }

  @Deprecated

  public CenterCrop(@SuppressWarnings("unused") BitmapPool bitmapPool) {

    this();

  }

  // Bitmap doesn't implement equals, so == and .equals are equivalent here.

  @SuppressWarnings("PMD.CompareObjectsWithEquals")

  @Override

  protected Bitmap transform(

      @NonNull BitmapPool pool, @NonNull Bitmap toTransform, int outWidth, int outHeight) {

    return TransformationUtils.centerCrop(pool, toTransform, outWidth, outHeight);

  }

  @Override

  public boolean equals(Object o) {

    return o instanceof CenterCrop;

  }

  @Override

  public int hashCode() {

    return ID.hashCode();

  }

  @Override

  public void updateDiskCacheKey(MessageDigest messageDigest) {

    messageDigest.update(ID_BYTES);

  }

}
不出所料 这里面也是继承了BitmapTransformation这个类然后重画了一边,后面我们自己有调用了transform()这个方法等于把系统的Centercrop这个方法给覆盖了,所以说这两个属性谁在后面就用哪种效果,但是现在的问题是我想两个都要用咋整,那么问题来了,这下只能在自己自定义的BitmapTransformation将两个效果一起画出来了;
先是我的布局文件:很简单就一个线性布局+3个ImageView
<?xml version="1.0" encoding="utf-8"?>

<LinearLayout xmlns:android="http://schemas.android.com/apk/res/android"

    xmlns:app="http://schemas.android.com/apk/res-auto"

    xmlns:tools="http://schemas.android.com/tools"

    android:layout_width="match_parent"

    android:layout_height="match_parent"

    android:orientation="vertical"

    tools:context="com.flyinbed.myapplication.MainActivity">

    <ImageView

        android:id="@+id/icon1"

        android:layout_width="150dp"

        android:layout_height="150dp" />

    <ImageView

        android:id="@+id/icon2"

        android:layout_marginTop="10dp"

        android:layout_width="150dp"

        android:layout_height="150dp"  />

    <ImageView

        android:id="@+id/icon3"

        android:layout_marginTop="10dp"

        android:layout_width="150dp"

        android:layout_height="150dp"  />

</LinearLayout>
Activity代码:3个Imageview加载3张本地图片
public class MainActivity extends AppCompatActivity {

    private ImageView icon1,icon2,icon3;

    @Override

    protected void onCreate(Bundle savedInstanceState) {

        super.onCreate(savedInstanceState);

        setContentView(R.layout.activity_main);

        icon1 = (ImageView) findViewById(R.id.icon1);

        icon2 = (ImageView) findViewById(R.id.icon2);

        icon3 = (ImageView) findViewById(R.id.icon3);

        Glide.with(this).load(R.drawable.item1).into(icon1);

        Glide.with(this).load(R.drawable.image2).into(icon2);

        Glide.with(this).load(R.drawable.image3).into(icon3);

    }

}
效果:
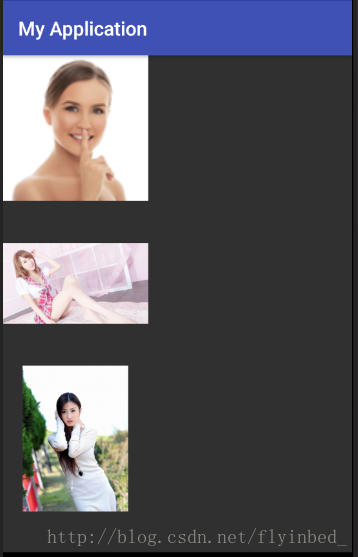
先设置一下Centercrop的属性:
题外话:glide4.0想设置图片的属性现在都是通过RequestOptions()这个类来实现的,然后在glide加载的时候通过
.apply()把那个类给塞进去就好了;
@Override

    protected void onCreate(Bundle savedInstanceState) {

        super.onCreate(savedInstanceState);

        setContentView(R.layout.activity_main);

        icon1 = (ImageView) findViewById(R.id.icon1);

        icon2 = (ImageView) findViewById(R.id.icon2);

        icon3 = (ImageView) findViewById(R.id.icon3);

        RequestOptions myOptions = new RequestOptions()

                .centerCrop();

        Glide.with(this)

                .load(R.drawable.item1)

                .apply(myOptions)

                .into(icon1);

        Glide.with(this)

                .load(R.drawable.image2)

                .apply(myOptions)

                .into(icon2);

        Glide.with(this)

                .load(R.drawable.image3)

                .apply(myOptions)

                .into(icon3);

    }

现在设置transform圆角属性
protected void onCreate(Bundle savedInstanceState) {

        super.onCreate(savedInstanceState);

        setContentView(R.layout.activity_main);

        icon1 = (ImageView) findViewById(R.id.icon1);

        icon2 = (ImageView) findViewById(R.id.icon2);

        icon3 = (ImageView) findViewById(R.id.icon3);

        RequestOptions myOptions = new RequestOptions()

                .centerCrop()

                .transform(new GlideRoundTransform(this,30));

        Glide.with(this)

                .load(R.drawable.item1)

                .apply(myOptions)

                .into(icon1);

        Glide.with(this)

                .load(R.drawable.image2)

                .apply(myOptions)

                .into(icon2);

        Glide.with(this)

                .load(R.drawable.image3)

                .apply(myOptions)

                .into(icon3);

    }
很明显把Centercrop的属性给覆盖了;
下面是我自定义类GlideRoundTransform()的代码:
public class GlideRoundTransform extends BitmapTransformation {

    private static float radius = 0f;

    public GlideRoundTransform(Context context) {

        this(context, 4);

    }

    public GlideRoundTransform(Context context, int dp) {

        super(context);

        this.radius = Resources.getSystem().getDisplayMetrics().density * dp;

    }

    @Override

    protected Bitmap transform(BitmapPool pool, Bitmap toTransform, int outWidth, int outHeight) {

        return roundCrop(pool, toTransform);

    }

    private static Bitmap roundCrop(BitmapPool pool, Bitmap source) {

        if (source == null) return null;

        Bitmap result = pool.get(source.getWidth(), source.getHeight(), Bitmap.Config.ARGB_8888);

        if (result == null) {

            result = Bitmap.createBitmap(source.getWidth(), source.getHeight(), Bitmap.Config.ARGB_8888);

        }

        Canvas canvas = new Canvas(result);

        Paint paint = new Paint();

        paint.setShader(new BitmapShader(source, BitmapShader.TileMode.CLAMP, BitmapShader.TileMode.CLAMP));

        paint.setAntiAlias(true);

        RectF rectF = new RectF(0f, 0f, source.getWidth(), source.getHeight());

        canvas.drawRoundRect(rectF, radius, radius, paint);

        return result;

    }

    public String getId() {

        return getClass().getName() + Math.round(radius);

    }

    @Override

    public void updateDiskCacheKey(MessageDigest messageDigest) {

    }

}
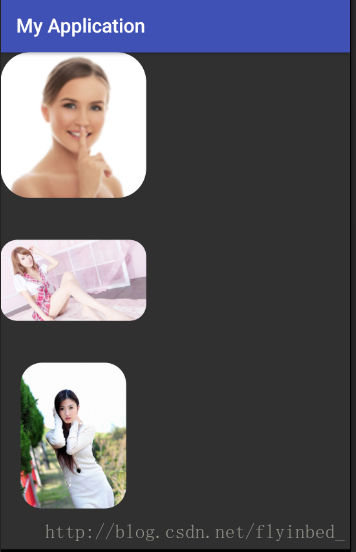
接下来就开始解决这个问题了,在这个自定义类当中,我们要先获取到Centercrop()这个属性后得到到图片,然后在根据这个图片在进行圆角加工然后在返回。
其实屡清楚了思路很简单 也就是一样代码的事,下面是我更改以后的代码:
public class GlideRoundTransform extends BitmapTransformation {

    private static float radius = 0f;

    public GlideRoundTransform(Context context) {

        this(context, 4);

    }

    public GlideRoundTransform(Context context, int dp) {

        super(context);

        this.radius = Resources.getSystem().getDisplayMetrics().density * dp;

    }

    @Override

    protected Bitmap transform(BitmapPool pool, Bitmap toTransform, int outWidth, int outHeight) {

        Bitmap bitmap = TransformationUtils.centerCrop(pool, toTransform, outWidth, outHeight);

        return roundCrop(pool, bitmap);

    }

    private static Bitmap roundCrop(BitmapPool pool, Bitmap source) {

        if (source == null) return null;

        Bitmap result = pool.get(source.getWidth(), source.getHeight(), Bitmap.Config.ARGB_8888);

        if (result == null) {

            result = Bitmap.createBitmap(source.getWidth(), source.getHeight(), Bitmap.Config.ARGB_8888);

        }

        Canvas canvas = new Canvas(result);

        Paint paint = new Paint();

        paint.setShader(new BitmapShader(source, BitmapShader.TileMode.CLAMP, BitmapShader.TileMode.CLAMP));

        paint.setAntiAlias(true);

        RectF rectF = new RectF(0f, 0f, source.getWidth(), source.getHeight());

        canvas.drawRoundRect(rectF, radius, radius, paint);

        return result;

    }

    public String getId() {

        return getClass().getName() + Math.round(radius);

    }

    @Override

    public void updateDiskCacheKey(MessageDigest messageDigest) {

    }

}
在看看效果:

很完美,搞定收工,接下来是Activity的完整代码:
public class MainActivity extends AppCompatActivity {

    private ImageView icon1,icon2,icon3;

    @Override

    protected void onCreate(Bundle savedInstanceState) {

        super.onCreate(savedInstanceState);

        setContentView(R.layout.activity_main);

        icon1 = (ImageView) findViewById(R.id.icon1);

        icon2 = (ImageView) findViewById(R.id.icon2);

        icon3 = (ImageView) findViewById(R.id.icon3);

        //第一个是上下文,第二个是圆角的弧度

        RequestOptions myOptions = new RequestOptions()

                .transform(new GlideRoundTransform(this,30));

        Glide.with(this)

                .load(R.drawable.item1)

                .apply(myOptions)

                .into(icon1);

        Glide.with(this)

                .load(R.drawable.image2)

                .apply(myOptions)

                .into(icon2);

        Glide.with(this)

                .load(R.drawable.image3)

                .apply(myOptions)

                .into(icon3);

    }

}
要是设置的效果没用就清除下缓存,要是还不行就卸载重装好了!!!!!
总结: 核心代码
 public class GlideRoundTransform extends BitmapTransformation {

     private static float radius = 0f;

     public GlideRoundTransform(Context context) {

         this(context, 4);

     }

     public GlideRoundTransform(Context context, int dp) {

         super(context);

         this.radius = Resources.getSystem().getDisplayMetrics().density * dp;

     }

     @Override

     protected Bitmap transform(BitmapPool pool, Bitmap toTransform, int outWidth, int outHeight) {

         Bitmap bitmap = TransformationUtils.centerCrop(pool, toTransform, outWidth, outHeight);

         return roundCrop(pool, bitmap);

     }

     private static Bitmap roundCrop(BitmapPool pool, Bitmap source) {

         if (source == null) return null;

         Bitmap result = pool.get(source.getWidth(), source.getHeight(), Bitmap.Config.ARGB_8888);

         if (result == null) {

             result = Bitmap.createBitmap(source.getWidth(), source.getHeight(), Bitmap.Config.ARGB_8888);

         }

         Canvas canvas = new Canvas(result);

         Paint paint = new Paint();

         paint.setShader(new BitmapShader(source, BitmapShader.TileMode.CLAMP, BitmapShader.TileMode.CLAMP));

         paint.setAntiAlias(true);

         RectF rectF = new RectF(0f, 0f, source.getWidth(), source.getHeight());

         canvas.drawRoundRect(rectF, radius, radius, paint);

         return result;

     }

     public String getId() {

         return getClass().getName() + Math.round(radius);

     }

     @Override

     public void updateDiskCacheKey(MessageDigest messageDigest) {

     }

 }
圆角转换 GlideRoundTransform 核心代码
         //第一个是上下文,第二个是圆角的弧度

         RequestOptions myOptions = new RequestOptions()

                 .transform(new GlideRoundTransform(this,30));

         Glide.with(this)

                 .load(path)

                 .apply(myOptions)

                 .into(img);
使用方法 核心代码
Glide4.0 centerCrop属性和圆角 冲突的更多相关文章
- css3.0新属性效果在ie下的解决方案(兼容性)
css3.0增加的新属性,如投影.渐变.旋转.圆角等等!这些新标准属性在ie6.ie7.ie8浏览器版本里得不到很好的支持,相信ie以后的新版本也会支持这些新属性的.目前ie6.ie7.ie8浏览器不 ...
- Android 图片加载框架Glide4.0源码完全解析(一)
写在之前 上一篇博文写的是Picasso基本使用和源码完全解析,Picasso的源码阅读起来还是很顺畅的,然后就想到Glide框架,网上大家也都推荐使用这个框架用来加载图片,正好我目前的写作目标也是分 ...
- Android 图片加载框架Glide4.0源码完全解析(二)
写在之前 上一篇博文写的是Android 图片加载框架Glide4.0源码完全解析(一),主要分析了Glide4.0源码中的with方法和load方法,原本打算是一起发布的,但是由于into方法复杂性 ...
- PIE使IE浏览器支持CSS3属性(圆角、阴影、渐变)
http://www.360doc.com/content/12/1214/09/11181348_253939277.shtml PIE使IE浏览器支持CSS3属性(圆角.阴影.渐变) 2012-1 ...
- IT兄弟连 HTML5教程 CSS3属性特效 圆角
传统的圆角生成方案,必须使用多张图片作为背景图案.CSS3的出现,使得我们再也不必浪费时间去制作这些图片了,只需要border-radius属性,支持浏览器IE 9.Opera 10.5.Safari ...
- windows2003 IIS6.0右键属性没有asp.net选项卡的解决办法
windows2003 IIS6.0右键属性没有asp.net选项卡的解决办法 1,如果是只安装了.net framework 1.1 在iis中是不显示那个选项卡的.默认就会支持asp.net1.1 ...
- 给div设置background-color: rgba(0, 0, 0, 0.2)属性,并加了css3动画--opacity动画淡出动画,之后div子元素的字体会抖一下
问题:给div设置background-color: rgba(0, 0, 0, 0.2)属性,并加了css3动画--opacity动画淡出动画,之后div子元素的字体会抖一下: 解决:animati ...
- PSU 离11.2.0.3.0 -> 11.2.0.3.11 如果解决冲突的整个
Oracle rdbms 扑灭psu离11.2.0.3.0升级到11.2.0.3.11 参考patch :18522512 停止应用,停止听音乐并DB,将db的oracle_home在下面OPatch ...
- Spring Boot 2.0的属性绑定
Spring Boot2.0的属性绑定 原文从Spring boot第一个版本以来,我们可以使用@ConfigurationProperties注解将属性绑定到对象.也可以指定属性的各种不同格式.比如 ...
随机推荐
- CodeForces 367E Sereja and Intervals
CodeForces 3 67E (109 + 7). Two ways are considered distinct if there is such j(1 ≤ j ≤ n), that the ...
- 从一行代码开始,浅谈python字符串格式化
今天看到了一行这样的代码: boundary = '%.32x' % random.randint(0, 256**16) 我知道这是一个生成格式化字符串的语句,它将随机生成的一个32位16进制数,将 ...
- Asm.Def谈笑风生
★ 输入文件:asm_talk.in 输出文件:asm_talk.out简单对比时间限制:2 s 内存限制:256 MB [题目描述] “人呐都不知道,自己不可以预料,直升机刚一出圣地亚哥 ...
- codevs——1979 第K个数
1979 第K个数 时间限制: 1 s 空间限制: 1000 KB 题目等级 : 黄金 Gold 题解 题目描述 Description 给定一个长度为N(0<n<=10 ...
- pt工具加字段脚本
#!/bin/bashcnn_db=$1table=$2alter_conment=$3 cnn_host='192.168.10.14'cnn_user='root'cnn_pwd='123456' ...
- oracle约束总结(not null/unique/primary key/foreign key/check)
约束(constraint):对创建的表的列属性.字段进行的限制. 诸如:not null/unique/primary key/foreign key/check 作用范围: ①列级 ...
- FloatingActionMenu 向上弹出菜单
本人在github上找到了一个FloatingActionsMenu,精简了其效果(原效果有上下左右四个方向)仅仅保留向上的效果,并做了一定的优化. github上的源代码:地址 ,精简后的源代码地址 ...
- JQuery之replace以及给控件赋值
<input type="hidden" name="ImgUrl" readonly="readonly"> <inpu ...
- 微信公众号H5用户授权
其实不是很难,总结起来就是: 1.微信公众号管理后台设置redirect_uri. 2.然后发起一个请求去重定向获取code,然后把获取到code之后重定向的URL放在获取code的URL中 3.获取 ...
- 七、备忘录模式Memento(行为型模式)
其目的是,在不违反封装原则的前提下.採集和备份一个对象的内部状态以便这个对象能够在以后恢复到之前的某个状态. 在Memento模式中,有例如以下角色: 1.Memento (备忘录) * 存储Orig ...