Blend 2015 教程 (五) 自定义状态
本篇再补充一块内容,就是自定义状态的介绍。
自定义状态用于封装用户控件在各种状态之间切换时的外观变化及其动画效果,方便调用。比如有个用户控件用于实现类似舞台幕布打开和关闭切换的效果,可以创建幕布关闭和幕布打开两个状态并编辑界面及动画,然后调用状态切换,就可以方便地实现幕布打开和关闭效果。下面看演示。
1. 首先创建一个用户控件命名为CurtainControl,打开该用户控件的xaml进行编辑。
2. 在状态面板中,点击添加状态组按钮,将新添加的状态组命名为CurtainControlStateGroup,点击添加状态按钮,添加两个状态,命名为CurtainOpened和CurtainClosed。
3. 点击选择状态面板中的“基本”状态项,将界面中的Grid分为四列,两边的两列为0,中间的两列为*,背景改为白色。在外层Grid内部放入两个Border,分别在中间两列,背景色改为某种径向渐变色(为了演示方便,实际项目可精心设计),加个边的颜色,最好抽取样式。完成后代码如下,
<UserControl

             xmlns="http://schemas.microsoft.com/winfx/2006/xaml/presentation"

             xmlns:x="http://schemas.microsoft.com/winfx/2006/xaml"

             xmlns:mc="http://schemas.openxmlformats.org/markup-compatibility/2006"

             xmlns:d="http://schemas.microsoft.com/expression/blend/2008"

             xmlns:x:Class="BlendDemo.CurtainControl"

             mc:Ignorable="d"

             d:DesignHeight="300" d:DesignWidth="300">

    <UserControl.Resources>

        <Style x:Key="CurtainStyle" TargetType="{x:Type Border}">

            <Setter Property="Background">

                <Setter.Value>

                    <RadialGradientBrush>

                        <GradientStop Color="Black" Offset="0"/>

                        <GradientStop Color="#FFFFC1C1" Offset="1"/>

                        <GradientStop Color="#FF382B2B" Offset="0.223"/>

                        <GradientStop Color="#FF755959" Offset="0.465"/>

                    </RadialGradientBrush>

                </Setter.Value>

            </Setter>

            <Setter Property="BorderBrush" Value="#FF00B9FF"/>

            <Setter Property="BorderThickness" Value="1"/>

        </Style>

    </UserControl.Resources>

    <Grid Background="White">

        <Grid.ColumnDefinitions>

            <ColumnDefinition Width="0"/>

            <ColumnDefinition/>

            <ColumnDefinition/>

            <ColumnDefinition Width="0"/>

        </Grid.ColumnDefinitions>

        <VisualStateManager.VisualStateGroups>

            <VisualStateGroup x:Name="CurtainControlStateGroup">

                <VisualState x:Name="CurtainOpened"/>

                <VisualState x:Name="CurtainClosed"/>

            </VisualStateGroup>

        </VisualStateManager.VisualStateGroups>

        <Border Grid.Column="1" Style="{DynamicResource CurtainStyle}"/>

        <Border Grid.Column="2" Style="{DynamicResource CurtainStyle}"/>

    </Grid>

</UserControl>
4. 点击状态面板中的CurtainControlStateGroup状态组的打开FluidLayout按钮(图标为上下两个波浪线),然后选择CurtainOpened状态项,进入动画录制状态。将第一个Border的Grid.Column由1改为0,将第二个Border的Grid.Column由2改为3。
5. 点击选择状态面板中的“基本”状态项,退出动画录制状态。将CurtainControlStateGroup状态组的默认过度时间改为1s。
此时用户控件已经完成,完整代码如下。
<UserControl

             xmlns="http://schemas.microsoft.com/winfx/2006/xaml/presentation"

             xmlns:x="http://schemas.microsoft.com/winfx/2006/xaml"

             xmlns:mc="http://schemas.openxmlformats.org/markup-compatibility/2006"

             xmlns:d="http://schemas.microsoft.com/expression/blend/2008"

             xmlns:ei="http://schemas.microsoft.com/expression/2010/interactions"

             x:Class ="BlendDemo.CurtainControl"

             mc:Ignorable="d"

             d:DesignHeight="300" d:DesignWidth="300">

    <UserControl.Resources>

        <Style x:Key="CurtainStyle" TargetType="{x:Type Border}">

            <Setter Property="Background">

                <Setter.Value>

                    <RadialGradientBrush>

                        <GradientStop Color="Black" Offset="0"/>

                        <GradientStop Color="#FFFFC1C1" Offset="1"/>

                        <GradientStop Color="#FF382B2B" Offset="0.223"/>

                        <GradientStop Color="#FF755959" Offset="0.465"/>

                    </RadialGradientBrush>

                </Setter.Value>

            </Setter>

            <Setter Property="BorderBrush" Value="#FF00B9FF"/>

            <Setter Property="BorderThickness" Value="1"/>

        </Style>

    </UserControl.Resources>

    <Grid Background="White">

        <Grid.ColumnDefinitions>

            <ColumnDefinition Width="0"/>

            <ColumnDefinition/>

            <ColumnDefinition/>

            <ColumnDefinition Width="0"/>

        </Grid.ColumnDefinitions>

        <VisualStateManager.VisualStateGroups>

            <VisualStateGroup x:Name="CurtainControlStateGroup" ei:ExtendedVisualStateManager.UseFluidLayout="True">

                <VisualStateGroup.Transitions>

                    <VisualTransition GeneratedDuration="0:0:1"/>

                </VisualStateGroup.Transitions>

                <VisualState x:Name="CurtainOpened">

                    <Storyboard>

                        <Int32AnimationUsingKeyFrames Storyboard.TargetProperty="(Grid.Column)" Storyboard.TargetName="border">

                            <EasingInt32KeyFrame KeyTime="0" Value="0"/>

                        </Int32AnimationUsingKeyFrames>

                        <Int32AnimationUsingKeyFrames Storyboard.TargetProperty="(Grid.Column)" Storyboard.TargetName="border1">

                            <EasingInt32KeyFrame KeyTime="0" Value="3"/>

                        </Int32AnimationUsingKeyFrames>

                    </Storyboard>

                </VisualState>

                <VisualState x:Name="CurtainClosed"/>

            </VisualStateGroup>

        </VisualStateManager.VisualStateGroups>

        <VisualStateManager.CustomVisualStateManager>

            <ei:ExtendedVisualStateManager/>

        </VisualStateManager.CustomVisualStateManager>

        <Border x:Name="border" Grid.Column="1" Style="{DynamicResource CurtainStyle}"/>

        <Border x:Name="border1" Grid.Column="2" Style="{DynamicResource CurtainStyle}"/>

    </Grid>

</UserControl>
6. 创建一个空的窗口,并设置为程序启动窗口。在外层Grid中加入两行,第一行为Auto,在其中放两个Button(外面套一个横向的StackPanel),文字改为打开和关闭。第二行为*,放入CurtainControl控件,在资产面板的“项目”分类中找,如果找不到该控件,请先生成项目。
7. 在资产面板中,选择“行为”分类,拖动GoToStateAction到文档大纲面板中的第一个Button上。在属性面板中,点击公共组下面的TargetName属性的美工板元素选取器按钮(圆圈中间有一个黑点),在美工板中选择CurtainControl控件。点击StateName属性的下拉框,选择CurtainOpened状态。第二个Button也执行同样的操作,StateName属性选择CurtainClosed状态。
至此,演示示例已全部完成,Window1的代码如下。
<Window

        xmlns="http://schemas.microsoft.com/winfx/2006/xaml/presentation"

        xmlns:x="http://schemas.microsoft.com/winfx/2006/xaml"

        xmlns:d="http://schemas.microsoft.com/expression/blend/2008"

        xmlns:mc="http://schemas.openxmlformats.org/markup-compatibility/2006"

        xmlns:local="clr-namespace:BlendDemo"

        xmlns:i="http://schemas.microsoft.com/expression/2010/interactivity" xmlns:ei="http://schemas.microsoft.com/expression/2010/interactions"

        x:Class="BlendDemo.Window1"

        mc:Ignorable="d"

        Title="Window1" Height="322" Width="375">

    <Grid>

        <Grid.RowDefinitions>

            <RowDefinition Height="Auto"/>

            <RowDefinition/>

        </Grid.RowDefinitions>

        <local:CurtainControl x:Name="curtainControl" Grid.Row="1"/>

        <StackPanel Orientation="Horizontal">

            <Button Content="打开">

                <i:Interaction.Triggers>

                    <i:EventTrigger EventName="Click">

                        <ei:GoToStateAction TargetName="curtainControl" StateName="CurtainOpened"/>

                    </i:EventTrigger>

                </i:Interaction.Triggers>

            </Button>

            <Button Content="关闭">

                <i:Interaction.Triggers>

                    <i:EventTrigger EventName="Click">

                        <ei:GoToStateAction TargetName="curtainControl" StateName="CurtainClosed"/>

                    </i:EventTrigger>

                </i:Interaction.Triggers>

            </Button>

        </StackPanel>

    </Grid>

</Window>
界面效果如下,
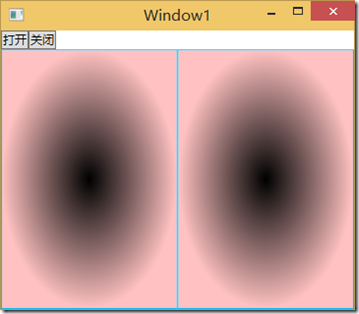
点击打开和关闭按钮试试效果吧。
Blend 2015 教程 (五) 自定义状态的更多相关文章
- Blend 2015 教程 (四)控件模板
前一篇讲述了修改ListBox样式的方法,本篇将修改性别显示区域的样式. 1. 选择ListBox控件,编辑ItemTemplate的当前项,选择CheckBox控件,在美工板导航栏中点击CheckB ...
- Blend 2015 教程 (一) 基础
微软公司在Visual Studio 2015产品套件中作出了许多革命性的变更,包括.NET开源,.NET服务器端部分跨平台,推出向个人和小团队免费的社区版,移动应用开发部分跨平台支持,商店应用支持C ...
- Blend 2015 教程 (二) 样式
前一篇讲述了如何在新Blend中完成一个简单的带数据绑定的界面小例子,本篇将讲述一下,把View层和Style层分开,并搭建Style层框架的方法,并进行细节样式修改. 1. 在解决方案资源管理器面板 ...
- Blend 2015 教程 (三) 模板
前一篇讲述了一些基本样式的修改方法,并搭建了Style层的基本框架,本篇将进一步修改ListBox的样式. 1. 首先选中ListBox控件,在美工板导航栏中点击ListBox,选择 编辑其他模板-编 ...
- Quartz教程五:SimpleTrigger
原文链接 | 译文链接 | 翻译:nkcoder 本系列教程由quartz-2.2.x官方文档翻译.整理而来,希望给同样对quartz感兴趣的朋友一些参考和帮助,有任何不当或错误之处,欢迎指正:有兴趣 ...
- React Native实战系列教程之自定义原生UI组件和VideoView视频播放器开发
React Native实战系列教程之自定义原生UI组件和VideoView视频播放器开发 2016/09/23 | React Native技术文章 | Sky丶清| 4 条评论 | 1 ...
- Elasticsearch入门教程(五):Elasticsearch查询(一)
原文:Elasticsearch入门教程(五):Elasticsearch查询(一) 版权声明:本文为博主原创文章,遵循CC 4.0 BY-SA版权协议,转载请附上原文出处链接和本声明. 本文链接:h ...
- C#微信公众号开发系列教程五(接收事件推送与消息排重)
微信公众号开发系列教程一(调试环境部署) 微信公众号开发系列教程一(调试环境部署续:vs远程调试) C#微信公众号开发系列教程二(新手接入指南) C#微信公众号开发系列教程三(消息体签名及加解密) C ...
- Android Studio系列教程五--Gradle命令详解与导入第三方包
Android Studio系列教程五--Gradle命令详解与导入第三方包 2015 年 01 月 05 日 DevTools 本文为个人原创,欢迎转载,但请务必在明显位置注明出处!http://s ...
随机推荐
- Appium简介及原理
1.Appium简介 Appium是一个开源.跨平台的,适用于原生或混合移动应用(hybrid mobile apps)的自动化测试平台.Appium使用WebDriver(JSON wire pro ...
- JSP的taglib示例
web.xml <?xml version="1.0" encoding="UTF-8"?> <web-app version="2 ...
- 【洛谷】P1247 取火柴游戏(Nim)
题目 传送门:QWQ 分析 蒟蒻根本不会博弈论..... 只知道异或和判断Nim游戏.. 不是很懂输出的选择,所以发一篇博客以待复习 代码 #include <bits/stdc++.h> ...
- ThreadCachedInt
folly/ThreadCachedInt.h High-performance atomic increment using thread caching. folly/ThreadCachedIn ...
- HttpContext.Current并非无处不在
阅读目录 开始 无处不在的HttpContext HttpContext.Current到底保存在哪里? HttpContext并非无处不在! 如何获取文件绝对路径? 异步调用中如何访问HttpCon ...
- Python的设计哲学
Beautiful is better than ugly. 优美胜于丑陋 Explicit is better than implicit. 明了胜于晦涩 Simple is better than ...
- Unix socket的准备(一)
套接字地址结构 套接字编程中,五元组是广为人知的. (host_ip, host_port, target_ip, target_port, protocol). 其中 ip 和 port 就是由套接 ...
- Pycharm上python和unittest两种姿势傻傻分不清楚
前言 经常有人在群里反馈,明明代码一样的啊,为什么别人的能出报告,我的出不了报告:为什么别人运行结果跟我的不一样啊... 这种问题先检查代码,确定是一样的,那就是运行姿势不对了,一旦导入unittes ...
- django-form.errors和前端上传文件
一.上传文件: 在相应的模型里面定义`FileField`或者是`ImageField`类型的字段,并且1.设置好`upload_to`参数来指定上传的路径. class User(models.Mo ...
- NotePad++替换行前、行后空格,替换空行
用 Notepad++ 打开,把每一个将要放在表中单元格的内容放一行(注: ^ 代表行首 $ 代表行尾) 去除行尾空格和空白行:按CTRL+H 选择正则表达式– 查找目标:\s+$ 替换为空 去除行首 ...