spring整合activemq发送MQ消息[Topic模式]实例
Topic模式消息发送实例
1、pom引入
<dependency>

            <groupId>junit</groupId>

            <artifactId>junit</artifactId>

            <version>4.11</version>

            <scope>test</scope>

        </dependency>

        <dependency>

            <groupId>org.apache.activemq</groupId>

            <artifactId>activemq-all</artifactId>

            <version>5.11.1</version>

        </dependency>

        <dependency>

            <groupId>org.springframework</groupId>

            <artifactId>spring-jms</artifactId>

            <version>4.1.4.RELEASE</version>

        </dependency>

        <dependency>

            <groupId>org.springframework</groupId>

            <artifactId>spring-test</artifactId>

            <version>4.1.4.RELEASE</version>

        </dependency>
2、生产者配置
<?xml version="1.0" encoding="UTF-8"?>

<beans xmlns="http://www.springframework.org/schema/beans"

       xmlns:xsi="http://www.w3.org/2001/XMLSchema-instance"

       xsi:schemaLocation="http://www.springframework.org/schema/beans

        http://www.springframework.org/schema/beans/spring-beans.xsd">

    <!-- 配置JMS连接工厂 -->

    <bean id="providerConnectionFactory" class="org.apache.activemq.ActiveMQConnectionFactory">

        <property name="brokerURL" value="failover:(tcp://192.168.147.131:61616)" />

        <property name="useAsyncSend" value="true" />

        <property name="clientID" value="providerClienctConnect" />

    </bean>

    <!-- 定义消息Destination -->

    <bean id="topicDestination"  class="org.apache.activemq.command.ActiveMQTopic">

        <constructor-arg value="testSpringTopic"/>

    </bean>

    <!-- 消息发送者客户端 -->

    <bean id="providerJmsTemplate" class="org.springframework.jms.core.JmsTemplate">

        <property name="connectionFactory" ref="providerConnectionFactory" />

        <property name="defaultDestination" ref="topicDestination" />

        <!-- 开启订阅模式 -->

        <property name="pubSubDomain" value="true"/>

        <property name="receiveTimeout" value="10000" />

        <!-- deliveryMode, priority, timeToLive 的开关要生效,必须配置为true,默认false-->

        <property name="explicitQosEnabled" value="true"/>

        <!-- 发送模式

             DeliveryMode.NON_PERSISTENT=1:非持久 ;

             DeliveryMode.PERSISTENT=2:持久

        -->

        <property name="deliveryMode" value="1"/>

    </bean>

</beans>
生产者程序
package com.mq.spring.topic;

import org.junit.Test;

import org.junit.runner.RunWith;

import org.springframework.jms.core.JmsTemplate;

import org.springframework.jms.core.MessageCreator;

import org.springframework.test.context.ContextConfiguration;

import org.springframework.test.context.junit4.SpringJUnit4ClassRunner;

import javax.annotation.Resource;

import javax.jms.*;

/**

 * created on 2015/6/4

 * @author dennisit@163.com

 * @version 1.0

 */

@RunWith(SpringJUnit4ClassRunner.class)

@ContextConfiguration(locations={"classpath:spring-topic.xml"})

public class TopicSender {

    @Resource(name = "providerJmsTemplate")

    private JmsTemplate jmsTemplate;

    @Test

    public void send(){

        sendMqMessage(null,"spring activemq topic type message[with listener] !");

    }

    /**

     * 说明:发送的时候如果这里没有显示的指定destination.将用spring xml中配置的destination

     * @param destination

     * @param message

     */

    public void sendMqMessage(Destination destination, final String message){

        if(null == destination){

            destination = jmsTemplate.getDefaultDestination();

        }

        jmsTemplate.send(destination, new MessageCreator() {

            public Message createMessage(Session session) throws JMSException {

                return session.createTextMessage(message);

            }

        });

        System.out.println("spring send text message...");

    }

    public void setJmsTemplate(JmsTemplate jmsTemplate) {

        this.jmsTemplate = jmsTemplate;

    }

}
3、消费者配置
<?xml version="1.0" encoding="UTF-8"?>

<beans xmlns="http://www.springframework.org/schema/beans"

       xmlns:xsi="http://www.w3.org/2001/XMLSchema-instance"

       xsi:schemaLocation="http://www.springframework.org/schema/beans

        http://www.springframework.org/schema/beans/spring-beans.xsd">

    <!-- 配置JMS连接工厂 -->

    <bean id="consumerConnectionFactory" class="org.apache.activemq.ActiveMQConnectionFactory">

        <property name="brokerURL" value="failover:(tcp://192.168.147.131:61616)" />

        <property name="useAsyncSend" value="true" />

        <property name="clientID" value="consumerClienctConnect" />

    </bean>

    <!-- 定义消息Destination -->

    <bean id="topic1Destination"  class="org.apache.activemq.command.ActiveMQTopic">

        <constructor-arg value="testSpringTopic1"/>

    </bean>

    <!-- 配置消息消费监听者 -->

    <bean id="consumerMessageListener" class="com.mq.spring.topic.ConsumerMessageListener" />

    <!-- 消息订阅客户端1 -->

    <bean id="consumerListenerClient1" class="org.springframework.jms.listener.DefaultMessageListenerContainer">

        <property name="connectionFactory" ref="consumerConnectionFactory" />

        <!-- 开启订阅模式 -->

        <property name="pubSubDomain" value="true"/>

        <property name="destination" ref="topic1Destination" />

        <property name="subscriptionDurable" value="true"/>

        <!---这里是设置接收客户端的ID,在持久化时,但这个客户端不在线时,消息就存在数据库里,直到被这个ID的客户端消费掉-->

        <property name="clientId" value="consumerClient1"/>

        <property name="messageListener" ref="consumerMessageListener" />

        <!-- 消息应答方式

             Session.AUTO_ACKNOWLEDGE  消息自动签收

             Session.CLIENT_ACKNOWLEDGE  客户端调用acknowledge方法手动签收

             Session.DUPS_OK_ACKNOWLEDGE 不必必须签收,消息可能会重复发送

        -->

        <property name="sessionAcknowledgeMode" value="1"/>

    </bean>

    <!-- 消息订阅客户端2 -->

    <bean id="consumerListenerClient2" class="org.springframework.jms.listener.DefaultMessageListenerContainer">

        <property name="connectionFactory" ref="consumerConnectionFactory" />

        <!-- 开启订阅模式 -->

        <property name="pubSubDomain" value="true"/>

        <property name="destination" ref="topicDestination" />

        <property name="subscriptionDurable" value="true"/>

        <!---这里是设置接收客户端的ID,在持久化时,但这个客户端不在线时,消息就存在数据库里,直到被这个ID的客户端消费掉-->

        <property name="clientId" value="consumerClient2"/>

        <property name="messageListener" ref="consumerMessageListener" />

        <!-- 消息应答方式

             Session.AUTO_ACKNOWLEDGE  消息自动签收

             Session.CLIENT_ACKNOWLEDGE  客户端调用acknowledge方法手动签收

             Session.DUPS_OK_ACKNOWLEDGE 不必必须签收,消息可能会重复发送

        -->

        <property name="sessionAcknowledgeMode" value="1"/>

    </bean>

</beans>
消费者监听代码
package com.mq.spring.topic;
import org.apache.commons.lang.builder.ToStringBuilder;
import javax.jms.JMSException;
import javax.jms.Message;
import javax.jms.MessageListener;
import javax.jms.TextMessage; /**
* created on 2015/6/4
* @author dennisit@163.com
* @version 1.0
*/
public class ConsumerMessageListener implements MessageListener{
@Override
public void onMessage(Message message) {
TextMessage tm = (TextMessage) message;
try {
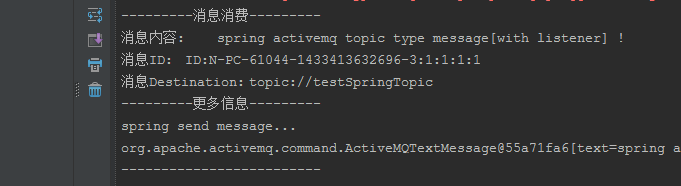
System.out.println("---------消息消费---------");
System.out.println("消息内容:\t" + tm.getText());
System.out.println("消息ID:\t" + tm.getJMSMessageID());
System.out.println("消息Destination:\t" + tm.getJMSDestination());
System.out.println("---------更多信息---------");
System.out.println(ToStringBuilder.reflectionToString(tm));
System.out.println("-------------------------");
} catch (JMSException e) {
e.printStackTrace();
}
}
}
运行结果:
说明:属于学习,网上资料结合个人理解,理解有误的地方,期待指导和建议,共同学习.
转载请注明出处:[http://www.cnblogs.com/dennisit/p/4552686.html]
spring整合activemq发送MQ消息[Topic模式]实例的更多相关文章
- spring整合activemq发送MQ消息[queue模式]实例
queue类型消息 pom依赖 <dependency> <groupId>junit</groupId> <artifactId>junit</ ...
- 解决Springboot整合ActiveMQ发送和接收topic消息的问题
环境搭建 1.创建maven项目(jar) 2.pom.xml添加依赖 <parent> <groupId>org.springframework.boot</group ...
- Spring整合ActiveMQ及多个Queue消息监听的配置
消息队列(MQ)越来越火,在java开发的项目也属于比较常见的技术,MQ的相关使用也成java开发人员必备的技能.笔者公司采用的MQ是ActiveMQ,且消息都是用的点对点的模式.本文记录了实 ...
- Spring整合ActiveMQ实现消息延迟投递和定时投递
linux(centos)系统安装activemq参考:https://www.cnblogs.com/pxblog/p/12222231.html 首先在ActiveMQ的安装路径 /conf/ac ...
- spring整合ActiveMq
spring整合ActiveMq: 1:依赖的jar包: 2:spring-activemq.xml 的配置: 代码: <?xml version="1.0" enco ...
- 【报错】spring整合activeMQ,pom.xml文件缺架包,启动报错:Caused by: java.lang.ClassNotFoundException: org.apache.xbean.spring.context.v2.XBeanNamespaceHandler
spring版本:4.3.13 ActiveMq版本:5.15 ======================================================== spring整合act ...
- Java消息队列-Spring整合ActiveMq
1.概述 首先和大家一起回顾一下Java 消息服务,在我之前的博客<Java消息队列-JMS概述>中,我为大家分析了: 消息服务:一个中间件,用于解决两个活多个程序之间的耦合,底层由Jav ...
- SpringBoot整合ActiveMq实现Queue和Topic两种模式(看不懂你来打我)
目录 一.前言 二.ActiveMq的下载和使用 三.依赖准备 四.yml文件配置 五.配置Bean 六.创建生产者(Queue+Topic) 七.创建消费者(Topic模式下) 八.测试结果(Top ...
- Spring整合ActiveMQ,实现队列主题消息生产消费
1.引入依赖 pom.xml 1 <!-- activemq --> 2 <dependency> 3 <groupId>org.springframework&l ...
随机推荐
- oracle添加和查看注释
1.给表加注释 COMMENT ON TABLE TABLENAME IS '用户表'; 2.查看表的COMMENT SELECT * FROM USER_TAB_COMMENTS WHERE TAB ...
- Pyhton开发堡垒机之paramiko模块
堡垒机前戏 开发堡垒机之前,先来学习Python的paramiko模块,该模块机遇SSH用于连接远程服务器并执行相关操作 SSHClient 用于连接远程服务器并执行基本命令 基于用户名密码连接: + ...
- 百度上传工具webuploader,图片上传附加参数
项目中需要上传视频,图片等资源.最先做的是上传图片,开始在网上找了一款野鸡插件,可以实现图片上传预览(无需传到后台).但是最近这个插件出了莫名的问题,不易修复,一怒之下,还是决定找个大点的,靠谱的插件 ...
- 如何处理webView跳转
- (void)webView:(UIWebView *)wv didFailLoadWithError:(NSError *)error { // Give iOS a chance to o ...
- Windows2003 SQL2005解决系统Administrator密码不知道的问题
Windows2003 SQL2005解决系统Administrator密码不知道的问题 今天上班的时候,有个同事说不知道谁设置了开机密码,那台电脑一直没有开机密码的他现在进不了桌面 那台电脑没有光驱 ...
- 国内CDN公共库
CDN公共库是指将常用的JS库存放在CDN节点,以方便广大开发者直接调用.与将JS库存放在服务器单机上相比,CDN公共库更加稳定.高速.一般的CDN公共库都会包含全球所有最流行的开源JavaScrip ...
- 给“.Net工资低”争论一个了结吧!
昨天我写了一篇<工资低的.Net程序员,活该你工资低>,底下的支持.争吵.骂娘的评论依旧像之前几篇园友的博客一样繁荣.公说公有理,婆说婆有理,这样争吵下去永远没有尽头.数据没有情绪,是公正 ...
- 在Android中调用C#写的WebService(附源代码)
由于项目中要使用Android调用C#写的WebService,于是便有了这篇文章.在学习的过程中,发现在C#中直接调用WebService方便得多,直接添加一个引用,便可以直接使用将WebServi ...
- [外挂6]在指定位置下棋 SendMessage函数
a.鼠标软件模拟,函数SendMessage b.分析窗口内棋子相对坐标X,Y c.软件模拟点击棋盘坐标x,y处的棋子 ::SendMessage(hwnd,WM_LBUTTOMDOWN,0,YX); ...
- [游戏模版2] Win32最小框架
>_<:Just the minimum Win32 frame don't have any other special function. //{{NO_DEPENDENCIES}} ...