day02-Spring基本介绍02
Spring基本介绍02
5.简单模拟Spring基于XML配置的程序
5.1需求说明
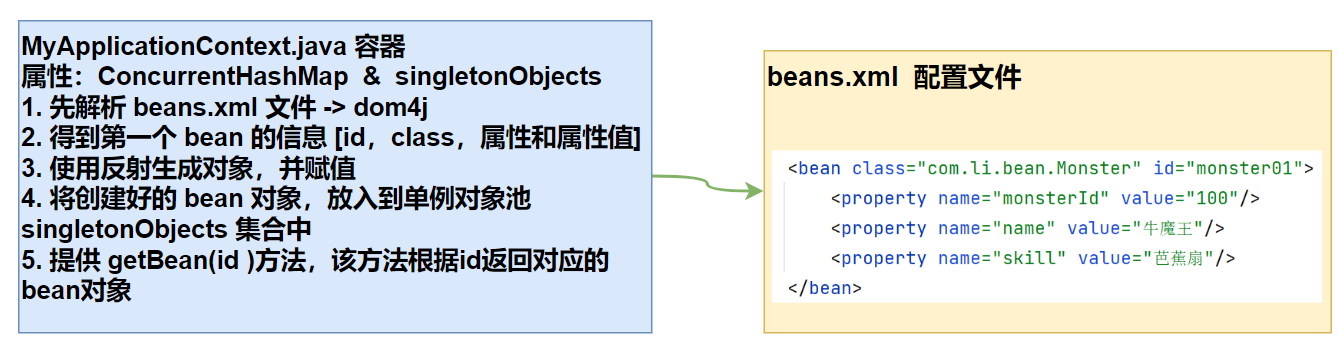
自己写一个简单的Spring容器,通过读取beans.xml,获取第一个Javabean:Monster的对象,给该对象属性赋值,放入到容器中,并输出该对象信息
也就是说,不使用spring原生框架,我们自己简单模拟实现,目的是了解Spring容器的简单机制
5.2思路分析
5.3代码实现
引入dom4j.jar包
MyApplicationContext.java:
package com.li.myapplicationcontext;

import com.li.bean.Monster;

import org.dom4j.Document;

import org.dom4j.Element;

import org.dom4j.io.SAXReader;

import java.io.File;

import java.lang.reflect.Method;

import java.util.List;

import java.util.concurrent.ConcurrentHashMap;

/**

 * @author 李

 * @version 1.0

 * 1. 这个程序用于实现Spring的一个简单容器机制

 * 2. 后面还会详细的实现

 * 3. 这里我们主要实现的是如何将beans.xml文件进行解析,并生成对象,放入容器中

 * 4. 然后提供一个getBean(id) 返回对应的对象

 */

public class MyApplicationContext {

    private ConcurrentHashMap<String, Object> singletonObjects

            = new ConcurrentHashMap<>();

    //构造器

    //接收一个容器的配置文件,如 beans.xml,默认路径在src下

    public MyApplicationContext(String iocBeanXMLFile) throws Exception {

        //1.得到配置文件的类加载路径

        String path = this.getClass().getResource("/").getPath();

        //2.创建 saxReader

        SAXReader saxReader = new SAXReader();

        //3.得到document对象

        Document document = saxReader.read(new File(path + iocBeanXMLFile));

        //4.得到rootDocument

        Element rootElement = document.getRootElement();

        //5.得到第一个bean-monster01

        Element bean = (Element) rootElement.elements("bean").get(0);

        //6.获取到第一个bean的相关属性(真实的情况下会把属性保存到beanDefinitionMap中)

        String id = bean.attributeValue("id");//bean的id

        String classFullPath = bean.attributeValue("class");//类的全路径

        List<Element> property = bean.elements("property");

        //原本是遍历,这里为了简化,就直接获取

        //property的value值

        Integer monsterId =

                Integer.parseInt(property.get(0).attributeValue("value"));

        String name = property.get(1).attributeValue("value");

        String skill = property.get(2).attributeValue("value");

        //7.反射创建对象

        Class<?> aClass = Class.forName(classFullPath);

        //这里的 o对象就是Monster对象

        Monster o = (Monster) aClass.newInstance();

        //给对象赋值-这里为了简化,直接赋值(真实情况下会使用反射)

        o.setMonsterId(monsterId);

        o.setName(name);

        o.setSkill(skill);

        //8.将创建好的对象放到singletonObjects单例对象池中

        singletonObjects.put(id, o);

    }

    public Object getBean(String id) {

        return singletonObjects.get(id);

    }

}
Test.java用于测试:
package com.li.myapplicationcontext;
import com.li.bean.Monster;
/**
* @author 李
* @version 1.0
*/
public class Test {
public static void main(String[] args) throws Exception {
MyApplicationContext ioc = new MyApplicationContext("beans.xml");
Monster monster01 = (Monster) ioc.getBean("monster01");
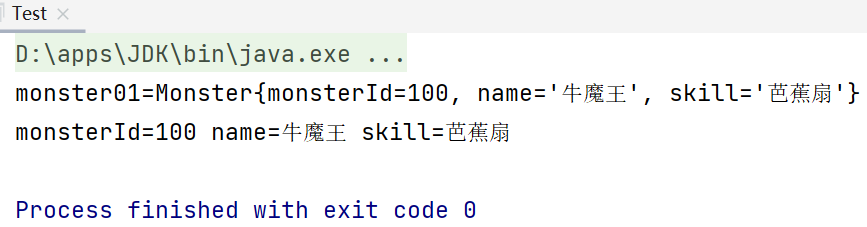
System.out.println("monster01=" + monster01);
System.out.println("monsterId=" + monster01.getMonsterId() +
" name=" + monster01.getName() +
" skill=" + monster01.getSkill());
}
}
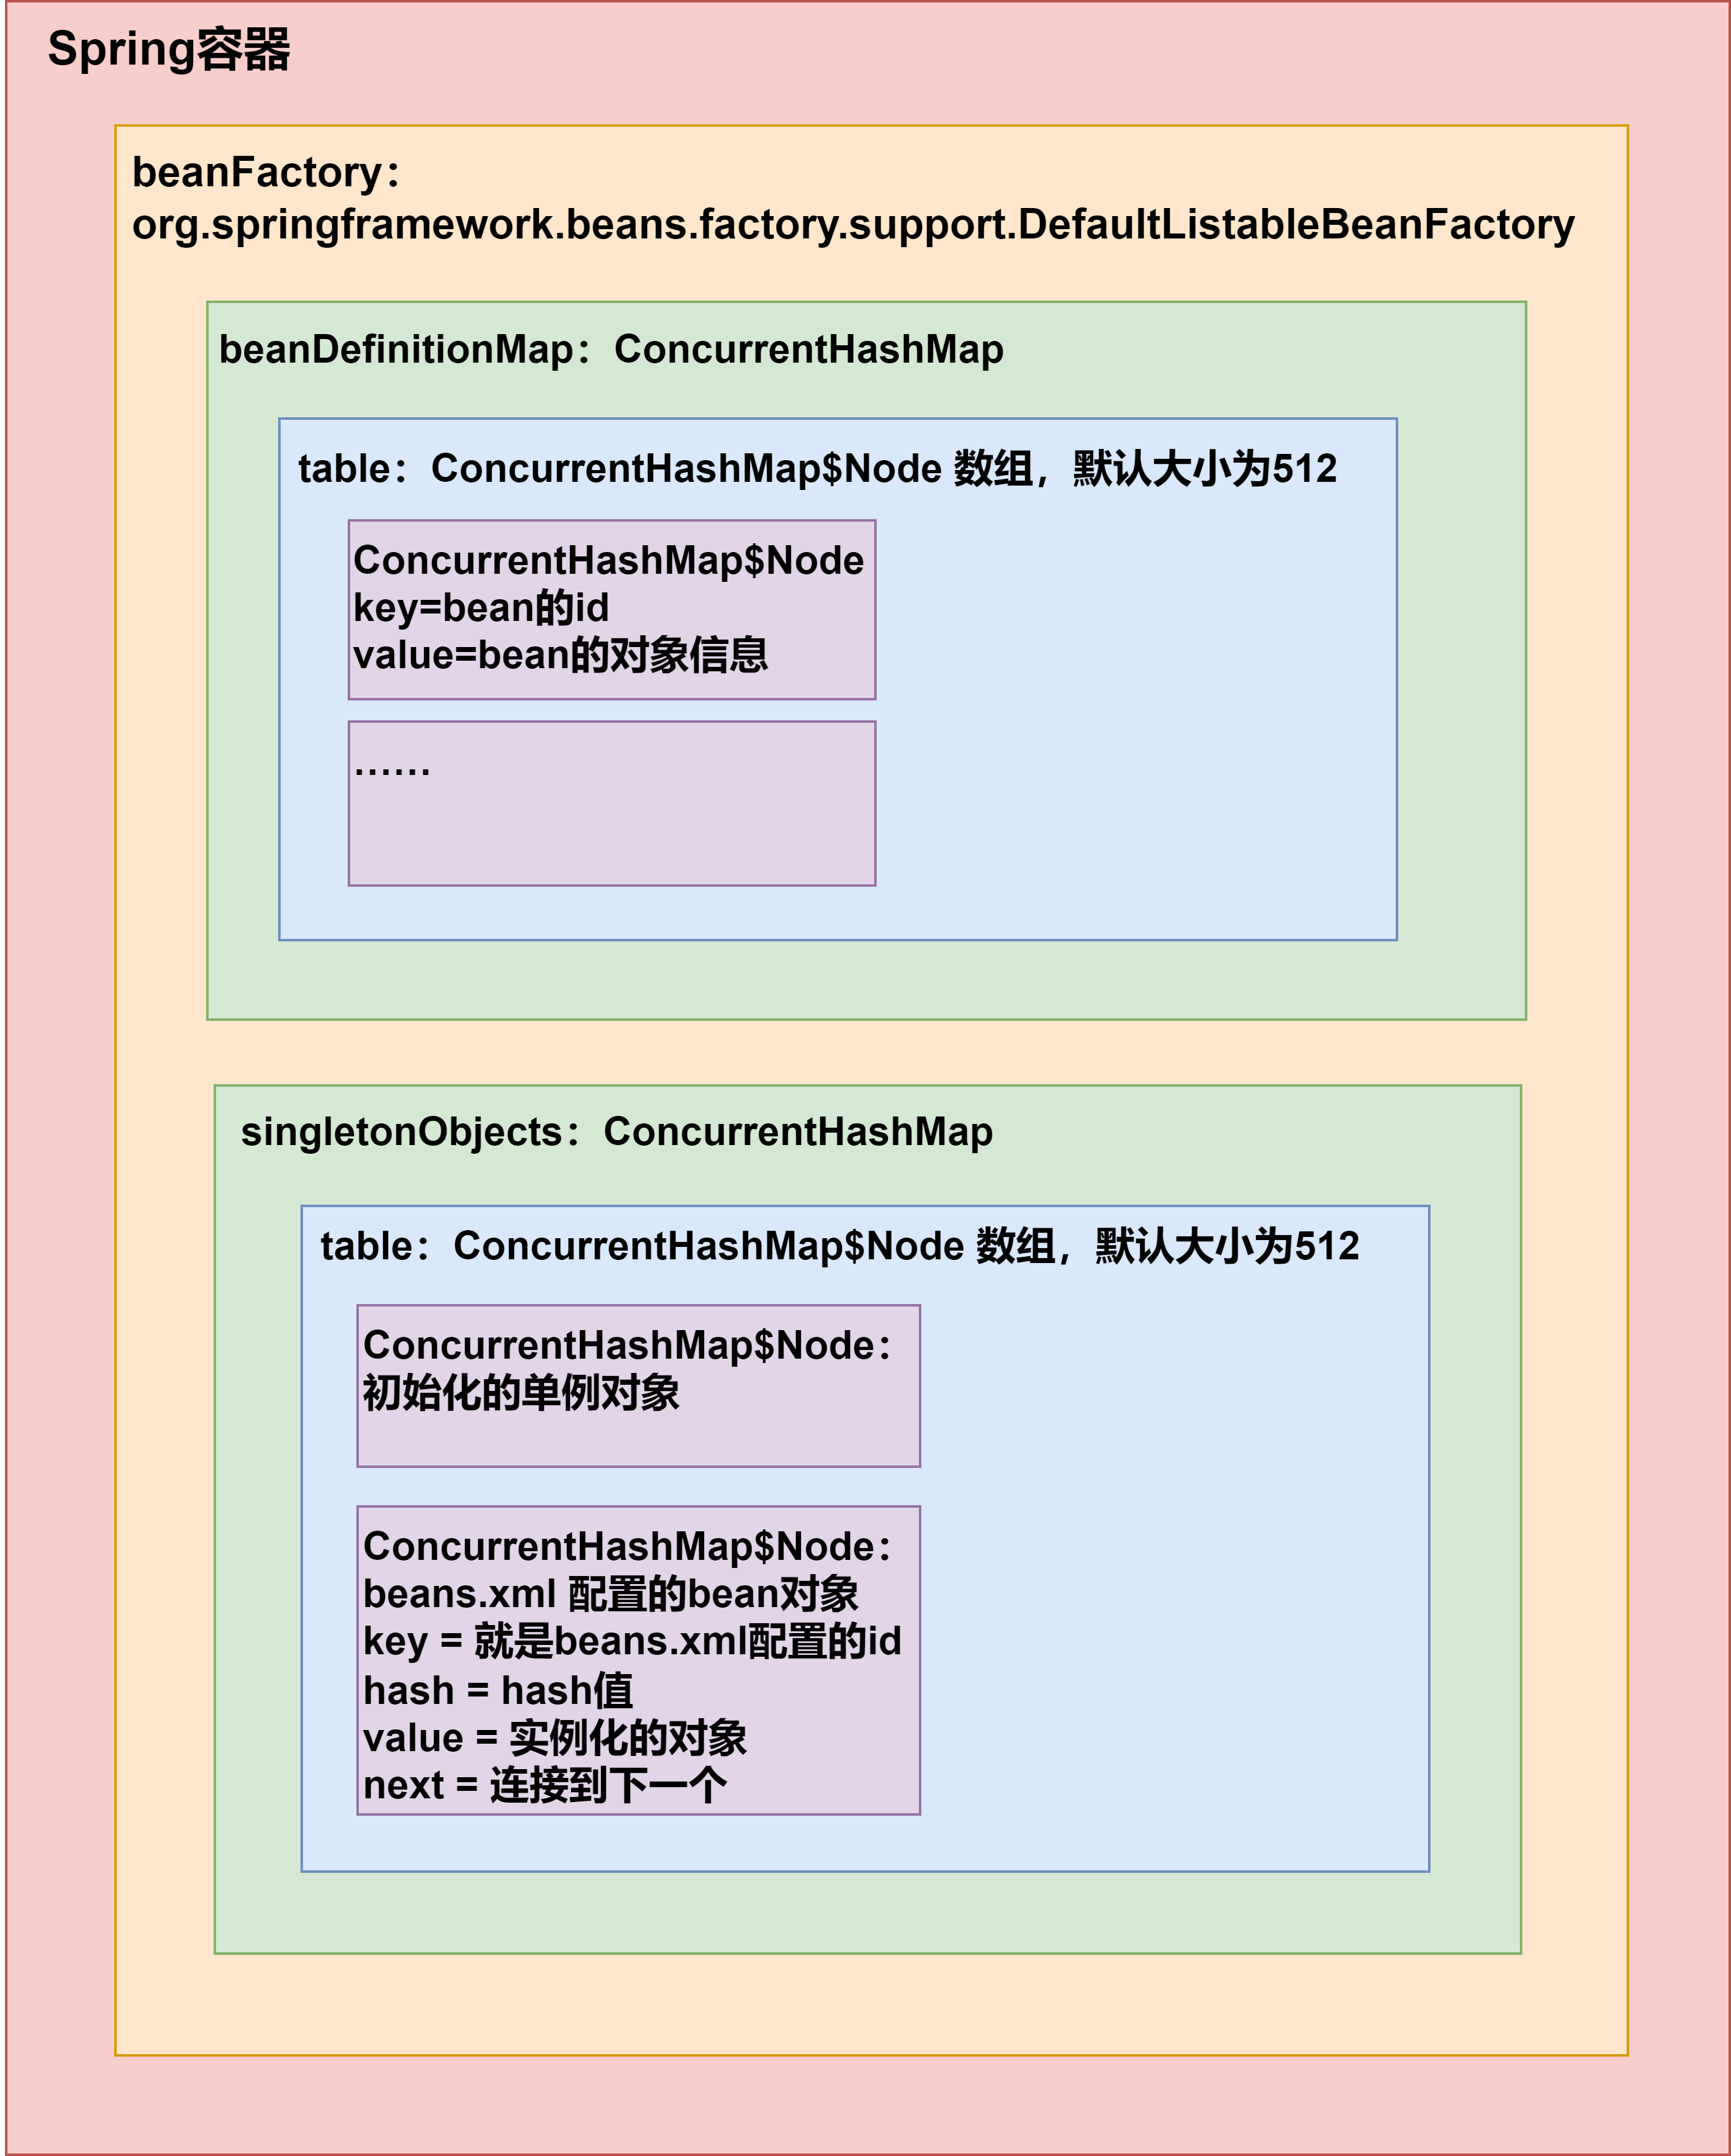
6.Spring原生容器底层结构梳理
我们之前在Spring基本介绍01--4.5Spring容器的结构/机制有一些基础的分析,现在来梳理一下:
7.练习
7.1关于bean的id
如下,在beans.xml中,我们注入2个Monster对象,但是不指定bean的id
<bean class="com.li.bean.Monster">

    <property name="monsterId" value="100"/>

    <property name="name" value="牛魔王"/>

    <property name="skill" value="芭蕉扇"/>

</bean>

<bean class="com.li.bean.Monster">

    <property name="monsterId" value="200"/>

    <property name="name" value="红孩儿"/>

    <property name="skill" value="三昧真火"/>

</bean>
问题1:运行会不会报错?
答:不会报错,可以正常运行。
问题2:如果不报错,你是否能找到分配的id并获取该对象?
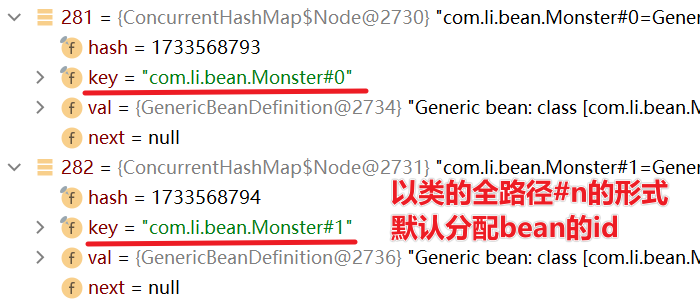
答:系统会默认分配id,分配id的规则是:全类名#0,全类名#1......全类名#n,这样的规则来分配id
我们可以通过debug的方式来查看:
beanFactory.beanDefinitionMap.table:
package com.li.homework;
import com.li.bean.Monster;
import org.springframework.context.ApplicationContext;
import org.springframework.context.support.ClassPathXmlApplicationContext;
import org.testng.annotations.Test;
/**
* @author 李
* @version 1.0
*/
public class Homework01 {
@Test
public void getMonster() {
ApplicationContext ioc =
new ClassPathXmlApplicationContext("beans.xml");
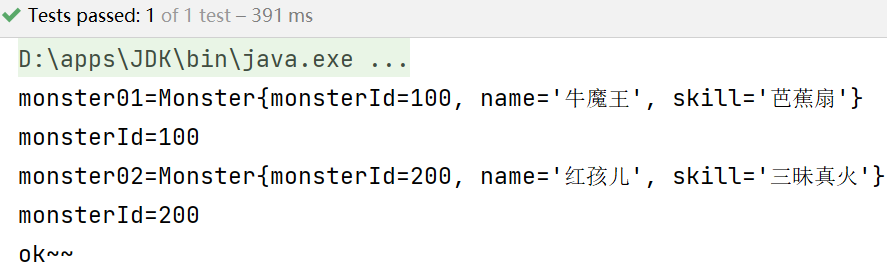
Monster monster01 = ioc.getBean("com.li.bean.Monster#0", Monster.class);
System.out.println("monster01=" + monster01);
System.out.println("monsterId=" + monster01.getMonsterId());
Monster monster02 = ioc.getBean("com.li.bean.Monster#1", Monster.class);
System.out.println("monster02=" + monster02);
System.out.println("monsterId=" + monster02.getMonsterId());
System.out.println("ok~~");
}
}
在实际开发中不会省略bean的id
7.2练习2
创建一个Car类(属性:id,name,price),具体要求如下:
- 创建ioc容器文件(即配置文件),并配置一个Car对象(bean)
- 通过java程序到ioc容器获取该bean对象,并输出
Car:
package com.li.bean;

/**

 * @author 李

 * @version 1.0

 */

public class Car {

    private Integer id;

    private String name;

    private Double price;

    public Car() {

    }

    public Car(Integer id, String name, Double price) {

        this.id = id;

        this.name = name;

        this.price = price;

    }

    public Integer getId() {

        return id;

    }

    public void setId(Integer id) {

        this.id = id;

    }

    public String getName() {

        return name;

    }

    public void setName(String name) {

        this.name = name;

    }

    public Double getPrice() {

        return price;

    }

    public void setPrice(Double price) {

        this.price = price;

    }

    @Override

    public String toString() {

        return "Car{" +

                "id=" + id +

                ", name='" + name + '\'' +

                ", price=" + price +

                '}';

    }

}
beans2.xml:
<?xml version="1.0" encoding="UTF-8"?>

<beans xmlns="http://www.springframework.org/schema/beans"

       xmlns:xsi="http://www.w3.org/2001/XMLSchema-instance"

       xsi:schemaLocation="http://www.springframework.org/schema/beans http://www.springframework.org/schema/beans/spring-beans.xsd">

    <bean class="com.li.bean.Car" id="car01">

        <property name="id" value="10001"/>

        <property name="name" value="宝马"/>

        <property name="price" value="1230000"/>

    </bean>

</beans>
Homework02:
package com.li.homework;
import com.li.bean.Car;
import org.springframework.context.ApplicationContext;
import org.springframework.context.support.ClassPathXmlApplicationContext;
import org.testng.annotations.Test;
/**
* @author 李
* @version 1.0
*/
public class Homework02 {
@Test
public void getCart() {
ApplicationContext ioc =
new ClassPathXmlApplicationContext("beans2.xml");
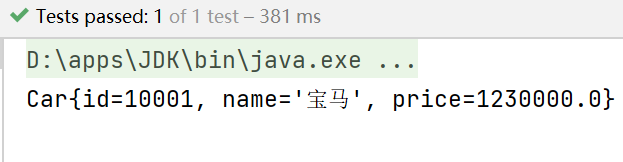
Car car = ioc.getBean("car01", Car.class);
System.out.println(car);
}
}
day02-Spring基本介绍02的更多相关文章
- 黑马_13 Spring Boot:01.spring boot 介绍&&02.spring boot 入门
13 Spring Boot: 01.spring boot 介绍&&02.spring boot 入门 04.spring boot 配置文件 SpringBoot基础 1.1 原有 ...
- Spring Security 介绍与Demo
一.Spring Security 介绍 Spring Security 是针对Spring项目的安全框架,也是Spring Boot底层安全模块的默认技术选型.我们仅需引入spring-boot-s ...
- Spring Batch 中文参考文档 V3.0.6 - 1 Spring Batch介绍
1 Spring Batch介绍 企业领域中许多应用系统需要采用批处理的方式在特定环境中运行业务操作任务.这种业务作业包括自动化,大量信息的复杂操作,他们不需要人工干预,并能高效运行.这些典型作业包括 ...
- [翻译]Spring框架参考文档(V4.3.3)-第二章Spring框架介绍 2.1 2.2 翻译--2.3待继续
英文链接:http://docs.spring.io/spring-framework/docs/current/spring-framework-reference/html/overview.ht ...
- Spring 的介绍和目标
1. Spring介绍 打开Spring 官网查看对 Spring 的介绍和目标 http://www.springsource.org/about We believe that: · J2EE s ...
- Spring的介绍与搭建
一.Spring的介绍 二.Spring的搭建 (1)导包 (2)创建一个对象 (3)书写配置注册对象到容器 (4)代码测试
- Spring Shell介绍
最近开发中在下遇到了spring-shell开发工具的项目,现在整理了相关文章,以供大家学习 本博客相关的文章均是在Spring Shell 1.2.0的基础上建立 Spring Shell介绍 ...
- Spring DevTools 介绍
Spring DevTools 介绍 Spring Boot包括一组额外的工具,可以使应用程序开发体验更加愉快. spring-boot-devtools模块可以包含在任何项目中,它可以节省大量的时间 ...
- 第1章—Spring之旅—Spring模块介绍
Spring模块介绍 Spring7大核心模块: 核心容器(Spring Core) 核心容器提供Spring框架的基本功能.Spring以bean的方式组织和管理Java应用中的各个组件及其关系.S ...
- 01.课程介绍 & 02.最小可行化产品MVP
01.课程介绍 02.最小可行化产品MVP 产品开发过程 最小化和可用之间找到一个平衡点
随机推荐
- Laravel日期处理
1. 常用: echo Carbon::now(); // 2023-04-08 18:07:24 echo Carbon::today(); // 2023-04-08 00:00:00 echo ...
- 小团队如何妙用 JuiceFS
早些年还在 ENJOY 的时候, 就已经在用 JuiceFS, 并且一路伴随着我工作过的四家小公司, 这玩意对我来说, 已经成了理所应当不可或缺的基础设施, 对于我服务过的小团队而言, 更是实实在在的 ...
- 基于Hyper-V搭建免费桌面云
Hyper-V 是 Microsoft 的硬件虚拟化产品. 它用于创建并运行计算机的软件版本,称为"虚拟机". 每个虚拟机都像一台完整的计算机一样运行操作系统和程序. 如果需要计算 ...
- Nebula Siwi:基于图数据库的智能问答助手思路分析
本文重点分析 Nebula Siwi 智能问答思路,具体代码可参考[2],使用的数据集为 Basketballplayer[3].部分数据和 schema 如下所示: 一.智能问答可实现的功能 1 ...
- NOIp 2023 游记
咕了正好一周的 NOIp 游记,是我第一篇游记,也是一张寄往四年后不得不退役的.即将画上青春句号的自己的,包含了自己的青涩.期待与成长的信笺. Day \((-\infty, -7)\) CSP-S ...
- Windows平台安装Oracle11.2.0.4客户端报错INS-30131
之前为解决EXP-00003错误给出了安装Oracle11.2.0.4的解决方案,自己测试是没问题的,客户自己安装反馈遇到报错INS-30131,MOS有一篇文章: E1: DB: Error INS ...
- .NET Core开发实战(第29课:定义仓储:使用EF Core实现仓储层)--学习笔记
29 | 定义仓储:使用EF Core实现仓储层 首先定义仓储层的接口,以及仓储层实现的基类,抽象类 仓储层的接口 namespace GeekTime.Infrastructure.Core { / ...
- Zookeeper-ZKFC的原理和功能
一.前言 HADOOP2 HA架构引入了ZKFC.Journalnode组件,本篇文章主要介绍ZKFC的功能和原理.HA架构支持两种切换方式: 手动切换: 通过命令实现主备之间的切换,可以用HDFS ...
- typora beta版本 typora免费版 typora 0.11.18 下载
壹 ❀ 引 typora从1.0.0正式版开始就不再免费了,可能有一些开了自动检测更新的同学,在某次打开typora就看到了购买以及试用天数的弹窗,但typora正式之前的beta版依旧免费,这里就分 ...
- 古猫先生 SATA系列博文转载
SATA专题文章列表 SATA系列专题之一:浅析Physical Layer物理层OOB信号 SATA系列专题之二:2.0 Link layer链路层概述 SATA系列专题之二: 2.1 Link l ...