Springboot基于Redisson实现Redis分布式可重入锁【案例到源码分析】
一、前言
我们在实现使用Redis实现分布式锁,最开始一般使用SET resource-name anystring NX EX max-lock-time进行加锁,使用Lua脚本保证原子性进行实现释放锁。这样手动实现比较麻烦,对此Redis官网也明确说Java版使用Redisson来实现。小编也是看了官网慢慢的摸索清楚,特写此记录一下。从官网到整合Springboot到源码解读,以单节点为例,小编的理解都在注释里,希望可以帮助到大家!!
二、为什么使用Redisson
1. 我们打开官网
2. 我们可以看到官方让我们去使用其他

3. 打开官方推荐
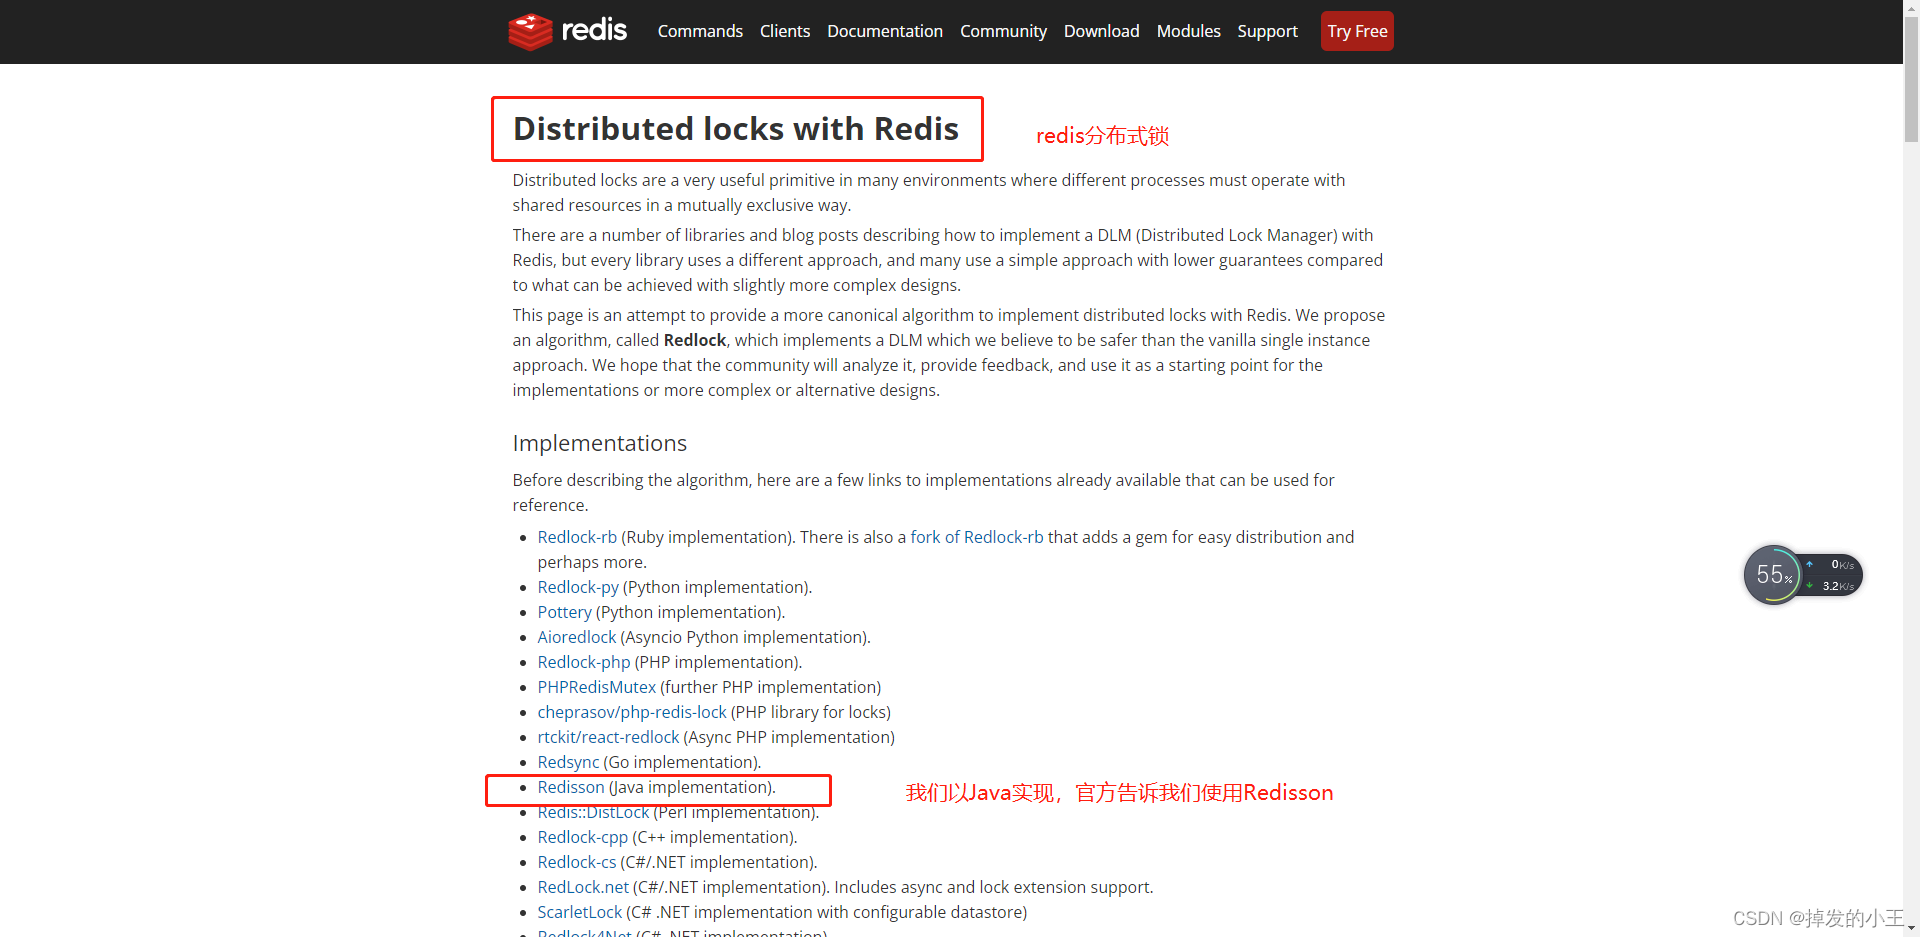
4. 找到文档
Redisson地址
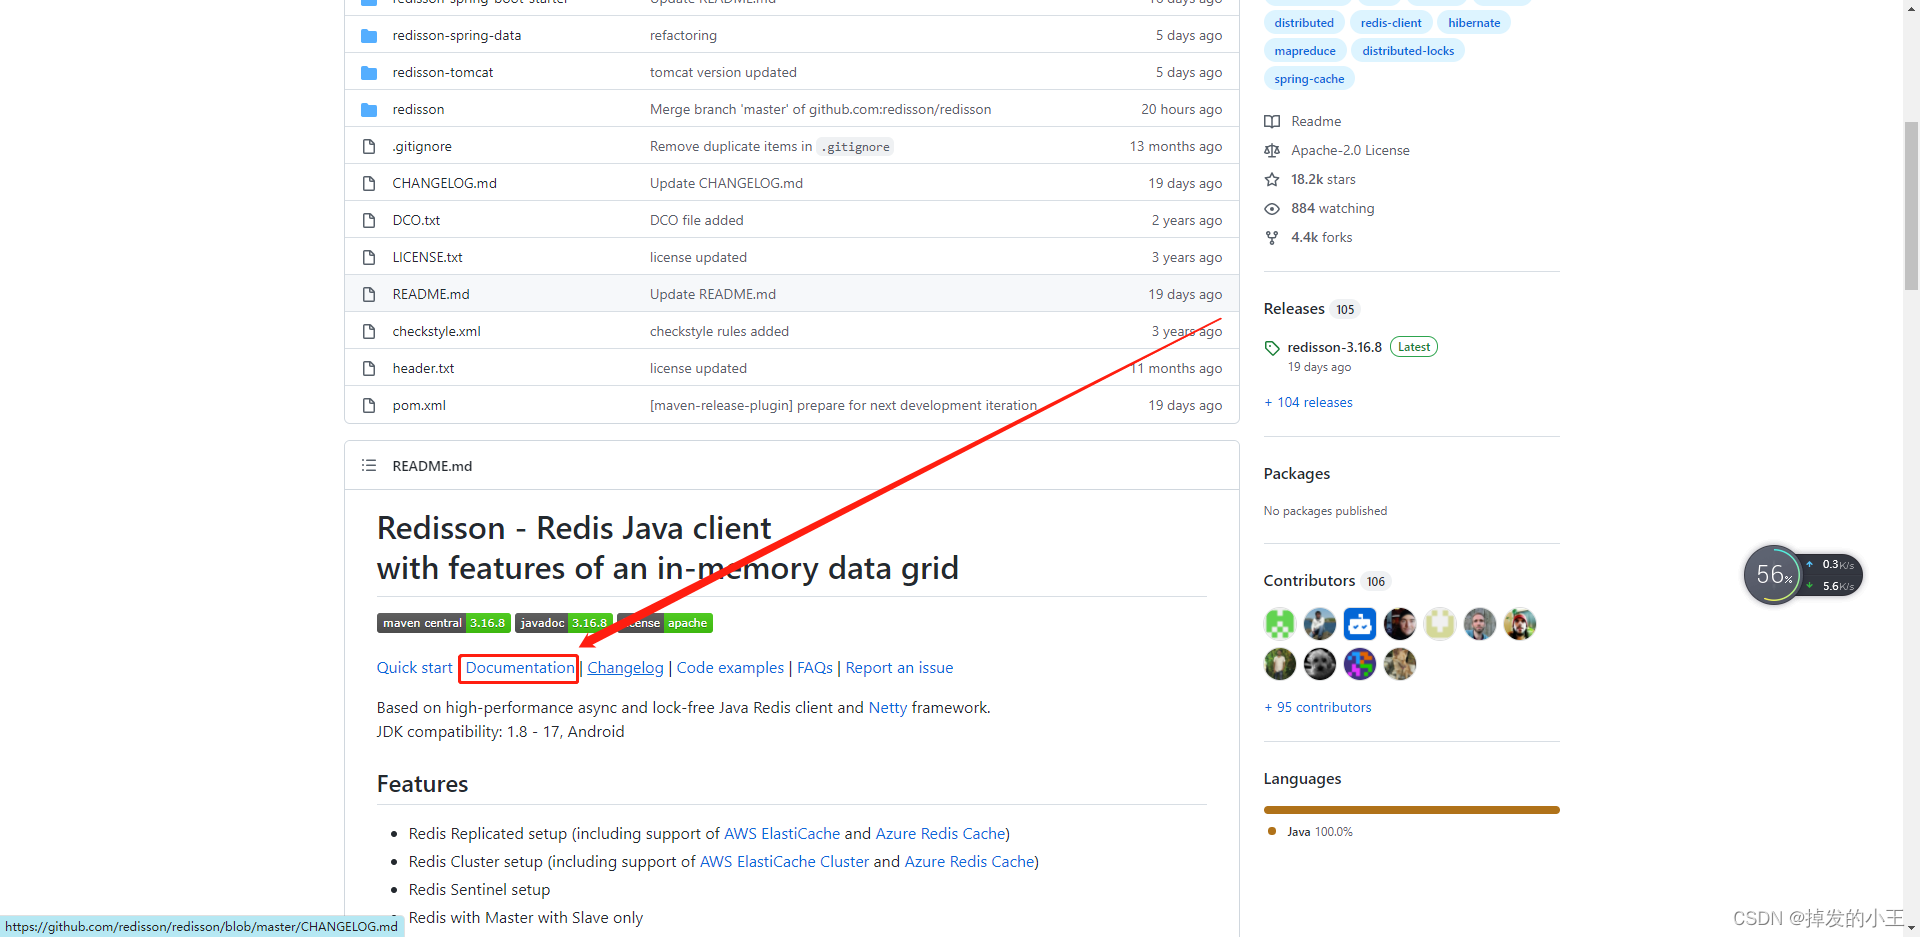
5. Redisson结构

三、Springboot整合Redisson
1. 导入依赖
<dependency>

    <groupId>org.springframework.boot</groupId>

    <artifactId>spring-boot-starter-data-redis</artifactId>

</dependency>

<dependency>

    <groupId>redis.clients</groupId>

    <artifactId>jedis</artifactId>

</dependency>

<!--redis分布式锁-->

<dependency>

    <groupId>org.redisson</groupId>

    <artifactId>redisson</artifactId>

    <version>3.12.0</version>

</dependency>
2. 以官网为例查看如何配置
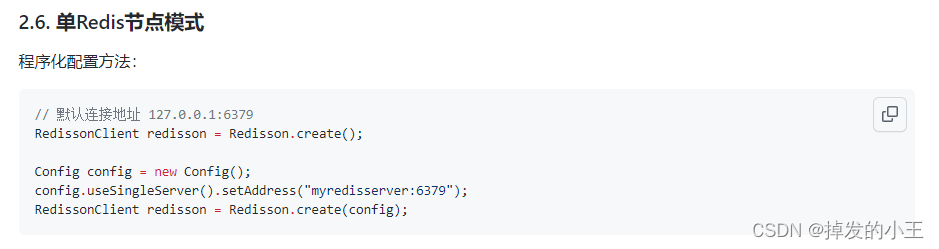
3. 编写配置类
import org.redisson.Redisson;

import org.redisson.api.RedissonClient;

import org.redisson.config.Config;

import org.springframework.context.annotation.Bean;

import org.springframework.context.annotation.Configuration;

/**

 * @author wangzhenjun

 * @date 2022/2/9 9:57

 */

@Configuration

public class MyRedissonConfig {

    /**

     * 所有对redisson的使用都是通过RedissonClient来操作的

     * @return

     */

    @Bean(destroyMethod="shutdown")

    public RedissonClient redisson(){

        // 1. 创建配置

        Config config = new Config();

        // 一定要加redis://

        config.useSingleServer().setAddress("redis://192.168.17.130:6379");

        // 2. 根据config创建出redissonClient实例

        RedissonClient redissonClient = Redisson.create(config);

        return redissonClient;

    }

}
4. 官网测试加锁例子
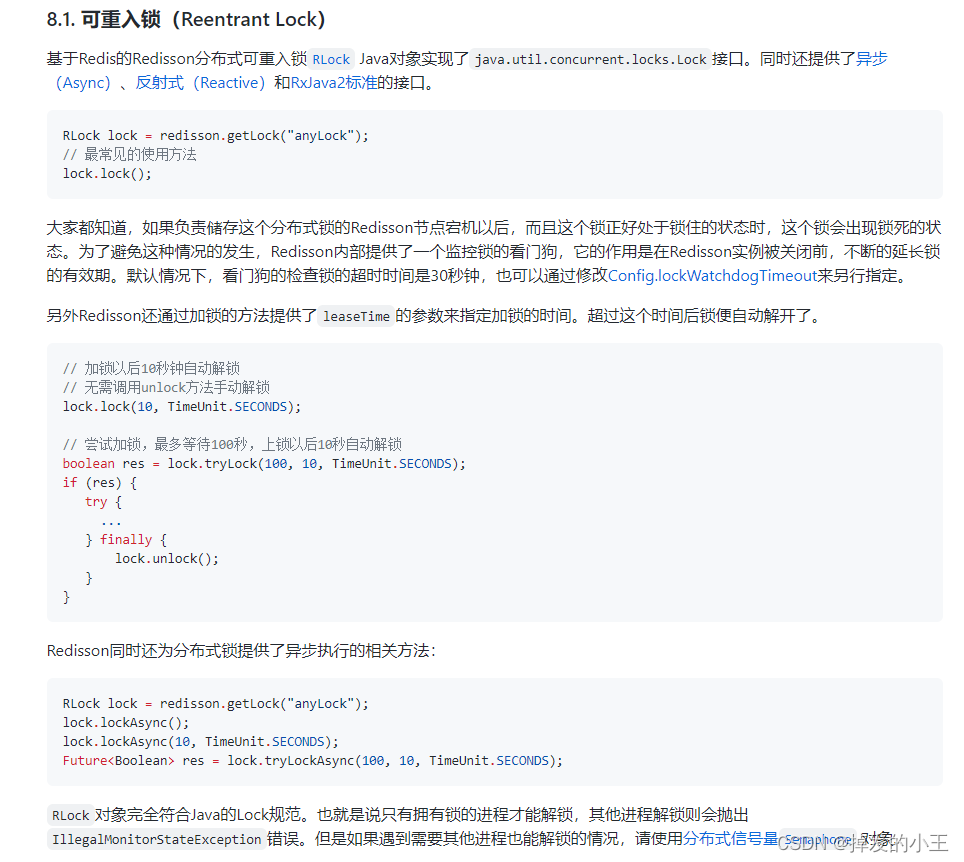
5. 根据官网简单Controller接口编写
@ResponseBody

@GetMapping("/hello")

public String hello(){

    // 1.获取一把锁,只要锁名字一样,就是同一把锁

    RLock lock = redisson.getLock("my-lock");

    // 2. 加锁

    lock.lock();// 阻塞试等待  默认加的都是30s

    // 带参数情况

    // lock.lock(10, TimeUnit.SECONDS);// 10s自动解锁,自动解锁时间一定要大于业务的执行时间。

    try {

        System.out.println("加锁成功" + Thread.currentThread().getId());

        Thread.sleep(30000);

    } catch (InterruptedException e) {

        e.printStackTrace();

    } finally {

        // 3. 解锁

        System.out.println("解锁成功:" + Thread.currentThread().getId());

        lock.unlock();

    }

    return "hello";

}
6. 测试
四、lock.lock()源码分析
1. 打开RedissonLock实现类
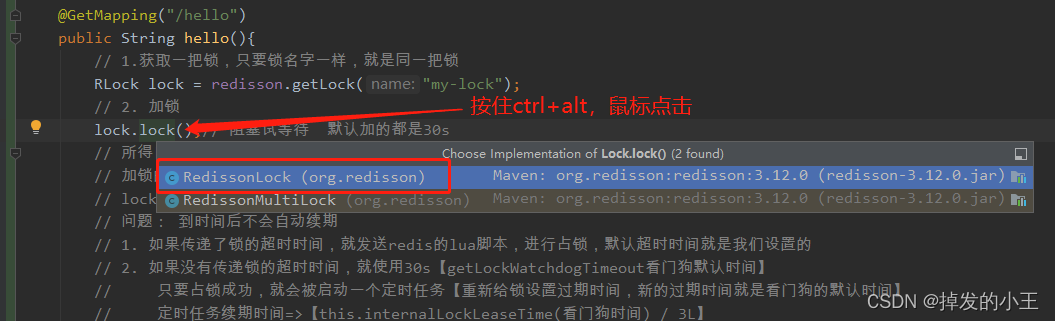
2. 找到实现方法
@Override

public void lock() {

    try {

    	// 我们发现不穿过期时间源码默认过期时间为-1

        lock(-1, null, false);

    } catch (InterruptedException e) {

        throw new IllegalStateException();

    }

}
3. 按住Ctrl进去lock方法
private void lock(long leaseTime, TimeUnit unit, boolean interruptibly) throws InterruptedException {
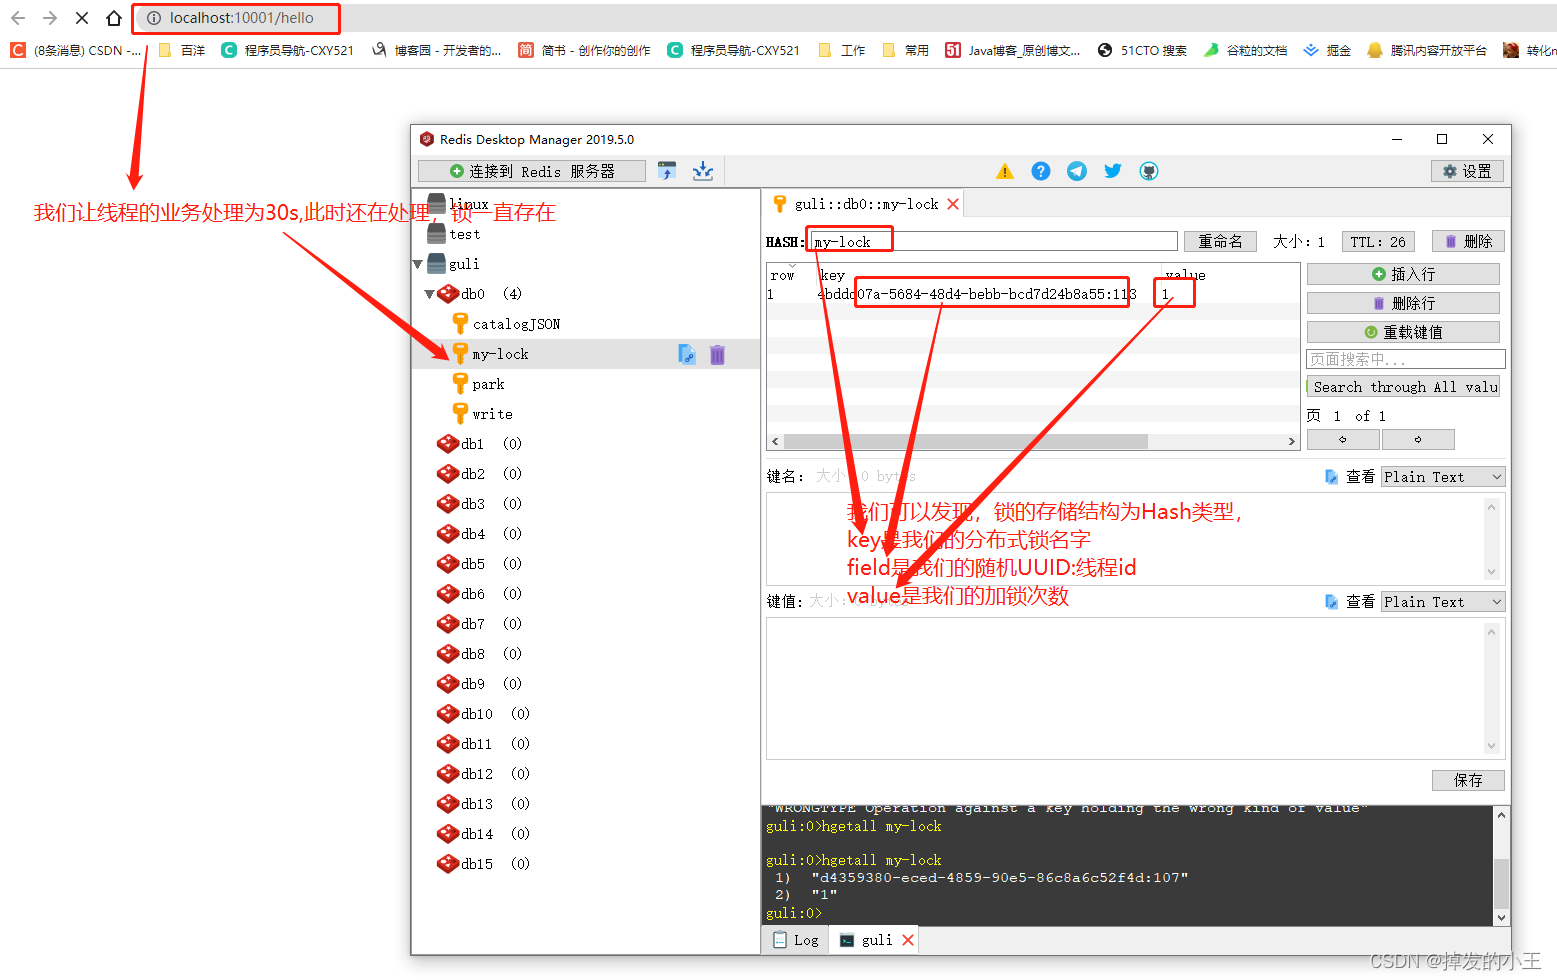
// 获取线程的id,占有锁的时候field的值为UUID:线程号id
long threadId = Thread.currentThread().getId();
// 尝试获得锁
Long ttl = tryAcquire(leaseTime, unit, threadId);
// lock acquired 获得锁,返回
if (ttl == null) {
return;
}
// 这里说明获取锁失败,就通过线程id订阅这个锁
RFuture<RedissonLockEntry> future = subscribe(threadId);
if (interruptibly) {
commandExecutor.syncSubscriptionInterrupted(future);
} else {
commandExecutor.syncSubscription(future);
}
try {
// 这里进行自旋,不断尝试获取锁
while (true) {
// 继续尝试获取锁
ttl = tryAcquire(leaseTime, unit, threadId);
// lock acquired 获取成功
if (ttl == null) {
// 直接返回,挑出自旋
break;
}
// waiting for message 继续等待获得锁
if (ttl >= 0) {
try {
future.getNow().getLatch().tryAcquire(ttl, TimeUnit.MILLISECONDS);
} catch (InterruptedException e) {
if (interruptibly) {
throw e;
}
future.getNow().getLatch().tryAcquire(ttl, TimeUnit.MILLISECONDS);
}
} else {
if (interruptibly) {
future.getNow().getLatch().acquire();
} else {
future.getNow().getLatch().acquireUninterruptibly();
}
}
}
} finally {
// 取消订阅
unsubscribe(future, threadId);
}
// get(lockAsync(leaseTime, unit));
}
4. 进去尝试获取锁方法

private Long tryAcquire(long leaseTime, TimeUnit unit, long threadId) {

	// 直接进入异步方法

    return get(tryAcquireAsync(leaseTime, unit, threadId));

}

private <T> RFuture<Long> tryAcquireAsync(long leaseTime, TimeUnit unit, long threadId) {

    // 这里进行判断如果没有设置参数leaseTime = -1

    if (leaseTime != -1) {

        return tryLockInnerAsync(leaseTime, unit, threadId, RedisCommands.EVAL_LONG);

    }

    // 此方法进行获得锁,过期时间为看门狗的默认时间

    // private long lockWatchdogTimeout = 30 * 1000;看门狗默认过期时间为30s

    // 加锁和过期时间要保证原子性,这个方法后面肯定调用执行了Lua脚本,我们下面在看

    RFuture<Long> ttlRemainingFuture = tryLockInnerAsync(commandExecutor.getConnectionManager().getCfg().getLockWatchdogTimeout(), TimeUnit.MILLISECONDS, threadId, RedisCommands.EVAL_LONG);

    // 开启一个定时任务进行不断刷新过期时间

    ttlRemainingFuture.onComplete((ttlRemaining, e) -> {

        if (e != null) {

            return;

        }

        // lock acquired 获得锁

        if (ttlRemaining == null) {

        	// 刷新过期时间方法,我们下一步详细说一下

            scheduleExpirationRenewal(threadId);

        }

    });

    return ttlRemainingFuture;

}
5. 查看tryLockInnerAsync()方法
<T> RFuture<T> tryLockInnerAsync(long leaseTime, TimeUnit unit, long threadId, RedisStrictCommand<T> command) {

    internalLockLeaseTime = unit.toMillis(leaseTime);

    return commandExecutor.evalWriteAsync(getName(), LongCodec.INSTANCE, command,

    		  // 首先判断锁是否存在

              "if (redis.call('exists', KEYS[1]) == 0) then " +

              		// 存在则获取锁

                  "redis.call('hset', KEYS[1], ARGV[2], 1); " +

                  // 然后设置过期时间

                  "redis.call('pexpire', KEYS[1], ARGV[1]); " +

                  "return nil; " +

              "end; " +

              // hexists查看哈希表的指定字段是否存在,存在锁并且是当前线程持有锁

              "if (redis.call('hexists', KEYS[1], ARGV[2]) == 1) then " +

              		// hincrby自增一

                  "redis.call('hincrby', KEYS[1], ARGV[2], 1); " +

                  	// 锁的值大于1,说明是可重入锁,重置过期时间

                  "redis.call('pexpire', KEYS[1], ARGV[1]); " +

                  "return nil; " +

              "end; " +

              // 锁已存在,且不是本线程,则返回过期时间ttl

              "return redis.call('pttl', KEYS[1]);",

                Collections.<Object>singletonList(getName()), internalLockLeaseTime, getLockName(threadId));

}
6. 进入4留下的定时任务scheduleExpirationRenewal()方法
一步步往下找源码:scheduleExpirationRenewal --->renewExpiration
根据下面源码,定时任务刷新时间为:internalLockLeaseTime / 3,是看门狗的1/3,即为10s刷新一次
private void renewExpiration() {

    ExpirationEntry ee = EXPIRATION_RENEWAL_MAP.get(getEntryName());

    if (ee == null) {

        return;

    }

    Timeout task = commandExecutor.getConnectionManager().newTimeout(new TimerTask() {

        @Override

        public void run(Timeout timeout) throws Exception {

            ExpirationEntry ent = EXPIRATION_RENEWAL_MAP.get(getEntryName());

            if (ent == null) {

                return;

            }

            Long threadId = ent.getFirstThreadId();

            if (threadId == null) {

                return;

            }

            RFuture<Boolean> future = renewExpirationAsync(threadId);

            future.onComplete((res, e) -> {

                if (e != null) {

                    log.error("Can't update lock " + getName() + " expiration", e);

                    return;

                }

                if (res) {

                    // reschedule itself

                    renewExpiration();

                }

            });

        }

    }, internalLockLeaseTime / 3, TimeUnit.MILLISECONDS);

    ee.setTimeout(task);

}
五、lock.lock(10, TimeUnit.SECONDS)源码分析
1. 打开实现类
@Override

public void lock(long leaseTime, TimeUnit unit) {

    try {

    	// 这里的过期时间为我们输入的10

        lock(leaseTime, unit, false);

    } catch (InterruptedException e) {

        throw new IllegalStateException();

    }

}
2. 方法lock()实现展示,同三.3源码
3. 直接来到尝试获得锁tryAcquireAsync()方法
private <T> RFuture<Long> tryAcquireAsync(long leaseTime, TimeUnit unit, long threadId) {

    // 这里进行判断如果没有设置参数leaseTime = -1,此时我们为10

    if (leaseTime != -1) {

    	// 来到此方法

        return tryLockInnerAsync(leaseTime, unit, threadId, RedisCommands.EVAL_LONG);

    }

    // 此处省略后面内容,前面以详细说明。。。。

}
4. 打开tryLockInnerAsync()方法
我们不难发现和没有传过期时间的方法一样,只不过leaseTime的值变了。
<T> RFuture<T> tryLockInnerAsync(long leaseTime, TimeUnit unit, long threadId, RedisStrictCommand<T> command) {

    internalLockLeaseTime = unit.toMillis(leaseTime);

    return commandExecutor.evalWriteAsync(getName(), LongCodec.INSTANCE, command,

    		  // 首先判断锁是否存在

              "if (redis.call('exists', KEYS[1]) == 0) then " +

              		// 存在则获取锁

                  "redis.call('hset', KEYS[1], ARGV[2], 1); " +

                  // 然后设置过期时间

                  "redis.call('pexpire', KEYS[1], ARGV[1]); " +

                  "return nil; " +

              "end; " +

              // hexists查看哈希表的指定字段是否存在,存在锁并且是当前线程持有锁

              "if (redis.call('hexists', KEYS[1], ARGV[2]) == 1) then " +

              		// hincrby自增一

                  "redis.call('hincrby', KEYS[1], ARGV[2], 1); " +

                  	// 锁的值大于1,说明是可重入锁,重置过期时间

                  "redis.call('pexpire', KEYS[1], ARGV[1]); " +

                  "return nil; " +

              "end; " +

              // 锁已存在,且不是本线程,则返回过期时间ttl

              "return redis.call('pttl', KEYS[1]);",

                Collections.<Object>singletonList(getName()), internalLockLeaseTime, getLockName(threadId));

}
六、lock.unlock()源码分析
1. 打开方法实现
@Override

public void unlock() {

    try {

    	// 点击进入释放锁方法

        get(unlockAsync(Thread.currentThread().getId()));

    } catch (RedisException e) {

        if (e.getCause() instanceof IllegalMonitorStateException) {

            throw (IllegalMonitorStateException) e.getCause();

        } else {

            throw e;

        }

    }

//        Future<Void> future = unlockAsync();

//        future.awaitUninterruptibly();

//        if (future.isSuccess()) {

//            return;

//        }

//        if (future.cause() instanceof IllegalMonitorStateException) {

//            throw (IllegalMonitorStateException)future.cause();

//        }

//        throw commandExecutor.convertException(future);

}
2. 打开unlockAsync()方法
@Override

public RFuture<Void> unlockAsync(long threadId) {

    RPromise<Void> result = new RedissonPromise<Void>();

    // 解锁方法,后面展开说

    RFuture<Boolean> future = unlockInnerAsync(threadId);

	// 完成

    future.onComplete((opStatus, e) -> {

        if (e != null) {

        	// 取消到期续订

            cancelExpirationRenewal(threadId);

            // 将这个未来标记为失败并通知所有人

            result.tryFailure(e);

            return;

        }

		// 状态为空,说明解锁的线程和当前锁不是同一个线程

        if (opStatus == null) {

            IllegalMonitorStateException cause = new IllegalMonitorStateException("attempt to unlock lock, not locked by current thread by node id: "

                    + id + " thread-id: " + threadId);

            result.tryFailure(cause);

            return;

        }

        cancelExpirationRenewal(threadId);

        result.trySuccess(null);

    });

    return result;

}
3. 打开unlockInnerAsync()方法
protected RFuture<Boolean> unlockInnerAsync(long threadId) {

    return commandExecutor.evalWriteAsync(getName(), LongCodec.INSTANCE, RedisCommands.EVAL_BOOLEAN,

    		// 判断释放锁的线程和已存在锁的线程是不是同一个线程,不是返回空

            "if (redis.call('hexists', KEYS[1], ARGV[3]) == 0) then " +

                "return nil;" +

            "end; " +

            // 释放锁后,加锁次数减一

            "local counter = redis.call('hincrby', KEYS[1], ARGV[3], -1); " +

            // 判断剩余数量是否大于0

            "if (counter > 0) then " +

            	// 大于0 ,则刷新过期时间

                "redis.call('pexpire', KEYS[1], ARGV[2]); " +

                "return 0; " +

            "else " +

            	// 释放锁,删除key并发布锁释放的消息

                "redis.call('del', KEYS[1]); " +

                "redis.call('publish', KEYS[2], ARGV[1]); " +

                "return 1; "+

            "end; " +

            "return nil;",

            Arrays.<Object>asList(getName(), getChannelName()), LockPubSub.UNLOCK_MESSAGE, internalLockLeaseTime, getLockName(threadId));

}
七、总结
这样大家就跟着小编走完了一遍底层源码,是不是感觉自己又行了,哈哈哈。小编走下来一遍觉得收货还是蛮大的,以前不敢点进去源码,进去就懵逼了,所以人要大胆的向前迈出第一步。一起加油吧,看到这里不一键三连,有点对不起小编了哦!!
顺便推广一下自己的网站!!!
Springboot基于Redisson实现Redis分布式可重入锁【案例到源码分析】的更多相关文章
- redis实现分布式可重入锁
利用redis可以实现分布式锁,demo如下: /** * 保存每个线程独有的token */ private static ThreadLocal<String> tokenMap = ...
- ReentrantLock可重入锁的理解和源码简单分析
import java.util.concurrent.TimeUnit; import java.util.concurrent.locks.ReentrantLock; /** * @author ...
- 分布式架构-Redis 从入门到精通 完整案例 附源码
导读 篇幅较长,干货十足,阅读需要花点时间,全部手打出来的字,难免出现错别字,敬请谅解.珍惜原创,转载请注明出处,谢谢~! NoSql介绍与Redis介绍 什么是Redis? Redis是用C语言开发 ...
- Redis核心原理与实践--事务实践与源码分析
Redis支持事务机制,但Redis的事务机制与传统关系型数据库的事务机制并不相同. Redis事务的本质是一组命令的集合(命令队列).事务可以一次执行多个命令,并提供以下保证: (1)事务中的所有命 ...
- [python] 基于词云的关键词提取:wordcloud的使用、源码分析、中文词云生成和代码重写
1. 词云简介 词云,又称文字云.标签云,是对文本数据中出现频率较高的“关键词”在视觉上的突出呈现,形成关键词的渲染形成类似云一样的彩色图片,从而一眼就可以领略文本数据的主要表达意思.常见于博客.微博 ...
- Django基于Pycharm开发之四[关于静态文件的使用,配置以及源码分析](原创)
对于django静态文件的使用,如果开发过netcore程序的开发人员,可能会比较容易理解django关于静态文件访问的设计原理,个人觉得,这是一个middlerware的设计,但是在django中我 ...
- Golang可重入锁的实现
Golang可重入锁的实现 项目中遇到了可重入锁的需求和实现,具体记录下. 什么是可重入锁 我们平时说的分布式锁,一般指的是在不同服务器上的多个线程中,只有一个线程能抢到一个锁,从而执行一个任务.而我 ...
- Java 重入锁 ReentrantLock 原理分析
1.简介 可重入锁ReentrantLock自 JDK 1.5 被引入,功能上与synchronized关键字类似.所谓的可重入是指,线程可对同一把锁进行重复加锁,而不会被阻塞住,这样可避免死锁的产生 ...
- ReentrantLock(重入锁)简单源码分析
1.ReentrantLock是基于AQS实现的一种重入锁. 2.先介绍下公平锁/非公平锁 公平锁 公平锁是指多个线程按照申请锁的顺序来获取锁. 非公平锁 非公平锁是指多个线程获取锁的顺序并不是按照申 ...
随机推荐
- 在Rainbond上使用Locust进行压力测试
Locust简介 Locust 是一种易于使用.可编写脚本且可扩展的性能测试工具.并且有一个用户友好的 Web 界面,可以实时显示测试进度.甚至可以在测试运行时更改负载.它也可以在没有 UI 的情况下 ...
- 推荐召回--基于用户的协同过滤UserCF
目录 1. 前言 2. 原理 3. 数据及相似度计算 4. 根据相似度计算结果 5. 相关问题 5.1 如何提炼用户日志数据? 5.2 用户相似度计算很耗时,有什么好的方法? 5.3 有哪些改进措施? ...
- C++虚函数和静态函数调用方式
简单情况: #include<iostream> using namespace std; class A { public: virtual void foo() { cout < ...
- openstack,docker,mesos,Kubernetes(k8s)
作者:张乾链接:https://www.zhihu.com/question/62985699/answer/204233732来源:知乎著作权归作者所有.商业转载请联系作者获得授权,非商业转载请注明 ...
- ansible roles实践——安装httpd
1. vim httpd.yml 2.执行
- 不难懂——th: 的常用标签
关键字> 功能介绍 > 案例 th:id 替换id <input th:id="'xxx' + ${collect.id}"/> ...
- 感恩陪伴 HelloGitHub 定制的红包封面
距离放假越来越近了,我们更文的频率也越来越低了. 先别打!听我解释... 我真没偷懒,我是去研究今年的「微信红包封面」玩法了. 这不去年,我们制作的 HelloGitHub 专属红包封面,很多粉丝都说 ...
- Linux查看CPU历史负载
sar -f /var/log/sa/sa20 -s 02:00:00 -e 06:00:00 | head -n 50 sysstat工具与负载历史回放 很多系统负载过高的时候我们是无法立即获知或者 ...
- Understanding C++ Modules In C++20 (2)
Compiling evironment: linux (ubuntu 16.04)+ gcc-10.2. The post will focus on using export,import,vis ...
- Android生成xml
XmlSerializer //使用XmlSerializer来序列化xml文件 public static boolean backupSms_android(Context con ...