微信小程序云开发-云存储的应用-识别身份证(正面和反面)
一、准备工作
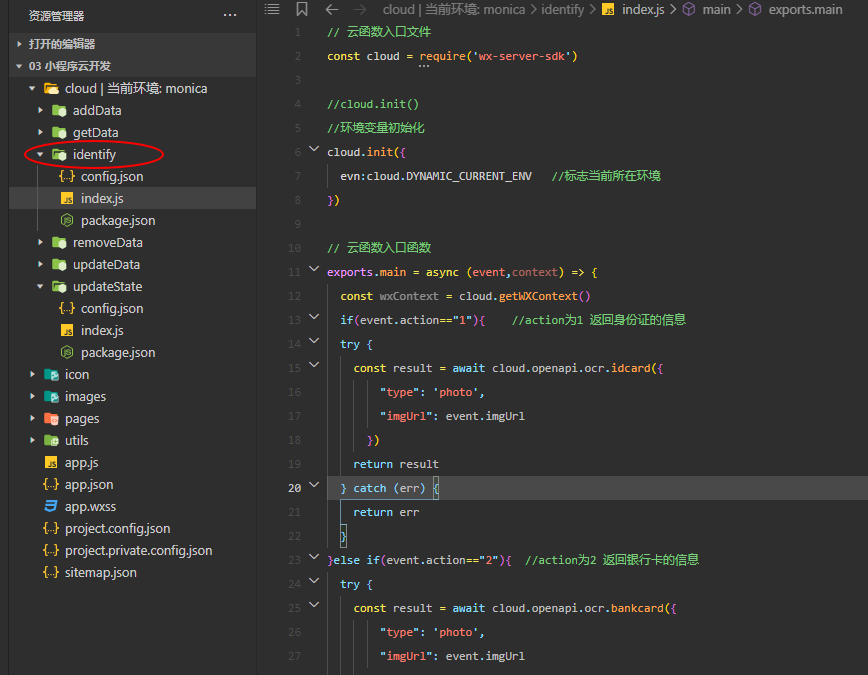
1、创建云函数identify

2、云函数identify中index.js代码
 1 // 云函数入口文件

 2 const cloud = require('wx-server-sdk')

 3

 4 //cloud.init()

 5 //环境变量初始化

 6 cloud.init({

 7   evn:cloud.DYNAMIC_CURRENT_ENV   //标志当前所在环境

 8 })

 9

10 // 云函数入口函数

11 exports.main = async (event,context) => {

12   const wxContext = cloud.getWXContext()

13   if(event.action=="1"){    //action为1 返回身份证的信息

14   try {

15     const result = await cloud.openapi.ocr.idcard({

16         "type": 'photo',

17         "imgUrl": event.imgUrl

18       })

19     return result

20   } catch (err) {

21     return err

22   }

23 }else if(event.action=="2"){  //action为2 返回银行卡的信息

24   try {

25     const result = await cloud.openapi.ocr.bankcard({

26         "type": 'photo',

27         "imgUrl": event.imgUrl

28       })

29     return result

30   } catch (err) {

31     return err

32   }

33 }else if(event.action=="3"){  //action为3 返回驾驶证的信息

34   try {

35     const result = await cloud.openapi.ocr.driverLicense({

36         "type": 'photo',

37         "imgUrl": event.imgUrl

38       })

39     return result

40   } catch (err) {

41     return err

42   }

43 }else if(event.action=="4"){        //action为4 返回行驶证的信息

44   try {

45     const result = await cloud.openapi.ocr.vehicleLicense({

46         "type": 'photo',

47         "imgUrl": event.imgUrl

48       })

49     return result

50   } catch (err) {

51     return err

52   }

53 }else if(event.action=="5"){        //action为5 返回营业执照的信息

54   try {

55     const result = await cloud.openapi.ocr.businessLicense({

56         "imgUrl": event.imgUrl

57       })

58     return result

59   } catch (err) {

60     return err

61   }

62 }else if(event.action=="6"){        //action为6 返回通用印刷体的信息

63   try {

64     const result = await cloud.openapi.ocr.businessLicense({

65         "imgUrl": event.imgUrl

66       })

67     return result

68   } catch (err) {

69     return err

70   }

71 }

72 }
二、创建页面并写相应代码
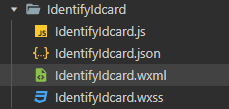
创建页面IdentifyIdcard,用于OCR识别身份证正面和反面

1、IdentifyIdcard.wxml
<button bindtap="identifyIdcardFront" type="primary">识别身份证正面</button>

<!-- 把识别到的身份证正面图片显示到页面上 -->

<view class="idcard">

<image src="{{idcardFrontURL}}"></image>

</view>

<!-- 把识别到的身份证正面信息显示到页面上 -->

<view class="front" wx:if="{{showIdCardFront}}">

<view>正反:{{idcardFrontMsg.type}}</view>

<view>身份证号:{{idcardFrontMsg.id}}</view>

<view>姓名:{{idcardFrontMsg.name}}</view>

<view>住址:{{idcardFrontMsg.addr}}</view>

<view>性别:{{idcardFrontMsg.gender}}</view>

<view>民族:{{idcardFrontMsg.nationality}}</view>

</view>

<button bindtap="identifyIdcardBack" type="primary">识别身份证背面</button>

<!-- 把识别到的身份证背面图片显示到页面上 -->

<view class="idcard">

<image src="{{idcardBackURL}}" ></image>

</view>

<!-- 把识别到的身份证背面信息显示到页面上 -->

<view class="front" wx:if="{{showIdCardBack}}">

<view>正反:{{idcardBankMsg.type}}</view>

<view>有效期:{{idcardBankMsg.validDate}}</view>

<view>公安局:{{idcardBankMsg.authority}}</view>

<view>属性:{{idcardBankMsg.cardProperty}}</view>

</view>
2、IdentifyIdcard.wxss
 1 button{

 2   margin: 20rpx;

 3 }

 4 .front{

 5   margin: 20rpx;

 6 }

 7

 8 .idcard{

 9   text-align: center;

10 }

11 .idcard image{

12   width: 95%rpx;

13   height: 300rpx;

14 }
3、IdentifyIdcard.js
  1 Page({

  2   //初始化数据

  3   data:{

  4     showIdCardFront:false,

  5     showIdCardBack:false,

  6     //定义对象,存放需要展示在页面的信息

  7     idcardFrontMsg:{},

  8     idcardBankMsg:{},

  9   },

 10 /*

 11 识别身份信息。分为4步:

 12     //第一步:选择图片

 13     //第二步:上传图片到云存储

 14     //第三步:获取云存储图片的真实链接

 15     //第四步:OCR识别图片信息

 16 */

 17

 18 //识别身份证正面信息

 19 identifyIdcardFront(){

 20   //调用函数,实现选择图片

 21   this.chooseImage()

 22 },

 23

 24 //自定义函数,从相册/拍照选择图片

 25 chooseImage(){

 26   wx.chooseImage({

 27     count: 1,

 28     sizeType: ['original', 'compressed'],

 29     sourceType: ['album', 'camera'],

 30   }).then(res=>{

 31     console.log("图片选择成功",res);

 32     console.log("所选图片的临时链接",res.tempFilePaths[0]);

 33     //调用函数,实现上传图片到云存储(传递参数为临时链接)

 34     this.uploadFile(res.tempFilePaths[0])

 35   }).catch(err=>{

 36     console.log("图片选择失败",err);

 37   })

 38 },

 39

 40 //自定义函数,上传所选图片到云存储

 41 uploadFile(tempFile){

 42   wx.cloud.uploadFile({

 43     cloudPath: (new Date()).valueOf()+'.png',

 44     filePath: tempFile,

 45   }).then(res=>{

 46     console.log("图片上传到云存储成功",res);

 47     console.log("图片在云存储里的fileID",res.fileID);

 48     //调用函数,实现获取图片的真实链接(传递参数为云存储的fileID)

 49     this.getImageURL(res.fileID)

 50     //将上传成功的图片显示到页面上

 51     this.setData({

 52       idcardFrontURL:res.fileID

 53     })

 54   }).catch(err=>{

 55     console.log("图片上传到云存储失败",err);

 56   })

 57 },

 58

 59 //自定义函数,用获取云函数图片的真实链接

 60 getImageURL(fileID){

 61   wx.cloud.getTempFileURL({

 62     fileList:[fileID]

 63   }).then(res=>{

 64     console.log("获取图片真实链接成功",res);

 65     //调用函数,实现识别身份证信息(传递参数为图片在云存储中的真实链接)

 66     this.identify(res.fileList[0].tempFileURL)

 67   }).catch(err=>{

 68     console.log("获取图片真实链接失败",err);

 69   })

 70 },

 71

 72 //自定义函数,识别身份证信息

 73 identify(imgUrl){

 74   //调用云函数OCR识别身份证信息

 75   wx.cloud.callFunction({

 76     name:"identify",

 77     data:{

 78       imgUrl:imgUrl,   //传递参数给云函数

 79       action:"1"

 80     }

 81   }).then(res=>{

 82     console.log("身份证图片识别成功",res);

 83     this.setData({

 84       idcardFrontMsg:res.result,

 85       showIdCardFront:true,

 86       showIdCardBack:false,

 87     })

 88   }).catch(err=>{

 89     console.log("身份证图片识别失败",err);

 90   })

 91 },

 92

 93 //识别身份证背面信息

 94 identifyIdcardBack(){

 95   //选择图片

 96   wx.chooseImage({

 97     count: 1,

 98     sizeType: ['original', 'compressed'],

 99     sourceType: ['album', 'camera'],

100   }).then(res=>{

101     console.log("图片选择成功",res);

102     console.log("所选图片的临时链接",res.tempFilePaths[0]);

103     //上传图片

104     wx.cloud.uploadFile({

105       cloudPath: (new Date()).valueOf()+'.png',

106       filePath: res.tempFilePaths[0],

107     }).then(res=>{

108       console.log("图片上传到云存储成功",res);

109       console.log("图片在云存储里的fileID",res.fileID);

110       //将上传成功的图片显示到页面上

111       this.setData({

112         idcardBackURL:res.fileID,

113       })

114       //获取图片真实URL

115       wx.cloud.getTempFileURL({

116         fileList:[res.fileID]

117       }).then(res=>{

118         console.log("获取图片真实链接成功",res);

119         //识别身份证背面信息

120         wx.cloud.callFunction({

121           name:"identify",

122           data:{

123             imgUrl:res.fileList[0].tempFileURL,   //传递参数给云函数

124             action:"1"       //action为1表示身份证,2表示银行卡,3表示驾驶证(在云函数中自定义的)

125           }

126         }).then(res=>{

127           console.log("身份证图片识别成功",res);

128           this.setData({

129             idcardBankMsg:res.result,

130             showIdCardBack:true,

131           })

132         }).catch(err=>{

133           console.log("身份证图片识别失败",err);

134         })

135       }).catch(err=>{

136         console.log("获取图片真实链接失败",err);

137       })

138     }).catch(err=>{

139       console.log("图片上传到云存储失败",err);

140     })

141

142   }).catch(err=>{

143     console.log("图片选择失败",err);

144   })

145 }

146 })
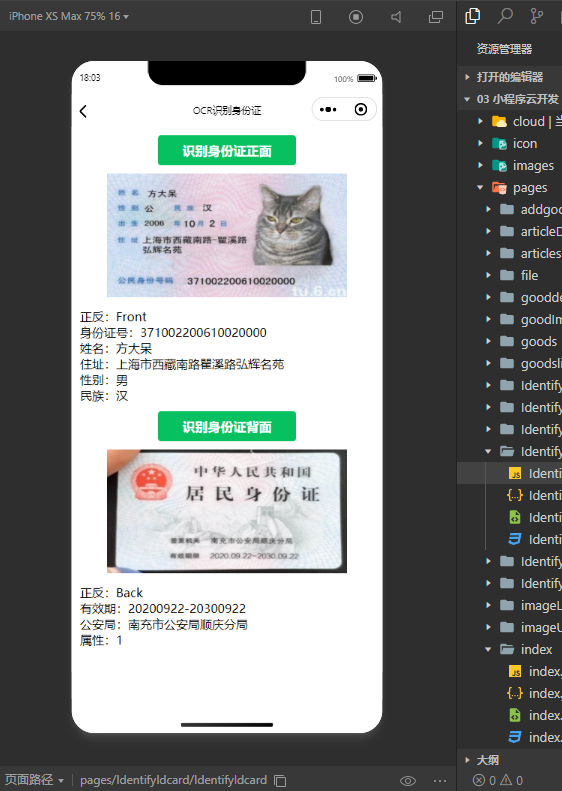
三、效果展示
1、图片展示

2、视频展示

································································································································································································
报错分析:
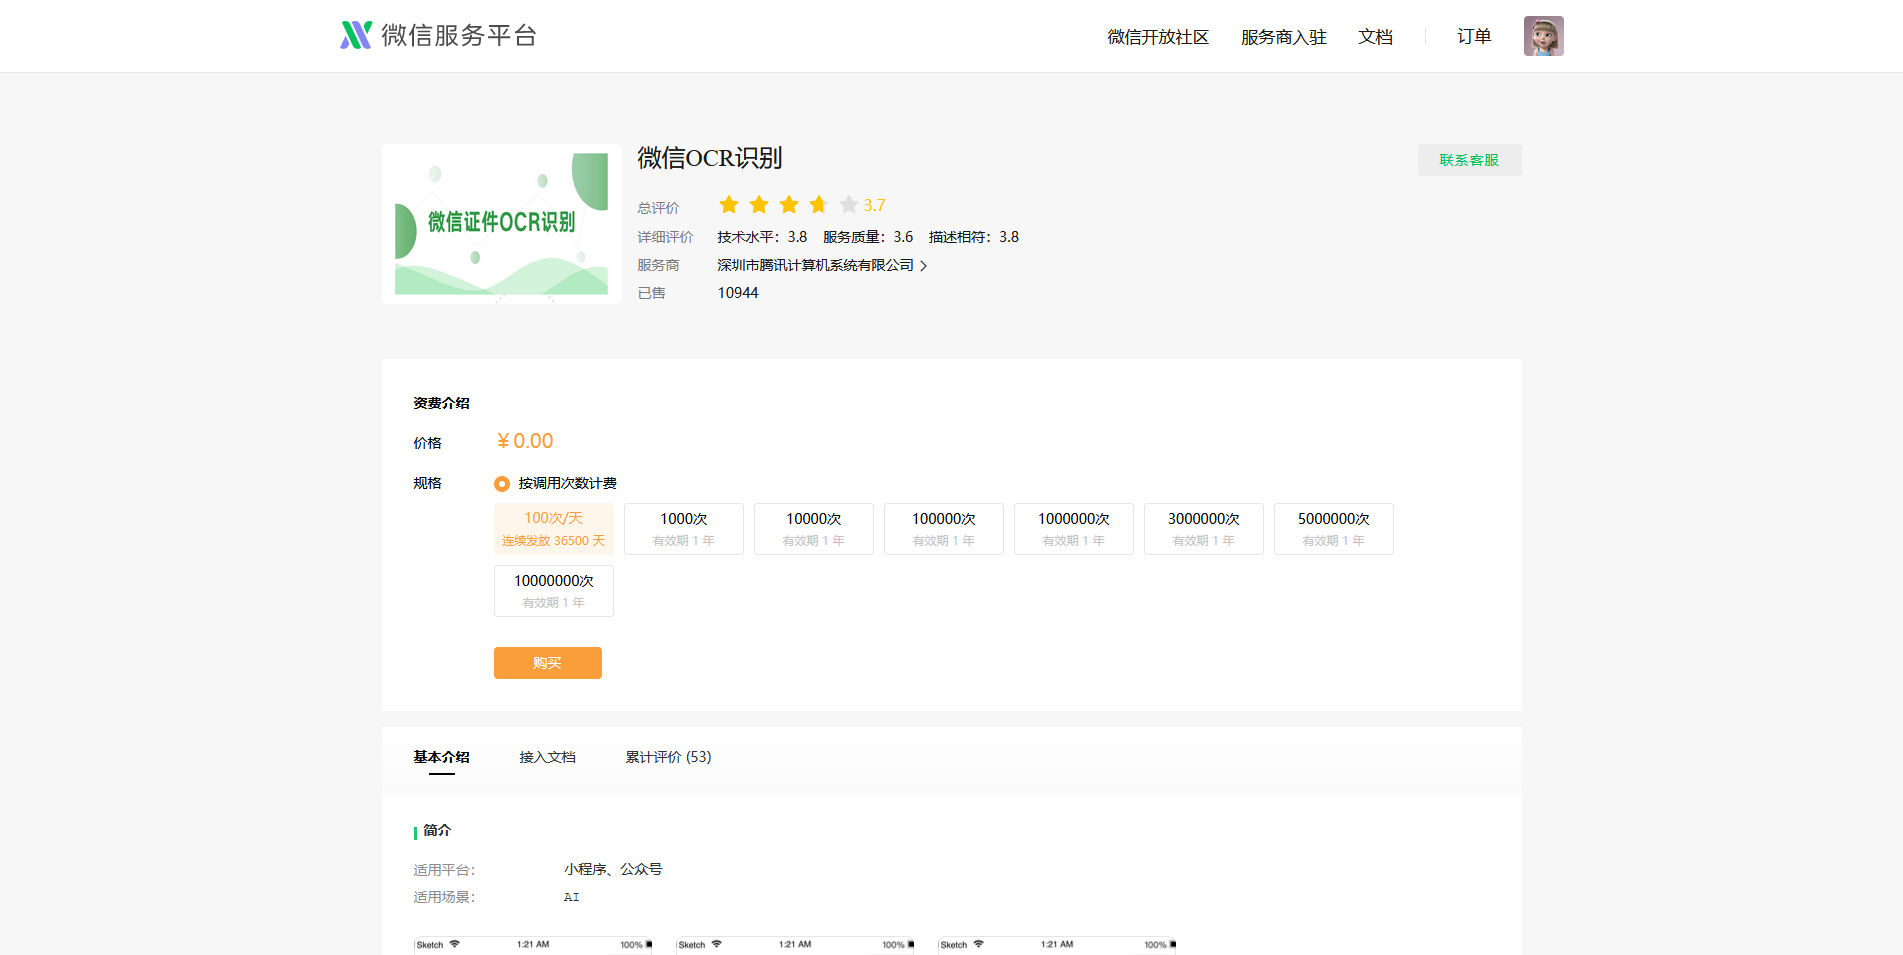
1、报错:调用云函数识别身份证时,报错fail not enough market quota hint

解决方案:
1、进入微信服务平台购买https://developers.weixin.qq.com/community/servicemarket/detail/000ce4cec24ca026d37900ed551415

2、选择自己想要的规格。然后授权你的小程序,提交订单购买即可。


3、重新编译,即可成功获取result信息。

微信小程序云开发-云存储的应用-识别身份证(正面和反面)的更多相关文章
- 微信小程序+腾讯云直播的实时音视频实战笔记
欢迎访问我的GitHub https://github.com/zq2599/blog_demos 内容:所有原创文章分类汇总及配套源码,涉及Java.Docker.Kubernetes.DevOPS ...
- 微信小程序腾讯云php后台解决方案
微信小程序腾讯云php后台解决方案 微信小程序前段需要添加必要的文件以配合后端 (1)wafer2-client-sdk sdk提供了几种接口包括登陆,获取用户openid,图片上传等 (2)conf ...
- 微信小程序-视频教程-百度云-下载
链接: https://pan.baidu.com/s/16WGL3whutozx-UXqsDPhhA 提取码: 关注公众号[GitHubCN]回复获取 什么是微信小程序?小程序是一种不需要下载安 ...
- 小程序语音红包开发中 汉字转拼音的问题 微信小程序红包开发遇到的坑
公司最近在开发微信小程序的红包功能,语音红包需要用到文字转拼音的功能. 之前介绍过怎么将中文的汉字转为拼音的,具体看下面这篇文章. 微信语音红包小程序开发如何提高精准度 红包小程序语音识别精准度 微信 ...
- 《微信小程序商城开发实战》笔者的新书,欢迎各位粉丝上京东购买
作者图书京东链接,请点击------>>> **微信小程序商城开发实战** 附京东真实评价截图: 编辑推荐 在当今移动互联网大潮中,微信应用凭借其庞大的用户基数和极强的用户黏性 ...
- Django微信小程序后台开发教程
本文链接:https://blog.csdn.net/qq_43467898/article/details/83187698Django微信小程序后台开发教程1 申请小程序,创建hello worl ...
- vue+uni-app商城实战 | 第一篇:【有来小店】微信小程序快速开发接入Spring Cloud OAuth2认证中心完成授权登录
一. 前言 本篇通过实战来讲述如何使用uni-app快速进行商城微信小程序的开发以及小程序如何接入后台Spring Cloud微服务. 有来商城 youlai-mall 项目是一套全栈商城系统,技术栈 ...
- 微信小程序快速开发
微信小程序快速开发 一.注册小程序账号,下载IDE 1.官网注册https://mp.weixin.qq.com/,并下载IDE. 2.官方文档一向都是最好的学习资料. 注意:1)注册账号之后会有一个 ...
- 【微信小程序】开发实战 之 「配置项」与「逻辑层」
微信小程序作为微信生态重要的一环,在实际生活.工作.商业中的应用越来越广泛.想学习微信小程序开发的朋友也越来越多,本文将在小程序框架的基础上就微信小程序项目开发所必需的基础知识及语法特点进行了详细总结 ...
随机推荐
- 【Java实现】剑指offer53.1——在排序数组中查找数字(LeetCode34:在排序数组中查找元素的起始位置)
序数组中查找元素的起始位置):思路分享 <剑指offer>题目和LeetCode主站本质是一样的,想要找到target数目,也需要找到左右边界 题目解析: 在一个排序数组中,找到targe ...
- CVPR2021|一个高效的金字塔切分注意力模块PSA
前言: 前面分享了一篇<继SE,CBAM后的一种新的注意力机制Coordinate Attention>,其出发点在于SE只引入了通道注意力,CBAM的空间注意力只考虑了局部区域的信息 ...
- C#设计模式学习之装饰者模式
写这个随笔时,其实对该模式理解的并不是十分透彻.在此想到什么写什么,希望对自己对他人有所帮助. 装饰者模式主要是应用继承和组合的思想,极大的实现了程序的多态,使得的程序有了更高的扩展性. 第一个基础例 ...
- jQuery获取标签信息
<!DOCTYPE html><html><head> <meta charset="utf-8"/> <titl ...
- excel用函数去掉单元格内容中的括号,并只保留单元格里面的内容
1.substitute(需要执行替换操作的单元格,需要替换的字符,替换后的字符,有多个需要替换的字符可以指定替换的第几个) 例如:aab--substitute("aab",&q ...
- 8、inotify和resync的优缺点
只有对外提供访问的服务需要有端口号,本地服务无端口号: 8.1.inotify的优缺点: 1.优点: 监控文件系统事件变化,通过同步工具实现实时的数据同步 2.缺点: 并发如果大于200个文件(10- ...
- css题库(含答案)
tip:<为< 单选题 1.页面上的div标签,其HTML结构如下: <div id="father"> <p class="son&quo ...
- AcWing 1282. 搜索关键词
给定n个长度不超过50的由小写英文字母组成的单词,以及一篇长为m的文章. 请问,有多少个单词在文章中出现了. #include<bits/stdc++.h> using namespace ...
- java_线程创建的三种方式及区别
java中关于线程的创建有三种: (1)通过继承Thread类创建线程. (2)通过实现Runnable接口创建线程. (3)通过Callable 和 Future 接口创建线程. * * * * * ...
- [小技巧] Windows7 半角全角快捷键 修改方法
From : http://blog.sina.com.cn/s/blog_87ab67b10100x3ww.html 转载说明:在浏览器下我们可以使用空格下翻一页,Shift + 空格上翻一页. 但 ...
