SSH 三大框架整合
Spring整合web项目
在Servlet当中直接加载配置文件,获取对象

存在问题
- 每次请求都会创建一个Spring的工厂,这样浪费服务器资源,应该一个项目只有一个Spring的工厂。
- 在服务器启动的时候,创建一个Spring的工厂。
- 创建完工厂,将这个工厂类保存到ServletContext中。
- 每次使用的时候都从ServletContext中获取。
解决方案
使用spring核心监听器ContextLoaderListener
引入jar包 spring-web.jar
配置监听器:
<!-- Spring的核心监听器 -->

<listener>

	<listener-class>org.springframework.web.context.ContextLoaderListener</listener-class>

</listener>

<!-- 加载Spring的配置文件的路径的,默认加载的/WEB-INF/applicationContext.xml -->

<context-param>

	<param-name>contextConfigLocation</param-name>

	<param-value>classpath:applicationContext.xml</param-value>

</context-param>
直接在Action当中获取工厂
@WebServlet("/MyServlet")

public class MyServlet extends HttpServlet {

    @Override

    protected void service(HttpServletRequest req, HttpServletResponse resp) throws ServletException, IOException {

        super.service(req, resp);

        req.setCharacterEncoding("utf-8");

        resp.setContentType("text/html;charset=utf-8");

        // 获取工厂  程序启动时,保存到ServletContext中

        ServletContext servletContext = this.getServletContext();

        WebApplicationContext applicationContext = WebApplicationContextUtils.getWebApplicationContext(servletContext);

        // 获取对象

        UserService userService = (UserService)applicationContext.getBean("userService");

        userService.save();

    }

}
public class UserService {

    public void save(){

        System.out.println("-save-");

    }

}
applicationContext.xml 中配置:
<bean id="userService" class="com.study.ssh.demo2.UserService"/>
SSH整合

案例(将页面信息存储到数据库中)
准备数据库
DROP TABLE IF EXISTS `account`;

CREATE TABLE `account` (

  `id` int(11) NOT NULL AUTO_INCREMENT,

  `name` varchar(20) DEFAULT NULL,

  `money` double DEFAULT NULL,

  PRIMARY KEY (`id`)

) ENGINE=InnoDB AUTO_INCREMENT=1 DEFAULT CHARSET=utf8;
web层接收请求——struts
dao层——hibernate
(1)引入Jar包
链接: 微云链接
(2)引入配置文件
struts
- 创建配置文件
- 添加核心过滤器
hibernate
- 创建配置文件
spring
- 添加核心配置文件
- 在web.xml当中添加spring核心监听器
(3)创建包结构
action、dao、domain(pojo)、service、util
(4)创建相关类
- 创建domain,建立关系映射
- 创建CustomerAaction,配置Struts
- JSP当中input标签添加name跳转到action
- 创建Customer业务层,把业务层交给spring管理
(5)搭建 struts 环境
页面
<%@ page contentType="text/html;charset=UTF-8" language="java" %>

<html>

<head>

    <title>Title</title>

</head>

<body>

    <form action="${pageContext.request.contextPath}/account_save.action">

        name:<input type="text">

        money:<input type="text">

        <input type="submit" value="提交">

    </form>

</body>

</html>
创建 action 类
import com.opensymphony.xwork2.ActionSupport;

public class AccountAction extends ActionSupport {

    public String save(){

        System.out.println("AccountAction——save");

        return null;

    }

}
struts 核心配置文件(struts.xml)接收action
<?xml version="1.0" encoding="UTF-8" ?>

<!DOCTYPE struts PUBLIC

        "-//Apache Software Foundation//DTD Struts Configuration 2.5//EN"

        "http://struts.apache.org/dtds/struts-2.5.dtd">

<struts>

    <package name="struts" namespace="/" extends="struts-default">

		<action name="account_*" class="com.ssh.action.AccountAction" method="{1}"/>

    </package>

</struts>
如果页面点击提交时,控制台能够成功显示"AccountAction——save",说明struts 环境配置成功。
(6)action接收页面参数
创建模型(domain包下)
import lombok.Getter;

import lombok.Setter;

@Getter @Setter

public class Account {

    private String name;

    private Double money;

    @Override

    public String toString() {

        return "Account{" +

                "name='" + name + '\'' +

                ", money=" + money +

                '}';

    }

}
web层(action)接收参数(采用模型驱动)
import com.opensymphony.xwork2.ActionSupport;

import com.opensymphony.xwork2.ModelDriven;

import com.ssh.domain.Account;

public class AccountAction extends ActionSupport implements ModelDriven<Account> {

    private Account account = new Account();

    @Override

    public Account getModel() {

        return account;

    }

    public String save(){

        System.out.println("AccountAction——save");

        System.out.println(account);

        return null;

    }

}
jsp页面提供name属性且值和对象属性一致
<%@ page contentType="text/html;charset=UTF-8" language="java" %>

<html>

<head>

    <title>Title</title>

</head>

<body>

    <form action="${pageContext.request.contextPath}/account_save.action">

        name:<input type="text" name="name">

        money:<input type="text" name="money">

        <input type="submit" value="提交">

    </form>

</body>

</html>
页面点击提交时,控制台能够成功显示对象的信息且参数正确,接收页面参数成功。
(7)创建业务层(面向接口)
接口
import com.ssh.domain.Account;

public interface AccountService {

    public void save(Account account);

}
实现类
import com.ssh.domain.Account;

public class AccountServiceImpl implements AccountService{

    @Override

    public void save(Account account) {

        System.out.println("已经来到业务类:"+account);

    }

}
web层(action)调用业务层(service)
import com.opensymphony.xwork2.ActionSupport;

import com.opensymphony.xwork2.ModelDriven;

import com.ssh.domain.Account;

import com.ssh.service.AccountService;

import com.ssh.service.AccountServiceImpl;

public class AccountAction extends ActionSupport implements ModelDriven<Account> {

    private Account account = new Account();

    @Override

    public Account getModel() {

        return account;

    }

    public String save(){

        /*System.out.println("AccountAction——save");

        System.out.println(account);*/

        // 调用业务层

        AccountService accountService = new AccountServiceImpl();

        accountService.save(account);

        return null;

    }

}
(8)引入spring框架
spring核心配置文件(applicationContext.xml)配置:将业务层交给spring管理。
<?xml version="1.0" encoding="UTF-8"?>

<beans xmlns="http://www.springframework.org/schema/beans"

       xmlns:xsi="http://www.w3.org/2001/XMLSchema-instance"

       xmlns:context="http://www.springframework.org/schema/context"

       xmlns:aop="http://www.springframework.org/schema/aop"

       xmlns:tx="http://www.springframework.org/schema/tx"

       xsi:schemaLocation="http://www.springframework.org/schema/beans

        http://www.springframework.org/schema/beans/spring-beans.xsd

        http://www.springframework.org/schema/context

        http://www.springframework.org/schema/context/spring-context.xsd

        http://www.springframework.org/schema/aop

        http://www.springframework.org/schema/aop/spring-aop.xsd

        http://www.springframework.org/schema/tx

        http://www.springframework.org/schema/tx/spring-tx.xsd">

    <!-- service bean -->

    <bean id="accountService" class="com.ssh.service.AccountServiceImpl"/>

</beans>
web层(action)通过spring调用业务层(service)
import com.opensymphony.xwork2.ActionSupport;

import com.opensymphony.xwork2.ModelDriven;

import com.ssh.domain.Account;

import com.ssh.service.AccountService;

import com.ssh.service.AccountServiceImpl;

import org.apache.struts2.ServletActionContext;

import org.springframework.web.context.WebApplicationContext;

import org.springframework.web.context.support.WebApplicationContextUtils;

import javax.servlet.ServletContext;

public class AccountAction extends ActionSupport implements ModelDriven<Account> {

    private Account account = new Account();

    @Override

    public Account getModel() {

        return account;

    }

    public String save(){

        /*System.out.println("AccountAction——save");

        System.out.println(account);*/

        // 调用业务层

        /*AccountService accountService = new AccountServiceImpl();

        accountService.save(account);*/

        // 通过spring调用业务层

        ServletContext servletContext = ServletActionContext.getServletContext();

        /*获取工厂*/

        WebApplicationContext applicationContext = WebApplicationContextUtils.getWebApplicationContext(servletContext);

        /*获取对象*/

        AccountService accountService = (AccountService)applicationContext.getBean("accountService");

        accountService.save(account);

        return null;

    }

}
(9)自动注入spring对象
需要导入 struts2-spring-plugin-2.5.16.jar
web层(action)通过自动注入spring对象调用业务层(service)
- 需要提供属性和set方法
import com.opensymphony.xwork2.ActionSupport;

import com.opensymphony.xwork2.ModelDriven;

import com.ssh.domain.Account;

import com.ssh.service.AccountService;

import com.ssh.service.AccountServiceImpl;

import org.apache.struts2.ServletActionContext;

import org.springframework.web.context.WebApplicationContext;

import org.springframework.web.context.support.WebApplicationContextUtils;

import javax.servlet.ServletContext;

public class AccountAction extends ActionSupport implements ModelDriven<Account> {

    private Account account = new Account();

    @Override

    public Account getModel() {

        return account;

    }

    // 自动注入

    private AccountService accountService;

    public void setAccountService(AccountService accountService) {

        this.accountService = accountService;

    }

    public String save(){

        /*System.out.println("AccountAction——save");

        System.out.println(account);*/

        // 调用业务层

        /*AccountService accountService = new AccountServiceImpl();

        accountService.save(account);*/

        // 通过spring调用业务层

        /*ServletContext servletContext = ServletActionContext.getServletContext();

        *//*获取工厂*//*

        WebApplicationContext applicationContext = WebApplicationContextUtils.getWebApplicationContext(servletContext);

        *//*获取对象*//*

        AccountService accountService = (AccountService)applicationContext.getBean("accountService");

        accountService.save(account);*/

        accountService.save(account);

        return null;

    }

}
(10)action交给spring管理
优点
- 方便统一管理
- 可以对action通过AOP做增强
struts.xml:
<?xml version="1.0" encoding="UTF-8" ?>

<!DOCTYPE struts PUBLIC

       "-//Apache Software Foundation//DTD Struts Configuration 2.5//EN"

       "http://struts.apache.org/dtds/struts-2.5.dtd">

<struts>

   <package name="struts" namespace="/" extends="struts-default">

       <!--class 值是spring中的id-->

   	<action name="account_*" class="accountAction" method="{1}"/>

   </package>

</struts>
applicationContext.xml:
<?xml version="1.0" encoding="UTF-8"?>

<!--suppress ALL -->

<beans xmlns="http://www.springframework.org/schema/beans"

      xmlns:xsi="http://www.w3.org/2001/XMLSchema-instance"

      xmlns:context="http://www.springframework.org/schema/context"

      xmlns:aop="http://www.springframework.org/schema/aop"

      xmlns:tx="http://www.springframework.org/schema/tx"

      xsi:schemaLocation="http://www.springframework.org/schema/beans

       http://www.springframework.org/schema/beans/spring-beans.xsd

       http://www.springframework.org/schema/context

       http://www.springframework.org/schema/context/spring-context.xsd

       http://www.springframework.org/schema/aop

       http://www.springframework.org/schema/aop/spring-aop.xsd

       http://www.springframework.org/schema/tx

       http://www.springframework.org/schema/tx/spring-tx.xsd">

   <!--action bean -->

   <!--注意:

       1.scope="prototype" 必须是多例。

       2.action中的service以前是交给struts管理的时候,它是自动注入的。现在交给spring管理,需要自己手动注入。

   -->

   <bean id="accountAction" class="com.ssh.action.AccountAction" scope="prototype">

       <property name="accountService" ref="accountService"/>

   </bean>

   <!-- service bean -->

   <bean id="accountService" class="com.ssh.service.AccountServiceImpl"/>

</beans>
AccountAction:
import com.opensymphony.xwork2.ActionSupport;

import com.opensymphony.xwork2.ModelDriven;

import com.ssh.domain.Account;

import com.ssh.service.AccountService;

public class AccountAction extends ActionSupport implements ModelDriven<Account> {

   private Account account = new Account();

   @Override

   public Account getModel() {

       return account;

   }

   // 自动注入

   private AccountService accountService;

   public void setAccountService(AccountService accountService) {

       this.accountService = accountService;

   }

   public String save(){

       accountService.save(account);

       return null;

   }

}
(11)引入Hibernate
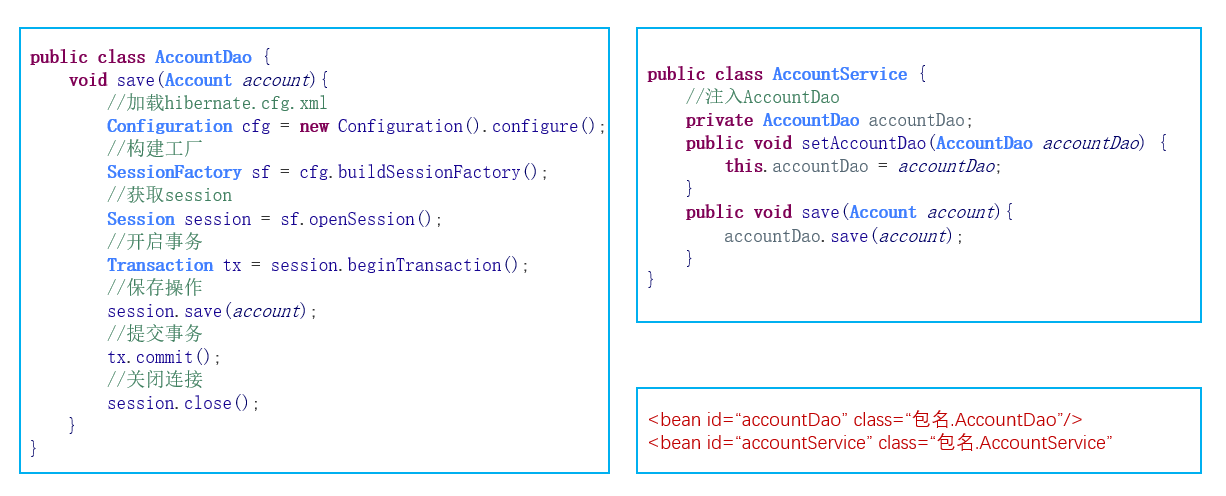
在service层中,需要调用dao来访问数据库。
新建dao层接口和实现类:
import com.ssh.domain.Account;

public interface AccountDao {

    public void save(Account account);

}
import com.ssh.domain.Account;

import org.springframework.orm.hibernate5.support.HibernateDaoSupport;

import org.springframework.transaction.annotation.Transactional;

@Transactional

public class AccountDaoImpl extends HibernateDaoSupport implements AccountDao {

    @Override

    public void save(Account account) {

        System.out.println("AccountDaoImpl——保存到数据库中 dao");

        this.getHibernateTemplate().save(account);

    }

}
表的映射文件
<?xml version="1.0" encoding="UTF-8" ?>

<!DOCTYPE hibernate-mapping PUBLIC

        "-//Hibernate/Hibernate Mapping DTD 3.0//EN"

        "http://www.hibernate.org/dtd/hibernate-mapping-3.0.dtd">

<hibernate-mapping>

    <class name="com.ssh.domain.Account" table="account">

        <!--建立类属性哪一个是主键 还要跟数据库当中主键进行对应 -->

        <id name="id" column="id">

            <generator class="native" />

        </id>

        <!--建立类中的普通属性与数据库当中字段进行关联 -->

        <property name="name" column="name" />

        <property name="money" column="money" />

    </class>

</hibernate-mapping>
spring 核心配置文件 applicationContext.xml
<?xml version="1.0" encoding="UTF-8"?>

<!--suppress ALL -->

<beans xmlns="http://www.springframework.org/schema/beans"

       xmlns:xsi="http://www.w3.org/2001/XMLSchema-instance"

       xmlns:context="http://www.springframework.org/schema/context"

       xmlns:aop="http://www.springframework.org/schema/aop"

       xmlns:tx="http://www.springframework.org/schema/tx"

       xsi:schemaLocation="http://www.springframework.org/schema/beans

        http://www.springframework.org/schema/beans/spring-beans.xsd

        http://www.springframework.org/schema/context

        http://www.springframework.org/schema/context/spring-context.xsd

        http://www.springframework.org/schema/aop

        http://www.springframework.org/schema/aop/spring-aop.xsd

        http://www.springframework.org/schema/tx

        http://www.springframework.org/schema/tx/spring-tx.xsd">

    <!-- 导入hibernate相关配置 -->

    <import resource="hibernateApplication.xml"/>

    <!--action bean -->

    <!--注意:

        1.scope="prototype" 必须是多例。

        2.action中的service以前是交给struts管理的时候,它是自动注入的。现在交给spring管理,需要自己手动注入。

    -->

    <bean id="accountAction" class="com.ssh.action.AccountAction" scope="prototype">

        <property name="accountService" ref="accountService"/>

    </bean>

    <!-- service bean -->

    <bean id="accountService" class="com.ssh.service.AccountServiceImpl">

        <property name="accountDao" ref="accountDao"/>

    </bean>

     <!--dao bean-->

     <bean id="accountDao" class="com.ssh.dao.AccountDaoImpl">

         <property name="sessionFactory" ref="sessionFactory"/>

     </bean>

</beans>
<?xml version="1.0" encoding="UTF-8"?>

<beans xmlns="http://www.springframework.org/schema/beans"

       xmlns:xsi="http://www.w3.org/2001/XMLSchema-instance"

       xmlns:context="http://www.springframework.org/schema/context"

       xmlns:tx="http://www.springframework.org/schema/tx"

       xsi:schemaLocation="http://www.springframework.org/schema/beans

        http://www.springframework.org/schema/beans/spring-beans.xsd

        http://www.springframework.org/schema/context

        http://www.springframework.org/schema/context/spring-context.xsd

        http://www.springframework.org/schema/tx

        http://www.springframework.org/schema/tx/spring-tx.xsd">

    <!-- 配置hibernate -->

    <!--引入属性文件-->

    <context:property-placeholder location="classpath:jdbc.properties"/>

    <!--连接池-->

    <bean id="dataSource" class="com.alibaba.druid.pool.DruidDataSource">

        <property name="driverClassName" value="${jdbc.driverClass}" />

        <!--属性文件当中的名称不能和name名称一样-->

        <property name="url" value="${jdbc.url}" />

        <property name="username" value="${jdbc.username}" />

        <property name="password" value="${jdbc.password}" />

    </bean>

    <!-- Spring整合Hibernate -->

    <!-- 引入Hibernate的配置的信息 -->

    <bean id="sessionFactory" class="org.springframework.orm.hibernate5.LocalSessionFactoryBean">

        <!-- 注入连接池 -->

        <property name="dataSource" ref="dataSource"/>

        <!-- 配置Hibernate的相关属性 -->

        <property name="hibernateProperties">

            <props>

                <prop key="hibernate.dialect">org.hibernate.dialect.MySQL5Dialect</prop>

                <prop key="hibernate.show_sql">true</prop>

                <prop key="hibernate.format_sql">true</prop>

                <prop key="hibernate.hbm2ddl.auto">update</prop>

            </props>

        </property>

        <!-- 设置映射文件 -->

        <property name="mappingResources">

            <list>

                <value>com/ssh/domain/Account.hbm.xml</value>

            </list>

        </property>

    </bean>

    <!--配置事务管理器-->

    <bean id="transactionManager" class="org.springframework.orm.hibernate5.HibernateTransactionManager">

        <property name="sessionFactory" ref="sessionFactory"/>

    </bean>

    <!--开启注解 增强-->

    <tx:annotation-driven transaction-manager="transactionManager"/>

</beans>
数据库链接配置 jdbc.properties
jdbc.driverClass=com.mysql.jdbc.Driver

jdbc.url=jdbc:mysql://localhost:3307/ssh

jdbc.username=root

jdbc.password=123456
HibernateTemplate的使用
接口
import com.ssh.domain.Account;

import java.util.List;

public interface AccountDao {

    public void save(Account account);

    public void update(Account account);

    public void delete(Account account);

    public Account getById(Integer id);

    public List<Account> getAll();

}
实现类
import com.ssh.domain.Account;

import org.hibernate.criterion.DetachedCriteria;

import org.springframework.orm.hibernate5.support.HibernateDaoSupport;

import org.springframework.transaction.annotation.Transactional;

import java.util.List;

@Transactional

public class AccountDaoImpl extends HibernateDaoSupport implements AccountDao {

    @Override

    public void save(Account account) {

        System.out.println("AccountDaoImpl——保存到数据库中 dao");

        this.getHibernateTemplate().save(account);

    }

    @Override

    public void update(Account account) {

        this.getHibernateTemplate().update(account);

    }

    @Override

    public void delete(Account account) {

        this.getHibernateTemplate().delete(account);

    }

    @Override

    public Account getById(Integer id) {

        Account account = this.getHibernateTemplate().get(Account.class, id);

        return account;

    }

    @Override

    public List<Account> getAll() {

        DetachedCriteria criteria = DetachedCriteria.forClass(Account.class);

        List<Account> list = (List<Account>)this.getHibernateTemplate().findByCriteria(criteria);

        return list;

    }

}
测试
import com.ssh.domain.Account;

import org.junit.Test;

import org.junit.runner.RunWith;

import org.springframework.test.context.ContextConfiguration;

import org.springframework.test.context.junit4.SpringJUnit4ClassRunner;

import javax.annotation.Resource;

import java.util.List;

@RunWith(SpringJUnit4ClassRunner.class)

@ContextConfiguration("classpath:applicationContext.xml")

public class AccountDaoTest {

    @Resource(name="accountDao")

    private AccountDao accountDao;

    @Test

    public void save(){

        Account account = new Account();

        account.setName("zs");

        account.setMoney(500d);

        accountDao.save(account);

    }

    @Test

    public void get(){

        Account account = accountDao.getById(1);

        System.out.println(account);

    }

    @Test

    public void update(){

        Account account = accountDao.getById(1);

        account.setMoney(600d);

        accountDao.update(account);

    }

    @Test

    public void getAll(){

        List<Account> list = accountDao.getAll();

        for (Account account : list) {

            System.out.println(account);

        }

    }

    @Test

    public void delete(){

        Account account = accountDao.getById(3);

        accountDao.delete(account);

    }

}
SSH 三大框架整合的更多相关文章
- Maven SSH三大框架整合的加载流程
<Maven精品教程视频\day02视频\03ssh配置文件加载过程.avi;> 此课程中讲 SSH三大框架整合的加载流程,还可以,初步接触的朋友可以听一听. < \day02视频\ ...
- SSH三大框架整合案例
SSH三大框架的整合 SSH三个框架的知识点 一.Hibernate框架 1. Hibernate的核心配置文件 1.1 数据库信息.连接池配置 1.2 Hibernate信息 1.3 映射配置 ...
- JavaWeb_(SSH)三大框架整合struts+hibernate+spring_Demo
三大框架整合 一.SSH导包 二.书写Spring 三.书写Struts 四.整合Spring与Struts 五.书写(与整合)Hibernate.引入c3p0连接池并使用hibernate模板 六. ...
- 关于ssh三大框架整合的碎碎念
三大框架整合,无非就是一个导jar包,修改配置文件的过程.完了就没事了. 还是有很多细节性的问题 比如在spring中写applicationContext.xml文件时不提示: 解决方法如下: 如果 ...
- SSH三大框架整合配置详解
首先,三大框架整合,肯定是要导入相当多的jar包,这是不容置疑的! 这里就不一一列举了,直接截图吧: (1) 基于配置文件的整合: 第一步:我们需要在we ...
- SSH三大框架整合步骤
Struts2:需要整合的第一个框架: 1.创建一个动态web项目 2.导入struts2必须的jar 放到 lib目录下 ,再 build path 添加web工程中 3.配置struts2的核心配 ...
- JAVAEE——SSH三大框架整合(spring+struts2+hibernate)
一.整合原理 二.导包(41个) 1.hibernate (1)hibernate/lib/required (2)hibernate/lib/jpa | java persist api java的 ...
- SSH三大框架整合配置详细步骤(3)
5 配置Spring2.5 5.1 基础配置 1) 导入spring包.下载spring-framework-2.5.6并解压后,在spring-framework-2.5.6" ...
- SSH三大框架整合使用的配置文件 注解实现
1 Struts.xml 使用拦截器 <?xml version="1.0" encoding="UTF-8" ?><!DOCTYPE str ...
随机推荐
- iview-admin本地测试上线登陆问题和文件路径找不到问题
在项目中vue.config.js下修改上线路径(图中我修改为:根目录路径) 测试本地上线登陆出现问题: 在main.js下if (process.env.NODE_ENV !== 'producti ...
- Mac命令行指定特定程序打开文件
如果文件已被指定默认程序 open httpd.conf 指定一个特定程序打开文件 # 用 sublime text 打开 httpd.conf open -a /Applications/Subli ...
- STM32定时器配置(TIM1、TIM2、TIM3、TIM4、TIM5、TIM8)高级定时器+普通定时器,定时计数模式下总结
文章结构: ——> 一.定时器基本介绍 ——> 二.普通定时器详细介绍TIM2-TIM5 ——> 三.定时器代码实例 一.定时器基本介绍 之前有用过野火的学习板上面讲解很详细,所以 ...
- G1垃圾收集器角色划分与重要概念详解【纯理论】
继续接着上一次[https://www.cnblogs.com/webor2006/p/11129326.html]对G1进行理论化的学习,上一次学到了G1收集器的堆结构,回忆下: 接着继续对它进行了 ...
- 使用Topshelf创建Windows服务[转载]
概述 Topshelf是创建Windows服务的另一种方法,老外的一篇文章Create a .NET Windows Service in 5 steps with Topshelf通过5个步骤详细的 ...
- [CSS] Change the Alignment of a Single Flexed Item with 'align-self'
Inside of a flexed container, a single item can control its own flex with align-self. The possible v ...
- 引入其他服务的JS、和 本地的JS文件,script的属性
==============使用其他服务器引入JS文件,1,减轻服务器压力2,速度快3,可以缓存 cdnjs库,更新比较快https://cdnjs.com/ cdn库 引入JS文件如:jqueryb ...
- js中数组元素的添加和删除
js中数组元素常用添加方法是直接添加.push方法以及unshift方法 删除方法则是delete.pop.shift 集修改方法为一身的则是splice 1.添加: (1)直接添加通常都是这样 va ...
- sql server 常见约束
1.not null 非空约束 ①强制列不接受空值 ②例:创建表时,name varchar(6) not null, 2.unique 唯一性约束 ①约束唯一标识数据库表中的每条记录 ②unique ...
- 063_显示本机 Linux 系统上所有开放的端口列表
#!/bin/bash#从端口列表中观测有没有没用的端口,有的话可以将该端口对应的服务关闭,防止意外的攻击可能性 ss -nutlp |awk '{print $1,$5}' | awk -F&quo ...