002.Heartbeat部署及httpd高可用
一 前期准备
1.1 依赖准备
1.2 环境准备
|
节点/主机名
|
业务IP
|
心跳IP
|
|
master1.yewu.com
|
192.168.88.100
|
192.168.77.100
|
|
master2.yewu.com
|
192.168.88.101
|
192.168.77.101
|
|
vip
|
192.168.88.88
|
|
 # hostnamectl set-hostname  master1.yewu.com

 # hostnamectl set-hostname  master2.yewu.com	#分别配置主机名

 # /etc/hosts

 127.0.0.1 localhost.localdomain localhost

 #public ip						#业务host解析

 192.168.88.100 master1.yewu.com master1

 192.168.88.101 master2.yewu.com master2

 #private ip						#Heartbeat心跳解析

 192.168.77.100 master1-private.ha.com master1-private

 192.168.77.101 master2-private.ha.com master2-private
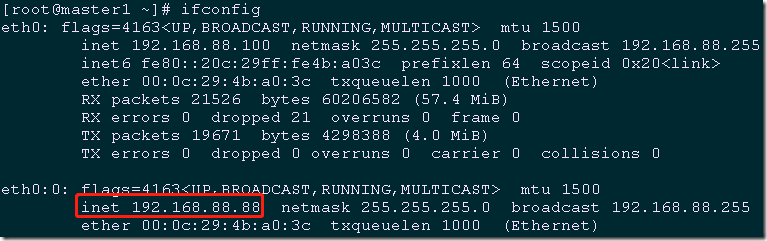
[root@master1 ~]# ifconfig |grep eth[0-9] -A1 #确认相应IP地址

 [root@master1 ~]# ssh-keygen -t rsa -f ~/.ssh/id_rsa -P ''

 [root@master1 ~]# ssh-copy-id -i ./.ssh/id_rsa.pub root@192.168.88.101

 [root@master2 ~]# ssh-keygen -t rsa -f ~/.ssh/id_rsa -P ''

 [root@master2 ~]# ssh-copy-id -i ./.ssh/id_rsa.pub root@192.168.88.100
二 正式安装Heartbeat
2.1 下载相应包
 [root@master1 ~]# wget http://hg.linux-ha.org/glue/archive/0a7add1d9996.tar.bz2

 [root@master1 ~]# wget http://hg.linux-ha.org/heartbeat-STABLE_3_0/archive/958e11be8686.tar.bz2

 [root@master1 ~]# wget https://github.com/ClusterLabs/resource-agents/archive/v3.9.6.tar.gz
2.2 安装cluster-glue
 [root@master1 ~]# groupadd haclient

 [root@master1 ~]# useradd -g haclient hacluster

 [root@master1 ~]# tar xf 0a7add1d9996.tar.bz2

 [root@master1 ~]# mv Reusable-Cluster-Components-glue--0a7add1d9996/ cluster_glue

 [root@master1 ~]# cd cluster_glue/

 [root@master1 cluster_glue]# ./autogen.sh

 [root@master1 cluster_glue]# ./configure --prefix=/usr/local/heartbeat --with-daemon-user=hacluster --with-daemon-group=haclient --enable-fatal-warnings=no LIBS='/lib64/libuuid.so.1'
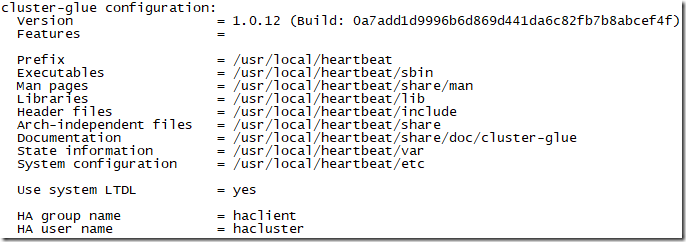
[root@master1 cluster_glue]# make && make install
2.3 安装Resource Agents
 [root@master1 ~]# tar xf v3.9.6.tar.gz

 [root@master1 ~]# cd resource-agents-3.9.6/

 [root@master1 resource-agents-3.9.6]# ./autogen.sh

 [root@master1 resource-agents-3.9.6]# ./configure --prefix=/usr/local/heartbeat --with-daemon-user=hacluster --with-daemon-group=haclient --enable-fatal-warnings=no LIBS='/lib64/libuuid.so.1'
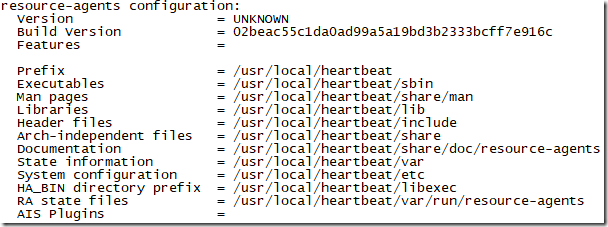
[root@master1 resource-agents-3.9.6]# make && make install
 ln -s  /usr/local/heartbeat/lib/* /lib/

 ln -s  /usr/local/heartbeat/lib/* /lib64/	#将生成的动态库,添加快捷方式到/lib下
2.4 安装Heartbeat
 [root@master1 ~]# tar xf 958e11be8686.tar.bz2

 [root@master1 ~]# export CFLAGS="$CFLAGS -I/usr/local/heartbeat/include -L/usr/local/heartbeat/lib"

 [root@master1 ~]# cd Heartbeat-3-0-958e11be8686/

 [root@master1 Heartbeat-3-0-958e11be8686]# ./bootstrap

 [root@master1 Heartbeat-3-0-958e11be8686]# ./configure --prefix=/usr/local/heartbeat --with-daemon-user=hacluster --with-daemon-group=haclient --enable-fatal-warnings=no LIBS='/lib64/libuuid.so.1'
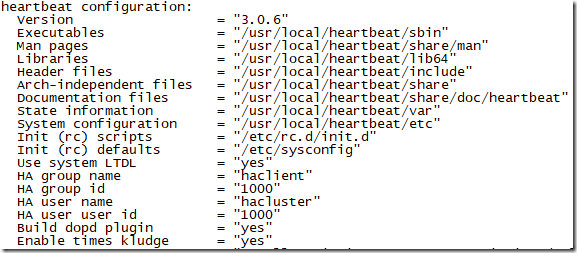
[root@master1 Heartbeat-3-0-958e11be8686]# make && make install
2.5 Heartbeat优化
 [root@master1 ~]# cp /root/Heartbeat-3-0-958e11be8686/doc/{ha.cf,haresources,authkeys} \

 /usr/local/heartbeat/etc/ha.d/			#复制相关配置文件

 [root@master1 ~]# chmod 600 /usr/local/heartbeat/etc/ha.d/authkeys

 [root@master1 ~]# mkdir -pv /usr/local/heartbeat/usr/lib/ocf/lib/heartbeat/

 [root@master1 ~]# cp /usr/lib/ocf/lib/heartbeat/ocf-* \

 /usr/local/heartbeat/usr/lib/ocf/lib/heartbeat/

 [root@master1 ~]# ln -svf /usr/local/heartbeat/lib64/heartbeat/plugins/RAExec/* \

 /usr/local/heartbeat/lib/heartbeat/plugins/RAExec/

 [root@master1 ~]# ln -svf /usr/local/heartbeat/lib64/heartbeat/plugins/* \

 /usr/local/heartbeat/lib/heartbeat/plugins/

 [root@master1 ~]# chkconfig --add heartbeat		#CentOS7可省略

 [root@master1 ~]# systemctl enable heartbeat.service

 [root@master1 ~]# systemctl start heartbeat.service
三 配置Heartbeat
3.1 安装httpd服务
 [root@master1 ~]# yum -y install httpd

 [root@master1 ~]# systemctl stop httpd

 [root@master1 ~]# systemctl disable httpd		#master2也需要安装

 [root@master1 ~]# echo "master1.yewu.com" >>/var/www/html/index.html

 [root@master2 ~]# echo "master2.yewu.com" >>/var/www/html/index.html
3.2 配置authkeys
 [root@master1 ~]# vi /usr/local/heartbeat/etc/ha.d/authkeys

 auth 3

 3 md5 Yes!
3.3 配置Heartbeat
 [root@master1 ~]# vi /usr/local/heartbeat/etc/ha.d/ha.cf

 logfile /var/log/ha-log		#记录Heartbeat其他相关日志信息

 logfacility     local0		#设置heartbeat的日志,这里用的是系统日志

 keepalive 2				#设定心跳(监测)时间间隔为2秒

 deadtime 15				#宣告死亡时间

 warntime 10				#心跳延时时间

 initdead 60				#初始化时间

 udpport 694				#用于通信的UDP端口

 bcast   eth1			#接受广播心跳的网卡接口

 ucast eth1 192.168.77.101		#置对方机器心跳检测的IP

 auto_failback off			#关闭自动切回恢复正常的主节点

 node master1.yewu.com		#集群节点的名称,必须匹配uname -n的结果。

 node master2.yewu.com

 ping 192.168.88.1

 respawn hacluster /usr/local/heartbeat/libexec/heartbeat/ipfail
3.4 配置haresources
[root@master1 ~]# ll /usr/local/heartbeat/etc/ha.d/resource.d/ #查看现有资源类型
[root@master1 ~]# vi /usr/local/heartbeat/etc/ha.d/haresources
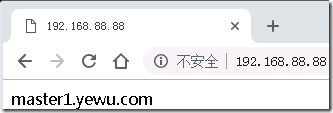
master1.yewu.com IPaddr::192.168.88.88/24/eth0 apache
[root@master1 ~]# scp /usr/local/heartbeat/etc/ha.d/{ha.cf,haresources,authkeys} 192.168.88.101:/usr/local/heartbeat/etc/ha.d/ #将所有配置复制至master2节点
[root@master2 ~]# vi /usr/local/heartbeat/etc/ha.d/ha.cf
ucast eth1 192.168.77.100 #置对方机器心跳检测的IP
四 验证Heartbeat
4.1 master1单节点启动验证
[root@master1 ~]# systemctl start heartbeat.service
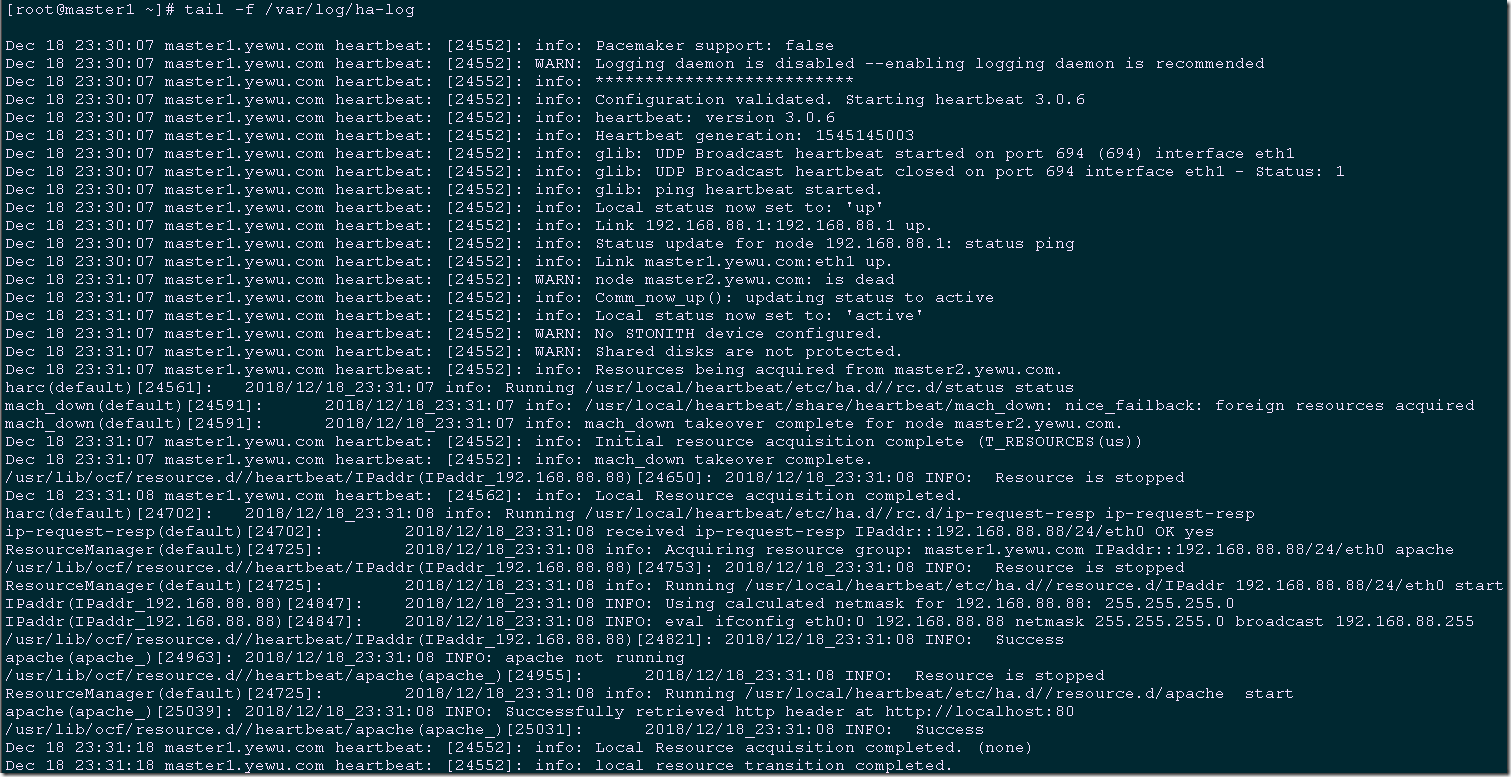
[root@master1 ~]# tail -f /var/log/ha-log #验证日志
4.2 master2启动并验证
 [root@master2 ~]# systemctl start heartbeat.service

 [root@master1 ~]# tail -f /var/log/ha-log	#观察master2节点启动后的master1日志


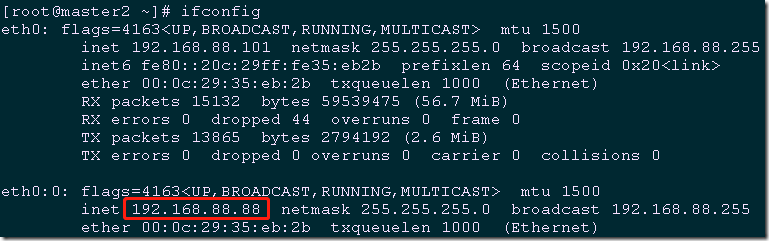
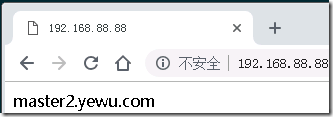
 [root@master1 ~]# shutdownr			#模拟master1节点宕机

 [root@master2 ~]# ifconfig			#master2节点会自动接管vip
002.Heartbeat部署及httpd高可用的更多相关文章
- Heartbeat实现web服务器高可用
一.Heartbeat概述: Heartbeat的工作原理:heartbeat最核心的包括两个部分,心跳监测部分和资源接管部分,心跳监测可以通过网络链路和串口进行,而且支持冗余链路,它们之间相互发送报 ...
- 配置:heartbeat+nginx+mysqld+drbd高可用笔记(OK)
参考资料:http://www.centoscn.com/CentosServer/cluster/2015/0605/5604.html 背景需求: 使用heartbeat来做HA高可用,并且把 ...
- 使用二进制的方式部署 K8S-1.16 高可用集群
一.项目介绍 项目致力于让有意向使用原生kubernetes集群的企业或个人,可以方便的.系统的使用二进制的方式手工搭建kubernetes高可用集群.并且让相关的人员可以更好的理解kubernete ...
- 用Kolla在阿里云部署10节点高可用OpenStack
为展现 Kolla 的真正实力,我在阿里云使用 Ansible 自动创建 10 台虚机,部署一套多节点高可用 OpenStack 集群! 前言 上次 Kolla 已经表示了要打 10 个的愿望,这次我 ...
- 使用kubeadm部署一套高可用k8s集群
使用kubeadm部署一套高可用k8s集群 有疑问的地方可以看官方文档 准备环境 我的机器如下, 系统为ubuntu20.04, kubernetes版本1.21.0 hostname IP 硬件配置 ...
- Heartbeat实现集群高可用热备
公司最近需要针对服务器实现热可用热备,这几天也一直在琢磨这个方面的东西,今天做了一些Heartbeat方面的工作,在此记录下来,给需要的人以参考. Heartbeat 项目是 Linux-HA 工程的 ...
- MariaDB Galera Cluster 部署 + keepalived实现高可用
MariaDB Galera Cluster 部署 MariaDB作为Mysql的一个分支,在开源项目中已经广泛使用,例如大热的openstack,所以,为了保证服务的高可用性,同时提高系统的负载能力 ...
- kubeadm部署k8s1.9高可用集群--4部署master节点
部署master节点 kubernetes master 节点包含的组件: kube-apiserver kube-scheduler kube-controller-manager 本文档介绍部署一 ...
- 008.Kubernetes二进制部署Nginx实现高可用
一 Nginx代理实现kube-apiserver高可用 1.1 Nginx实现高可用 基于 nginx 代理的 kube-apiserver 高可用方案. 控制节点的 kube-controller ...
随机推荐
- jquery 学习(四) - 标签 添加/删除/修改
HTML代码 <div class="a1"> <div> <span id="a2">aaa</span> & ...
- 【Udacity并行计算课程笔记】- Lesson 3 Fundamental GPU Algorithms (Reduce, Scan, Histogram)
本周主要内容如下: 如何分析GPU算法的速度和效率 3个新的基本算法:归约.扫描和直方图(Reduce.Scan.Histogram) 一.评估标准 首先介绍用于评估GPU计算的两个标准: ste ...
- Linux下查看文件或文件夹大小的命令df 、du、ls
转自:http://www.cnblogs.com/benio/archive/2010/10/13/1849946.html 当磁盘大小超过标准时会有报警提示,这时如果掌握df和du命令是非常明智的 ...
- des结合base64加解密的python源码
#coding=utf8 from pyDes import * import base64 class Crypt_Error(): pass """ des方法,de ...
- mongodb数据库安装及常见操作
客户端和服务端的安装 # rpm -ivh mongo-10gen-2.4.6-mongodb_1.x86_64.rpm mongo-10gen-server-2.4.6-mongodb_1.x86_ ...
- totastmessage 触发事件后浮框消失的方法
1. 前言 通过查了官放的文档,发现没有 totastmessage 触发事件后,浮框消失的方法,然后通过研究了下点击关闭时的源码,得到了一个的解决方案. 2. 样例代码如下 $("#dro ...
- VirtualBox虚拟机安装Mac OS 10.12
注:本文作者 (QQ:85805214) 本博主只是转载发布而已. VMware 安装Mac OS 方法 由于Virtual Box拷贝文件比较麻烦,有时候经常出现拷贝失败的情况,故使用VMware ...
- 数论-质数 poj2689,阶乘分解,求阶乘的尾零hdu1124, 求尾零为x的最小阶乘
/* 要求出[1,R]之间的质数会超时,但是要判断[L,R]之间的数是否是素数却不用筛到R 因为要一个合数n的最大质因子不会超过sqrt(n) 所以只要将[2,sqrt(R)]之间的素数筛出来,再用这 ...
- bootstrap之表格和按钮
<!DOCTYPE html> <html lang="en"> <head> <meta charset="UTF-8&quo ...
- 《剑指offer》-二叉搜索树与双向链表
输入一棵二叉搜索树,将该二叉搜索树转换成一个排序的双向链表.要求不能创建任何新的结点,只能调整树中结点指针的指向. 题目的描述不是很习惯.题目的意思是把二叉树从左到右遍历,相当于双向链表的遍历. 其实 ...