java框架之SpringBoot(13)-检索及整合Elasticsearch
ElasticSearch介绍
简介
我们的应用经常需要使用检索功能,开源的 Elasticsearch 是目前全文搜索引擎的首选。它可以快速的存储、搜索和分析海量数据。SpringBoot 通过整合 SpringData Elasticsearch 为我们提供了非常便捷的检索功能支持。
Elasticsearch 是一个分布式搜索服务,提供 Restful API,底层基于 Lucene,采用多 shard(分片)的方式保证数据安全,并且提供自动 resharding 的功能,github 等大型的站点也是采用了 Elasticsearch 作为其搜索服务。
Elasticsearch 官网 | Elasticsearch 权威指南 | Elasticsearch 权威指南离线版(提取码:v7th)
安装
核心概念
下面引用权威指南中的一段话:
应用中的对象很少只是简单的键值列表,更多时候它拥有复杂的数据结构,比如包含日期、地理位置、另一个对象或者数组。
总有一天你会想到把这些对象存储到数据库中。将这些数据保存到由行和列组成的关系数据库中,就好像是把一个丰富,信息表现力强的对象拆散了放入一个非常大的表格中:你不得不拆散对象以适应表模式(通常一列表示一个字段),然后又不得不在查询的时候重建它们。
Elasticsearch 是面向文档 (document oriented) 的,这意味着它可以存储整个对象或文档 (document) 。然而它不仅仅是存储,还会索引 (index) 每个文档的内容使之可以被搜索。在 Elasticsearch 中,你可以对文档(而非成行成列的数据)进行索引、搜索、排序、过滤。这种理解数据的方式与以往完全不同,这也是 Elasticsearch 能够执行复杂的全文搜索的原因之一。
涉及如下几个概念:
- Document:文档,通常一个对象就用一个文档表示,保存到 Elasticsearch 中数据的最小单位,存储格式为 Json,即一个文档也是一个 Json 对象。
- Index:索引,在 Elasticsearch 中有两种语境:1、索引(动词)一个文档,表示将文档存储到 Elasticsearch 中的行为;2、进行文档的索引过程中会生成一个索引(名词),类似于传统关系型数据库中的一个数据库,是一个存储文档的地方。
- Type:类型,索引一个文档时要指定文档将要保存在哪个位置,这个位置的描述就为类型。
示例
我们只需要 http 请求的方式来操作 Elasticserach 服务。
索引文档
以索引一个员工对象(文档)操作为例,只需要对 Elasticsearch 发送一个如下 restful 风格的 put 请求:
- PUT /megacorp/employee/
- {
- "first_name" : "John",
- "last_name" : "Smith",
- ,
- "about" : "I love to go rock climbing",
- "interests": [ "sports", "music" ]
- }
- {
- "_index": "megacorp",
- "_type": "employee",
- ",
- ,
- "result": "created",
- "_shards": {
- ,
- ,
- },
- "created": true
- }
响应
| 名字 | 说明 |
|---|---|
| megacorp | 索引名 |
| employee | 类型名 |
| 1 | 员工Id |
我们可以接着保存 Id 为 2、3 的员工:
- PUT /megacorp/employee/
- {
- "first_name" : "Jane",
- "last_name" : "Smith",
- ,
- "about" : "I like to collect rock albums",
- "interests": [ "music" ]
- }
- PUT /megacorp/employee/
- {
- "first_name" : "Douglas",
- "last_name" : "Fir",
- ,
- "about": "I like to build cabinets",
- "interests": [ "forestry" ]
- }
要更新一个已有的文档,同样可以以该方式。
检索文档
以查询 megacorp 索引的 employee 类型下 id 为 1 的员工为例,我们只需要发送一个如下 restful 风格的 get 请求:
- GET /megacorp/employee/
- {
- "_index": "megacorp",
- "_type": "employee",
- ",
- ,
- "found": true,
- "_source": {
- "first_name": "John",
- "last_name": "Smith",
- ,
- "about": "I love to go rock climbing",
- "interests": [
- "sports",
- "music"
- ]
- }
- }
响应
检查文档
以检查 id 为 1 的员工是否存在为例,我们只需要发送一个 restful 风格的 head 请求:
- HEAD /megacorp/employee/
该请求没有响应体,而是以响应状态码为标识。如果存在这个员工,响应状态码为 200,否则为 404。
删除文档
以删除 id 为 1 的员工为例,我们只需要发送一个 restful 风格的 delete 请求:
- DELETE /megacorp/employee/
- {
- "found": true,
- "_index": "megacorp",
- "_type": "employee",
- ",
- ,
- "result": "deleted",
- "_shards": {
- ,
- ,
- }
- }
响应
轻量搜索
简单搜索
上面我们已经知道了如何获取一个指定 id 的文档,还可以通过如下方式搜索指定索引的类型下所有文档:
- GET /megacorp/employee/_search
- {
- ,
- "timed_out": false,
- "_shards": {
- ,
- ,
- ,
- },
- "hits": {
- ,
- ,
- "hits": [
- {
- "_index": "megacorp",
- "_type": "employee",
- ",
- ,
- "_source": {
- "first_name": "Jane",
- "last_name": "Smith",
- ,
- "about": "I like to collect rock albums",
- "interests": [
- "music"
- ]
- }
- },
- {
- "_index": "megacorp",
- "_type": "employee",
- ",
- ,
- "_source": {
- "first_name": "John",
- "last_name": "Smith",
- ,
- "about": "I love to go rock climbing",
- "interests": [
- "sports",
- "music"
- ]
- }
- },
- {
- "_index": "megacorp",
- "_type": "employee",
- ",
- ,
- "_source": {
- "first_name": "Douglas",
- "last_name": "Fir",
- ,
- "about": "I like to build cabinets",
- "interests": [
- "forestry"
- ]
- }
- }
- ]
- }
- }
响应
通过 url 参数根据指定字段值搜索文档,以搜索姓氏中包含 "Smith" 的员工为例:
- GET /megacorp/employee/_search?q=last_name:Smith
- {
- ,
- "timed_out": false,
- "_shards": {
- ,
- ,
- ,
- },
- "hits": {
- ,
- "max_score": 0.2876821,
- "hits": [
- {
- "_index": "megacorp",
- "_type": "employee",
- ",
- "_score": 0.2876821,
- "_source": {
- "first_name": "Jane",
- "last_name": "Smith",
- ,
- "about": "I like to collect rock albums",
- "interests": [
- "music"
- ]
- }
- },
- {
- "_index": "megacorp",
- "_type": "employee",
- ",
- "_score": 0.2876821,
- "_source": {
- "first_name": "John",
- "last_name": "Smith",
- ,
- "about": "I love to go rock climbing",
- "interests": [
- "sports",
- "music"
- ]
- }
- }
- ]
- }
- }
响应
DSL查询
Elasticsearch 提供了丰富且灵活的查询语言叫做 DSL ( Domain Specific Language:特定领域语言 ) 查询,它能够构建更复杂、强大的查询。DSL 以 Json 请求体的形式出现。
我们可以这样表示之前关于“Smith”的查询:
- GET /megacorp/employee/_search
- {
- "query" : {
- "match" : {
- "last_name" : "Smith"
- }
- }
- }
让搜索稍微再变的复杂一些。我们依旧想要找到姓氏为“Smith”的员工,但是我们只想得到年龄大于 30 岁的员工。我们的 语句将添加过滤器 filter,它使得我们高效率的执行一个结构化搜索:
- {
- "query": {
- "bool": {
- "filter": {
- "range": {
- "age": {
- }
- }
- },
- "must": {
- "match": {
- "last_name": "smith"
- }
- }
- }
- }
- }
- {
- ,
- "timed_out": false,
- "_shards": {
- ,
- ,
- ,
- },
- "hits": {
- ,
- "max_score": 0.2876821,
- "hits": [
- {
- "_index": "megacorp",
- "_type": "employee",
- ",
- "_score": 0.2876821,
- "_source": {
- "first_name": "Jane",
- "last_name": "Smith",
- ,
- "about": "I like to collect rock albums",
- "interests": [
- "music"
- ]
- }
- }
- ]
- }
- }
响应
全文搜索
我们尝试一种更高级的搜索,全文搜索——一种传统数据库很难实现的功能。 我们将会搜索所有喜欢 “rock climbing” 的员工:
- GET /megacorp/employee/_search{
- "query": {
- "match": {
- "about": "rock climbing"
- }
- }
- }
- {
- ,
- "timed_out": false,
- "_shards": {
- ,
- ,
- ,
- },
- "hits": {
- ,
- "max_score": 0.53484553,
- "hits": [
- {
- "_index": "megacorp",
- "_type": "employee",
- ",
- "_score": 0.53484553,
- "_source": {
- "first_name": "John",
- "last_name": "Smith",
- ,
- "about": "I love to go rock climbing",
- "interests": [
- "sports",
- "music"
- ]
- }
- },
- {
- "_index": "megacorp",
- "_type": "employee",
- ",
- "_score": 0.26742277,
- "_source": {
- "first_name": "Jane",
- "last_name": "Smith",
- ,
- "about": "I like to collect rock albums",
- "interests": [
- "music"
- ]
- }
- }
- ]
- }
- }
响应
默认情况下,Elasticsearch 根据结果相关性评分来对结果集进行排序,所谓的「结果相关性评分」就是文档与查询条件的匹 配程度。很显然,排名第一的 John Smith 的 about 字段明确的写到“rock climbing”。
但是为什么 Jane Smith 也会出现在结果里呢?原因是“rock”在她的 about 字段中被提及了。因为只有“rock”被提及 而“climbing”没有,所以她的 _score 要低于 John。
这个例子很好的解释了 Elasticsearch 如何在各种文本字段中进行全文搜索,并且返回相关性最大的结果集。相关性 (relevance)的概念在 Elasticsearch 中非常重要,而这个概念在传统关系型数据库中是不可想象的,因为传统数据库对记录的查询只有匹配或者不匹配。
短语检索
上面全文检索方式是经过分词后的搜索,如果我们想要不分词查询 about 字段包含 "rock climbing" 的员工记录,只需要将 "match" 查询变更为 "match_phrase" 即可:
- GET /megacorp/employee/_search
- {
- "query": {
- "match_phrase": {
- "about": "rock climbing"
- }
- }
- }
- {
- ,
- "timed_out": false,
- "_shards": {
- ,
- ,
- ,
- },
- "hits": {
- ,
- "max_score": 0.53484553,
- "hits": [
- {
- "_index": "megacorp",
- "_type": "employee",
- ",
- "_score": 0.53484553,
- "_source": {
- "first_name": "John",
- "last_name": "Smith",
- ,
- "about": "I love to go rock climbing",
- "interests": [
- "sports",
- "music"
- ]
- }
- }
- ]
- }
- }
响应
高亮搜索
从每个搜索结果中高亮 (highlight) 匹配到的关键字,这样用户可以知道为什么这些文档和查询相匹配。在 Elasticsearch 中高亮片段是非常容易的。 让我们在之前的语句上增加 highlight 参数:
- GET /megacorp/employee/_search{
- "query": {
- "match_phrase": {
- "about": "rock climbing"
- }
- },
- "highlight": {
- "fields": {
- "about": {}
- }
- }
- }
- {
- ,
- "timed_out": false,
- "_shards": {
- ,
- ,
- ,
- },
- "hits": {
- ,
- "max_score": 0.53484553,
- "hits": [
- {
- "_index": "megacorp",
- "_type": "employee",
- ",
- "_score": 0.53484553,
- "_source": {
- "first_name": "John",
- "last_name": "Smith",
- ,
- "about": "I love to go rock climbing",
- "interests": [
- "sports",
- "music"
- ]
- },
- "highlight": {
- "about": [
- "I love to go <em>rock</em> <em>climbing</em>"
- ]
- }
- }
- ]
- }
- }
响应
当我们运行这个语句时,会命中与之前相同的结果,但是在返回结果中会有一个新的部分叫做 highlight ,这里包含了来 自 about 字段中的文本,并且用 <em></em> 来标识匹配到的单词。
整合ElasticSearch
SpringBoot 默认支持两种以下两种方式操作 Elasticsearch。
新建测试 bean:
- package zze.springboot.elasticsearch.bean;
- import io.searchbox.annotations.JestId;
- public class Product {
- private Integer id;
- private String name;
- private String remark;
- private Double price;
- public Integer getId() {
- return id;
- }
- public void setId(Integer id) {
- this.id = id;
- }
- public String getName() {
- return name;
- }
- public void setName(String name) {
- this.name = name;
- }
- public String getRemark() {
- return remark;
- }
- public void setRemark(String remark) {
- this.remark = remark;
- }
- public Double getPrice() {
- return price;
- }
- public void setPrice(Double price) {
- this.price = price;
- }
- @Override
- public String toString() {
- return "Product{" +
- "id=" + id +
- ", name='" + name + '\'' +
- '}';
- }
- }
zze.springboot.elasticsearch.bean.Product
Jest操作
1、使用 maven 新建 SpringBoot 项目,引入 Web 场景启动器,导入 Jest 的依赖:
- <dependency>
- <groupId>io.searchbox</groupId>
- <artifactId>jest</artifactId>
- <version>5.3.4</version>
- </dependency>
2、配置 Elasticsearch 服务主机地址,使用 9200 端口:
- spring.elasticsearch.jest.uris=http://192.168.202.136:9200
application.properties
3、修改文档 bean,使用注解标识主键:
- package zze.springboot.elasticsearch.bean;
- import io.searchbox.annotations.JestId;
- public class Product {
- @JestId
- private Integer id;
- private String name;
- private String remark;
- private Double price;
- public Integer getId() {
- return id;
- }
- public void setId(Integer id) {
- this.id = id;
- }
- public String getName() {
- return name;
- }
- public void setName(String name) {
- this.name = name;
- }
- public String getRemark() {
- return remark;
- }
- public void setRemark(String remark) {
- this.remark = remark;
- }
- public Double getPrice() {
- return price;
- }
- public void setPrice(Double price) {
- this.price = price;
- }
- @Override
- public String toString() {
- return "Product{" +
- "id=" + id +
- ", name='" + name + '\'' +
- '}';
- }
- }
zze.springboot.elasticsearch.bean.Product
4、测试:
- package zze.springboot.elasticsearch;
- import io.searchbox.client.JestClient;
- import io.searchbox.core.Index;
- import io.searchbox.core.Search;
- import io.searchbox.core.SearchResult;
- import org.junit.Test;
- import org.junit.runner.RunWith;
- import org.springframework.beans.factory.annotation.Autowired;
- import org.springframework.boot.test.context.SpringBootTest;
- import org.springframework.test.context.junit4.SpringRunner;
- import zze.springboot.elasticsearch.bean.Product;
- import java.io.IOException;
- import java.util.List;
- @RunWith(SpringRunner.class)
- @SpringBootTest
- public class JestTests {
- @Autowired
- private JestClient jestClient;
- // 索引文档
- @Test
- public void testIndex() {
- // 创建一个产品作为文档
- Product product = new Product();
- product.setId(1);
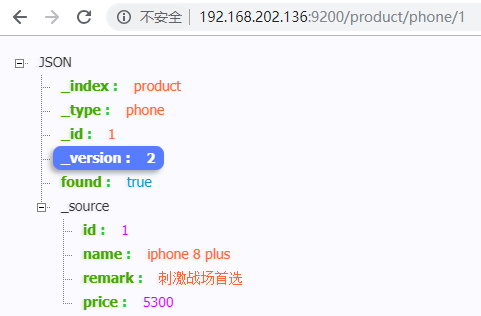
- product.setName("iphone 8 plus");
- product.setPrice(5300D);
- product.setRemark("刺激战场首选");
- // 构建一个 product 索引,索引文档到该索引下 phone 类型
- Index index = new Index.Builder(product).index("product").type("phone").build();
- try {
- jestClient.execute(index);
- } catch (IOException e) {
- e.printStackTrace();
- }
- }
- // 搜索
- @Test
- public void testSearch() {
- // 查询表达式
- String json = "{\n" +
- " \"query\": {\n" +
- " \"match\": {\n" +
- " \"name\": \"iphone 8 plus\"\n" +
- " }\n" +
- " }\n" +
- "}"; // 空字符串为查询所有
- // 构建搜索对象,指定在 product 索引的 phone 类型下通过 json 变量指定的查询表达式搜索
- Search search = new Search.Builder(json).addIndex("product").addType("phone").build();
- try {
- SearchResult searchResult = jestClient.execute(search);
- List<SearchResult.Hit<Product, Void>> hits = searchResult.getHits(Product.class);
- for (SearchResult.Hit<Product, Void> hit : hits) {
- System.out.println(hit.source);
- }
- } catch (IOException e) {
- e.printStackTrace();
- }
- /*
- Product{id=1, name='iphone 8 plus'}
- */
- }
- }
test
SpringData操作
SpringBoot 默认使用 SpringData 来操作 Elasticsearch。
Spring Data Elasticsearch 官方文档 | Spring Data Elasticsearch GitHub
1、使用 maven 新建 SpringBoot 项目,引入 Web、Elasticsearch 场景启动器。
2、配置 Elasticsearch 服务主机地址,使用 9300 端口:
- spring.data.elasticsearch.cluster-name=elasticsearch
- spring.data.elasticsearch.cluster-nodes=192.168.202.136:9300
application.properties
3、修改文档 bean,使用注解指定文档存放的索引及类型:
- package zze.springboot.elasticsearch.bean;
- import org.springframework.data.elasticsearch.annotations.Document;
- @Document(indexName = "product",type = "phone") // 指定该类型实例是一个文档对象,存放在 product 索引下 phone 类型中
- public class Product {
- private Integer id;
- private String name;
- private String remark;
- private Double price;
- public Integer getId() {
- return id;
- }
- public void setId(Integer id) {
- this.id = id;
- }
- public String getName() {
- return name;
- }
- public void setName(String name) {
- this.name = name;
- }
- public String getRemark() {
- return remark;
- }
- public void setRemark(String remark) {
- this.remark = remark;
- }
- public Double getPrice() {
- return price;
- }
- public void setPrice(Double price) {
- this.price = price;
- }
- @Override
- public String toString() {
- return "Product{" +
- "id=" + id +
- ", name='" + name + '\'' +
- '}';
- }
- }
zze.springboot.elasticsearch.bean.Product
ElasticsearchRepository操作
1、新建 Repository 接口:
- package zze.springboot.elasticsearch.repository;
- import org.springframework.data.elasticsearch.repository.ElasticsearchRepository;
- import zze.springboot.elasticsearch.bean.Product;
- import java.util.List;
- public interface ProductRepository extends ElasticsearchRepository<Product, Integer> {
- // 扩展 ElasticsearchRepository 自定义方法,使用可参考官方文档及 GitHub 文档
- public List<Product> findProductByNameLike(String name);
- }
zze.springboot.elasticsearch.repository.ProductRepository
2、测试:
- package zze.springboot.elasticsearch;
- import io.searchbox.client.JestClient;
- import io.searchbox.core.Index;
- import io.searchbox.core.Search;
- import io.searchbox.core.SearchResult;
- import org.junit.Test;
- import org.junit.runner.RunWith;
- import org.springframework.beans.factory.annotation.Autowired;
- import org.springframework.boot.test.context.SpringBootTest;
- import org.springframework.test.context.junit4.SpringRunner;
- import zze.springboot.elasticsearch.bean.Product;
- import zze.springboot.elasticsearch.repository.ProductRepository;
- import java.io.IOException;
- import java.util.List;
- @RunWith(SpringRunner.class)
- @SpringBootTest
- public class ElasticsearchRepositoryTests {
- @Autowired
- private ProductRepository productRepository;
- // 索引文档
- @Test
- public void testIndex() {
- // 创建一个产品作为文档
- Product product = new Product();
- product.setId(1);
- product.setName("iphone 8 plus");
- product.setPrice(5300D);
- product.setRemark("刺激战场首选");
- productRepository.index(product);
- }
- // 搜索
- @Test
- public void testSearch() {
- Iterable<Product> products = productRepository.findAll();
- products.forEach(p-> System.out.println(p));
- /*
- Product{id=1, name='iphone 8 plus'}
- */
- }
- // 根据名称查询
- @Test
- public void testFindByName(){
- // like 模糊查询时值不能直接使用空格,需要使用 \b 转义
- List<Product> products = productRepository.findProductByNameLike("iphone\b8");
- products.fotestrEach(p-> System.out.println(p));
- /*
- Product{id=1, name='iphone 8 plus'}
- */
- }
- }
test
关于在接口中扩展查询方法可参考如下范例:
| 关键字 | 例子 | 对应查询表达式 |
|---|---|---|
|
|
|
|
|
|
|
|
|
|
|
|
|
|
|
|
|
|
|
|
|
|
|
|
|
|
|
|
|
|
|
|
|
|
|
|
|
|
|
|
|
|
|
|
|
|
|
|
|
|
|
|
|
|
|
|
|
|
|
|
|
|
|
|
|
|
|
|
|
|
|
|
|
|
|
|
不仅如此,还可以通过注解让指定查询表达式绑定到扩展的查询方法,如:
- @Query("{\"bool\" : {\"must\" : {\"field\" : {\"name\" : \" ? 0\"}}}}")
- Page<Product> findByName(String name, Pageable pageable);
更多使用细节参考官方文档 2.2 节。
ElasticsearchTemplate操作
测试:
- package zze.springboot.elasticsearch;
- import org.elasticsearch.action.search.SearchType;
- import org.elasticsearch.index.query.BoolQueryBuilder;
- import org.elasticsearch.index.query.QueryBuilders;
- import org.junit.Test;
- import org.junit.runner.RunWith;
- import org.springframework.beans.factory.annotation.Autowired;
- import org.springframework.boot.test.context.SpringBootTest;
- import org.springframework.data.elasticsearch.core.ElasticsearchTemplate;
- import org.springframework.data.elasticsearch.core.query.IndexQuery;
- import org.springframework.data.elasticsearch.core.query.IndexQueryBuilder;
- import org.springframework.data.elasticsearch.core.query.NativeSearchQueryBuilder;
- import org.springframework.data.elasticsearch.core.query.SearchQuery;
- import org.springframework.test.context.junit4.SpringRunner;
- import zze.springboot.elasticsearch.bean.Product;
- import zze.springboot.elasticsearch.repository.ProductRepository;
- import java.util.List;
- @RunWith(SpringRunner.class)
- @SpringBootTest
- public class ElasticsearchTemplateTests {
- @Autowired
- private ElasticsearchTemplate elasticsearchTemplate;
- // 索引文档
- @Test
- public void testIndex() {
- // 创建一个产品作为文档
- Product product = new Product();
- product.setId();
- product.setName("iphone 9 plus");
- product.setPrice(5300D);
- product.setRemark("刺激战场首选");
- IndexQuery indexQuery = new IndexQueryBuilder().withIndexName("product")
- .withType("phone").withId(product.getId().toString()).withObject(product).build();
- elasticsearchTemplate.index(indexQuery);
- }
- // 搜索
- @Test
- public void testSearch() {
- // 构建查询构建器
- BoolQueryBuilder bqb = QueryBuilders.boolQuery();
- bqb.must(QueryBuilders.boolQuery()
- .should(QueryBuilders.matchQuery(")));
- // 构建一个搜索查询
- SearchQuery searchQuery = new NativeSearchQueryBuilder().withQuery(bqb).withIndices("product").withTypes("phone")
- .withSearchType(SearchType.DEFAULT)
- .build();
- List<Product> products = elasticsearchTemplate.queryForList(searchQuery, Product.class);
- for (Product product : products) {
- System.out.println(product);
- }
- /*
- Product{id=3, name='iphone 9 plus'}
- */
- }
- }
test
注意:SpringData 依赖的 Elasticsearch 依赖版本需要与 Elasticsearch 服务器版本匹配,在 GitHub 中有说明规则:
| spring data elasticsearch | elasticsearch |
|---|---|
| 3.2.x | 6.5.0 |
| 3.1.x | 6.2.2 |
| 3.0.x | 5.5.0 |
| 2.1.x | 2.4.0 |
| 2.0.x | 2.2.0 |
| 1.3.x | 1.5.2 |
如果版本不匹配,会抛出如下异常:
- org.elasticsearch.transport.ConnectTransportException: [][192.168.202.136:9300] connect_timeout[30s]
- ...
- Caused by: java.net.ConnectException: Connection refused: no further information: /192.168.202.136:9300
- ...
解决方案是修改依赖版本或者重新安装 Elasticsearch 指定版本服务。
java框架之SpringBoot(13)-检索及整合Elasticsearch的更多相关文章
- java框架之SpringBoot(15)-安全及整合SpringSecurity
SpringSecurity介绍 Spring Security 是针对 Spring 项目的安全框架,也是 Spring Boot 底层安全模块默认的技术选型.它可以实现强大的 Web 安全控制.对 ...
- java框架之SpringBoot(16)-分布式及整合Dubbo
前言 分布式应用 在分布式系统中,国内常用 Zookeeper + Dubbo 组合,而 SpringBoot 推荐使用 Spring 提供的分布式一站式解决方案 Spring + SpringBoo ...
- java框架之SpringBoot(12)-消息及整合RabbitMQ
前言 概述 大多数应用中,可通过消息服务中间件来提升系统异步通信.扩展解耦的能力. 消息服务中两个重要概念:消息代理(message broker)和目的地(destination).当消息发送者发送 ...
- 【java框架】SpringBoot(5)--SpringBoot整合分布式Dubbo+Zookeeper
1.理论概述 1.1.分布式 分布式系统是若干独立计算机的集合,这些计算机对于用户来讲就像单个系统. 由多个系统集成成一个整体,提供多个功能,组合成一个板块,用户在使用上看起来是一个服务.(比如淘宝网 ...
- java框架之SpringBoot(9)-数据访问及整合MyBatis
简介 对于数据访问层,无论是 SQL 还是 NOSQL,SpringBoot 默认采用整合 SpringData 的方式进行统一处理,添加了大量的自动配置,引入了各种 Template.Reposit ...
- java框架之SpringBoot(11)-缓存抽象及整合Redis
Spring缓存抽象 介绍 Spring 从 3.1 版本开始定义了 org.springframework.cache.Cache 和 org.springframework.cache.Cache ...
- 【java框架】SpringBoot(7) -- SpringBoot整合MyBatis
1.整合MyBatis操作 前面一篇提到了SpringBoot整合基础的数据源JDBC.Druid操作,实际项目中更常用的还是MyBatis框架,而SpringBoot整合MyBatis进行CRUD也 ...
- java框架之SpringBoot(3)-日志
市面上的日志框架 日志抽象层 日志实现 JCL(Jakarta Commons Logging).SLF4J(Simple Logging Facade For Java).JBoss-Logging ...
- java框架之SpringBoot(4)-资源映射&thymeleaf
资源映射 静态资源映射 查看 SpringMVC 的自动配置类,里面有一个配置静态资源映射的方法: @Override public void addResourceHandlers(Resource ...
随机推荐
- CPU与GPU性能的比较报告
运行时间分析 不同的模型在cpu和gpu下的时间差异较大,一般来说gpu会比cpu快5-20倍.我们选用了最常用的inception v3的分类模型,输入图片尺寸为:3x299x299. GPU 在一 ...
- FastDFS常用命令
1.启动FastDFS tracker: /usr/local/bin/fdfs_trackered %FastDFS%/tracker.conf storage: /usr/local/bin/fd ...
- 基于jQuery发展历程时间轴特效代码
分享一款基于jQuery发展历程时间轴特效代码,带左右箭头,数字时间轴选项卡切换特效下载.效果图如下: 在线预览 源码下载 实现的代码. html代码: <div id="time ...
- Java对象序列化全面总结
前言 Java允许我们在内存中创建可复用的Java对象,但一般情况下,这些对象的生命周期不会比JVM的生命周期更长.但在现实应用中,可能要求在JVM停止运行之后能够保存(持久化)指定的对象,并在将来重 ...
- linux下从一台服务器复制文件或文件夹到本地
1.从服务器复制文件到本地:scp root@×××.×××.×××.×××:/data/test.txt /home/myfile/ root@×××.×××.×××.××× root是目标服务 ...
- linux系统下键盘按键的重新映射——xmodmap工具和xev工具
大家会不会有时候,感觉键盘上的某几个键用起来不是很方便,打字打久了很容易手指头疼呢? 例如大家使用vim编辑器时, 经常需要使用到esc键,而该键在左上角,很不方便的.再比如写程序的时候,经常会使用到 ...
- Windows 性能监视器的基本指标说明(CPU,内存,硬盘参数)
[转]Windows 性能监视器的基本指标说明(CPU,内存,硬盘参数) 作为一个系统工程师来说,要看懂监控的数据至关重要,关系着优化和分析出现的问题.我是在运维过程中要用到的.因此,今天给出Wind ...
- Java线程生命周期
当你需要使用Java线程在多线程环境下进行编程时,理解Java的线程周期与线程的状态是非常重要的.通过实现Runnale接口或者继承Thread类,我们可以创建线程,为了启动一个线程,我们需要创建一个 ...
- Android查看文件大小
查看当前路径下的各个挂载模块的大小及剩余量(例如在根目录执行) df #输出 Filesystem Size Used Free Blksize /sys/fs/cgroup .0K /mnt/ase ...
- 深入理解 Java 虚拟机之学习笔记(3)
垃圾回收(Garbage Collection,GC ),GC的历史其实比Java久远,1960年诞生与MIT的Lisp是第一门真正使用内存动态分配和垃圾收集技术的语言.当Lisp还在胚胎时期时,人们 ...