Redis(二)CentOS7安装Redis4.0.10与集群搭建
一 Redis单机安装
1 Redis下载安装
1.1 检查依赖环境(Redis是C语言开发,编译依赖gcc环境)
- [root@node21 redis-4.0.]$ gcc -v
- -bash: gcc: command not found
- [root@node21 redis-4.0.]$ yum install -y gcc
1.2 解压文件到指定目录
- [root@node21 software]$ wget http://download.redis.io/releases/redis-4.0.10.tar.gz
- [root@node21 software]$ ll
- -rw-rw-r-- root root June : redis-4.0..tar.gz
- [root@node21 software]$ tar xzf redis-4.0..tar.gz -C /opt/module/
1.3 编译文件
- [root@node21 software]$ cd /opt/module/redis-4.0./
- [root@node21 redis-4.0.]$ make
1)如果没有安装gcc,编译会出现如下错误提示。(如果编译失败,必须删除文件夹,重新解压)
- /bin/sh: cc: command not found
- make[]: *** [adlist.o] Error
- make[]: Leaving directory `/opt/module/redis-4.0./src'
- make: *** [all] Error
2)安装成功

1.4 安装
- [root@node21 redis-4.0.]$ make PREFIX=/opt/module/redis-4.0.10 install
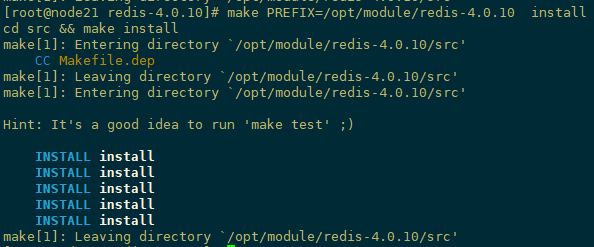
安装完成后,在redis安装目录下会出现一个bin目录,bin目录下有几个可执行文件
- redis-benchmark ---性能测试工具
- redis-check-aof ---AOF文件修复工具
- redis-check-rdb ---RDB文件检测工具(快照持久化文件)
- redis-cli ---命令行客户端
- redis-sentinel -> redis-server ---redis哨兵
- redis-server ---redis服务器启动命令
1.5 配置环境变量
- [root@node21 redis-4.0.]$ vi /etc/profile
- 末未追加如下
- export REDIS_HOME=/opt/module/redis-4.0.
- export PATH=$REDIS_HOME/bin:$PATH
- [root@node21 redis-4.0.]# source /etc/profile
2 Redis服务启动
2.1 前台模式启动(默认)
- [root@node21 redis-4.0.10]$ bin/redis-server
前台服务端启动成功后,不能进行其他操作,使用Ctrl+c结束或者服务器关闭redis服务自动结束,此种方式不推荐,成功启动信息如下
- [root@node21 redis-4.0.]$ bin/redis-server
- :C June ::00.955 # oO0OoO0OoO0Oo Redis is starting oO0OoO0OoO0Oo
- :C June ::00.956 # Redis version=4.0., bits=, commit=, modified=, pid=, just started
- :C June ::00.956 # Warning: no config file specified, using the default config. In order to specify a config file use bin/redis-server /path/to/redis.conf
- _._
- _.-``__ ''-._
- _.-`` `. `_. ''-._ Redis 4.0. (/) bit
- .-`` .-```. ```\/ _.,_ ''-._
- ( ' , .-` | `, ) Running in standalone mode
- |`-._`-...-` __...-.``-._|'` _.-'| Port:
- | `-._ `._ / _.-' | PID: 5356
- `-._ `-._ `-./ _.-' _.-'
- |`-._`-._ `-.__.-' _.-'_.-'|
- | `-._`-._ _.-'_.-' | http://redis.io
- `-._ `-._`-.__.-'_.-' _.-'
- |`-._`-._ `-.__.-' _.-'_.-'|
- | `-._`-._ _.-'_.-' |
- `-._ `-._`-.__.-'_.-' _.-'
- `-._ `-.__.-' _.-'
- `-._ _.-'
- `-.__.-'
- :M June ::00.960 # WARNING: The TCP backlog setting of cannot be enforced because /proc/sys/net/core/somaxconn is set to the lower value of .
- :M June ::00.960 # Server initialized
- :M June ::00.960 # WARNING overcommit_memory is set to ! Background save may fail under low memory condition. To fix this issue add 'vm.overcommit_memory =
- ' to /etc/sysctl.conf and then reboot or run the command 'sysctl vm.overcommit_memory=' for this to take effect.5356:M 19 June 22:47:00.960 # WARNING you have Transparent Huge Pages (THP) support enabled in your kernel. This will create latency and memory usage issues with Redis.
- To fix this issue run the command 'echo never > /sys/kernel/mm/transparent_hugepage/enabled' as root, and add it to your /etc/rc.local in order to retain the setting after a reboot. Redis must be restarted after THP is disabled.:M June ::00.960 * Ready to accept connections
2.2 后台模式启动
修改redis.conf 将daemonize no 改为 daemonize yes,说明:将Redis设置为后台进程;绑定ip由本地ip换成真机ip,方便对外访问
- [root@node21 redis-4.0.10]# vi redis.conf


修改完之后指定配置文件为后台启动
- [root@node21 redis-4.0.10]# ./bin/redis-server ./redis.conf
:C June ::44.115 # oO0OoO0OoO0Oo Redis is starting oO0OoO0OoO0Oo
:C June ::44.115 # Redis version=4.0., bits=, commit=, modified=, pid=, just started
:C June ::44.115 # Configuration loaded
Redis默认端口6379,通过当前服务进行查看
- [root@node21 redis-4.0.10]# ps -ef |grep redis
root : ? :: bin/redis-server *:6379
root : pts/ :: grep --color=auto -i redis
3 Redis客户端连接
连接客户端 :redis-cli -h ip地址 -p 端口
- [root@node21 redis-4.0.10]# ./bin/redis-cli -h 192.168.100.21 -p 6379
- 192.168.100.21:6379>
redis-cli连上redis服务后,可以在命令行发送命令 ping,测试客户端和Redis的连接是否正常,如果连接正常会收到回复pong。
- 192.168.100.21:6379> ping
- PONG
4 Redis停止
强制终止Redis进程可能会导致redis持久化数据丢失
- [root@node21 redis-4.0.10]# kill -9 5336 #pid需要通过‘ps -aux |grep redis’ 进行查询
正确停止Redis连接方式应向redis发送shutdown指令(关闭默认端口)
- [root@node21 redis-4.0.10]# redis-cli -h 192.168.100.21 -p 6379 shutdown
quit 退出客户端连接
5 安装服务脚本
- [root@node21 redis-4.0.]# cd utils/
- [root@node21 utils]# ./install_server.sh
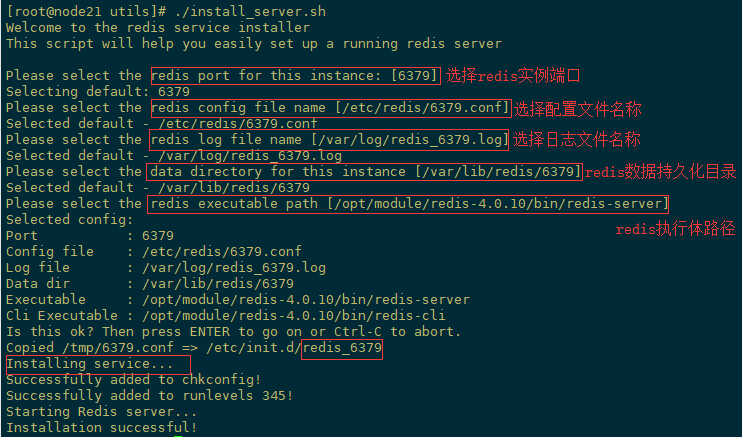
查看服务运行状态
- [root@node21 utils]# service redis_6379 status

停止Redis服务
- [root@node21 admin]# service redis_6379 stop
二 Redis集群安装
右侧是官网文档(Redis集群规范) http://redis.io/topics/cluster-spec
右侧是上文链接的翻译文档 http://redisdoc.com/topic/cluster-spec.html#cluster-spec
1 原理简述
此处的集群指的是Cluster, 通过分区/分片来实现一定程度的分布式与高可用部署。

2 集群配置
Redis 最小集群规划,需要包含至少三个主节点,此处测试部署具有三个主服务器和三个从服务器的六节点群集。计划是在一台机器上模拟一个集群,主节点端口7000,7001,7002, 从节点7003,7004,7005,这和生产环境的集群搭建没本质区别。
2.1 创建节点目录
创建一个新目录以及redis实例已端口号命名的以下目录
- [root@node21 module]# mkdir redis-Cluster
- [root@node21 module]# cd redis-Cluster
- [root@node21 redis-Cluster]# mkdir 7000 7001 7002 7003 7004 7005
2.2 创建配置文件
在每个节点目录中创建一个文件redis.conf,从7000到7005.作为配置文件的模板,以下是最小的Redis群集配置文件,每个节点实例配置稍作修改
- [root@node21 redis-Cluster]# cd
- [root@node21 ]# vi redis.conf
- port 7000 #端口7000,,,,,
- cluster-enabled yes #开启集群
- cluster-config-file nodes.conf #集群配置信息,开启集群后自动生成
- cluster-node-timeout #请求超时时长
- appendonly yes #开启aof日志,它会每次写操作都记录一条日志
- daemonize yes #redis后台运行
- bind 192.168.100.21 #默认ip为127.0.0. 需要改为其他节点机器可访问的ip 否则创建集群时无法访问对应的端口,无法创建集群
pidfile /opt/module/redis-Cluster/7000/redis_7000.pid #pidfile文件对应7000,,,,,
dir /opt/module/redis-Cluster/7000/ #数据文件存放位置对应7000,7001,7002,7003,7004,7005
2.3 启动节点服务
分别启动6个实例,可执行文件redis-server用之前单机版的,已配过环境变量
- [root@node21 redis-Cluster]# redis-server /redis.conf
- [root@node21 redis-Cluster]# redis-server /redis.conf
- [root@node21 redis-Cluster]# redis-server /redis.conf
- [root@node21 redis-Cluster]# redis-server /redis.conf
- [root@node21 redis-Cluster]# redis-server /redis.conf
- [root@node21 redis-Cluster]# redis-server /redis.conf
6台实例运行起来后,查看进程,下一步创建集群
- [root@node21 redis-Cluster]# ps -ef |grep redis
- root : ? :: redis-server 192.168.100.21: [cluster]
- root : ? :: redis-server 192.168.100.21: [cluster]
- root : ? :: redis-server 192.168.100.21: [cluster]
- root : ? :: redis-server 192.168.100.21: [cluster]
- root : ? :: redis-server 192.168.100.21: [cluster]
- root : ? :: redis-server 192.168.100.21: [cluster]
2.4 创建集群
redis安装目录src中redis-trib.rb完成集群创建,redis-trib.rb命令需要安装gem redis模块才能运行,gem redis需要Ruby环境
- [root@node21 redis-Cluster]# yum install ruby rubygems -y
- [root@node21 redis-Cluster]# gem install redis
创建新集群命令:命令create,选项--replicas 1意味着我们希望每个创建的主服务器都有一个从服 其他参数是我要用于创建新集群的实例的地址列表。
- [root@node21 src]# pwd
- /opt/module/redis-4.0./src
- [root@node21 src]# ./redis-trib.rb create --replicas 192.168.100.21: 192.168.100.21: 192.168.100.21: 192.168.100.21: 192.168.100.21: 192.168.100.21:
创建命令运行界面如下,主要是分配主从和槽位数
- >>> Creating cluster
- >>> Performing hash slots allocation on 6 nodes...
- Using 3 masters:
- 192.168.100.21:
- 192.168.100.21:
- 192.168.100.21:
- Adding replica 192.168.100.21:7004 to 192.168.100.21:7000
- Adding replica 192.168.100.21:7005 to 192.168.100.21:7001
- Adding replica 192.168.100.21:7003 to 192.168.100.21:7002
- >>> Trying to optimize slaves allocation for anti-affinity
- [WARNING] Some slaves are in the same host as their master
- M: 2b2a9cab4591508e44290a1fd16781e5c9099010 192.168.100.21:
- slots:- ( slots) master
- M: 69d97b0c7c3c1587f0e4ed0abb82c01fa66a5478 192.168.100.21:
- slots:- ( slots) master
- M: 4728f1d7da089b6ec9c20f8c9907652536ee5804 192.168.100.21:
- slots:- ( slots) master
- S: 73f894c5ddca484f5b72fd7f1f08612e50681133 192.168.100.21:
- replicates 4728f1d7da089b6ec9c20f8c9907652536ee5804
- S: 7f09c99b30f16ed583f9e144c75e2bb065c0528d 192.168.100.2:
- replicates 2b2a9cab4591508e44290a1fd16781e5c9099010
- S: 23d31961a1ad249b4af1d9f7be6cf3abc1b82f0a 192.168.100.21:
- replicates 69d97b0c7c3c1587f0e4ed0abb82c01fa66a5478
- Can I set the above configuration? (type 'yes' to accept): yes
- >>> Nodes configuration updated
- >>> Assign a different config epoch to each node
- >>> Sending CLUSTER MEET messages to join the cluster
- Waiting for the cluster to join..
- >>> Performing Cluster Check (using node 192.168.100.21:)
- M: 2b2a9cab4591508e44290a1fd16781e5c9099010 192.168.100.21:7000
- slots:0-5460 (5461 slots) master
- additional replica(s)
- S: 73f894c5ddca484f5b72fd7f1f08612e50681133 192.168.100.21:
- slots: ( slots) slave
- replicates 4728f1d7da089b6ec9c20f8c9907652536ee5804
- S: 7f09c99b30f16ed583f9e144c75e2bb065c0528d 192.168.100.21:
- slots: ( slots) slave
- replicates 2b2a9cab4591508e44290a1fd16781e5c9099010
- S: 23d31961a1ad249b4af1d9f7be6cf3abc1b82f0a 192.168.100.21:
- slots: ( slots) slave
- replicates 69d97b0c7c3c1587f0e4ed0abb82c01fa66a5478
- M: 69d97b0c7c3c1587f0e4ed0abb82c01fa66a5478 192.168.100.21:7001
- slots:5461-10922 (5462 slots) master
- additional replica(s)
- M: 4728f1d7da089b6ec9c20f8c9907652536ee5804 192.168.100.21:7002
- slots:10923-16383 (5461 slots) master
- additional replica(s)
- [OK] All nodes agree about slots configuration.
- >>> Check for open slots...
- >>> Check slots coverage...
- [OK] All 16384 slots covered.
3 集群测试
集群客户端连接方式 redis-cli -c
- [root@node21 redis-Cluster]# redis-cli -c -h 192.168.100.21 -p
- 192.168.100.21:> set foo bar
- -> Redirected to slot [] located at 192.168.100.21:
- OK
- 192.168.100.21:> get foo
- "bar"
- 192.168.100.21:> keys *
- ) "foo"
- 192.168.100.21:> exit
- [root@node21 redis-Cluster]# redis-cli -c -h 192.168.100.21 -p
- 192.168.100.21:> keys *
- (empty list or set)
- 192.168.100.21:> get foo
- -> Redirected to slot [] located at 192.168.100.21:
- "bar"
- 192.168.100.21:>
不加-c会报错如下
- [root@node21 redis-Cluster]# redis-cli -p
- 192.168.100.21:> set foo bar
- (error) MOVED 192.168.100.21:
4验证故障转移
我们可以使用以下命令识别集群并使其崩溃:
- [root@node21 redis-Cluster]# redis-cli -h 192.168.100.21 -p cluster nodes | grep master
- 2b2a9cab4591508e44290a1fd16781e5c9099010 192.168.100.21:@ myself,master - connected -
- 69d97b0c7c3c1587f0e4ed0abb82c01fa66a5478 192.168.100.21:@ master - connected -
- 4728f1d7da089b6ec9c20f8c9907652536ee5804 192.168.100.21:@ master - connected -
如上,7000,7001和7002都是主服。让我们使用DEBUG SEGFAULT命令崩溃节点7002 :
- [root@node21 redis-Cluster]# redis-cli -h 192.168.100.21 -p debug segfault
- Error: Server closed the connection
7002的从服7003节点部分日志信息如下
- :S Jul ::43.245 * Background AOF rewrite finished successfully
- :S Jul ::45.370 # Connection with master lost.
- :S Jul ::45.371 * Caching the disconnected master state.
- :S Jul ::45.595 * Connecting to MASTER 192.168.100.21:
- :S Jul ::45.595 * MASTER <-> SLAVE sync started
- :S Jul ::45.595 # Error condition on socket for SYNC: Connection refused
- :S Jul ::46.604 * Connecting to MASTER 192.168.100.21:
- :S Jul ::46.605 * MASTER <-> SLAVE sync started
- :S Jul ::46.605 # Error condition on socket for SYNC: Connection refused
- :S Jul ::47.999 * Connecting to MASTER 192.168.100.21:
- :S Jul ::47.999 * MASTER <-> SLAVE sync started
- :S Jul ::47.999 # Error condition on socket for SYNC: Connection refused
- :S Jul ::49.008 * Connecting to MASTER 192.168.100.21:
- :S Jul ::49.008 * MASTER <-> SLAVE sync started
- :S Jul ::49.008 # Error condition on socket for SYNC: Connection refused
- :S Jul ::50.023 * Connecting to MASTER 192.168.100.21:
- :S Jul ::50.023 * MASTER <-> SLAVE sync started
- :S Jul ::50.024 # Error condition on socket for SYNC: Connection refused
- :S Jul ::51.032 * FAIL message received from 69d97b0c7c3c1587f0e4ed0abb82c01fa66a5478 about 4728f1d7da089b6ec9c20f8c9907652536ee5804
- :S Jul ::51.032 * Connecting to MASTER 192.168.100.21:
- :S Jul ::51.032 * MASTER <-> SLAVE sync started
- :S Jul ::51.032 # Start of election delayed for milliseconds (rank #, offset ).
- :S Jul ::51.032 # Cluster state changed: fail
- :S Jul ::51.033 # Error condition on socket for SYNC: Connection refused
- :S Jul ::51.738 # Starting a failover election for epoch .
- :S Jul ::51.749 # Failover election won: I'm the new master.
- :S Jul ::51.750 # configEpoch set to after successful failover
- :M Jul ::51.750 # Setting secondary replication ID to 8ef669a5f5a6e6efafed75005ca9426d539c4c47, valid up to offset: . New replication ID is bec5f6f31031
- 1deaa4aff371b7244cd131f594fe8417:M Jul ::51.750 * Discarding previously cached master state.
- :M Jul ::51.750 # Cluster state changed: ok
客户端测试:7002的数据自动跳转到7003上
- [root@node21 redis-Cluster]# redis-cli -c -h 192.168.100.21 -p
- 192.168.100.21:> get foo
- -> Redirected to slot [] located at 192.168.100.21:
- "bar"
- 192.168.100.21:>
查看集群节点状态
- [root@node21 redis-Cluster]# redis-cli -h 192.168.100.21 -p cluster nodes
- 2b2a9cab4591508e44290a1fd16781e5c9099010 192.168.100.21:@ myself,master - connected -
- 73f894c5ddca484f5b72fd7f1f08612e50681133 192.168.100.21:@ master - connected -
- 7f09c99b30f16ed583f9e144c75e2bb065c0528d 192.168.100.21:@ slave 2b2a9cab4591508e44290a1fd16781e5c9099010 connected
- 23d31961a1ad249b4af1d9f7be6cf3abc1b82f0a 192.168.100.21:@ slave 69d97b0c7c3c1587f0e4ed0abb82c01fa66a5478 connected
- 69d97b0c7c3c1587f0e4ed0abb82c01fa66a5478 192.168.100.21:@ master - connected -
- 4728f1d7da089b6ec9c20f8c9907652536ee5804 192.168.100.21:@ master,fail - disconnected
7002再启动,又成为集群中的从服。
5 其他说明
5.1 添加新节点为主服
使用add-node命令将新节点的地址指定为第一个参数,并将集群中随机存在节点的地址指定为第二个参数,redis-trib在运行之前也会检查集群的状态。
- # ./redis-trib.rb add-node 192.168.100.21: 192.168.100.21:
当添加新节点为主节点时,
- 它没有数据,因为它没有分配的哈希槽。
- 因为它是没有分配插槽的主设备,所以当从设备想要成为主设备时,它不参与选举过程。
现在可以使用resharding功能为此节点分配哈希槽redis-trib,重新分区,具体参考官方文档,这里不详述了。
5.2 添加新节点为副本
添加新副本分配给指定的主副本
- ./redis-trib.rb add-node --slave --master-id 3c3a0c74aae0b56170ccb03a76b60cfe7dc1912e 192.168.100.21: 192.168.100.21:
三 安装报错解决
1 gem安装超时
解决gem install redis 因为网络问题造成连接超时的问题,把gem镜像换成国内淘宝的
- [root@node21 redis-Cluster]# gem sources -l
- *** CURRENT SOURCES ***
- https://rubygems.org/
- [root@node21 redis-Cluster]# gem sources --remove https://rubygems.org/
- https://rubygems.org/ removed from sources
- [root@node21 redis-Cluster]# gem sources -a https://ruby.taobao.org/
- https://ruby.taobao.org/ added to sources
- [root@node21 redis-Cluster]# gem sources -l
- *** CURRENT SOURCES ***
- https://ruby.taobao.org/
2Ruby版本过低
- [root@node21 redis-Cluster]# gem install redis
- Fetching: redis-4.0..gem (%)
- ERROR: Error installing redis:
- redis requires Ruby version >= 2.2..
我这里CentOS7.5默认安装的Ruby版本为2.0,需升级为2.2.2以上(ruby -v),先安装RVM,用RVM升级Ruby
- 、sudo yum install curl 安装curl
- 、http://www.rvm.io/ 官网首页就可以看到 $ gpg --keyserver hkp://keys.gnupg.net --recv-keys 409B6B1796C275462A1703113804BB82D39DC0E3 7D2BAF1CF37B13E2069D6956105BD0E739499BDB
- 、下载rvm $ \curl -sSL https://get.rvm.io | bash -s stable
- 、查找配置文件 find / -name rvm.sh
- 、配置文件生效 source /etc/profile.d/rvm.sh
- 、下载rvm依赖 rvm requirements
- 、查看rvm库ruby版本 rvm list known
- 、安装ruby指定版本 rvm install ruby-2.5.
- 、使用ruby版本默认 rvm use 2.5. default
10.gem install redis
3创建集群报错
集群数据不为空,Node 192.168.100.21:7001 is not empty
- [root@node21 src]# ./redis-trib.rb create --replicas 192.168.100.21: 192.168.100.21: 192.168.100.21: 192.168.100.21: 192.168.100.21: 192.168..
- :>>> Creating cluster
- [ERR] Node 192.168.100.21:7001 is not empty. Either the node already knows other nodes (check with CLUSTER NODES) or contains some key in database 0.
清空数据,在将每个节点下aof、rdb、nodes.conf本地备份文件删除 ,重新创建即可成功
- [root@node21 src]# redis-cli -h 192.168.100.21 -p
- 192.168.100.21:> flushdb
- OK
四Redis配置说明
Redis 的配置文件位于 Redis 安装目录下,文件名为 redis.conf,配置项说明如下:
1. Redis默认不是以守护进程的方式运行,可以通过该配置项修改,使用yes启用守护进程
daemonize no
2. 当Redis以守护进程方式运行时,Redis默认会把pid写入/var/run/redis.pid文件,可以通过pidfile指定
pidfile /var/run/redis.pid
3. 指定Redis监听端口,默认端口为6379,
port 6379
4. 绑定的主机地址
bind 127.0.0.1
5.当 客户端闲置多长时间后关闭连接,如果指定为0,表示关闭该功能
timeout 300
6. 指定日志记录级别,Redis总共支持四个级别:debug、verbose、notice、warning,默认为verbose
loglevel verbose
7. 日志记录方式,默认为标准输出,如果配置Redis为守护进程方式运行,而这里又配置为日志记录方式为标准输出,则日志将会发送给/dev/null
logfile stdout
8. 设置数据库的数量,默认数据库为0,可以使用SELECT <dbid>命令在连接上指定数据库id
databases 16
9. 指定在多长时间内,有多少次更新操作,就将数据同步到数据文件,可以多个条件配合
save <seconds> <changes>
Redis默认配置文件中提供了三个条件:
save 900 1
save 300 10
save 60 10000
分别表示900秒(15分钟)内有1个更改,300秒(5分钟)内有10个更改以及60秒内有10000个更改。
10. 指定存储至本地数据库时是否压缩数据,默认为yes,Redis采用LZF压缩,如果为了节省CPU时间,可以关闭该选项,但会导致数据库文件变的巨大
rdbcompression yes
11. 指定本地数据库文件名,默认值为dump.rdb
dbfilename dump.rdb
12. 指定本地数据库存放目录
dir ./
13. 设置当本机为slav服务时,设置master服务的IP地址及端口,在Redis启动时,它会自动从master进行数据同步
slaveof <masterip> <masterport>
14. 当master服务设置了密码保护时,slav服务连接master的密码
masterauth <master-password>
15. 设置Redis连接密码,如果配置了连接密码,客户端在连接Redis时需要通过AUTH <password>命令提供密码,默认关闭
requirepass foobared
16. 设置同一时间最大客户端连接数,默认无限制,Redis可以同时打开的客户端连接数为Redis进程可以打开的最大文件描述符数,如果设置 maxclients 0,表示不作限制。当客户端连接数到达限制时,Redis会关闭新的连接并向客户端返回max number of clients reached错误信息
maxclients 128
17. 指定Redis最大内存限制,Redis在启动时会把数据加载到内存中,达到最大内存后,Redis会先尝试清除已到期或即将到期的Key,当此方法处理 后,仍然到达最大内存设置,将无法再进行写入操作,但仍然可以进行读取操作。Redis新的vm机制,会把Key存放内存,Value会存放在swap区
maxmemory <bytes>
18. 指定是否在每次更新操作后进行日志记录,Redis在默认情况下是异步的把数据写入磁盘,如果不开启,可能会在断电时导致一段时间内的数据丢失。因为 redis本身同步数据文件是按上面save条件来同步的,所以有的数据会在一段时间内只存在于内存中。默认为no
appendonly no
19. 指定更新日志文件名,默认为appendonly.aof
appendfilename appendonly.aof
20. 指定更新日志条件,共有3个可选值:
no:表示等操作系统进行数据缓存同步到磁盘(快)
always:表示每次更新操作后手动调用fsync()将数据写到磁盘(慢,安全)
everysec:表示每秒同步一次(折衷,默认值)
appendfsync everysec
21. 指定是否启用虚拟内存机制,默认值为no,简单的介绍一下,VM机制将数据分页存放,由Redis将访问量较少的页即冷数据swap到磁盘上,访问多的页面由磁盘自动换出到内存中(在后面的文章我会仔细分析Redis的VM机制)
vm-enabled no
22. 虚拟内存文件路径,默认值为/tmp/redis.swap,不可多个Redis实例共享
vm-swap-file /tmp/redis.swap
23. 将所有大于vm-max-memory的数据存入虚拟内存,无论vm-max-memory设置多小,所有索引数据都是内存存储的(Redis的索引数据 就是keys),也就是说,当vm-max-memory设置为0的时候,其实是所有value都存在于磁盘。默认值为0
vm-max-memory 0
24. Redis swap文件分成了很多的page,一个对象可以保存在多个page上面,但一个page上不能被多个对象共享,vm-page-size是要根据存储的 数据大小来设定的,作者建议如果存储很多小对象,page大小最好设置为32或者64bytes;如果存储很大大对象,则可以使用更大的page,如果不 确定,就使用默认值
vm-page-size 32
25. 设置swap文件中的page数量,由于页表(一种表示页面空闲或使用的bitmap)是在放在内存中的,,在磁盘上每8个pages将消耗1byte的内存。
vm-pages 134217728
26. 设置访问swap文件的线程数,最好不要超过机器的核数,如果设置为0,那么所有对swap文件的操作都是串行的,可能会造成比较长时间的延迟。默认值为4
vm-max-threads 4
27. 设置在向客户端应答时,是否把较小的包合并为一个包发送,默认为开启
glueoutputbuf yes
28. 指定在超过一定的数量或者最大的元素超过某一临界值时,采用一种特殊的哈希算法
hash-max-zipmap-entries 64
hash-max-zipmap-value 512
29. 指定是否激活重置哈希,默认为开启(后面在介绍Redis的哈希算法时具体介绍)
activerehashing yes
30. 指定包含其它的配置文件,可以在同一主机上多个Redis实例之间使用同一份配置文件,而同时各个实例又拥有自己的特定配置文件
include /path/to/local.conf
Redis(二)CentOS7安装Redis4.0.10与集群搭建的更多相关文章
- Centos7安装Redis4.0.8
今天安装了CentOS7 1708 在安装redis时报错 make[1]: *** [adlist.o] 错误 127 因为Redis是C实现的,需要gcc来进行编译,所以原因是系统未安装gcc, ...
- 【安装】Redis4.0.10在Linux环境搭建
1.下载Redis后上传到指定目录 2.解压 tar -zxvf redis-4.0.10.tar.gz 3.进入加压后的目录并编译 cd redis-4.0.10 make 4.进入src目录安装 ...
- Linux下安装redis-4.0.10
1.下载redis-4.0.10 在redis官网(https://redis.io/download)下载redis-4.0.10 2.将安装包上传至Linux服务器 在Linux服务器根目录下创建 ...
- CentOS 7安装Redis4.0.10
cd /usr/local/src && wget http://download.redis.io/releases/redis-4.0.10.tar.gz && t ...
- CentOS7.6搭建redis4.0.1 cluster集群
1. 操作系统信息: $ uname -a Linux iZbp11d57wmumnwuihb2czZ -.el7.x86_64 # SMP Fri Feb :: UTC x86_64 x86_64 ...
- CentOs7.3 搭建 Redis-4.0.1 Cluster 集群服务
环境 VMware版本号:12.0.0 CentOS版本:CentOS 7.3.1611 三台虚拟机(IP):192.168.252.101,192.168.102..102,192.168.252. ...
- Hadoop上路-01_Hadoop2.3.0的分布式集群搭建
一.配置虚拟机软件 下载地址:https://www.virtualbox.org/wiki/downloads 1.虚拟机软件设定 1)进入全集设定 2)常规设定 2.Linux安装配置 1)名称类 ...
- Neo4j 2.0 生产环境集群搭建
一.在windows上搭建Neo4j ha cluster的配置方法: 例如:建立集群的三台机器的ip分别为:10.230.9.91,10.230.9.92,10.230.9.93. 10.230.9 ...
- 分布式实时日志系统(四) 环境搭建之centos 6.4下hbase 1.0.1 分布式集群搭建
一.hbase简介 HBase是一个开源的非关系型分布式数据库(NoSQL),它参考了谷歌的BigTable建模,实现的编程语言为 Java.它是Apache软件基金会的Hadoop项目的一部分,运行 ...
随机推荐
- NATS_13:NATS Streaming案例讲解
启动服务 首先启动 go-nats-streaming 服务.为了更加能说明问题,我们启动的时候不使用默认端口号 $ nats-streaming-server -p 4242 -m 8222 -DV ...
- P3130 [USACO15DEC]计数haybalesCounting Haybales
P3130 [USACO15DEC]计数haybalesCounting Haybales 1)给定一段连续的田地,给每一个田地都增加一些新的草包. 2)给定一段连续的田地,找出草包最少的田地有多少草 ...
- zkw费用流模板
理论:http://www.cnblogs.com/acha/p/6735037.html #include<cstdio> #include<cstring> #includ ...
- call 大佬 help7——kmp 补齐 循环节
http://acm.hdu.edu.cn/showproblem.php?pid=3746 用kmp算法,那么 但是也等于上面的是正确的 也等于下面是错误的 why? #include<cst ...
- 用户管理_组管理_权限管理.ziw
2017年1月10日, 星期二 用户管理_组管理_权限管理 用户管理: useradd, userdel, usermod, passwd, chsh, chfn, finger, id, chage ...
- JavaScript 延时与定时
一.定时(setInterval) var i = 0; function hello(){ console.log(i++); } setInterval(hello,1000); // 每一秒执行 ...
- JAVA多线程提高十四: 面试题
前面针对多线程相关知识点进行了学习,那么我们来来看看常见的面试题: 1. 空中网面试题1 package com.kongzhongwang.interview; import java.util.c ...
- ECMAScript6语法检查规范错误信息说明
项目中使用ECMAScript6的时候经查会使用语法检查,下面是常见错误信息的汇总: “Missing semicolon.” : “缺少分号.”, “Use the function form of ...
- CSS3实战之content
为元素添加内容 content属性术语内容生成和替换模块,该属性能够为指定元素添加内容. 取值如下 normal:默认值 string:文本内容 attr():插入元素的属性值 uri():插入一个外 ...
- ORA 00972 错误处理
Oracle 11G SQL 写好的脚本执行后报错:ORA 00972 标识符过长 可能的原因一: select 语句中的字段别名太长,中文字符别名最长为10个汉字,简化别名名称,问题得到解决. 可能 ...