Spring笔记(二)
1. SPRING aop入门
Aop 面向切面编程
在一个大型的系统中,会写很多的业务类--业务方法
同时,一个大型的系统中,还有很多公共的功能:比如事务管理、日志处理、缓存处理.....
1.1. 动态代理机制复习
1.1.1. 动态代理编程实例
工程结构如下:
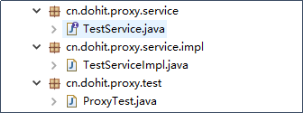
1.1.1.1. 原业务接口TestService
public interface TestService {

    public String lababa(String babaleixing);

    public String chifan(String shenmefan);

}
1.1.1.2. 原业务类TestServiceImpl
public class TestServiceImpl implements TestService{

    @Override

    public String lababa(String babaleixing) {

        System.out.println("脱虎皮裙了。。。。");

        System.out.println("撅屁股了。。。。");

        System.out.println("开拉了。。。。" +babaleixing);

        System.out.println("擦屁屁了");

        return "拉完了";

    }

    @Override

    public String chifan(String shenmefan) {

        System.out.println("上桌。。。。。");

        System.out.println("抓饭。。。。。");

        System.out.println("开吃。。。。。" +shenmefan);

        System.out.println("擦嘴嘴。。。。。。");

        return "吃完了";

    }

}
1.1.1.3. 动态代理的测试类
ProxyTest
public class ProxyTest {

    public static void main(String[] args) {

        // 首先获取原业务对象的动态代理对象,并且定义动态代理对象中的增强处理逻辑

        TestService testServiceImpl = (TestService) Proxy.newProxyInstance(TestServiceImpl.class.getClassLoader(), TestServiceImpl.class.getInterfaces(), new InvocationHandler() {

            /**

             * 代理对象被调用时的真正处理逻辑所在

             */

            @Override

            public Object invoke(Object proxy, Method method, Object[] args) throws Throwable {

                //前置增强

                System.out.println("开启事务...........");

                //调用原业务对象的原方法

                TestServiceImpl testService = new TestServiceImpl();

                // 根据代理对象被调用的方法,去调用相应的原业务对象的原方法

                String name = method.getName();

                System.out.println("当前被调用的是这个方法: " + name);

                //调用一下原业务对象的该方法

                Object invokeResult = method.invoke(testService, args);

                //后置增强

                System.out.println("提交事务...........");

                return invokeResult;

            }

        });

        // 调用一下动态代理对象的业务方法

        String lababa = testServiceImpl.lababa("稀粑粑");

        System.out.println("动态代理对象invoke完毕,结果为:" + lababa);

        String chifan = testServiceImpl.chifan("满汉全席");

        System.out.println("动态代理对象invoke完毕,结果为:" + chifan);

    }

}
1.2. aspectJ面向切面编程(模拟实现)
1.2.1. AOP编程框架简介
aspectJ是一个AOP组织提供的面向切面编程框架
它的使用方法是:
1/ 用户自己开发自己的业务类和业务方法
2/ 用户自己开发自己的增强逻辑,增强逻辑可以写在一个普通Advice类中
3/ 配置一个配置文件,告诉aspectJ,为哪些业务方法增加哪些增强逻辑
1.2.2. AOP框架编程示例
示例如下:
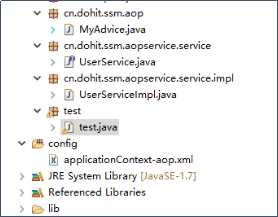
1.2.2.1. 用户自己的原业务接口
public interface UserService {

    User findUserById(int id);

    User findUserByName(String name);

}
1.2.2.2. 用户自己的原业务类
public class UserServiceImpl implements UserService {

    @Override

    public User findUserById(int id){

        System.out.println("执行原方法findUserById.......");

        User user = new User();

        user.setId(id);

        return user;

    }

    @Override

    public User findUserByName(String name){

        System.out.println("执行原方法findUserByName.......");

        User user = new User();

        user.setUsername(name);

        return user;

    }

}
1.2.2.3. 用户提供的增强逻辑类
public class MyAdvice {

    public void before(JoinPoint joinPoint){

        System.out.println("前增强处理。。。。。。");

    }

    public void after(JoinPoint joinPoint){

        System.out.println("后增强处理。。。。。。");

    }

}
1.2.2.4. AOP切面配置文件
    <bean  id="userService" class="cn.dohit.ssm.aopservice.service.impl.UserServiceImpl" />

    <bean id="myadvice" class="cn.dohit.ssm.aop.MyAdvice"></bean>

    <aop:config>

        <aop:aspect ref="myadvice">

            <aop:pointcut expression="execution(* cn.dohit.ssm.aopservice.service.*.*(..))"

                id="mypoint" />

            <aop:before method="before" pointcut-ref="mypoint" />

        </aop:aspect>

    </aop:config>
1.2.2.5. 测试类
public class test {

    public static void main(String[] args) {

        ClassPathXmlApplicationContext context = new ClassPathXmlApplicationContext("classpath:applicationContext-aop.xml");

        // 拿到的这个bean不是原业务类的对象,而是一个动态代理对象

        UserService bean = (UserService) context.getBean("userService");

        // 调用业务方法时,走的是代理对象中的处理逻辑

        User findUserById = bean.findUserById(100);

        System.out.println(findUserById.getId());

        User findUserByName = bean.findUserByName("张三");

        System.out.println(findUserByName.getUsername());

    }

}
2. SSM整合
整合目标:控制层采用springmvc、持久层使用mybatis实现。
各层的BEAN都交给spring管理
本质: 让mybatis层的Mapper类的对象交给spring来构造,在service层的类中需要Mapper对象时,直接从spring注入即可
整个项目的各种业务逻辑的数据库事务管理,也交给spring来处理(aop)
2.1. 需求
实现商品查询列表,从mysql数据库查询商品信息。
2.2. jar包
包括:spring(包括springmvc)、mybatis、mybatis-spring整合包、数据库驱动、第三方连接池。
参考:“mybatis与springmvc整合全部jar包”目录
2.3. 工程搭建
2.3.1. 整合思路
Dao层:
1、SqlMapConfig.xml,空文件即可。需要文件头。
2、applicationContext-dao.xml。
a) 数据库连接池
b) SqlSessionFactory对象,需要spring和mybatis整合包下的。
c) 配置mapper文件扫描器。
Service层:
1、applicationContext-service.xml包扫描器,扫描@service注解的类。
2、applicationContext-trans.xml配置事务。
表现层:
Springmvc.xml
1、包扫描器,扫描@Controller注解的类。
2、配置注解驱动。
3、视图解析器
Web.xml
配置前端控制器。
2.3.2. 整合步骤
2.3.2.1. 导入三大框架的所有jar包
2.3.2.2. 建各类配置文件
2.3.2.3. 配置spring应用容器的方式
1、修改web.xml——关键点:在web项目中如何启动spring的applicationContext容器
思路:
由于整个工程中所有的controller对象,service对象,dao对象都交给spring框架来构造
但是web工程中,并没有一个main方法来启动spring的applicationContext容器
所以,我们需要让tomcat在启动的时候去启动spring的applicationContext容器
而spring中有两个类(DispatcherServlet和ContextListener)可以被tomcat所加载,并在初始化时创建spring的应用容器
从而,具体做法上有两种:
第一种:用两个类去创建两个应用容器来构造项目中的类
把controller对象交给DispatcherServlet去构造
把service和dao层的对象交给ContextListener去构造
DispatcherServlet加载springmvc.xml文件,该文件中只扫描controller层的包
ContextListener加载applicationContext-service.xml,applicationContext-dao.xml两个配置文件,两个配置文件中分别配置service层和dao层的对象构造
在这种方法中,整个项目运行时,会存在两个spring的容器,这两个容器有一个父子关系:
DispatcherServlet的容器是子容器
ContextListener的容器是父容器
子容器可以获取父容器中的对象
第二种:用一个容器去加载项目中类
把controller对象、service对象、dao对象全都交给DispatcherServlet去构造
具体做法就是让DispatcherServlet加载所有的bean配置文件
2.3.2.4. 配置web.xml
<?xml version="1.0" encoding="UTF-8"?>

<web-app xmlns:xsi="http://www.w3.org/2001/XMLSchema-instance"

    xmlns="http://java.sun.com/xml/ns/javaee"

    xsi:schemaLocation="http://java.sun.com/xml/ns/javaee http://java.sun.com/xml/ns/javaee/web-app_2_5.xsd"

    id="WebApp_ID" version="2.5">

    <display-name>ssm-integration</display-name>

    <welcome-file-list>

        <welcome-file>index.html</welcome-file>

    </welcome-file-list>

    <!-- 加载spring容器 -->

    <!--

      <context-param>

        <param-name>contextConfigLocation</param-name>

        <param-value>classpath:spring/applicationContext-service.xml</param-value>

    </context-param>

    <listener>

        <listener-class>org.springframework.web.context.ContextLoaderListener</listener-class>

    </listener>

    -->

    <servlet>

        <servlet-name>springmvc</servlet-name>

        <servlet-class>org.springframework.web.servlet.DispatcherServlet</servlet-class>

        <init-param>

            <param-name>contextConfigLocation</param-name>

            <param-value>classpath:springmvc/springmvc.xml</param-value>

        </init-param>

    </servlet>

    <servlet-mapping>

        <servlet-name>springmvc</servlet-name>

        <url-pattern>*.action</url-pattern>

    </servlet-mapping>

</web-app>
2.3.2.5. 整合service层
A、可以让dispatcherServlet创造的容器来构建service层对象
B、也可以让ContextListener创造的容器来构建service层对象
C、修改applicationContext-service.xml文件:
<?xml version="1.0" encoding="UTF-8"?>

<beans xmlns="http://www.springframework.org/schema/beans"

    xmlns:context="http://www.springframework.org/schema/context" xmlns:p="http://www.springframework.org/schema/p"

    xmlns:aop="http://www.springframework.org/schema/aop" xmlns:tx="http://www.springframework.org/schema/tx"

    xmlns:xsi="http://www.w3.org/2001/XMLSchema-instance"

    xsi:schemaLocation="http://www.springframework.org/schema/beans http://www.springframework.org/schema/beans/spring-beans-4.0.xsd

    http://www.springframework.org/schema/context http://www.springframework.org/schema/context/spring-context-4.0.xsd

    http://www.springframework.org/schema/aop http://www.springframework.org/schema/aop/spring-aop-4.0.xsd http://www.springframework.org/schema/tx http://www.springframework.org/schema/tx/spring-tx-4.0.xsd

    http://www.springframework.org/schema/util http://www.springframework.org/schema/util/spring-util-4.0.xsd">

    <!-- 组件扫描父包路径 -->

    <context:component-scan base-package="com.dohit.ssm.service" />

</beans>
2.3.2.6. 整合测试controller+service
1、开发一个service层的测试类:
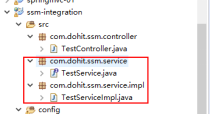
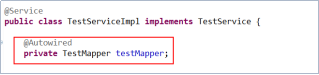
TestServiceImple.java
@Service

public class TestServiceImpl implements TestService {

    @Override

    public String helloService(String name) {

        return name+" sb";

    }

}
2、开发表现层controller类:
写一个controller方法,在方法中调用TestServiceImpl中的一个方法
然后在页面上请求一下这个controller的方法
TestController.java
@Controller

public class TestController {

    @Autowired

    private TestService testService;

    @RequestMapping("/hello")

    @ResponseBody

    public String hello(String name){

        return "你好:"+name;

    }

    @RequestMapping("/hello2")

    @ResponseBody

    public String hello2(String name){

        String res = testService.helloService(name);

        return "hello: "+res;

    }

}
2.3.2.7. 整合dao层
核心思想:让spring去帮我们构造一个sqlsessionfactory,并且让它去自动扫描mapper接口和xml文件,生成mapper接口的实例对象
做法:
A、在applicationContext-dao.xml中,配置sqlsessionfactory的bean
B、先配置一个连接池bean
classpath:mybatis/db.properties
jdbc.driver=com.mysql.jdbc.Driver

jdbc.url=jdbc:mysql://localhost:3306/mybatis?characterEncoding=utf-8

jdbc.username=root

jdbc.password=root
2.3.2.7.1. applicationContext-dao.xml中
    <!-- 加载properties配置文件 -->

    <context:property-placeholder location="classpath:mybatis/db.properties" />

    <!-- 数据库连接池 -->

    <bean id="dataSource" class="org.apache.commons.dbcp.BasicDataSource"

        destroy-method="close">

        <property name="driverClassName" value="${jdbc.driver}" />

        <property name="url" value="${jdbc.url}" />

        <property name="username" value="${jdbc.username}" />

        <property name="password" value="${jdbc.password}" />

        <property name="maxActive" value="10" />

        <property name="maxIdle" value="5" />

    </bean>
2.3.2.7.2. 配置SqlSessionFactoryBean
    <!-- 让spring管理sqlsessionfactory 使用mybatis和spring整合包中的 -->

    <bean id="sqlSessionFactory" class="org.mybatis.spring.SqlSessionFactoryBean">

        <!-- 数据库连接池 -->

        <property name="dataSource" ref="dataSource" />

        <!-- 加载mybatis的全局配置文件 -->

        <property name="configLocation" value="classpath:mybatis/SqlMapConfig.xml" />

    </bean>
并且准备一个"classpath:mybatis/SqlMapConfig.xml"文件
<?xml version="1.0" encoding="UTF-8" ?>

<!DOCTYPE configuration

PUBLIC "-//mybatis.org//DTD Config 3.0//EN"

"http://mybatis.org/dtd/mybatis-3-config.dtd">

<configuration>

</configuration>
2.3.2.7.3. 配置mapper扫描器
    <!-- 配置Mapper扫描器,mapper扫描器会自动扫描mapper包,生成各种mapper的实例对象,就可以在service中注入这些mapper实例对象了-->

    <bean class="org.mybatis.spring.mapper.MapperScannerConfigurer">

        <property name="basePackage" value="com.dohit.ssm.mapper"/>

    </bean>
2.3.2.7.4. 测试controller层+service层+mybatis层
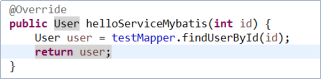
在testservice中,注入一个mapper对象
并且,写一个方法来调用testMapper的方法
在controller中,写一个方法来调service的这个方法
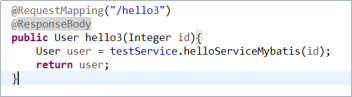
在页面上请求/hello3.action?id=1
2.3.2.8. Spring声明式事务配置
Spring声明式事务管理配置很简单,只要加一个配置文件到工程中,并且让spring容器去加载该文件即可,配置文件如下
<?xml version="1.0" encoding="UTF-8"?>

<beans xmlns="http://www.springframework.org/schema/beans"

    xmlns:context="http://www.springframework.org/schema/context" xmlns:p="http://www.springframework.org/schema/p"

    xmlns:aop="http://www.springframework.org/schema/aop" xmlns:tx="http://www.springframework.org/schema/tx"

    xmlns:xsi="http://www.w3.org/2001/XMLSchema-instance"

    xsi:schemaLocation="http://www.springframework.org/schema/beans http://www.springframework.org/schema/beans/spring-beans-4.0.xsd

    http://www.springframework.org/schema/context http://www.springframework.org/schema/context/spring-context-4.0.xsd

    http://www.springframework.org/schema/aop http://www.springframework.org/schema/aop/spring-aop-4.0.xsd http://www.springframework.org/schema/tx http://www.springframework.org/schema/tx/spring-tx-4.0.xsd

    http://www.springframework.org/schema/util http://www.springframework.org/schema/util/spring-util-4.0.xsd">

    <!-- 事务管理器 -->

    <bean id="transactionManager"

        class="org.springframework.jdbc.datasource.DataSourceTransactionManager">

        <!-- 数据源 -->

        <property name="dataSource" ref="dataSource" />

    </bean>

    <!-- 通知:增强 -->

    <tx:advice id="txAdvice" transaction-manager="transactionManager">

        <tx:attributes>

            <!-- 传播行为 -->

            <tx:method name="save*" propagation="REQUIRED" />

            <tx:method name="insert*" propagation="REQUIRED" />

            <tx:method name="delete*" propagation="REQUIRED" />

            <tx:method name="update*" propagation="REQUIRED" />

            <tx:method name="find*" propagation="SUPPORTS" read-only="true" />

            <tx:method name="get*" propagation="SUPPORTS" read-only="true" />

        </tx:attributes>

    </tx:advice>

    <!-- 切面 -->

    <aop:config>

        <aop:advisor advice-ref="txAdvice"

            pointcut="execution(* com.dohit.ssm.service.*.*(..))" />

    </aop:config>

</beans>
注:文件中的datasource对象引用的是在application-dao.xml中配置好的datasource对象
事务配置文件的加载应该在web.xml中由contextLoaderListener去读取加载:
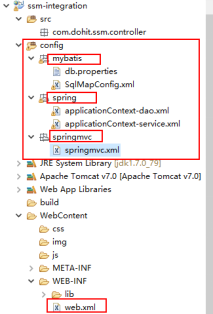
2.4. 整合完成后的所有配置文件及工程结构
2.4.1. 工程结构示意图:
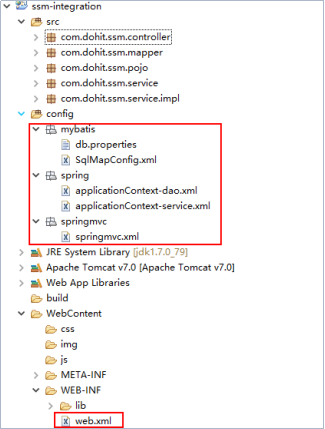
2.4.2. 各配置文件
2.4.2.1. sqlMapConfig.xml
在classpath下创建mybatis/sqlMapConfig.xml
<?xml version="1.0" encoding="UTF-8"?>

<!DOCTYPE configuration

PUBLIC "-//mybatis.org//DTD Config 3.0//EN"

"http://mybatis.org/dtd/mybatis-3-config.dtd">

<configuration>

</configuration>
2.4.2.2. applicationContext-dao.xml
配置数据源、配置SqlSessionFactory、mapper扫描器。
<?xml version="1.0" encoding="UTF-8"?>

<beans xmlns="http://www.springframework.org/schema/beans"

    xmlns:context="http://www.springframework.org/schema/context" xmlns:p="http://www.springframework.org/schema/p"

    xmlns:aop="http://www.springframework.org/schema/aop" xmlns:tx="http://www.springframework.org/schema/tx"

    xmlns:xsi="http://www.w3.org/2001/XMLSchema-instance"

    xsi:schemaLocation="http://www.springframework.org/schema/beans http://www.springframework.org/schema/beans/spring-beans-4.0.xsd

    http://www.springframework.org/schema/context http://www.springframework.org/schema/context/spring-context-4.0.xsd

    http://www.springframework.org/schema/aop http://www.springframework.org/schema/aop/spring-aop-4.0.xsd http://www.springframework.org/schema/tx http://www.springframework.org/schema/tx/spring-tx-4.0.xsd

    http://www.springframework.org/schema/util http://www.springframework.org/schema/util/spring-util-4.0.xsd">

    <!-- 加载properties配置文件 -->

    <context:property-placeholder location="classpath:mybatis/db.properties" />

    <!-- 数据库连接池 -->

    <bean id="dataSource" class="org.apache.commons.dbcp.BasicDataSource"

        destroy-method="close">

        <property name="driverClassName" value="${jdbc.driver}" />

        <property name="url" value="${jdbc.url}" />

        <property name="username" value="${jdbc.username}" />

        <property name="password" value="${jdbc.password}" />

        <property name="maxActive" value="10" />

        <property name="maxIdle" value="5" />

    </bean>

    <!-- mapper配置 -->

    <!-- 让spring管理sqlsessionfactory 使用mybatis和spring整合包中的 -->

    <bean id="sqlSessionFactory" class="org.mybatis.spring.SqlSessionFactoryBean">

        <!-- 数据库连接池 -->

        <property name="dataSource" ref="dataSource" />

        <!-- 加载mybatis的全局配置文件 -->

        <property name="configLocation" value="classpath:mybatis/SqlMapConfig.xml" />

    </bean>

    <!-- 配置Mapper扫描器,mapper扫描器会自动扫描mapper包,生成各种mapper的实例对象,就可以在service中注入这些mapper实例对象了-->

    <bean class="org.mybatis.spring.mapper.MapperScannerConfigurer">

        <property name="basePackage" value="com.dohit.ssm.mapper"/>

    </bean>

</beans>
2.4.2.3. db.properties
jdbc.driver=com.mysql.jdbc.Driver

jdbc.url=jdbc:mysql://localhost:3306/mybatis?characterEncoding=utf-8

jdbc.username=root

jdbc.password=root
2.4.2.4. applicationContext-service.xml
<?xml version="1.0" encoding="UTF-8"?>

<beans xmlns="http://www.springframework.org/schema/beans"

    xmlns:context="http://www.springframework.org/schema/context" xmlns:p="http://www.springframework.org/schema/p"

    xmlns:aop="http://www.springframework.org/schema/aop" xmlns:tx="http://www.springframework.org/schema/tx"

    xmlns:xsi="http://www.w3.org/2001/XMLSchema-instance"

    xsi:schemaLocation="http://www.springframework.org/schema/beans http://www.springframework.org/schema/beans/spring-beans-4.0.xsd

    http://www.springframework.org/schema/context http://www.springframework.org/schema/context/spring-context-4.0.xsd

    http://www.springframework.org/schema/aop http://www.springframework.org/schema/aop/spring-aop-4.0.xsd http://www.springframework.org/schema/tx http://www.springframework.org/schema/tx/spring-tx-4.0.xsd

    http://www.springframework.org/schema/util http://www.springframework.org/schema/util/spring-util-4.0.xsd">

    <!-- 组件扫描父包路径 -->

    <context:component-scan base-package="com.dohit.ssm.service" />

</beans>
2.4.2.5. applicationContext-transaction.xml
<?xml version="1.0" encoding="UTF-8"?>

<beans xmlns="http://www.springframework.org/schema/beans"

    xmlns:context="http://www.springframework.org/schema/context" xmlns:p="http://www.springframework.org/schema/p"

    xmlns:aop="http://www.springframework.org/schema/aop" xmlns:tx="http://www.springframework.org/schema/tx"

    xmlns:xsi="http://www.w3.org/2001/XMLSchema-instance"

    xsi:schemaLocation="http://www.springframework.org/schema/beans http://www.springframework.org/schema/beans/spring-beans-4.0.xsd

    http://www.springframework.org/schema/context http://www.springframework.org/schema/context/spring-context-4.0.xsd

    http://www.springframework.org/schema/aop http://www.springframework.org/schema/aop/spring-aop-4.0.xsd http://www.springframework.org/schema/tx http://www.springframework.org/schema/tx/spring-tx-4.0.xsd

    http://www.springframework.org/schema/util http://www.springframework.org/schema/util/spring-util-4.0.xsd">

    <!-- 事务管理器 -->

    <bean id="transactionManager"

        class="org.springframework.jdbc.datasource.DataSourceTransactionManager">

        <!-- 数据源 -->

        <property name="dataSource" ref="dataSource" />

    </bean>

    <!-- 通知 -->

    <tx:advice id="txAdvice" transaction-manager="transactionManager">

        <tx:attributes>

            <!-- 传播行为 -->

            <tx:method name="save*" propagation="REQUIRED" />

            <tx:method name="insert*" propagation="REQUIRED" />

            <tx:method name="delete*" propagation="REQUIRED" />

            <tx:method name="update*" propagation="REQUIRED" />

            <tx:method name="find*" propagation="SUPPORTS" read-only="true" />

            <tx:method name="get*" propagation="SUPPORTS" read-only="true" />

        </tx:attributes>

    </tx:advice>

    <!-- 切面 -->

    <aop:config>

        <aop:advisor advice-ref="txAdvice"

            pointcut="execution(* cn.dohit.springmvc.service.*.*(..))" />

    </aop:config>

</beans>
2.4.2.6. springmvc.xml
<?xml version="1.0" encoding="UTF-8"?>

<beans xmlns="http://www.springframework.org/schema/beans"

    xmlns:xsi="http://www.w3.org/2001/XMLSchema-instance" xmlns:p="http://www.springframework.org/schema/p"

    xmlns:context="http://www.springframework.org/schema/context"

    xmlns:mvc="http://www.springframework.org/schema/mvc"

    xsi:schemaLocation="http://www.springframework.org/schema/beans http://www.springframework.org/schema/beans/spring-beans-4.0.xsd

        http://www.springframework.org/schema/mvc http://www.springframework.org/schema/mvc/spring-mvc-4.0.xsd

        http://www.springframework.org/schema/context http://www.springframework.org/schema/context/spring-context-4.0.xsd">

    <!-- 加载注解驱动 -->

    <mvc:annotation-driven />

    <!-- 指定需要扫描controller类的包 -->

    <context:component-scan base-package="com.dohit.ssm.controller" />

    <!-- 视图解析器配置:前缀和后缀 -->

    <bean class="org.springframework.web.servlet.view.InternalResourceViewResolver">

        <property name="viewClass"

            value="org.springframework.web.servlet.view.JstlView" />

        <property name="prefix" value="/WEB-INF/jsp/" />

        <property name="suffix" value=".jsp" />

    </bean>

    <!-- 静态资源的自动映射 -->

    <mvc:resources location="/js/" mapping="/js/**" />

    <mvc:resources location="/img/" mapping="/img/**" />

    <mvc:resources location="/css/" mapping="/css/**" />

</beans>
2.4.2.7. web.xml
<?xml version="1.0" encoding="UTF-8"?>
<web-app xmlns:xsi="http://www.w3.org/2001/XMLSchema-instance"
xmlns="http://java.sun.com/xml/ns/javaee"
xsi:schemaLocation="http://java.sun.com/xml/ns/javaee http://java.sun.com/xml/ns/javaee/web-app_2_5.xsd"
id="WebApp_ID" version="2.5">
<display-name>ssm-integration</display-name>
<welcome-file-list>
<welcome-file>index.html</welcome-file>
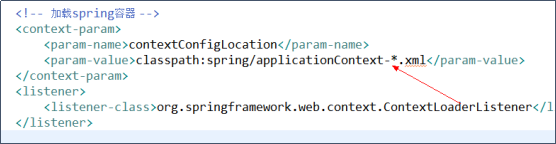
</welcome-file-list> <!-- 加载spring容器 -->
<context-param>
<param-name>contextConfigLocation</param-name>
<param-value>classpath:spring/applicationContext-*.xml</param-value>
</context-param>
<listener>
<listener-class>org.springframework.web.context.ContextLoaderListener</listener-class>
</listener> <servlet>
<servlet-name>springmvc</servlet-name>
<servlet-class>org.springframework.web.servlet.DispatcherServlet</servlet-class>
<init-param>
<param-name>contextConfigLocation</param-name>
<param-value>classpath:springmvc/springmvc.xml</param-value>
</init-param>
</servlet>
<servlet-mapping>
<servlet-name>springmvc</servlet-name>
<url-pattern>*.action</url-pattern>
</servlet-mapping>
</web-app>
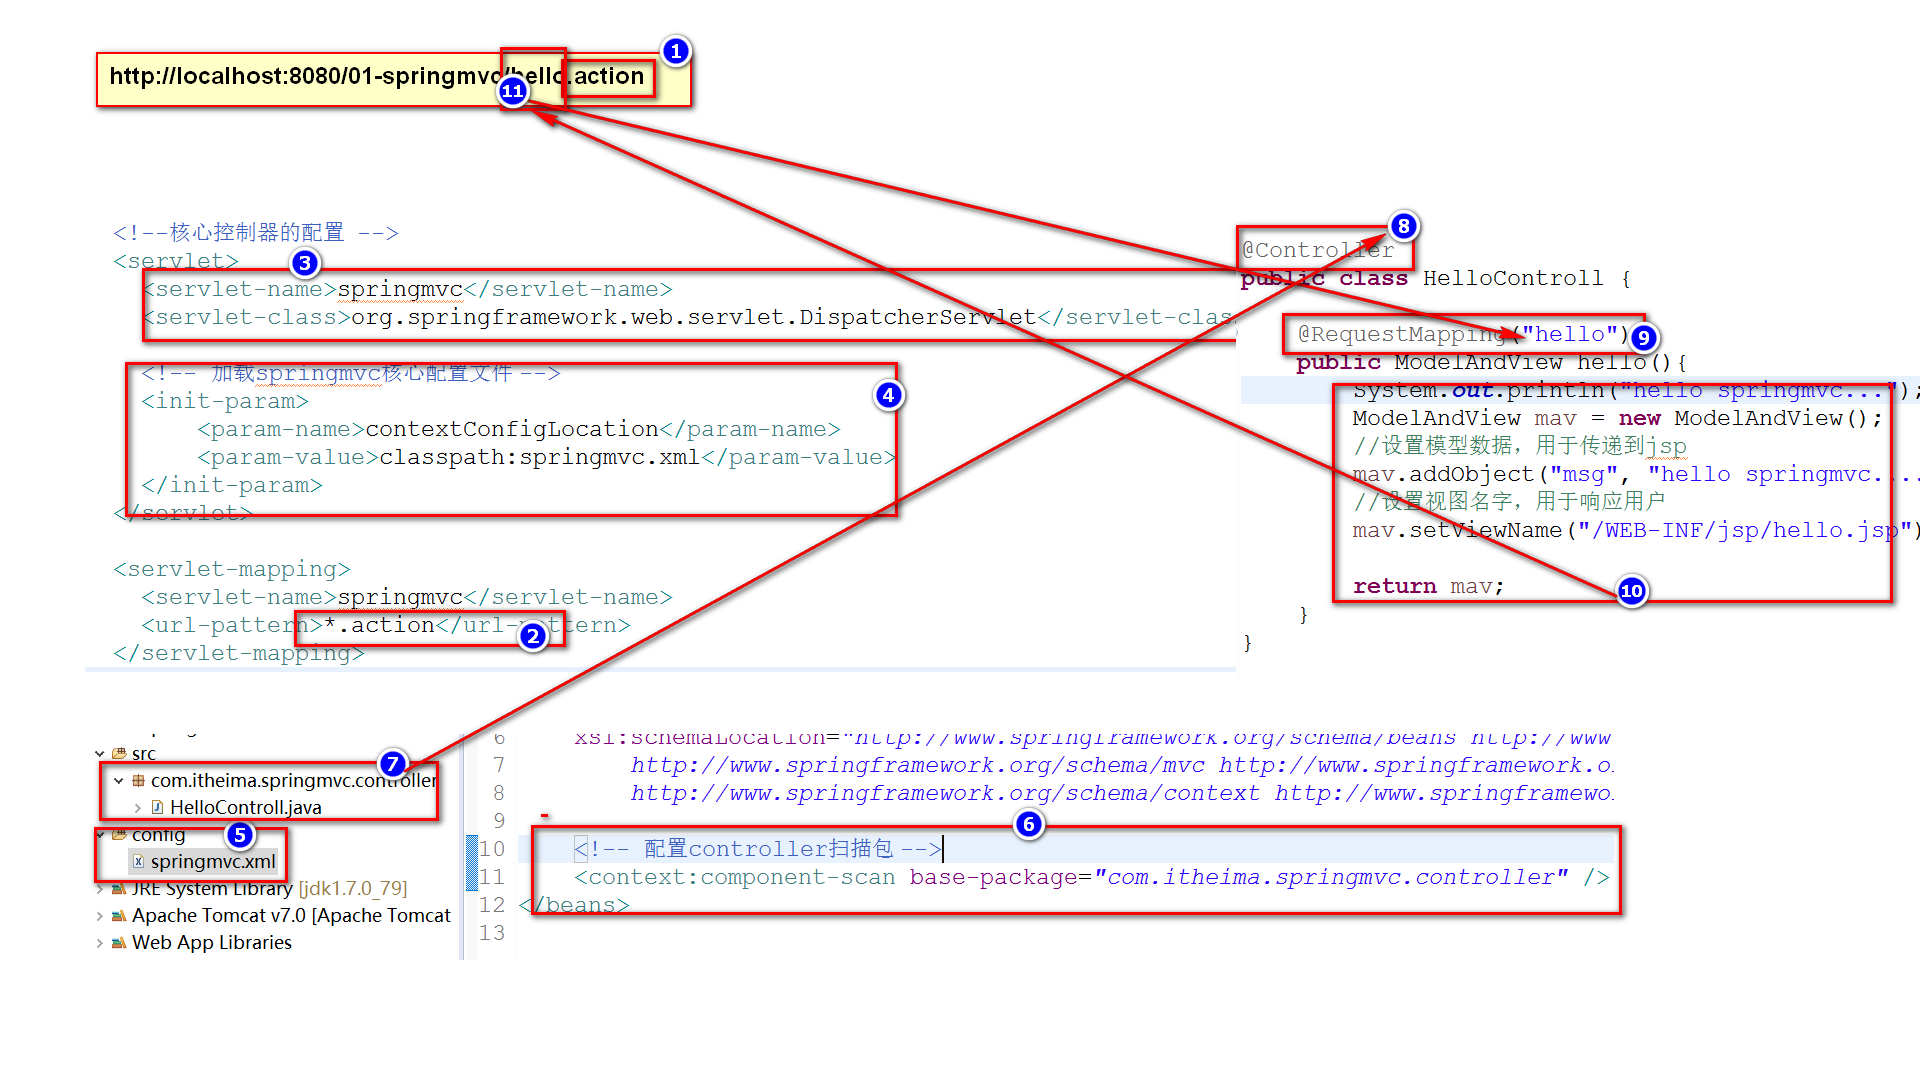
springmvc代码执行流程
Spring笔记(二)的更多相关文章
- Spring笔记(二)Core层
Spring用一种非入侵的方式来管理程序,模块结构图如下: .Core层 IOC(控制反转):应用本身程序不负责依赖对象的创建及维护,依赖对象的创建及维护有外设容器负责,即:IOC: DI(依赖注 ...
- spring笔记(二)
共性问题: 1. 服务器启动报错,什么原因? * jar包缺少.jar包冲突 1) 先检查项目中是否缺少jar包引用 2) 服务器: 检查jar包有没有发布到服务器下: 用户库jar包,需要手动发布到 ...
- spring笔记二
DI—Dependency Injection,即“依赖注入”:组件之间依赖关系由容器在运行期决定,形象的说,即由容器动态的将某个依赖关系注入到组件之中.依赖注入的目的并非为软件系统带来更多功能,而是 ...
- Spring 笔记 -06- 从 MySQL 建库到 登录验证数据库信息(maven)
Spring 笔记 -06- 从 MySQL 建库到 登录验证数据库信息(maven) 本篇和 Spring 没有什么关系,只是学习 Spring,必备一些知识,所以放在这里了. 本篇内容: (1)M ...
- JDBC学习笔记二
JDBC学习笔记二 4.execute()方法执行SQL语句 execute几乎可以执行任何SQL语句,当execute执行过SQL语句之后会返回一个布尔类型的值,代表是否返回了ResultSet对象 ...
- MyBatis笔记二:配置
MyBatis笔记二:配置 1.全局配置 1.properites 这个配置主要是引入我们的 properites 配置文件的: <properties resource="db.pr ...
- Spring笔记(6) - Spring的BeanFactoryPostProcessor探究
一.背景 在说BeanFactoryPostProcessor之前,先来说下BeanPostProcessor,在前文Spring笔记(2) - 生命周期/属性赋值/自动装配及部分源码解析中讲解了Be ...
- 《CMake实践》笔记二:INSTALL/CMAKE_INSTALL_PREFIX
<CMake实践>笔记一:PROJECT/MESSAGE/ADD_EXECUTABLE <CMake实践>笔记二:INSTALL/CMAKE_INSTALL_PREFIX &l ...
- jQuery源码笔记(二):定义了一些变量和函数 jQuery = function(){}
笔记(二)也分为三部分: 一. 介绍: 注释说明:v2.0.3版本.Sizzle选择器.MIT软件许可注释中的#的信息索引.查询地址(英文版)匿名函数自执行:window参数及undefined参数意 ...
- Mastering Web Application Development with AngularJS 读书笔记(二)
第一章笔记 (二) 一.scopes的层级和事件系统(the eventing system) 在层级中管理的scopes可以被用做事件总线.AngularJS 允许我们去传播已经命名的事件用一种有效 ...
随机推荐
- excel提取汉字拼音首字母
本文转载:http://jingyan.baidu.com/article/63acb44adca44461fcc17e85.html 利用Excel表格中的宏,轻松提取首字母 方法/步骤 1.启动E ...
- python2--升级python3
先安装开发工具包: yum -y group install "Development Tools" 安装Python的依赖包: yum -y install openssl-de ...
- .Net Ajax跨域请求总结
导语 之前写过一篇文章Ajax跨域请求COOKIE无法带上的解决办法,这两天正好好好的查了一下相关知识,做来总结一下 一.传统 ajax跨域访问是一个老问题了,解决方法很多,比较常用的是JSONP方法 ...
- timepicker php strtotime 8hours
https://jqueryui.com/datepicker/ w timepicker datepicker 日期 时间 选择器 <script src="static/jquer ...
- SaaS成熟度模型分级:
SaaS成熟度模型分级: 根据SaaS应用是否具有可配置性,高性能,可伸缩性的特性,SaaS成熟度模型被分成四级.每一级都比前一级增加三中特性中的一种. 可配置 高性能 可伸缩 Level1 N ...
- linux 修改用户密码
passwd 命令:用于对用户的密码进行管理,可以设置.修改.删除密码. 修改root用户的密码:$ sudo passwd root
- vue中回车键登录
created() { let that = this; document.onkeypress = function(e) { var keycode = document.all ? event. ...
- JSONP使用
一.什么是JSONP jsonp是一种规则,它是利用创建html的script快的方式,将远端url放到src属性中,并以函数的形式执行远程返回值中的函数. jsonp的出现是为了解决浏览器同源策略的 ...
- git学习——<五>git分支
git学习——<一>git安装 git学习——<二>git配置文件 git学习——<三>git操作 git学习——<四>git版本管理 一.提出问题 今 ...
- leetcode 旋转单链表
Given a linked list, rotate the list to the right by k places, where k is non-negative. Example 1: I ...